
Creating Ticket Boards
Ticket boards are saved configurations that you can open from the Tickets list view. When you create a board, you can also choose to display it on the Dispatch Board, where it can be added as a tab. To find your boards, click Service in the sidebar menu and select Tickets.
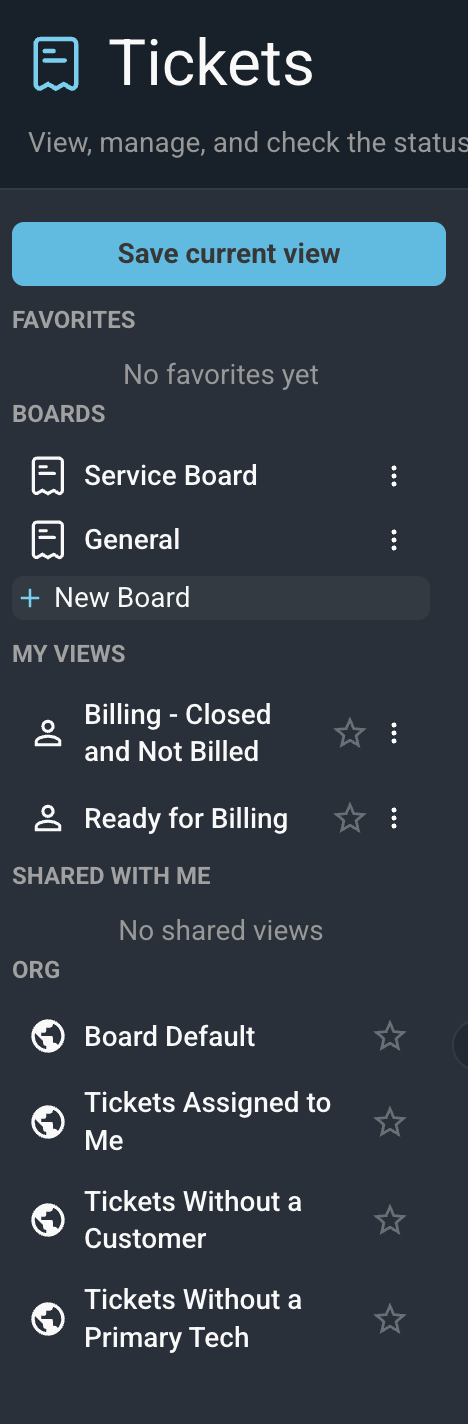
The left side of the Tickets list view organizes your saved configurations. Each section is defined below.
No. | Label | Definition |
|---|---|---|
1 | Favorites | Saved views that you have marked as favorites. |
2 | Boards | The ticket boards available to you. Click a board to open it as a tab above the ticket list. Click + New Board to create a new board. |
3 | My Views | Views you have saved from the ticket list. |
4 | Shared With Me | Views that other users have shared with you. |
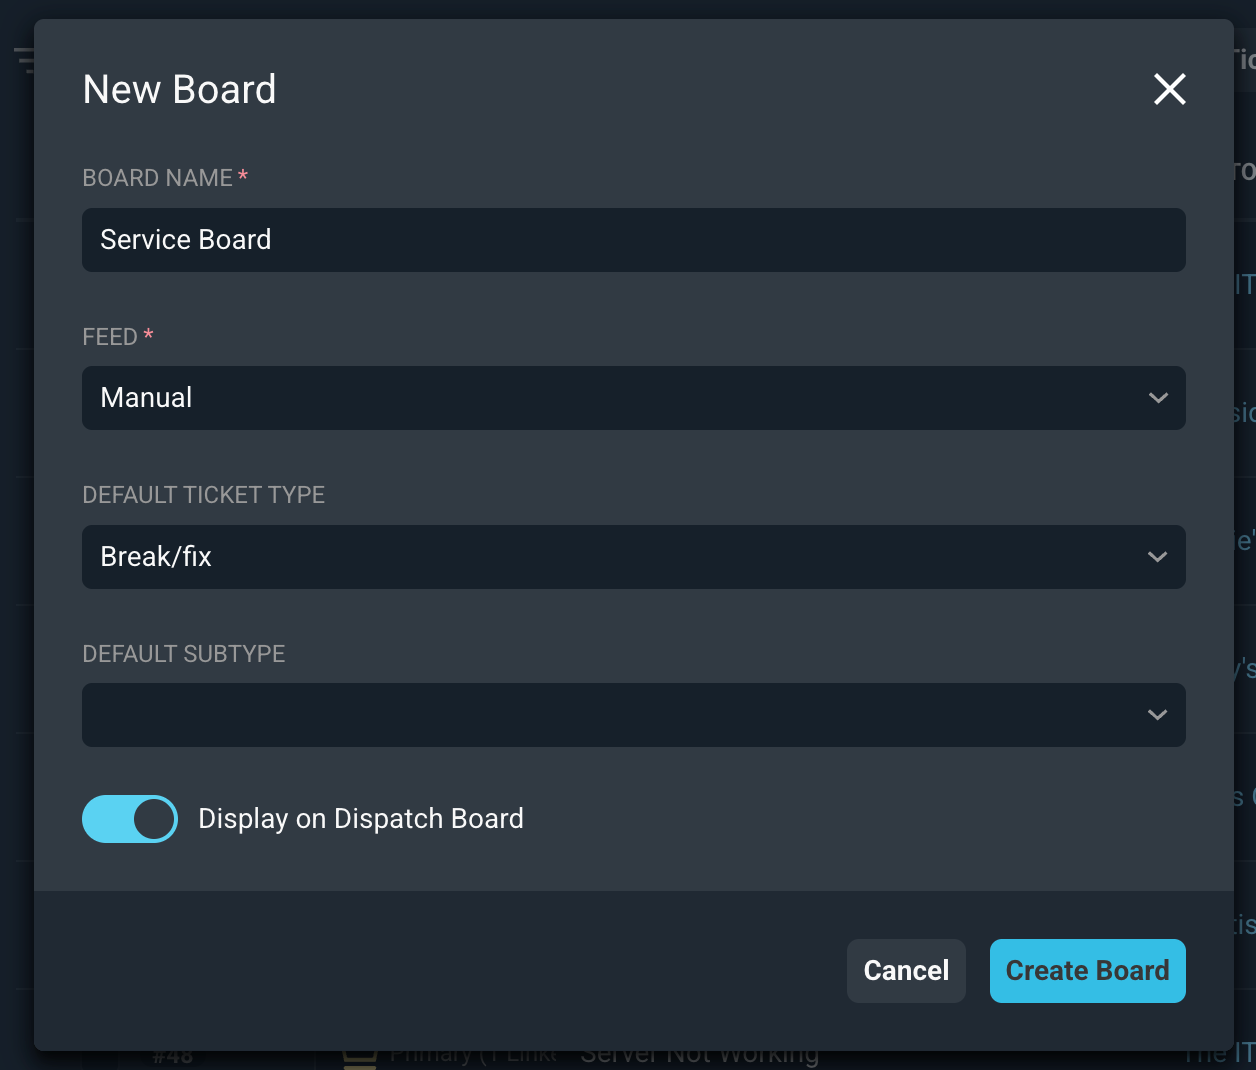
Each field on the New Board dialog is defined below.
No. | Label | Definition |
|---|---|---|
1 | Board Name | Name of the board. |
2 | Feed | The source of tickets for the board. Options are Inbox and Manual. |
3 | Default Ticket Type | The ticket type the board uses by default. |
4 | Default Subtype | The ticket subtype the board uses by default. This field becomes available after you select a Default Ticket Type. |
5 | Display on Dispatch Board | Turn this option on to make the board available to add as a tab on the Dispatch Board. |
Follow these steps to create a ticket board.
- Click Service in the sidebar menu and select Tickets.
- Click + New Board in the Boards section.
- Enter a name in the Board Name field and select an option from the Feed dropdown.
- Optionally, select a Default Ticket Type and Default Subtype.
- To make the board available on the Dispatch Board, turn on the Display on Dispatch Board option.
- Click the Create Board button to save the board, or click Cancel to close the dialog without saving.
After you create the board, it appears in the Boards section and as a tab above the ticket list. If you turned on Display on Dispatch Board, you can add it as a tab on the Dispatch Board. See the Dispatch Board: Ticket Board Tabs article for more information.
Other actions are available for each board by clicking the three-dot menu next to its name, such as editing or deleting a board.
Related Articles