How To Guide: Customer Lifecycle - Opportunity to Quote to Activation
1. Introduction
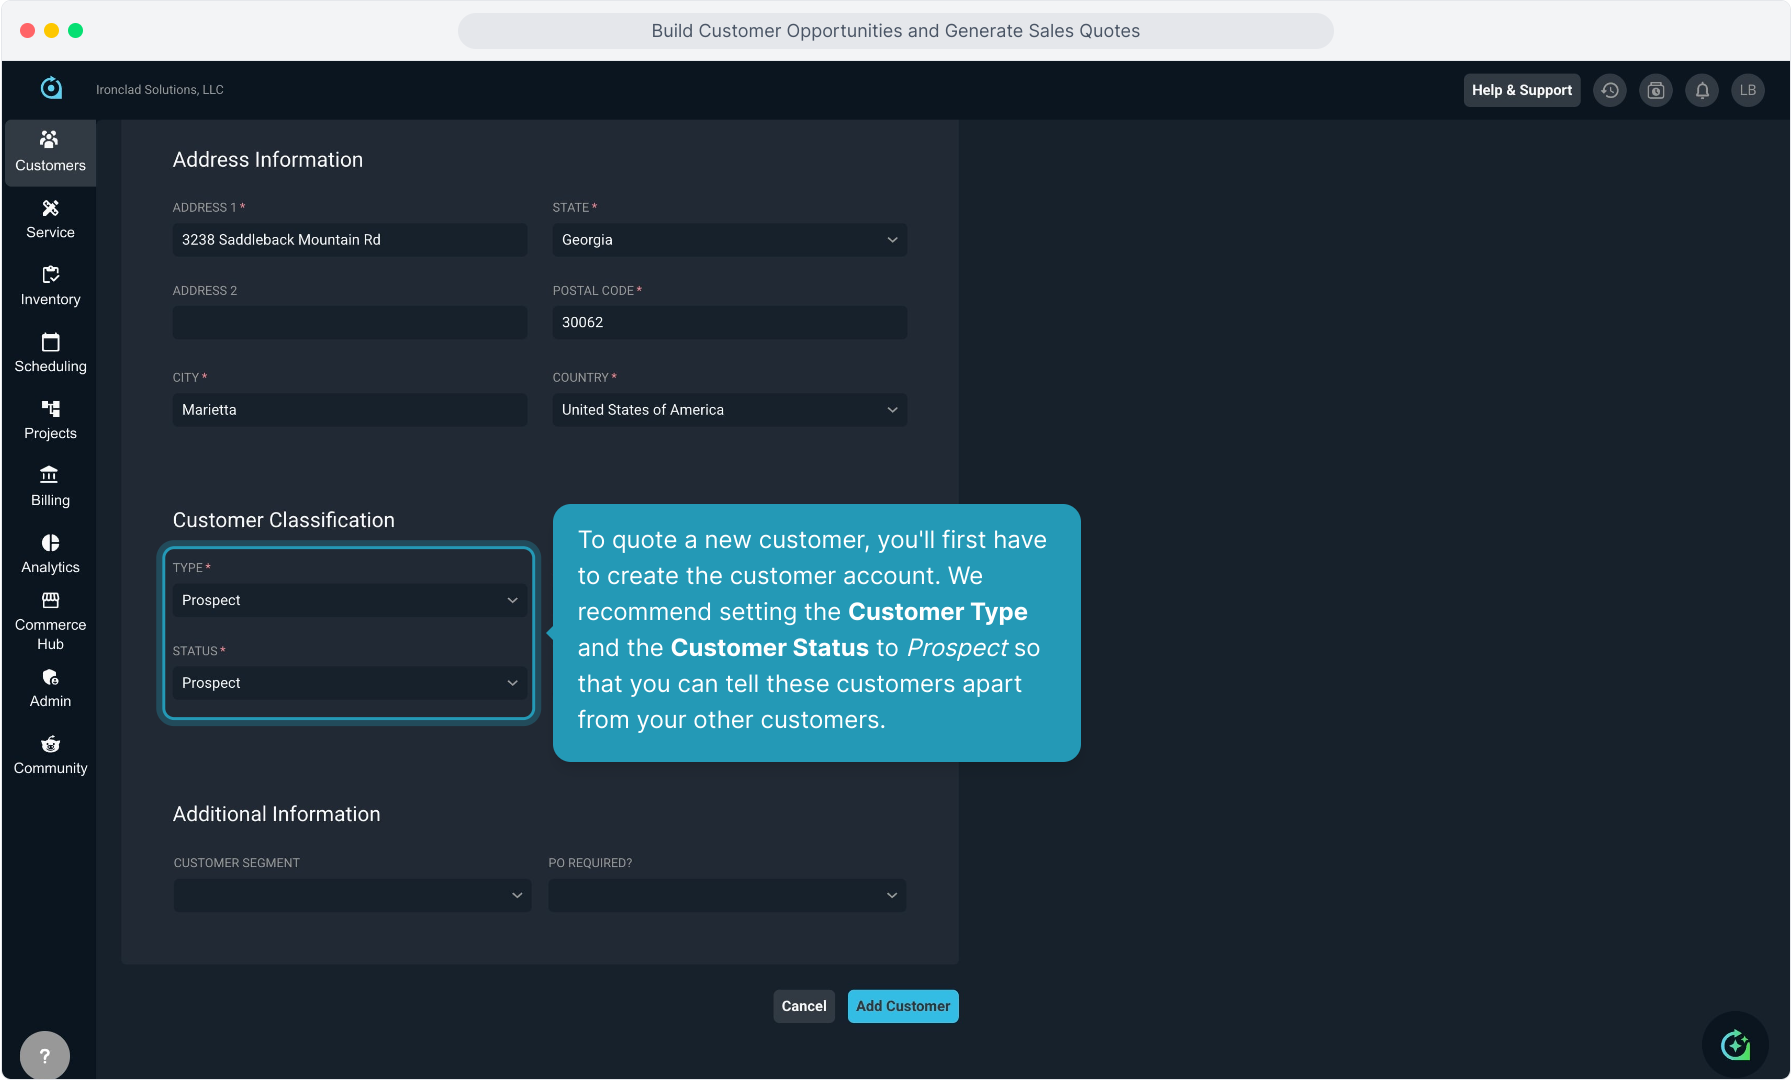
2. To quote a new customer, you'll first have to create the customer account. We recommend setting the Customer Type and the Customer Status to Prospect so that you can tell these customers apart from your other customers.
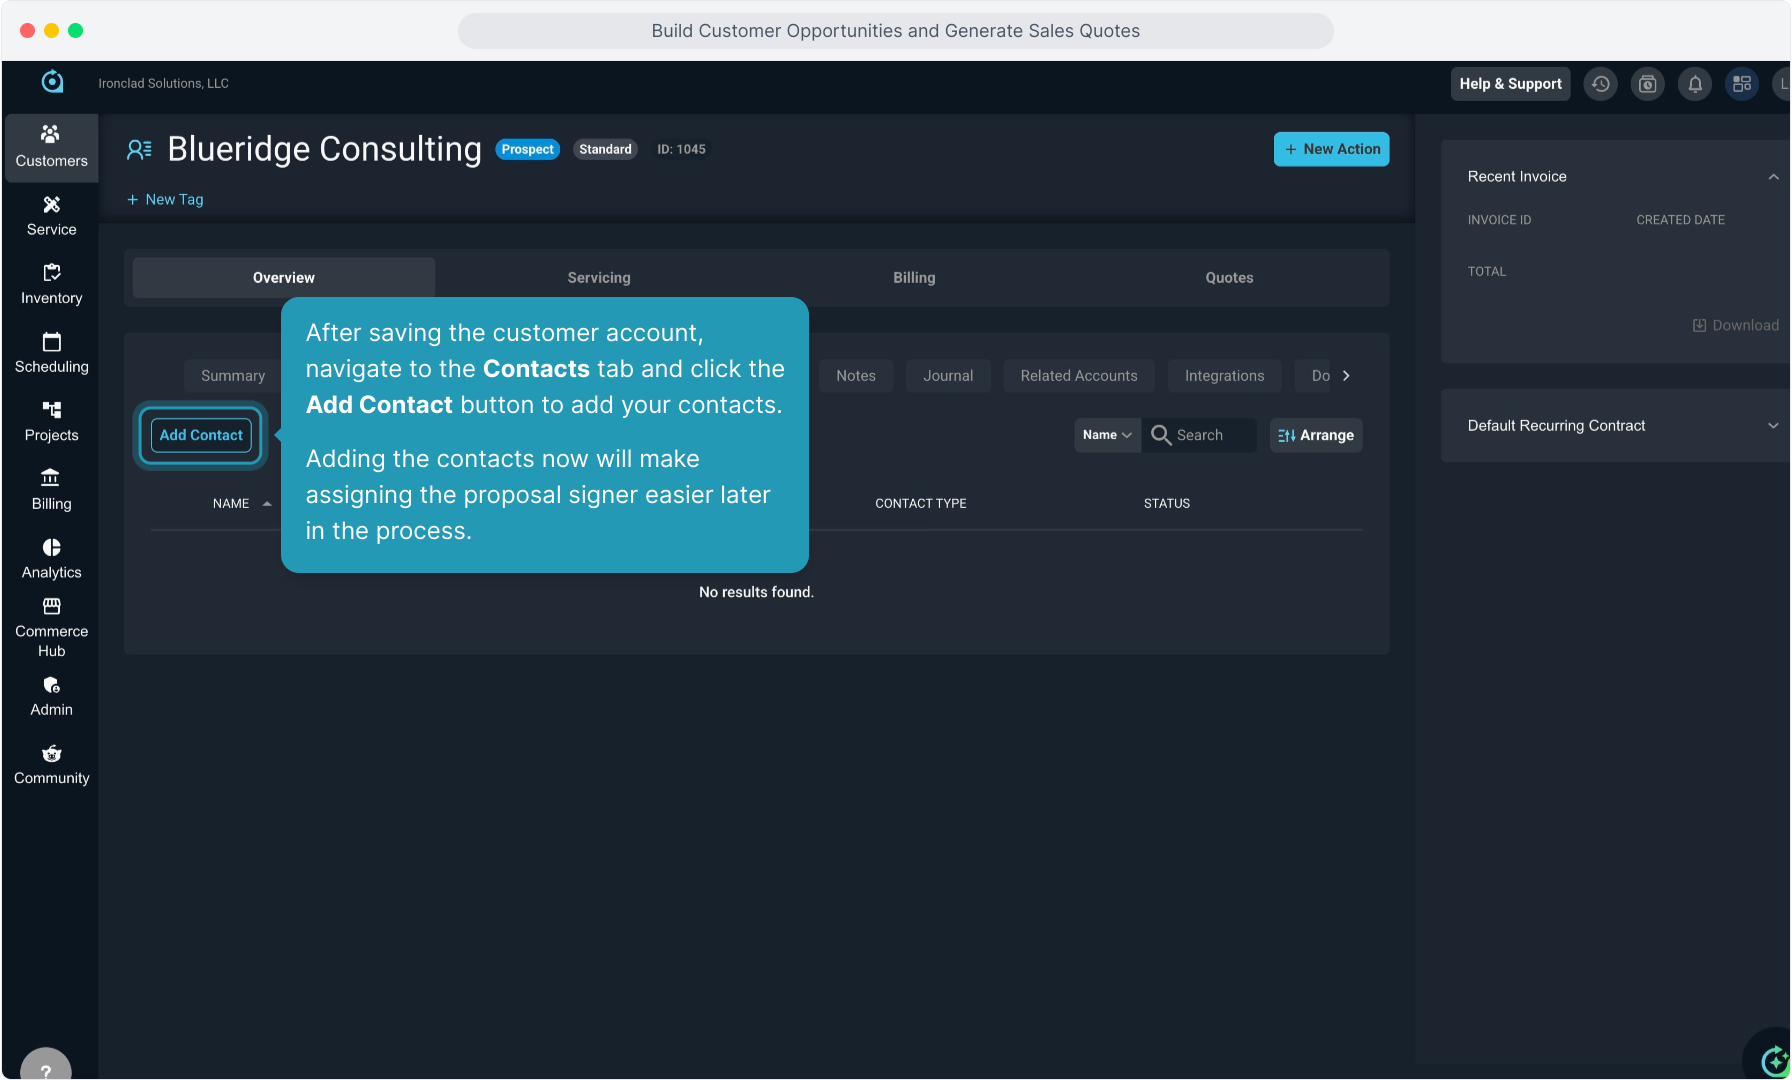
3. After saving the customer account, navigate to the Contacts tab and click the Add Contact button to add your contacts.
Adding the contacts now will make assigning the proposal signer easier later in the process.
4. Add the basic contact information and click the Add Contact button to save.

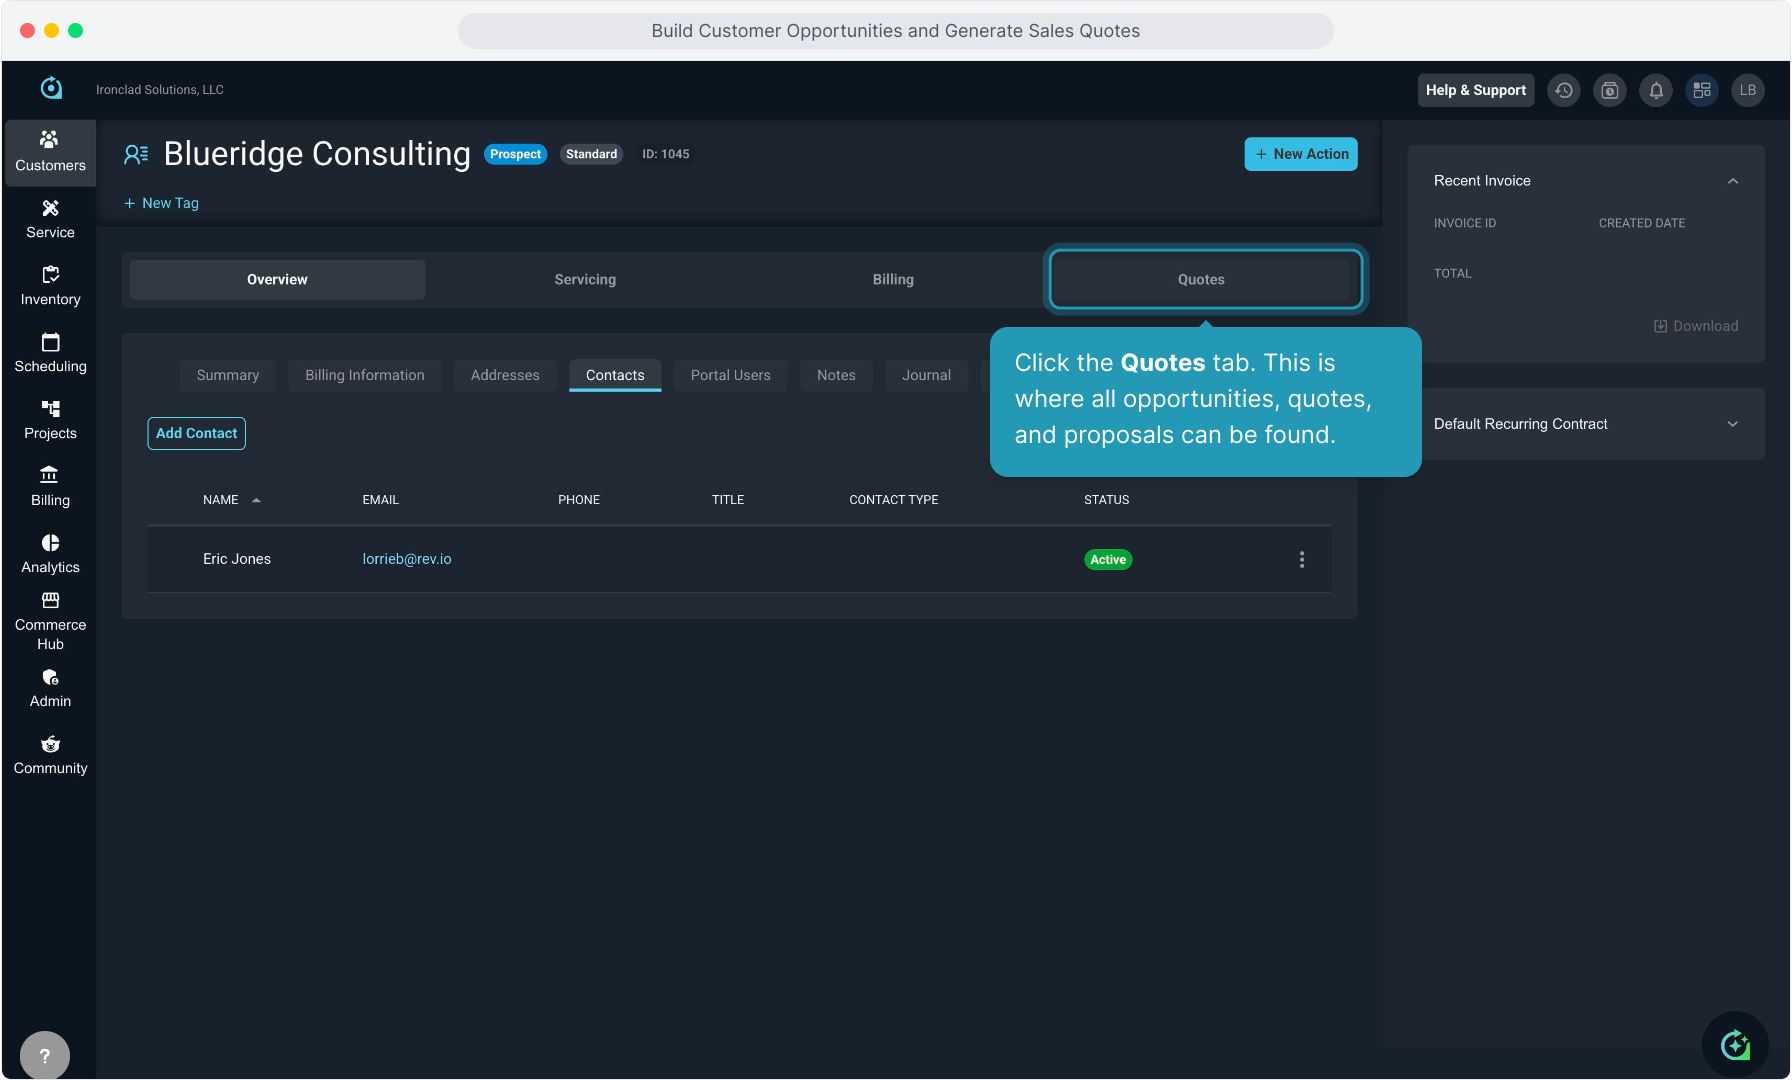
5. Click the Quotes tab. This is where all opportunities, quotes, and proposals can be found.
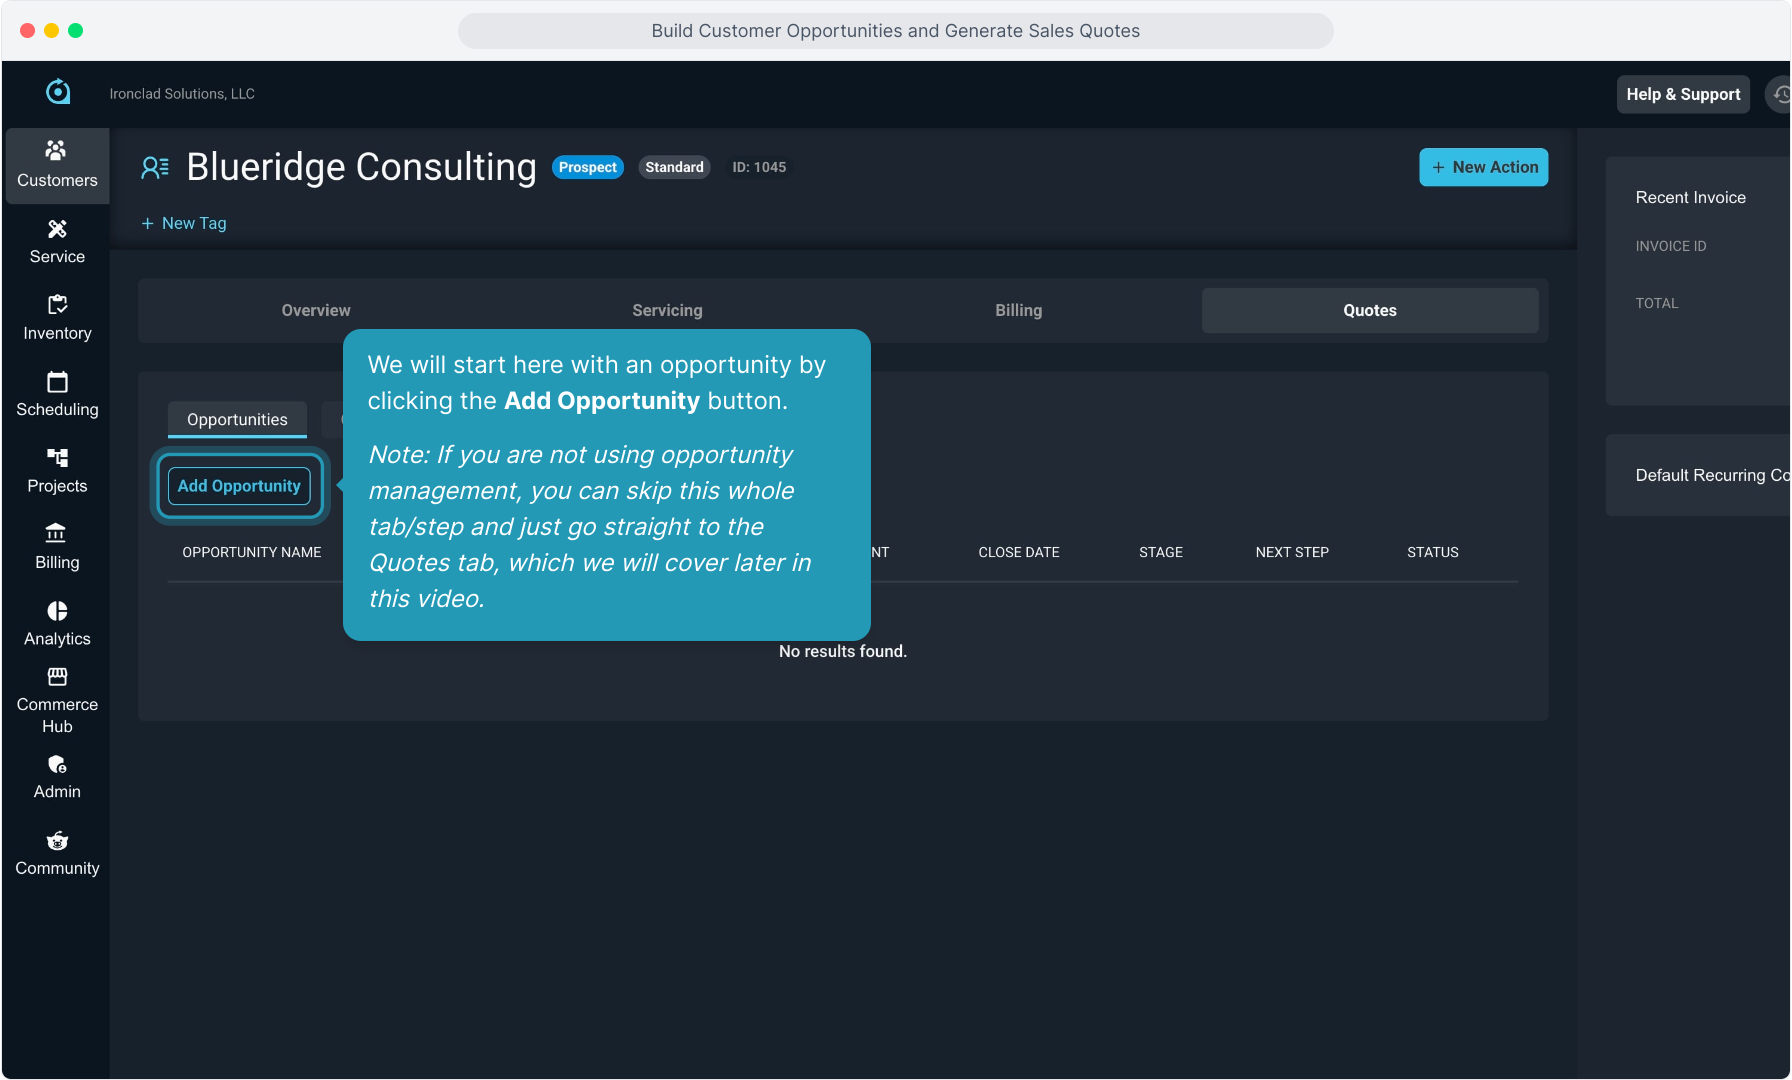
6. We will start here with an opportunity by clicking the Add Opportunity button.
Note: If you are not using opportunity management, you can skip this whole tab/step and just go straight to the Quotes tab, which we will cover later in this video.
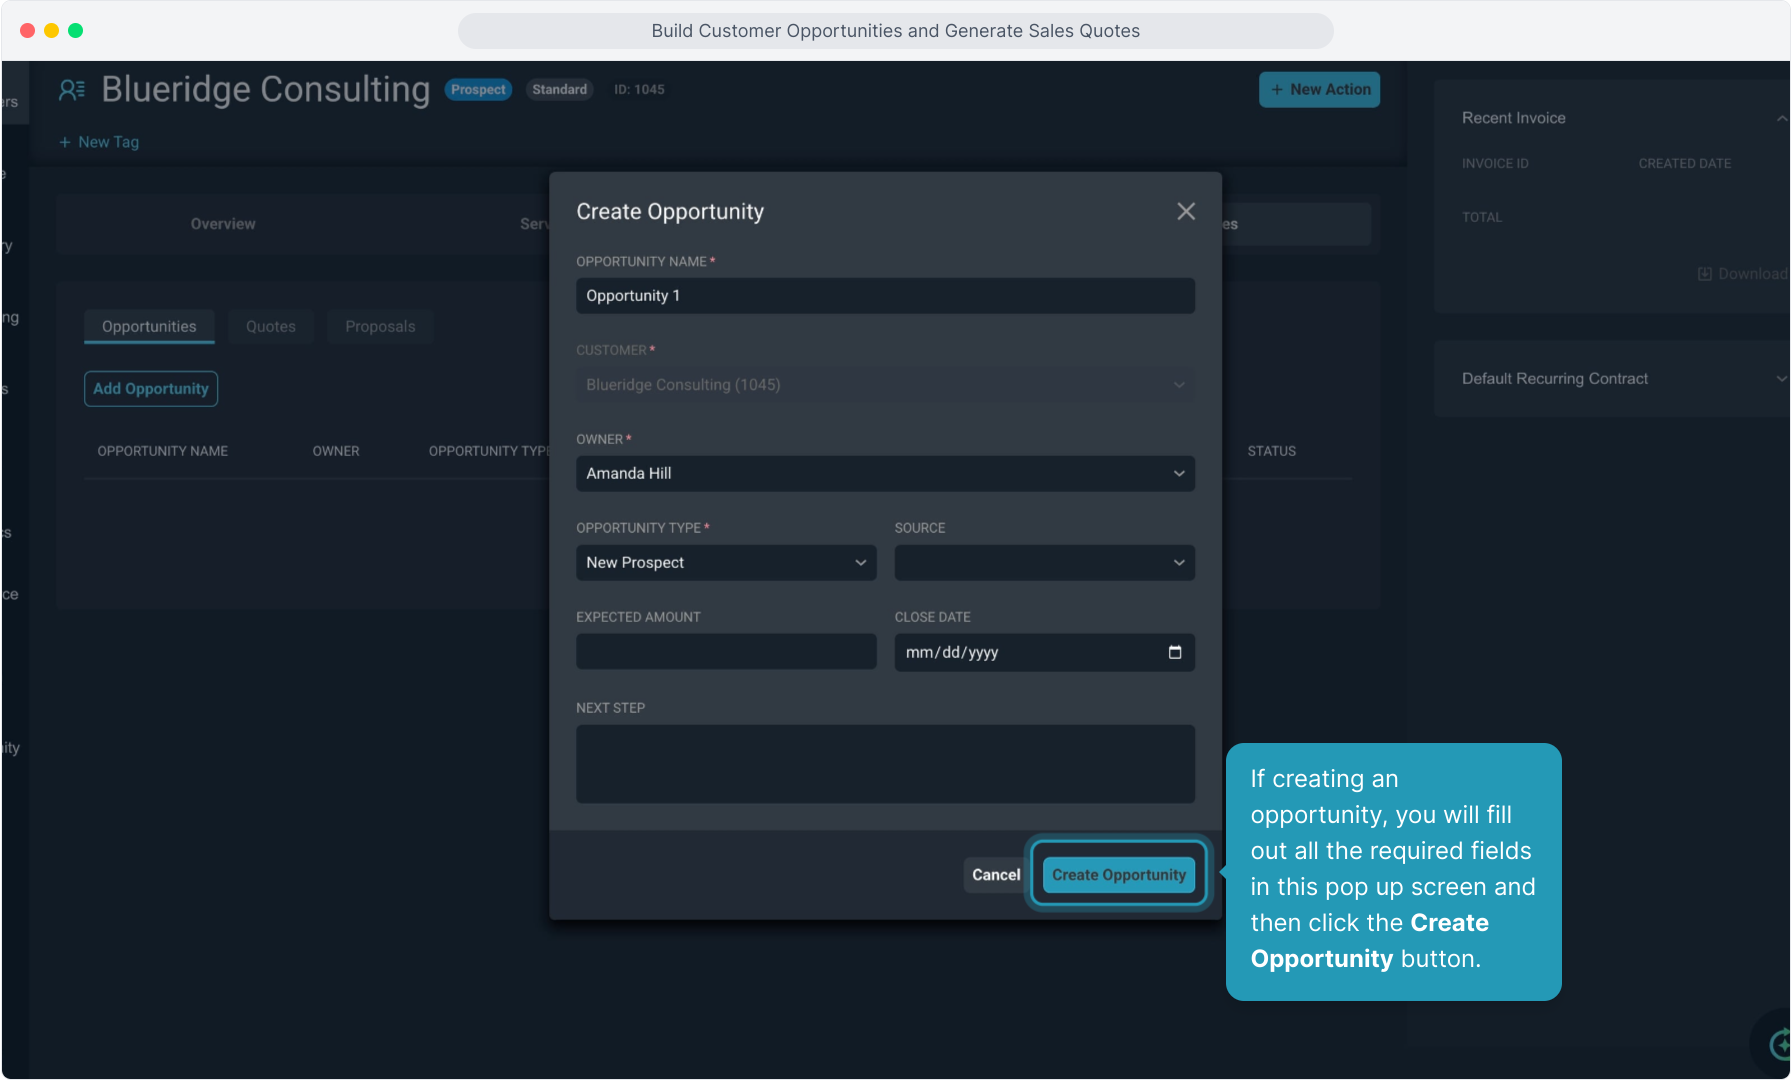
7. If creating an opportunity, you will fill out all the required fields in this pop up screen and then click the Create Opportunity button.
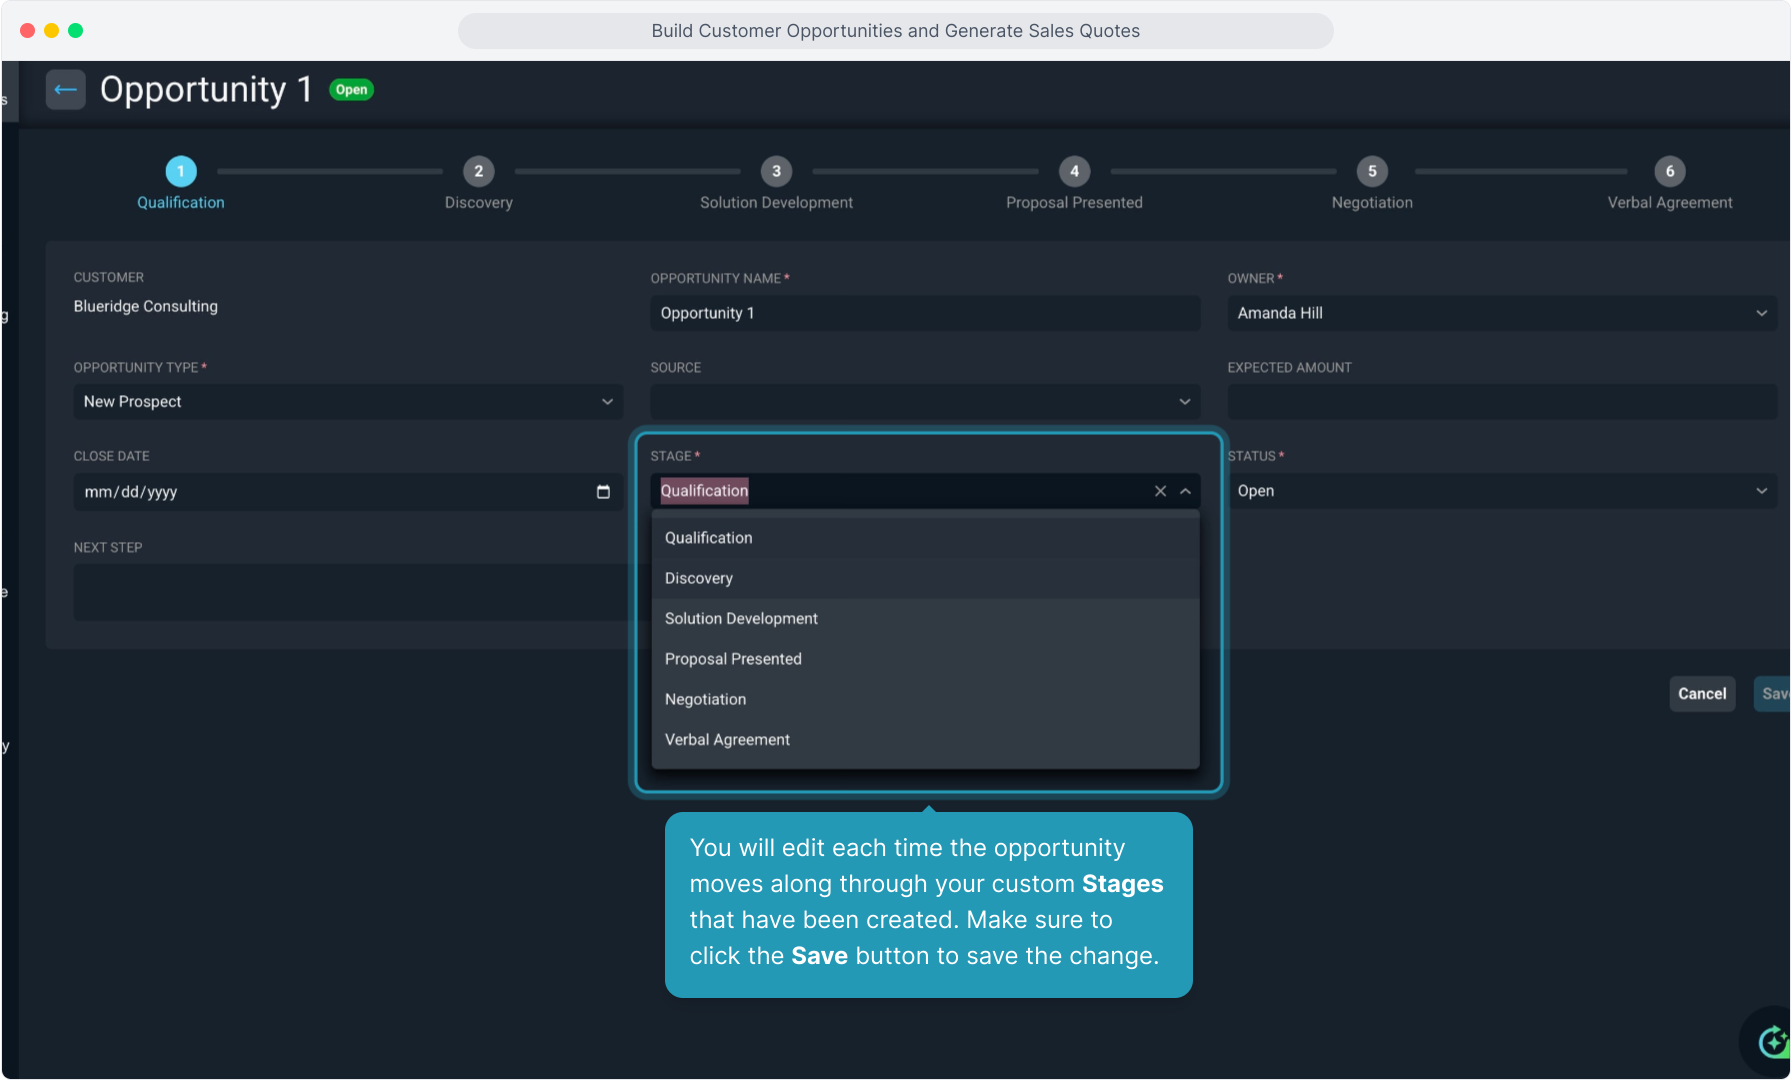
8. As this opportunity moves through the pipeline, you'll click Edit on the opportunity to change the step that it is in.
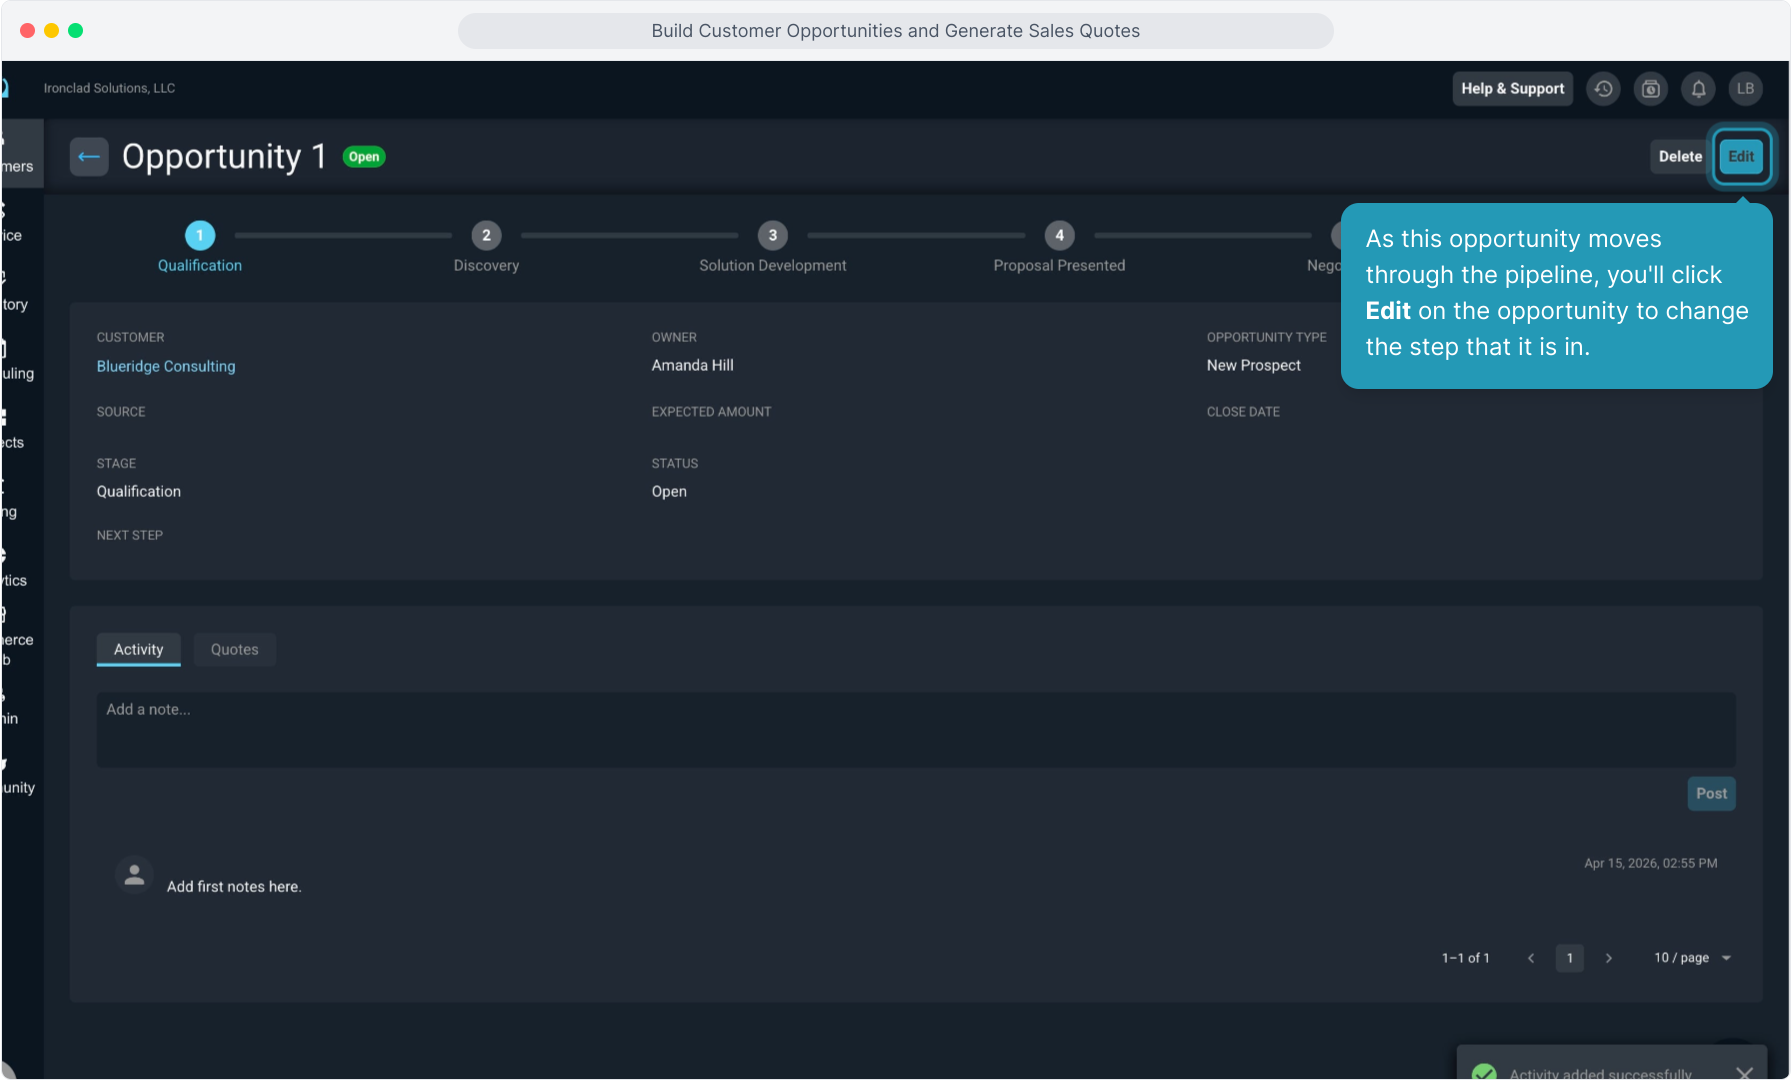
9. You will edit each time the opportunity moves along through your custom Stages that have been created. Make sure to click the Save button to save the change.
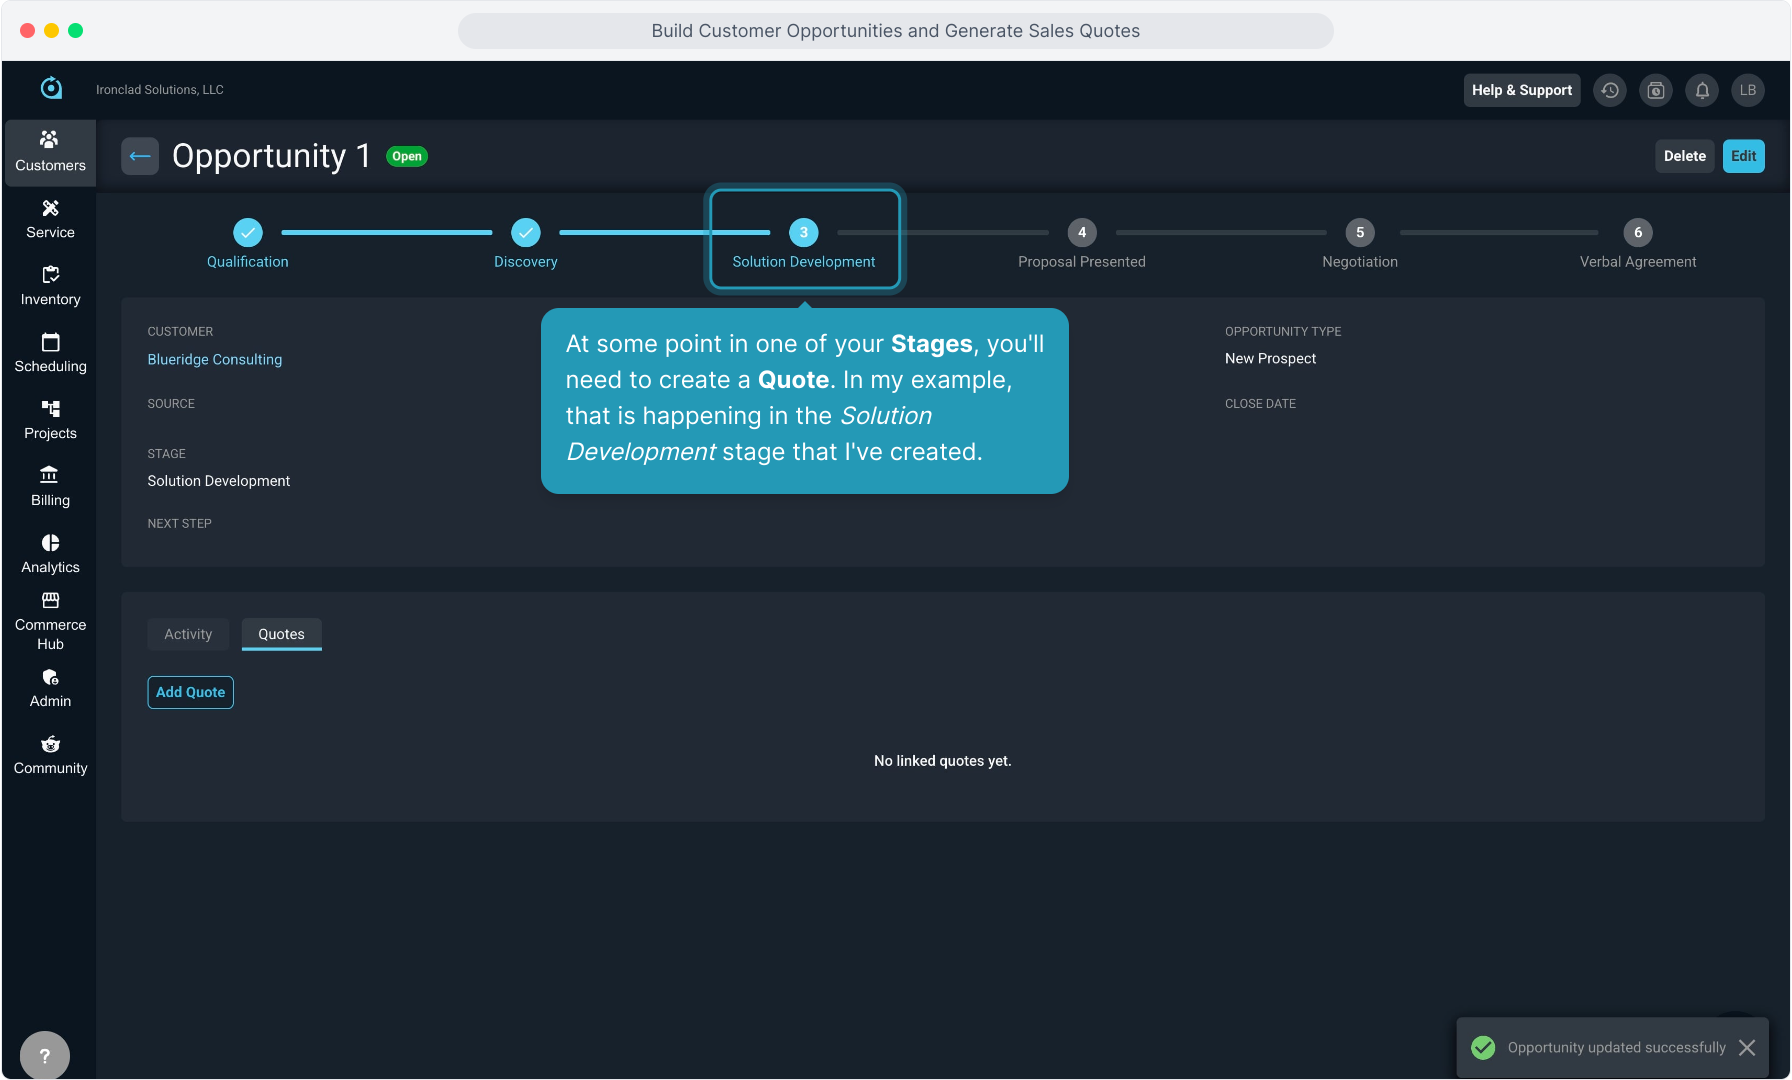
10. At some point in one of your Stages, you'll need to create a Quote. In my example, that is happening in the Solution Development stage that I've created.
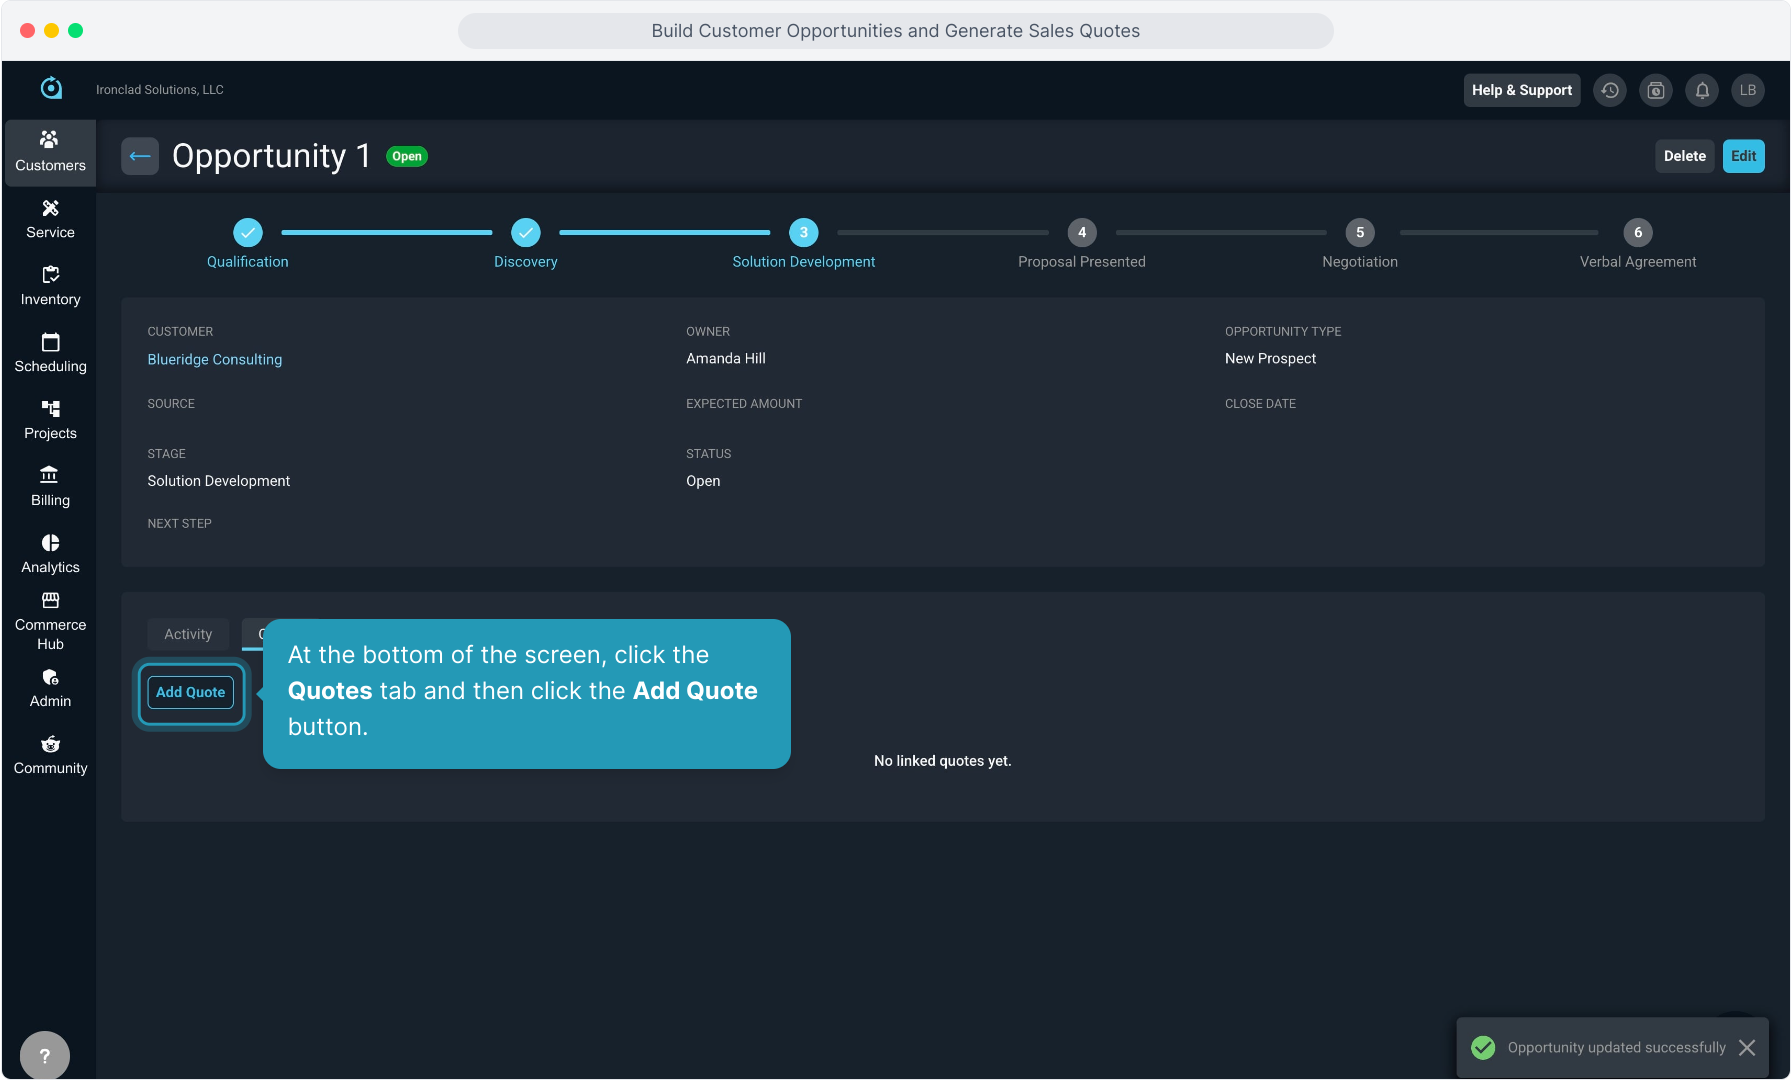
11. At the bottom of the screen, click the Quotes tab and then click the Add Quote button.
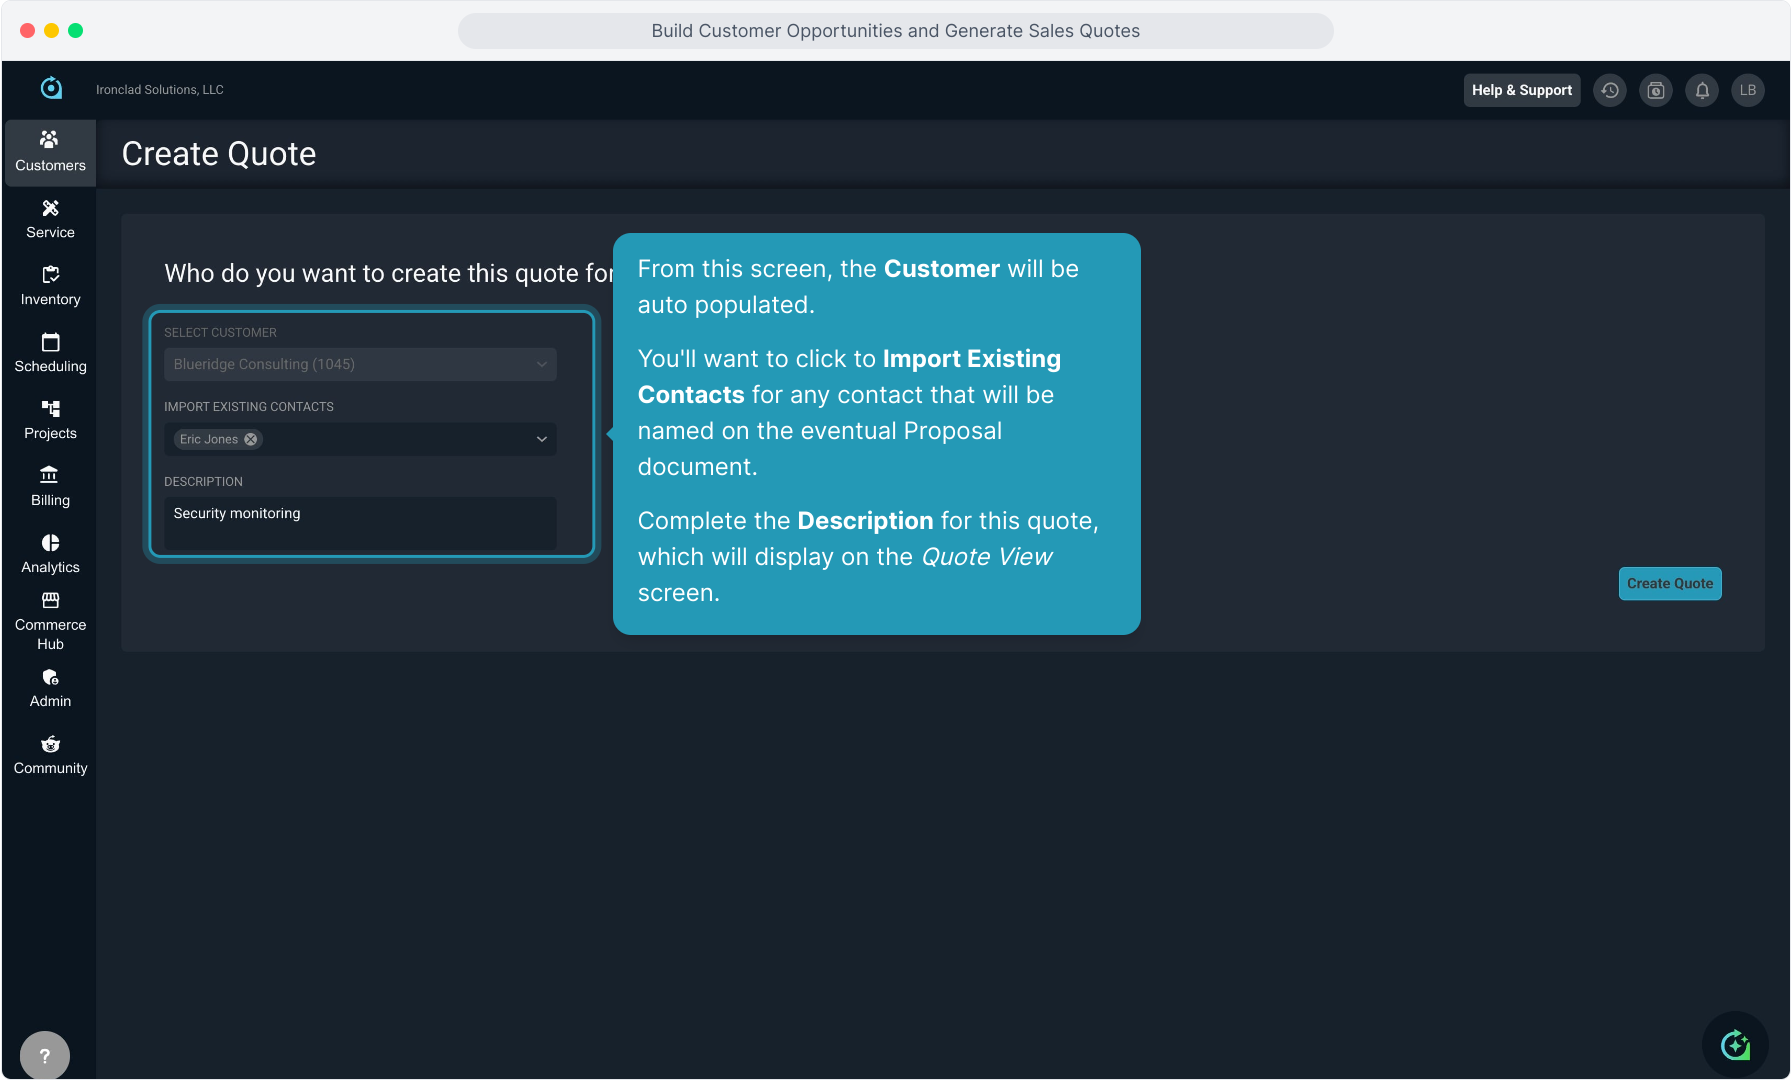
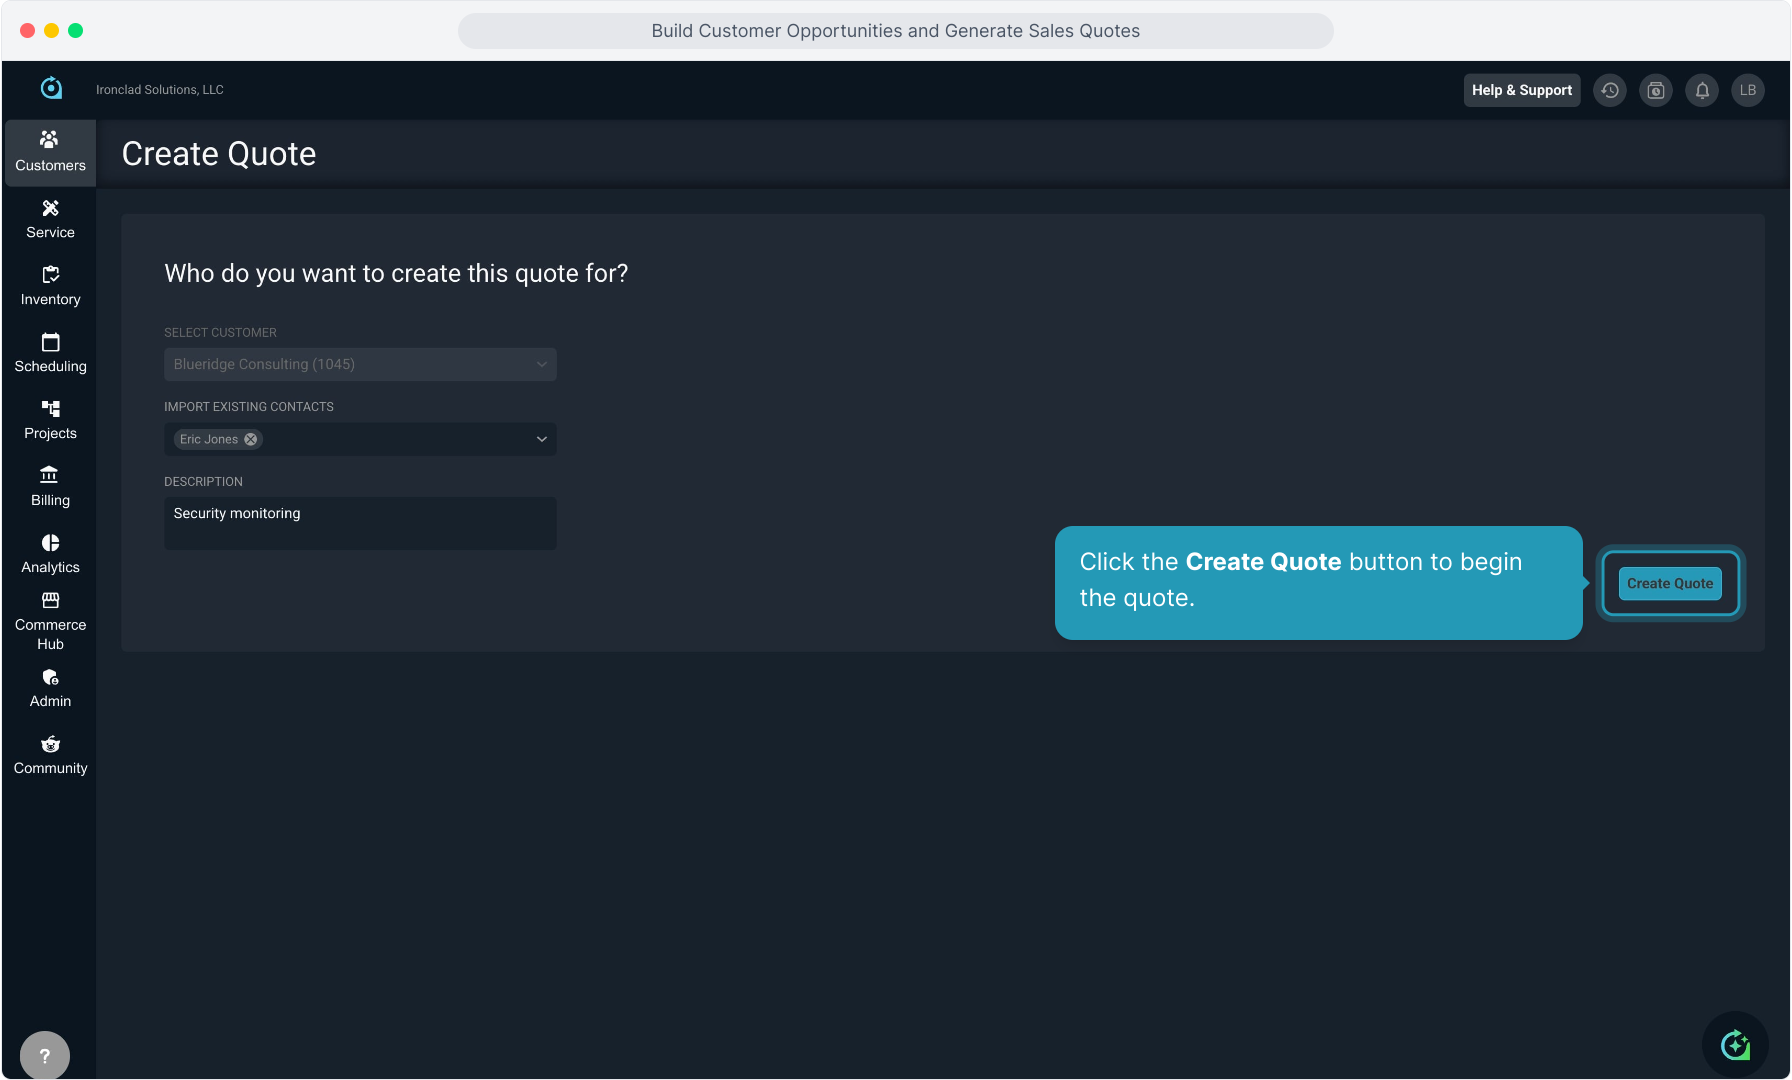
12. From this screen, the Customer will be auto populated.
You'll want to click to Import Existing Contacts for any contact that will be named on the eventual Proposal document.
Complete the Description for this quote, which will display on the Quote View screen.
13. Click the Create Quote button to begin the quote.
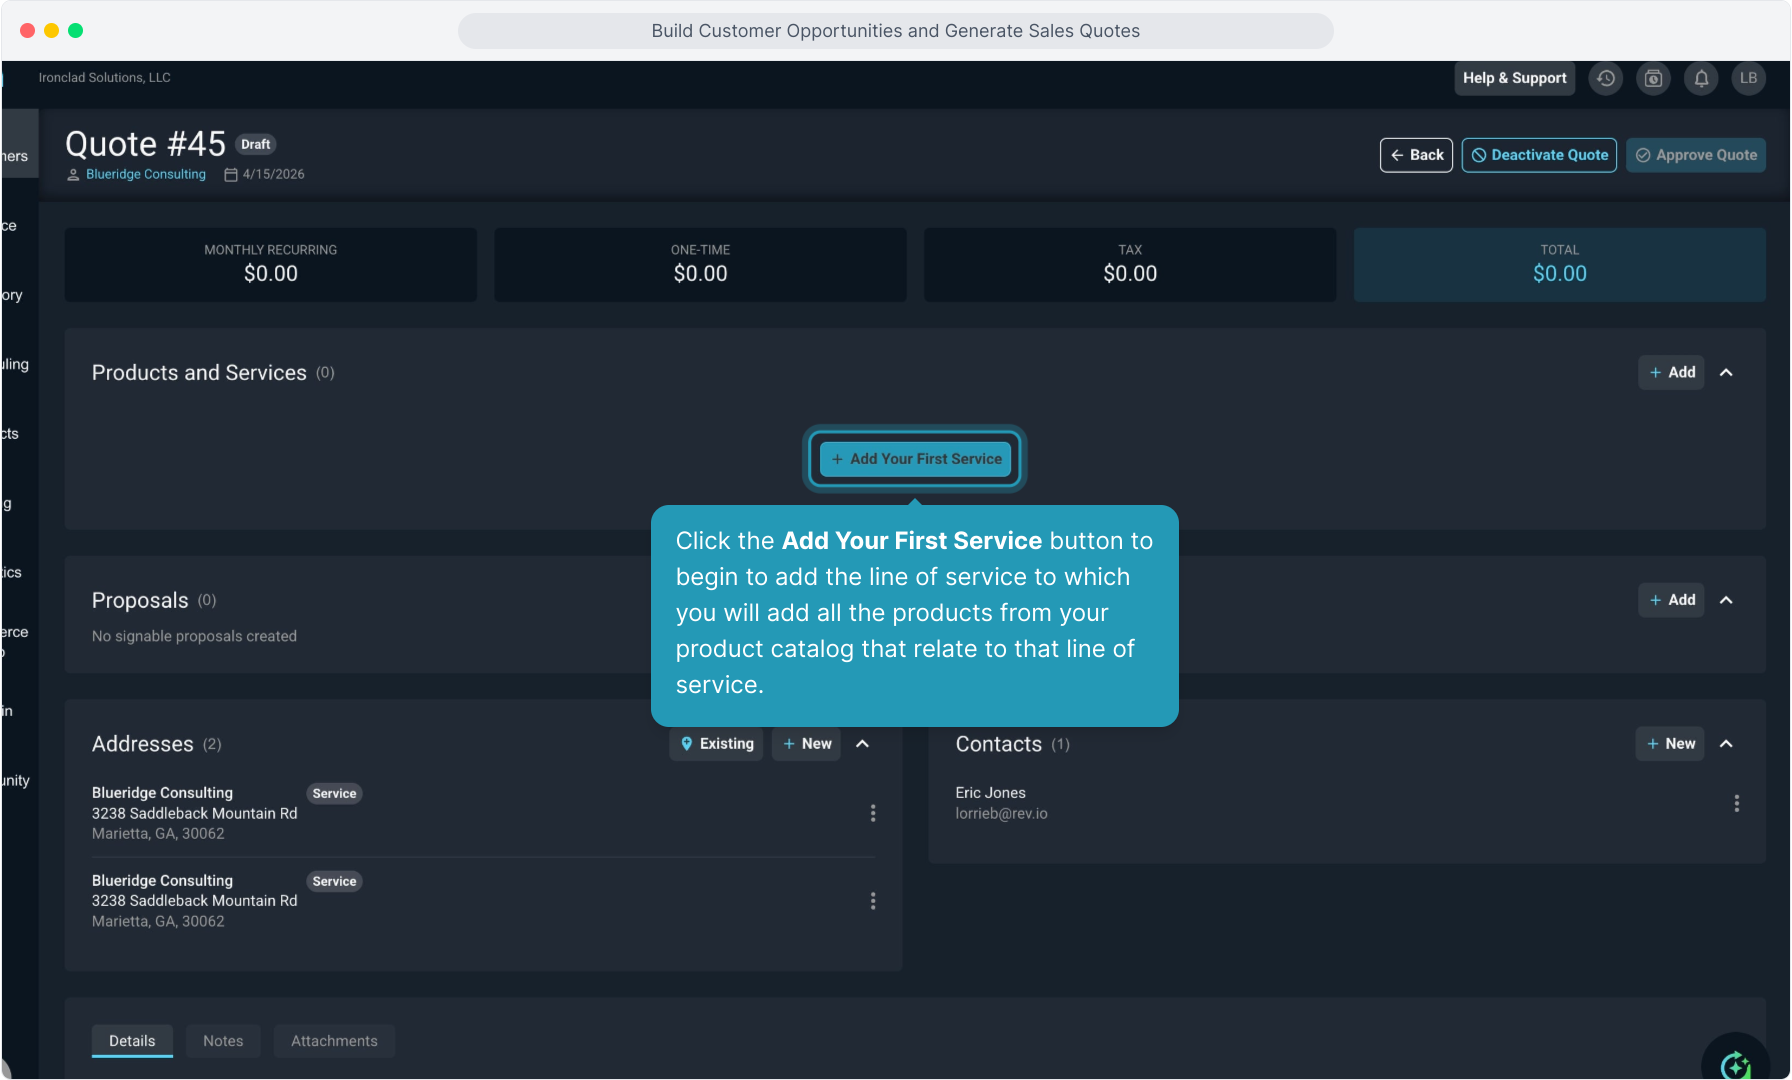
14. Click the Add Your First Service button to begin to add the line of service to which you will add all the products from your product catalog that relate to that line of service.
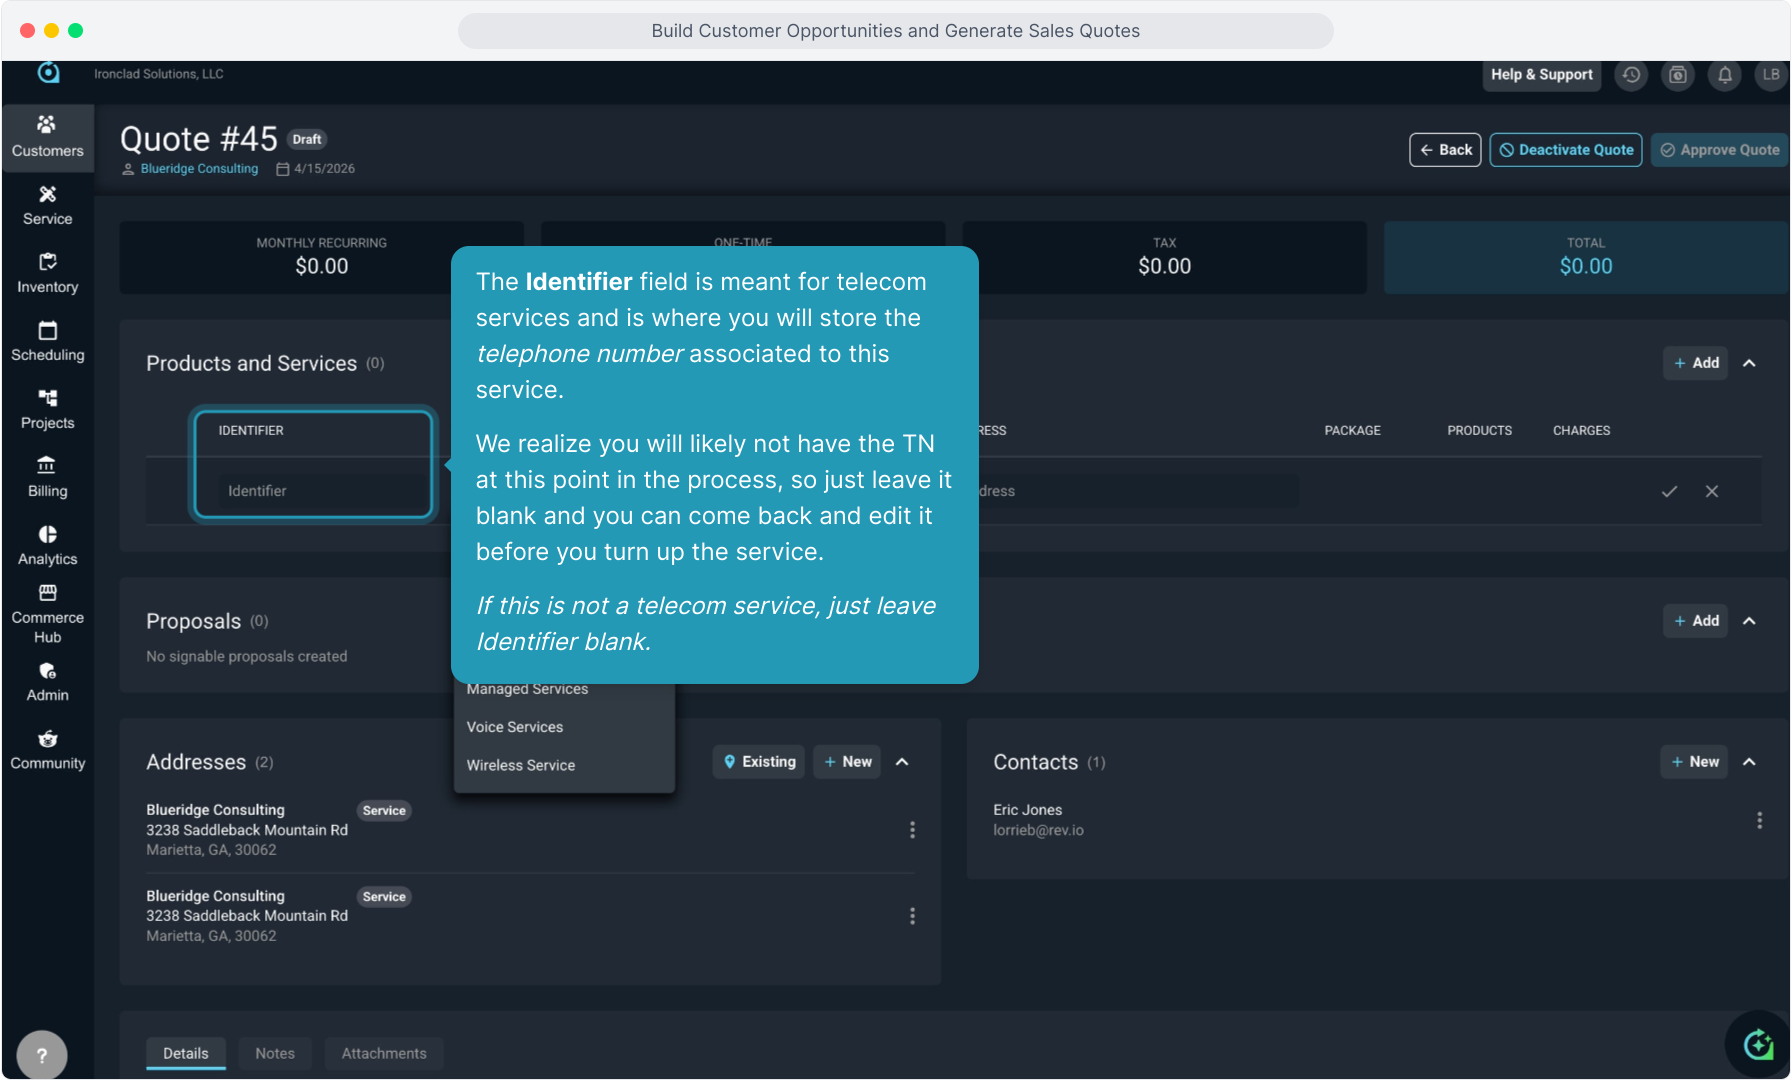
15. The Identifier field is meant for telecom services and is where you will store the telephone number associated to this service.
We realize you will likely not have the TN at this point in the process, so just leave it blank and you can come back and edit it before you turn up the service.
If this is not a telecom service, just leave Identifier blank.
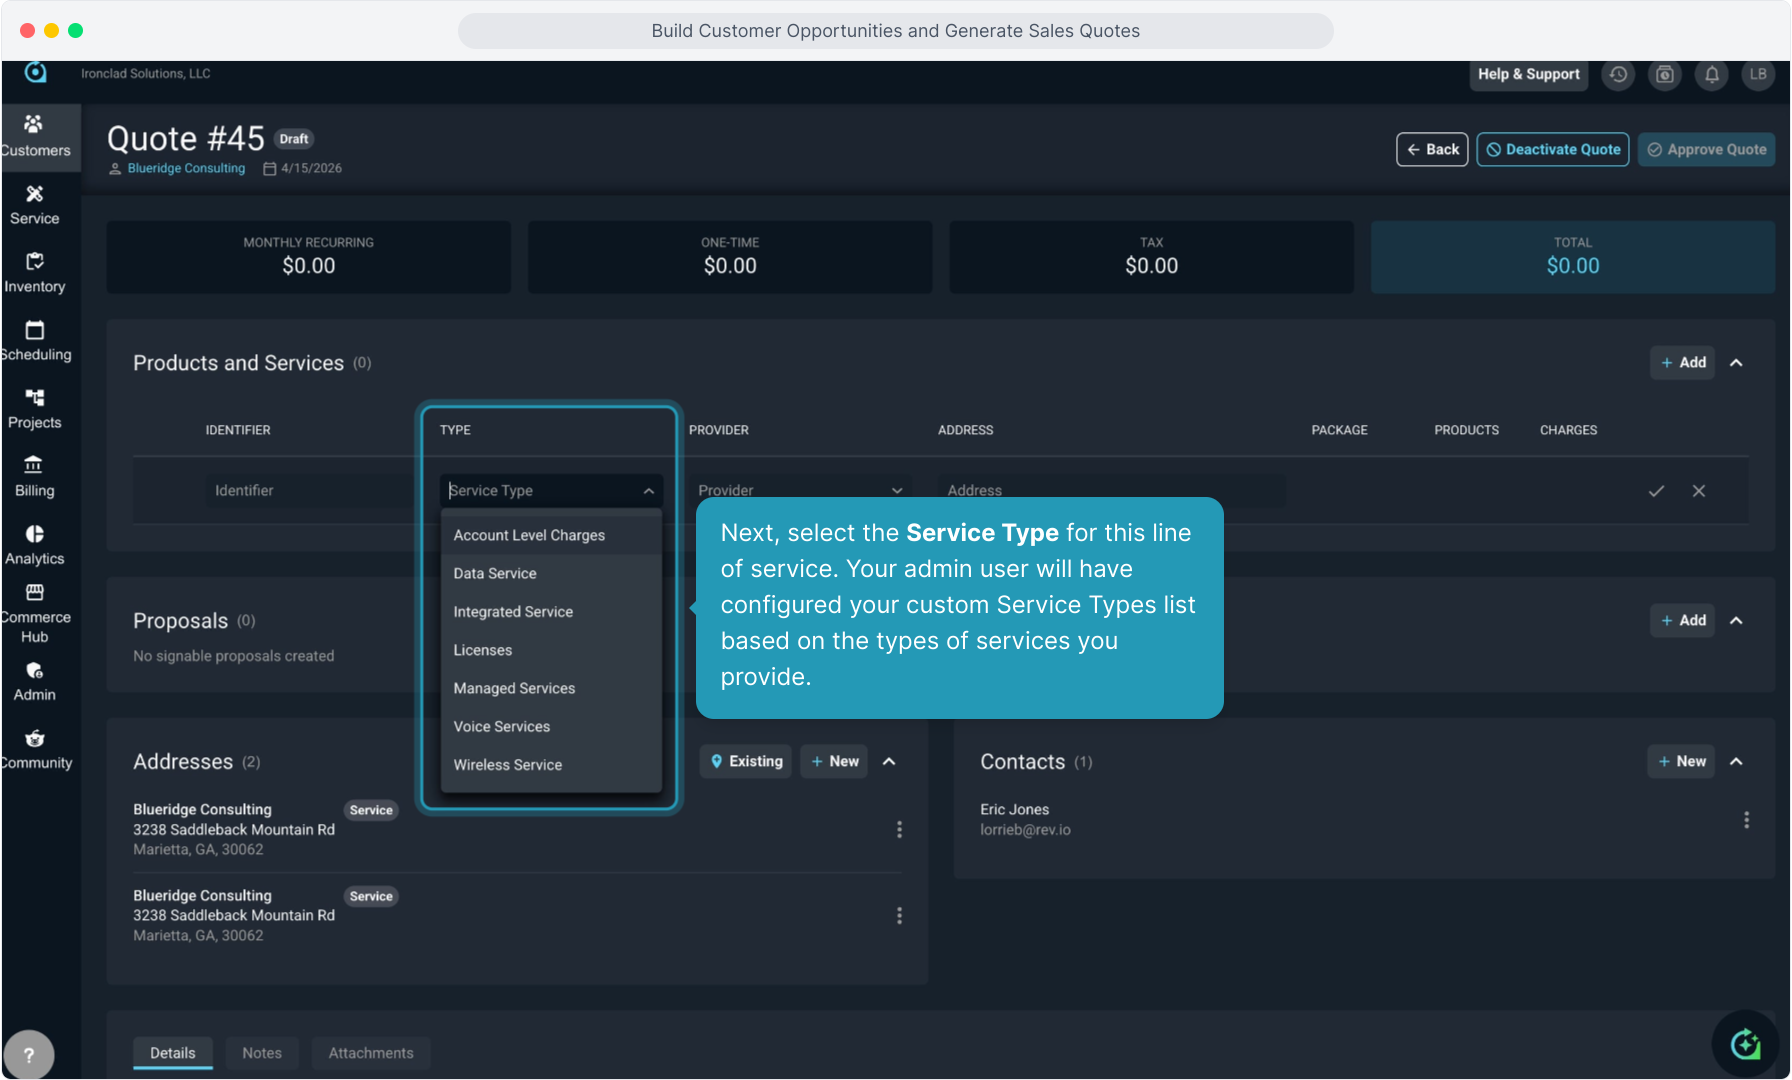
16. Next, select the Service Type for this line of service. Your admin user will have configured your custom Service Types list based on the types of services you provide.
17. Then select the Provider for this line of service. Your admin user will have configured your custom list based on the providers that you resell services and products from.

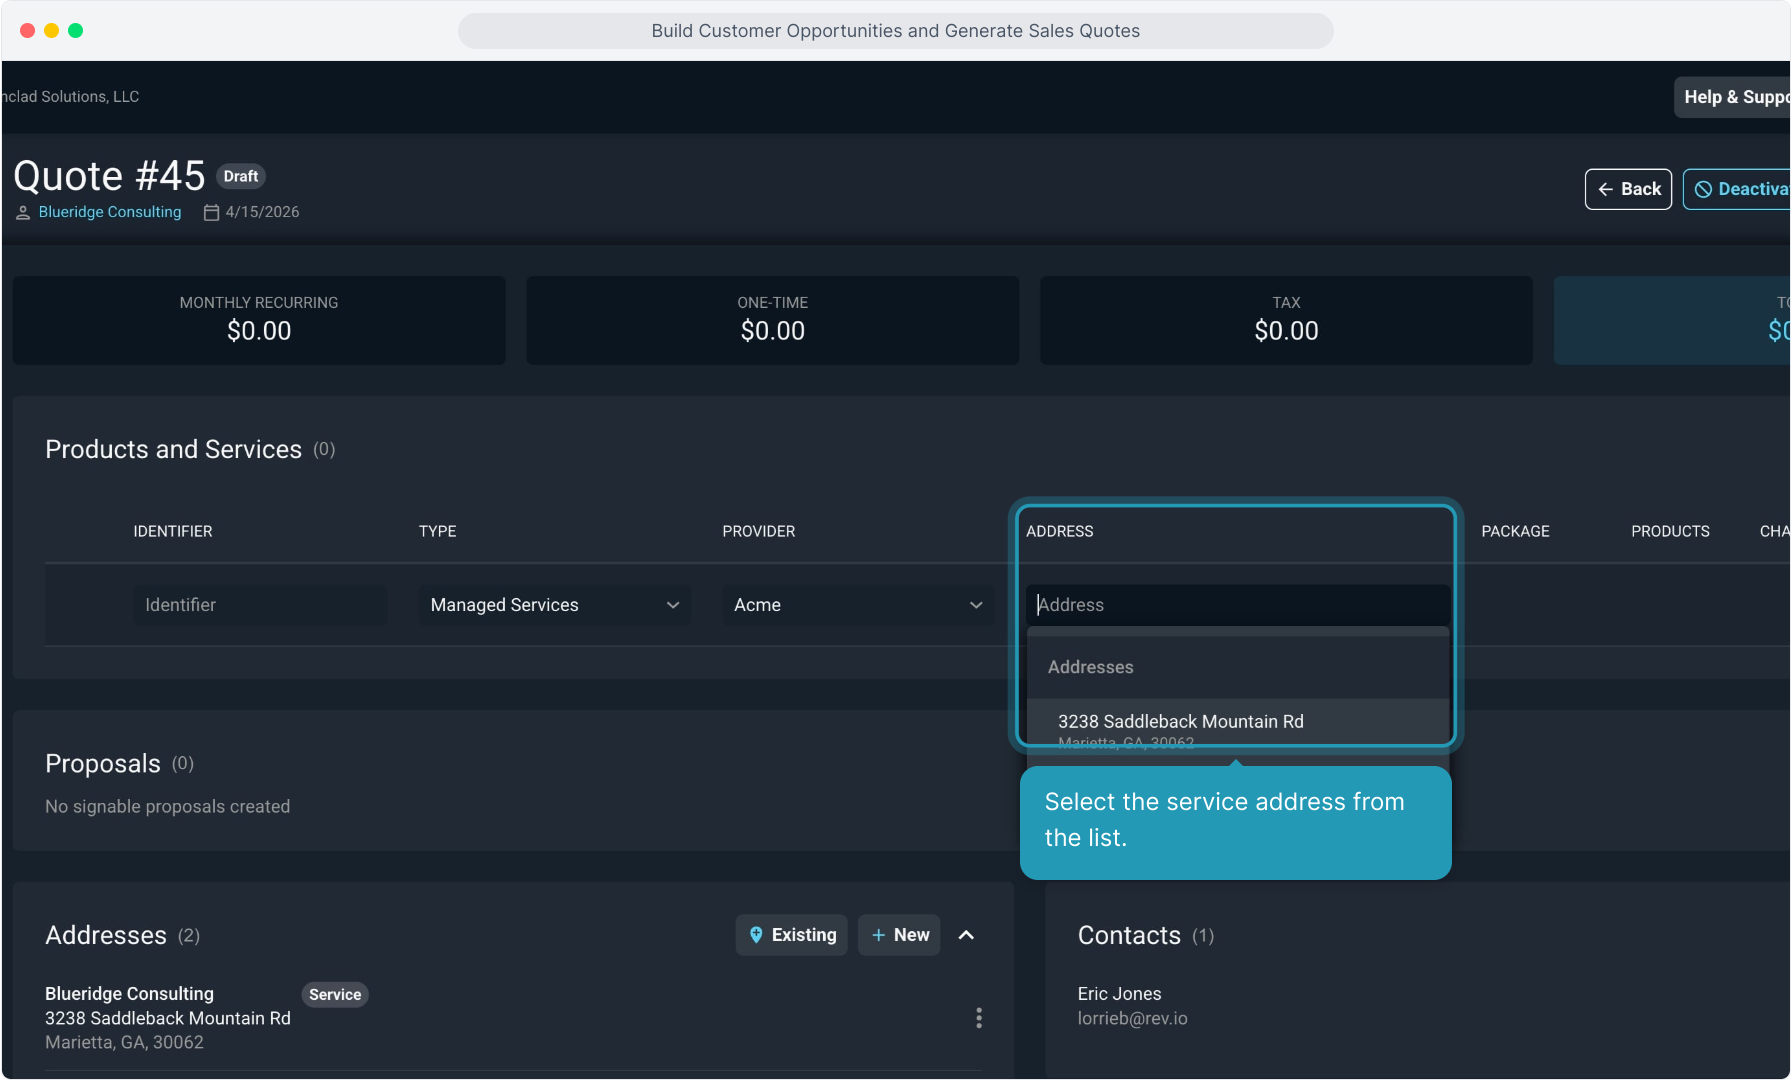
18. Select the service address from the list.
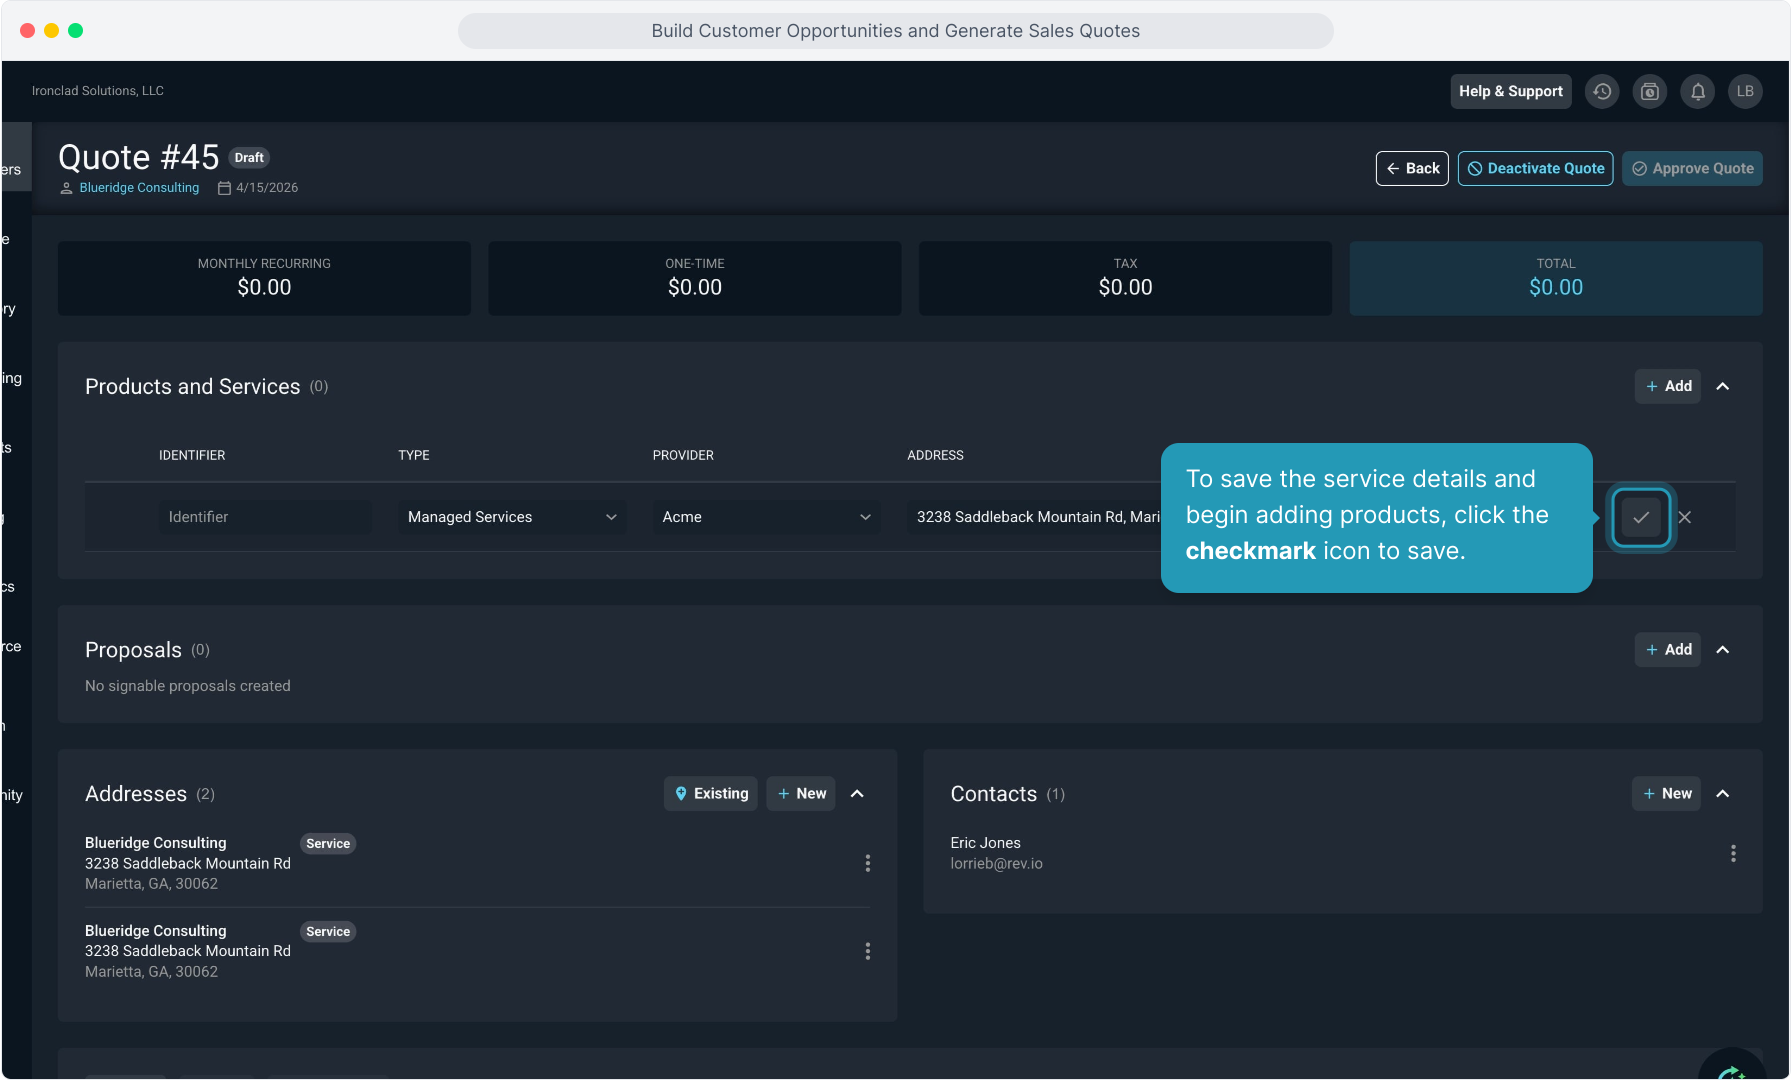
19. To save the service details and begin adding products, click the checkmark icon to save.
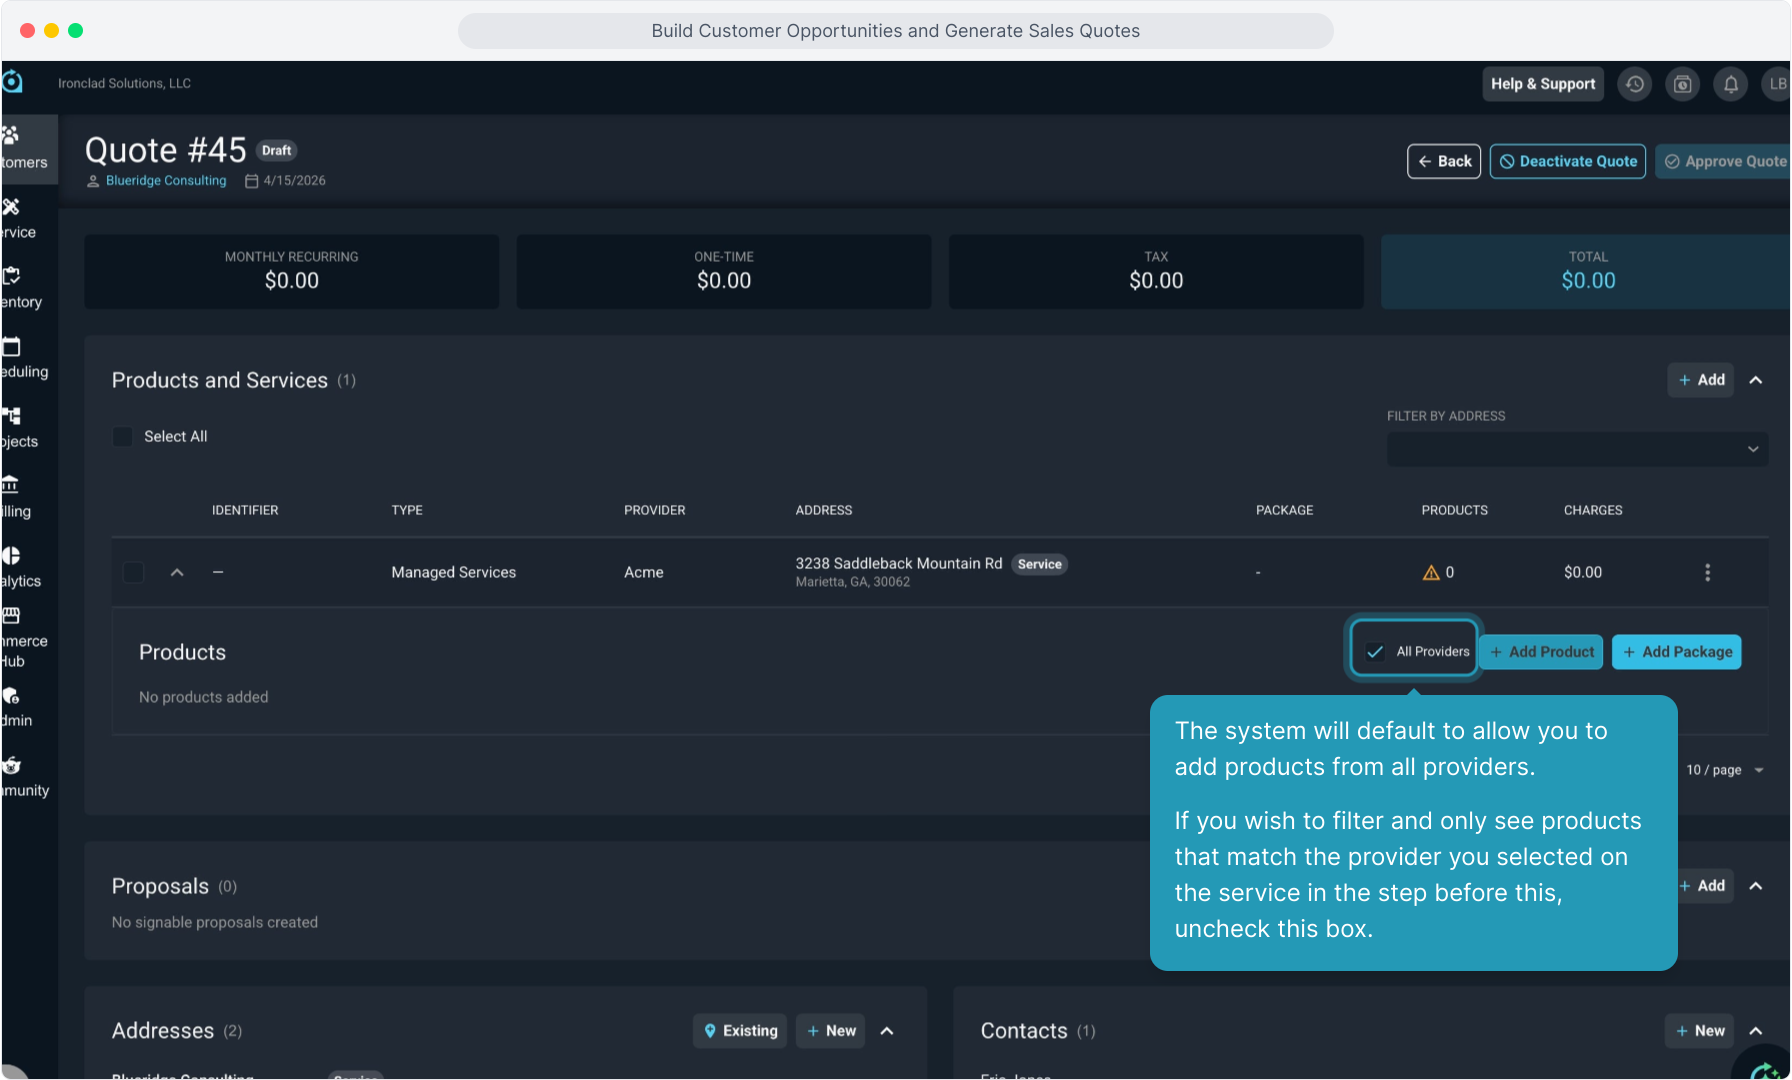
20. The system will default to allow you to add products from all providers.
If you wish to filter and only see products that match the provider you selected on the service in the step before this, uncheck this box.
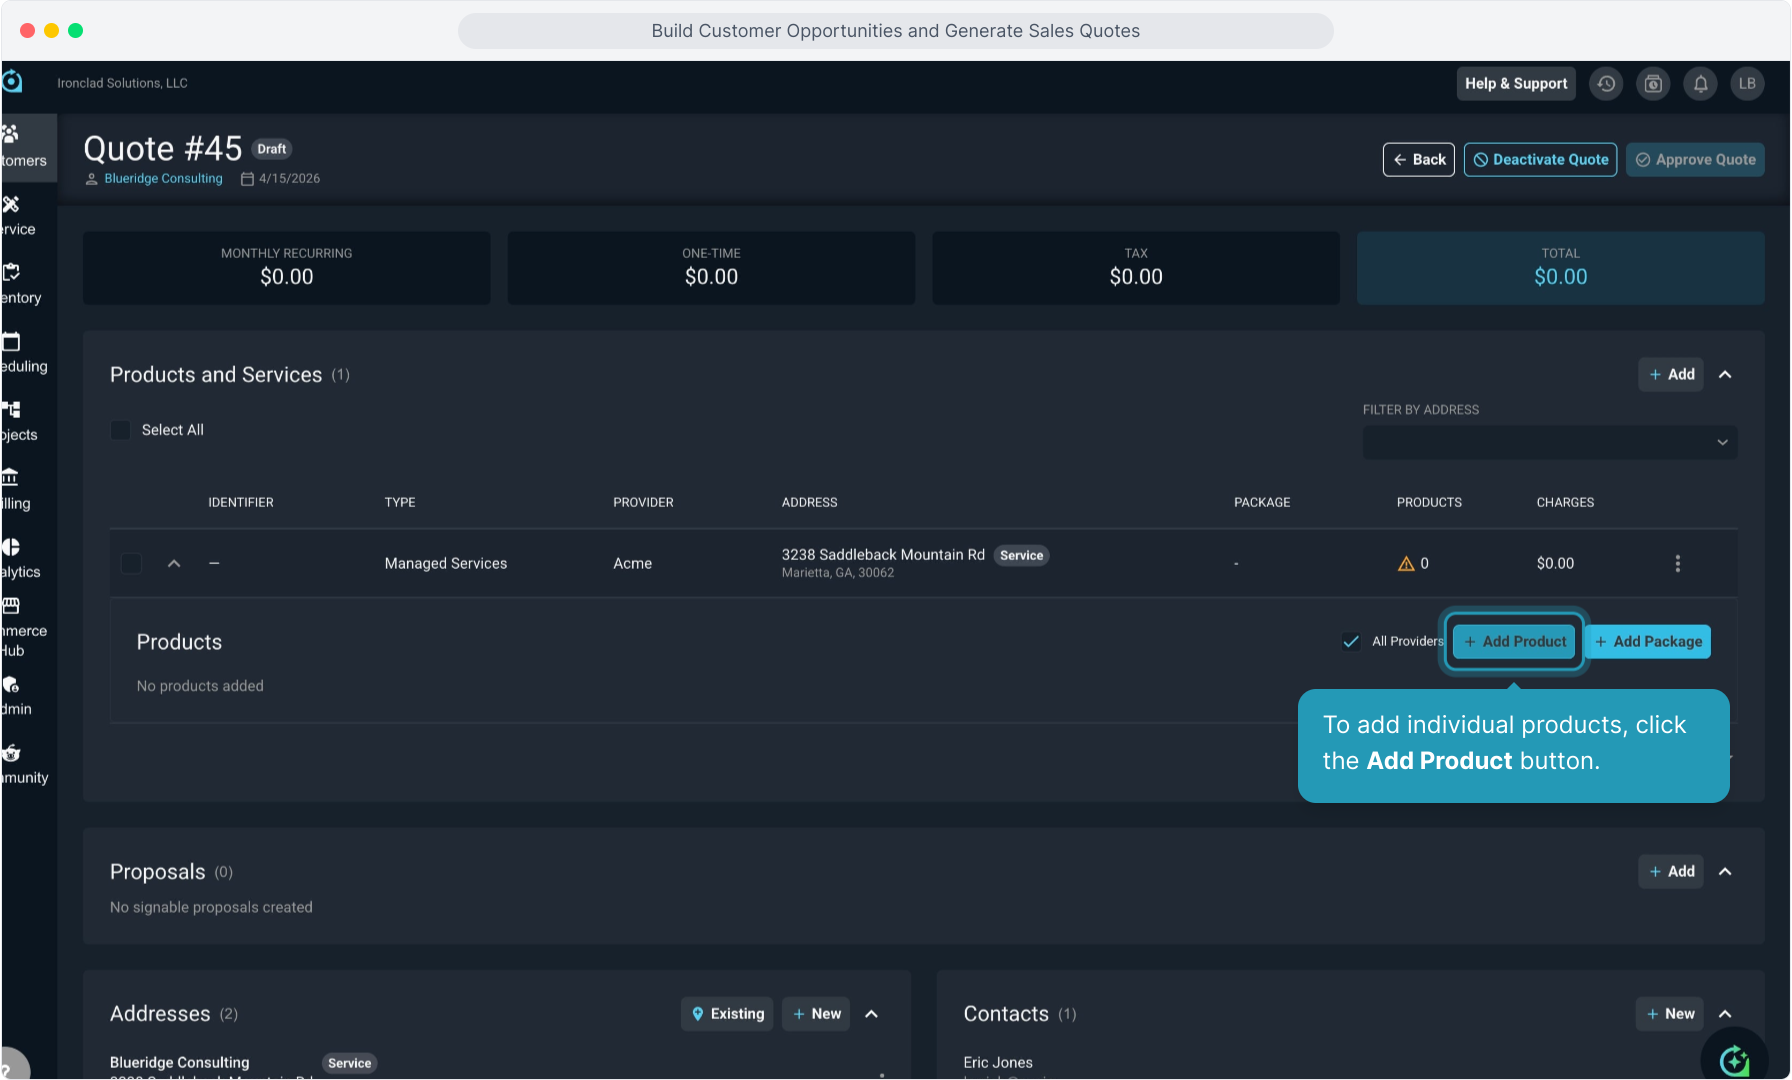
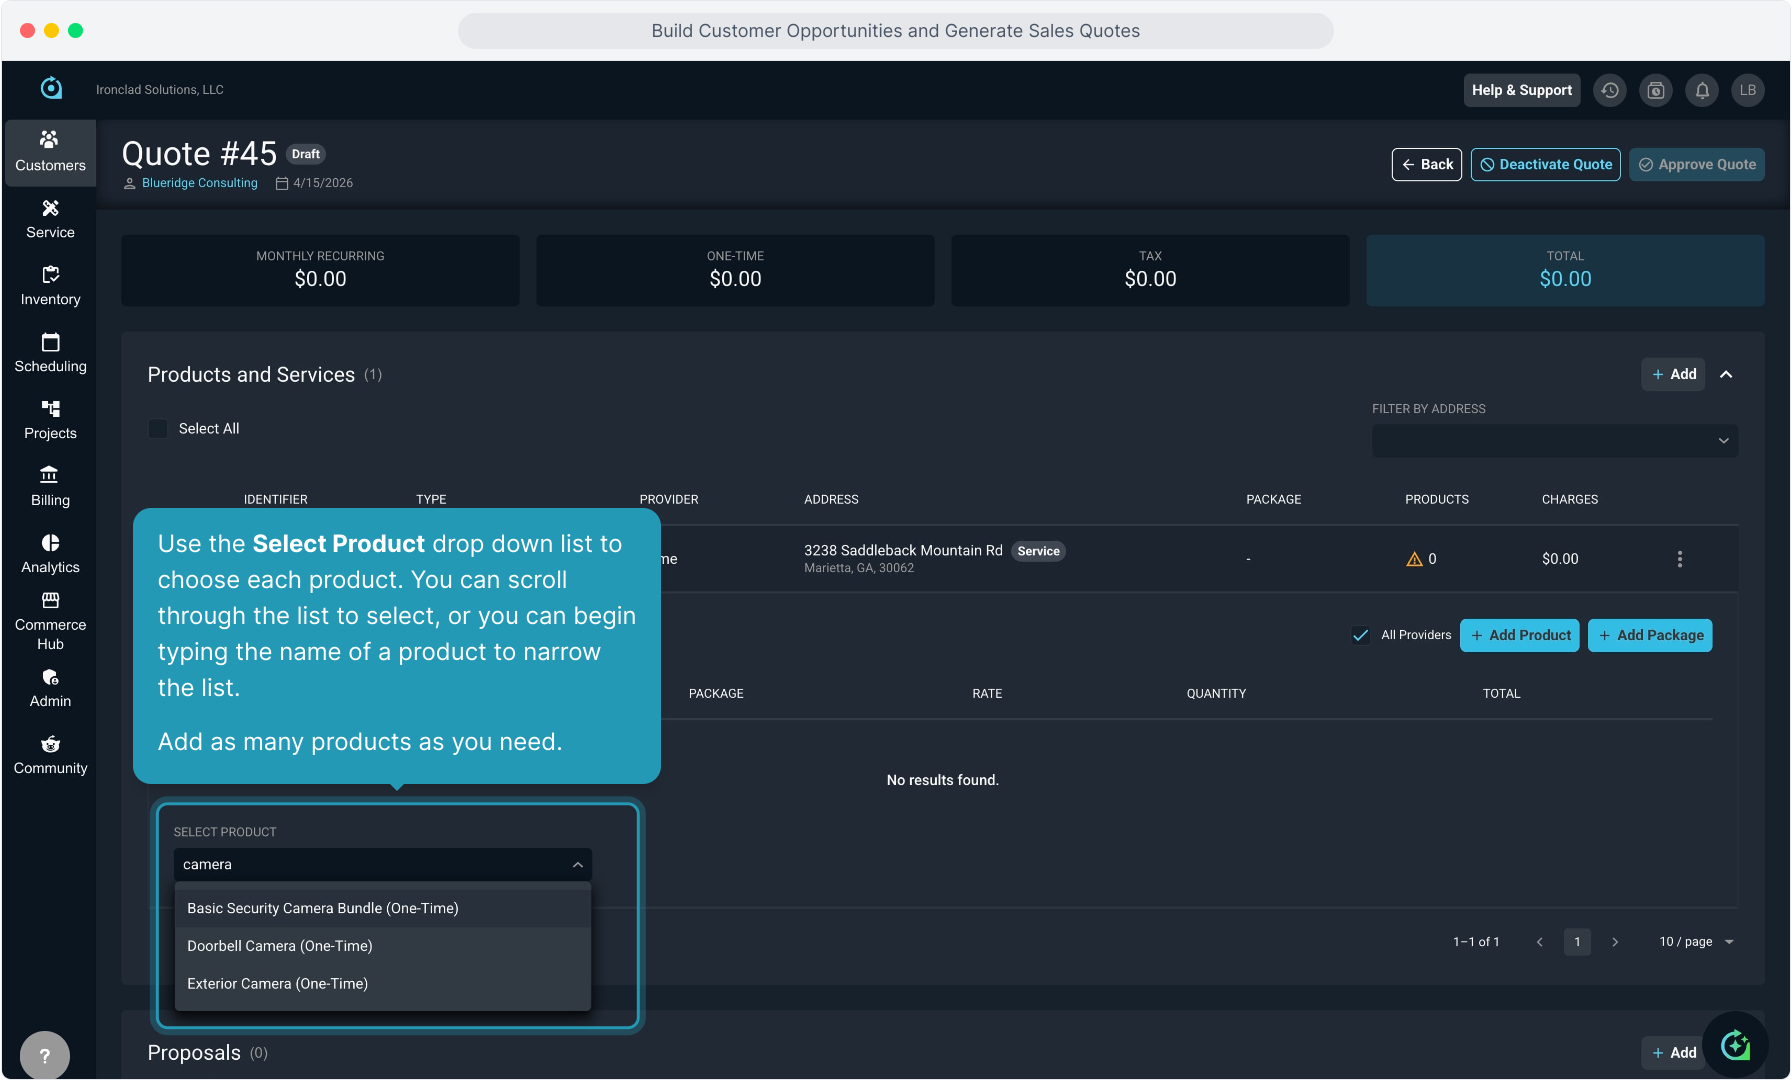
21. To add individual products, click the Add Product button.
22. Use the Select Product drop down list to choose each product. You can scroll through the list to select, or you can begin typing the name of a product to narrow the list. Add as many products as you need.
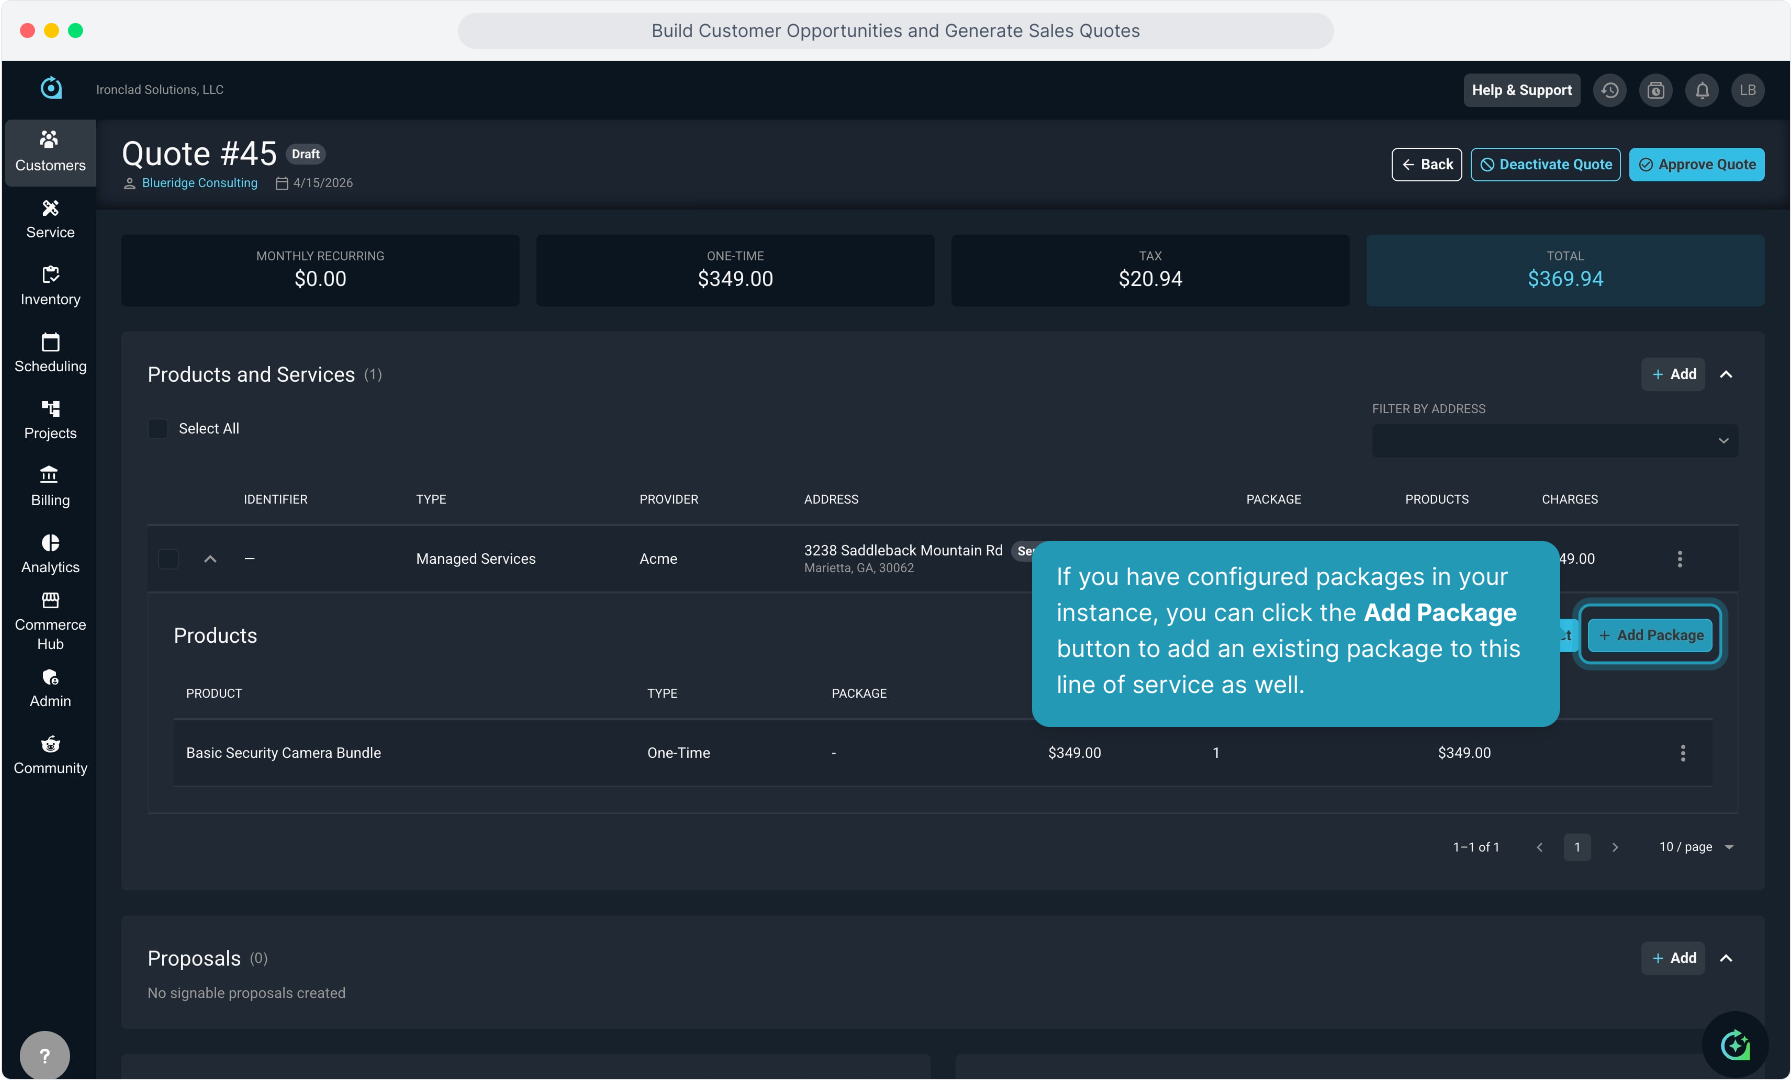
23. If you have configured packages in your instance, you can click the Add Package button to add an existing package to this line of service as well.
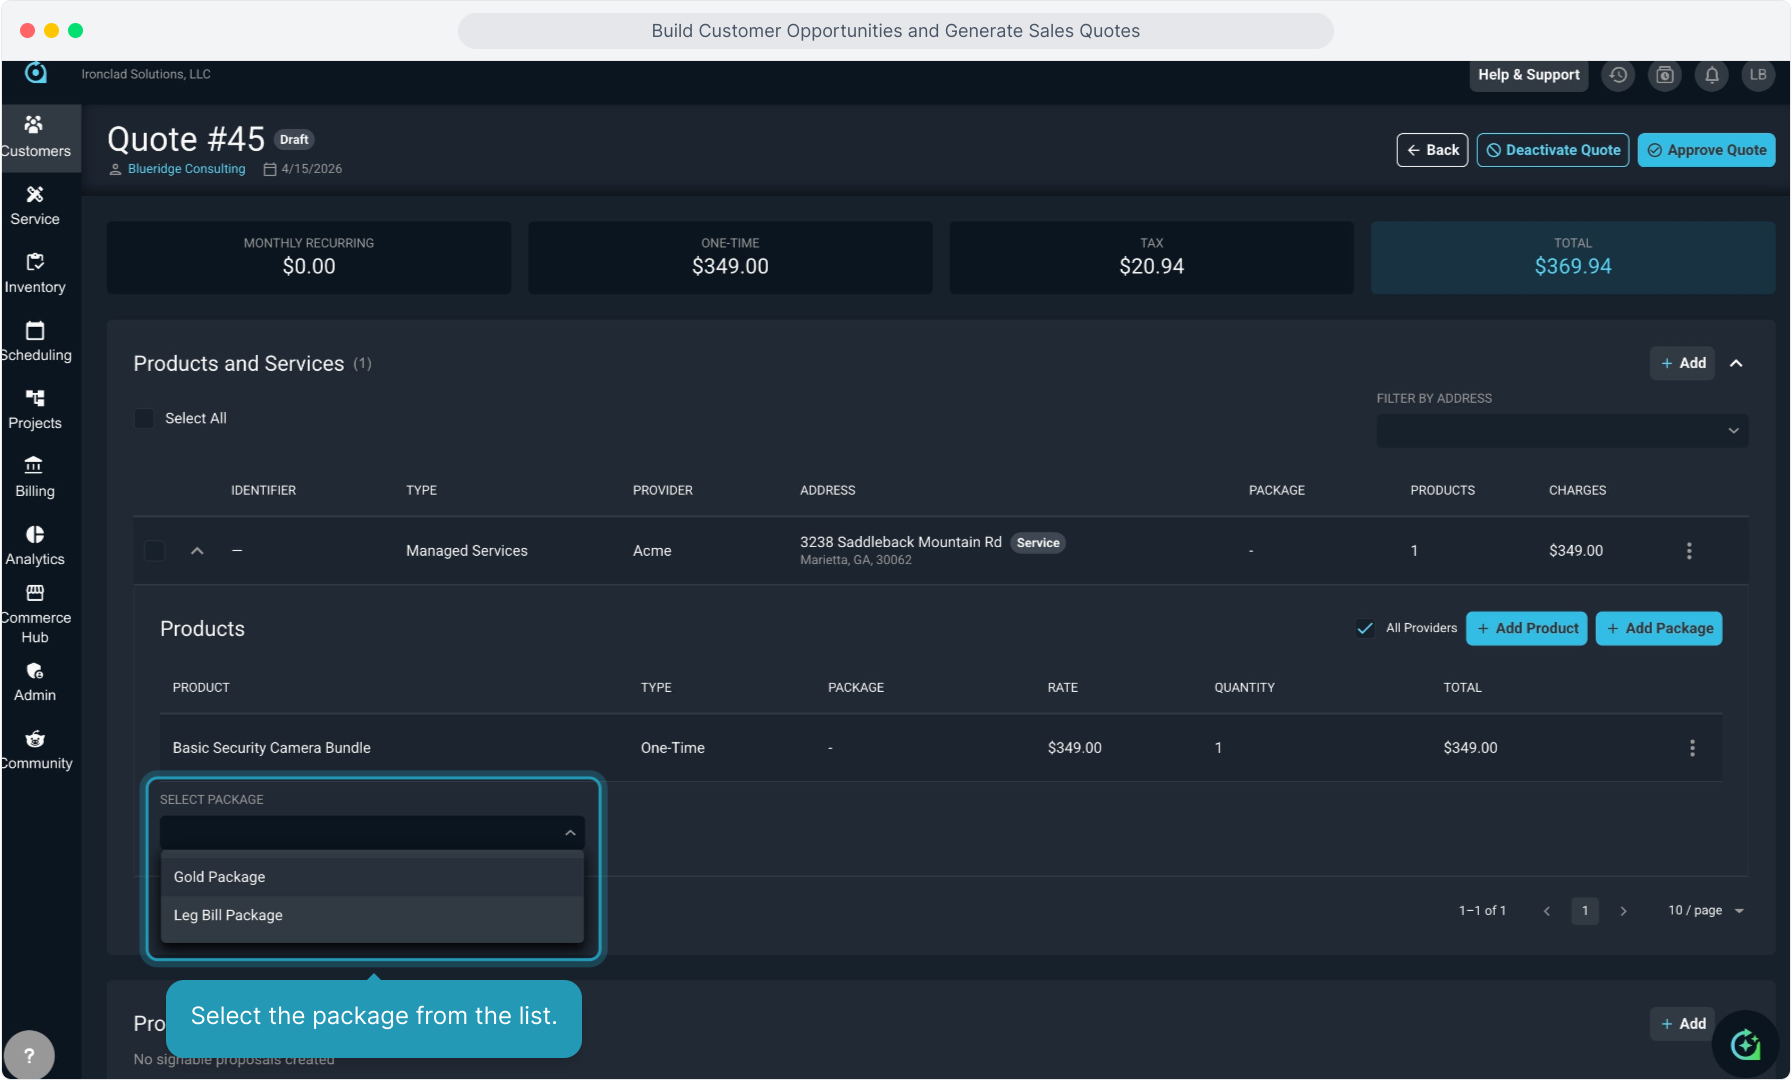
24. Select the package from the list.
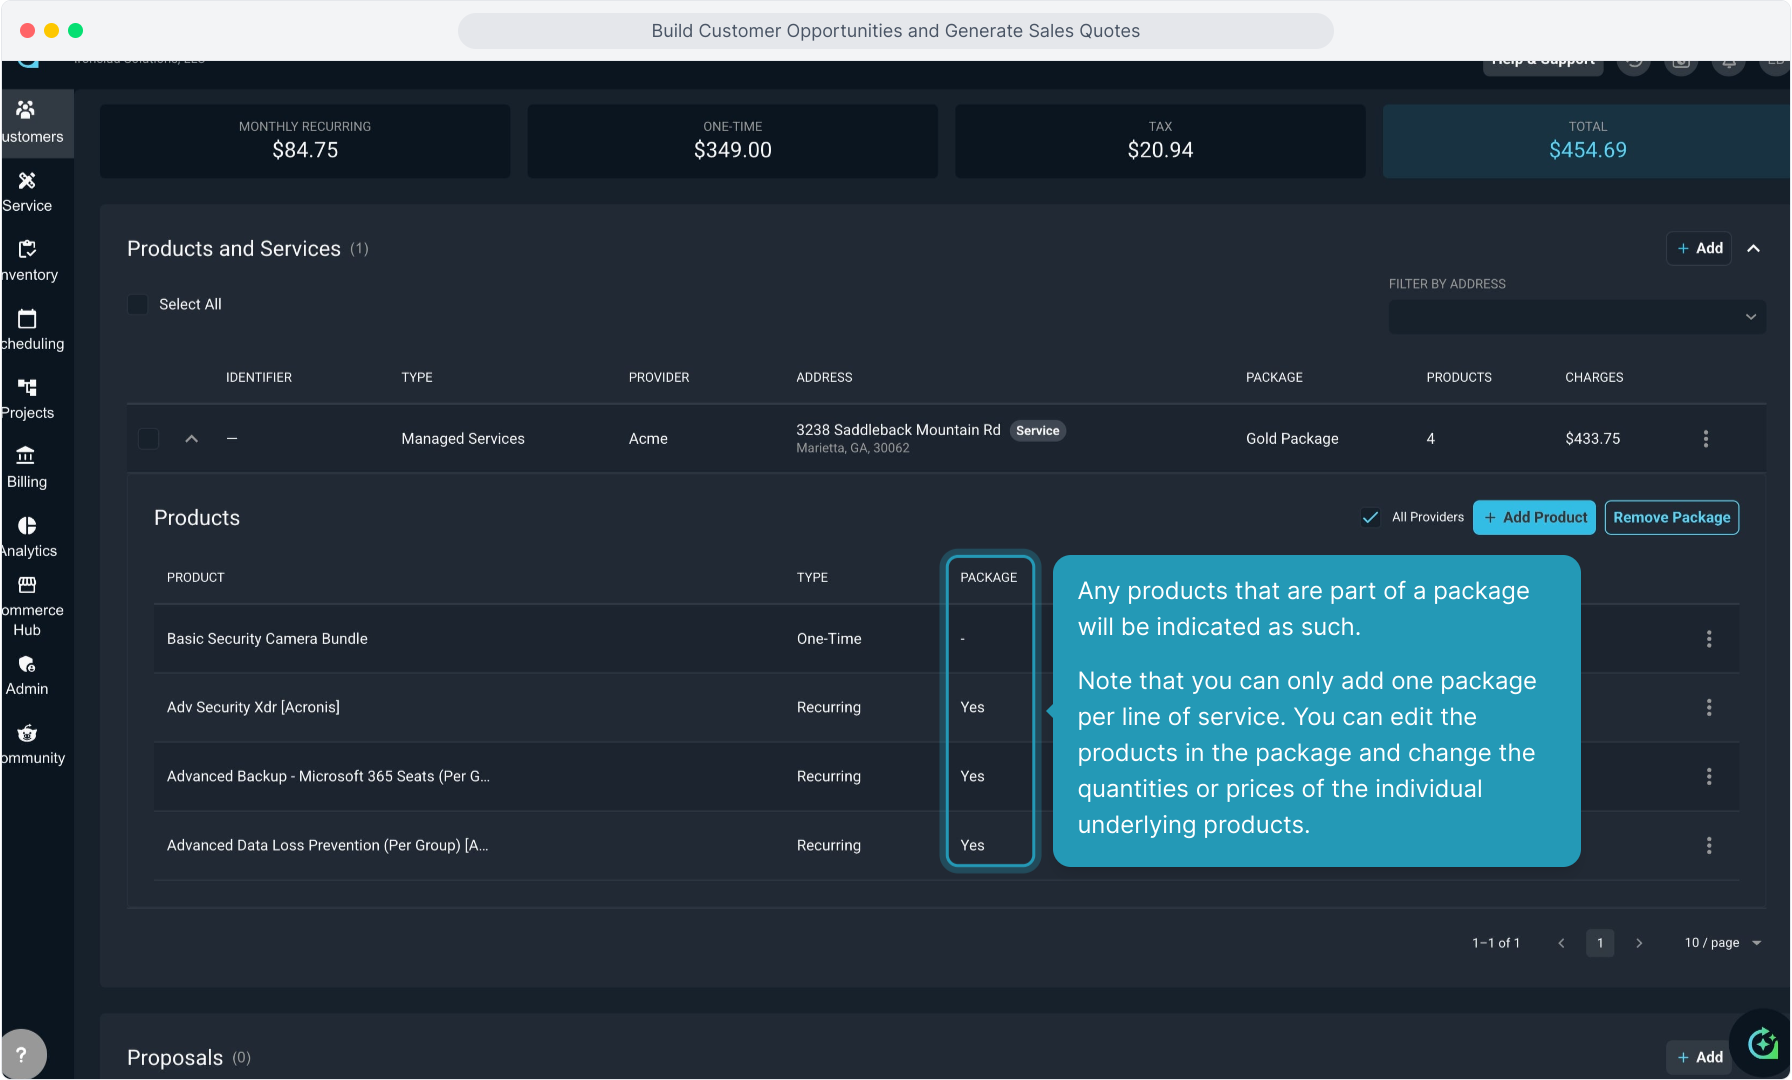
25. Once you're done, you'll see the service information at the top and all the products on that line of service listed underneath that.
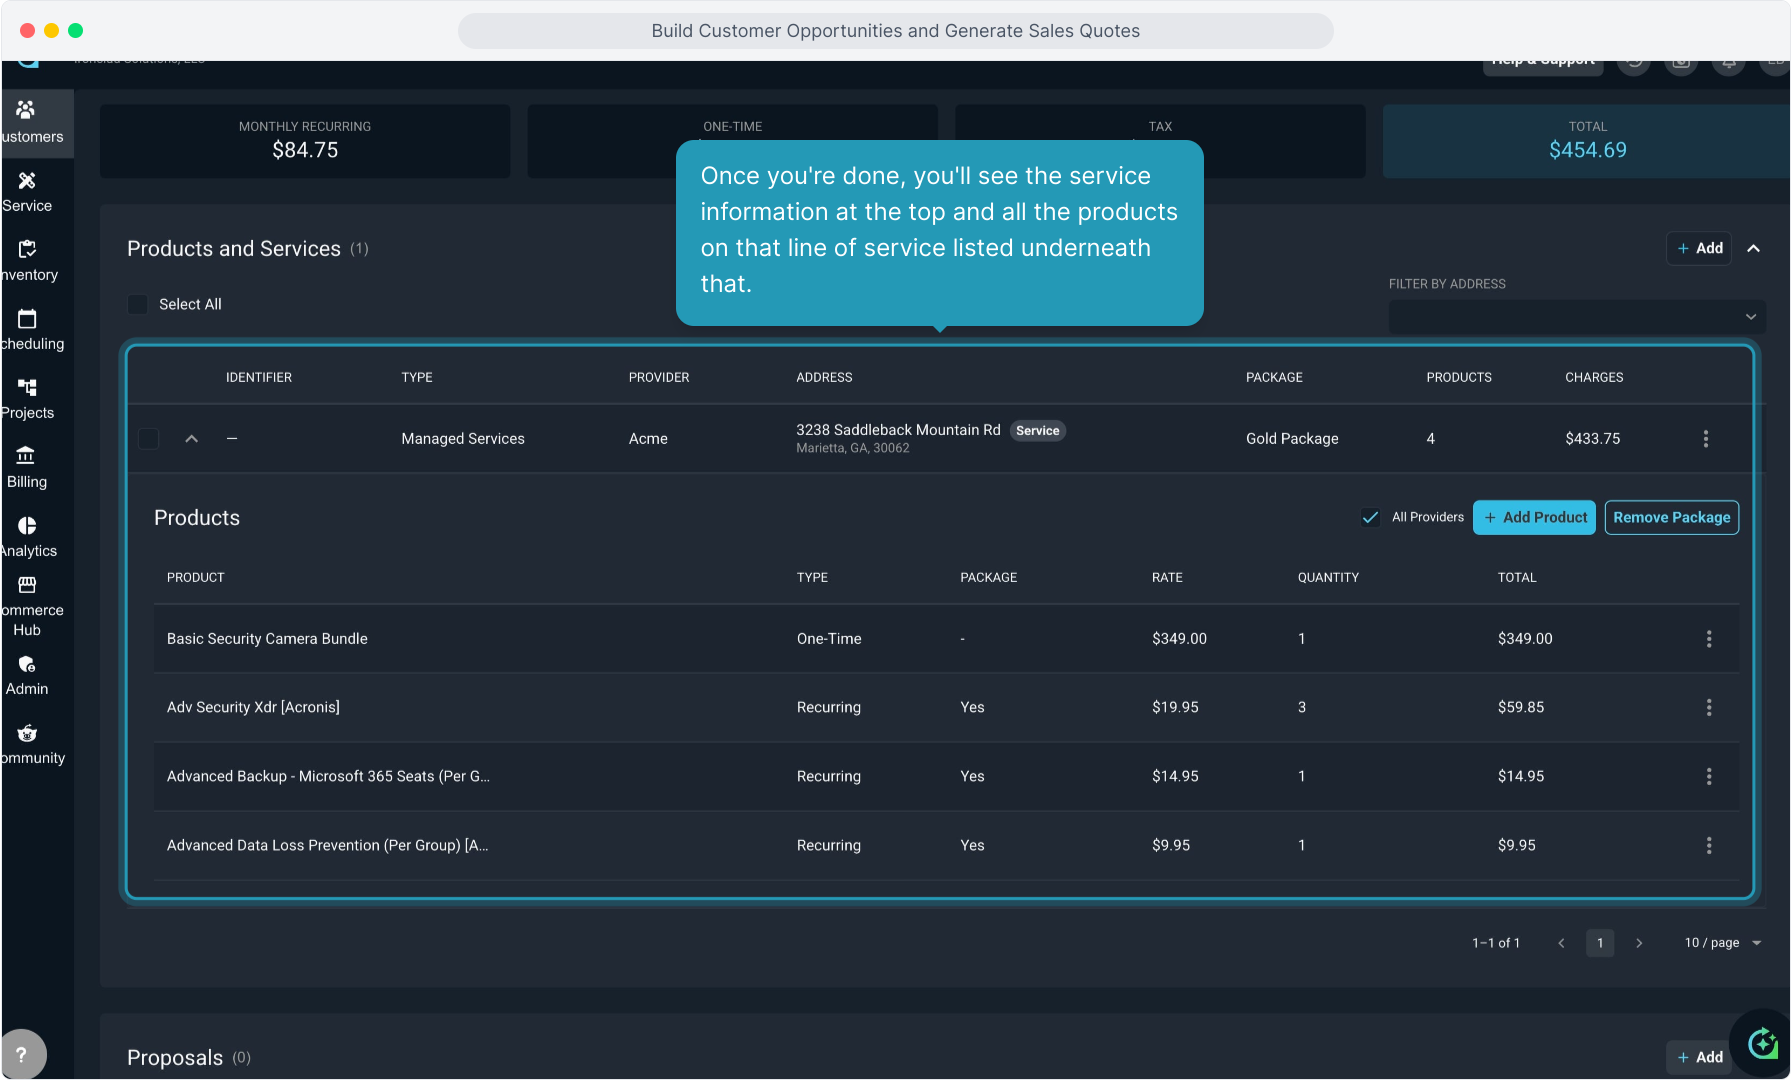
26. Any products that are part of a package will be indicated as such.
Note that you can only add one package per line of service. You can edit the products in the package and change the quantities or prices of the individual underlying products.
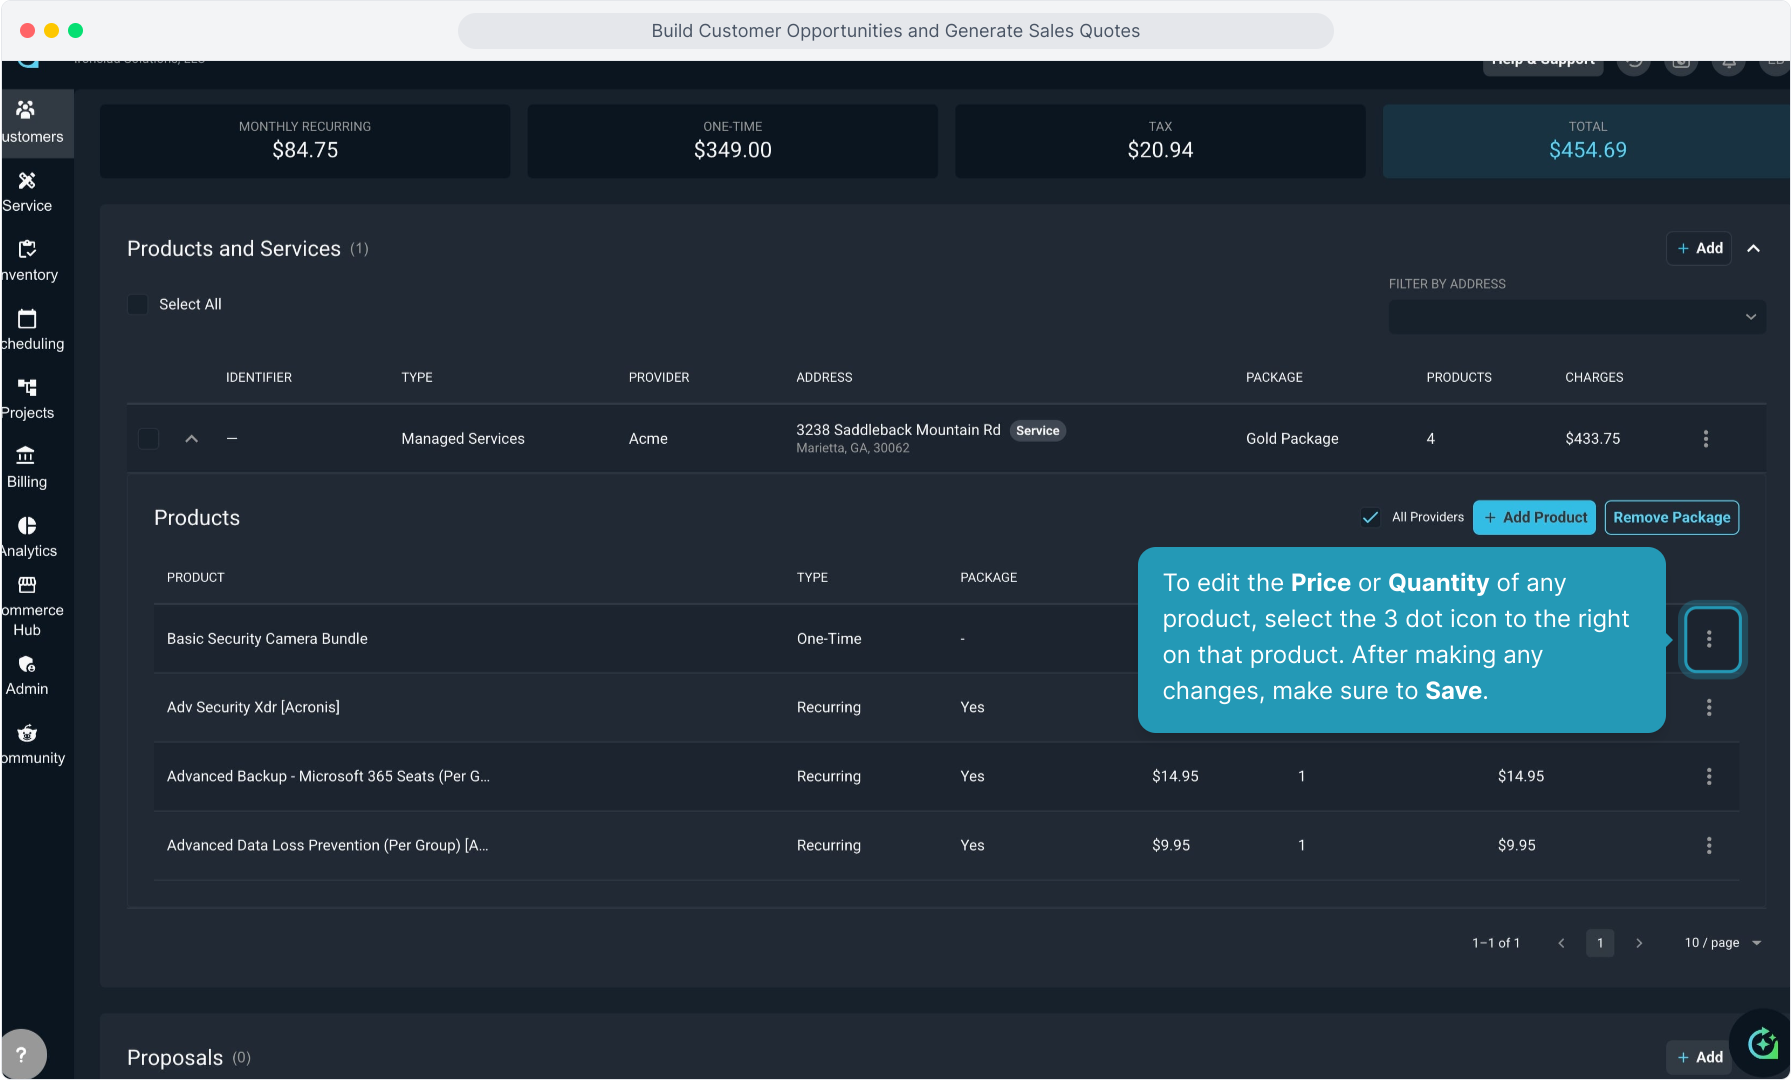
27. To edit the Price or Quantity of any product, select the 3 dot icon to the right on that product. After making any changes, make sure to Save.
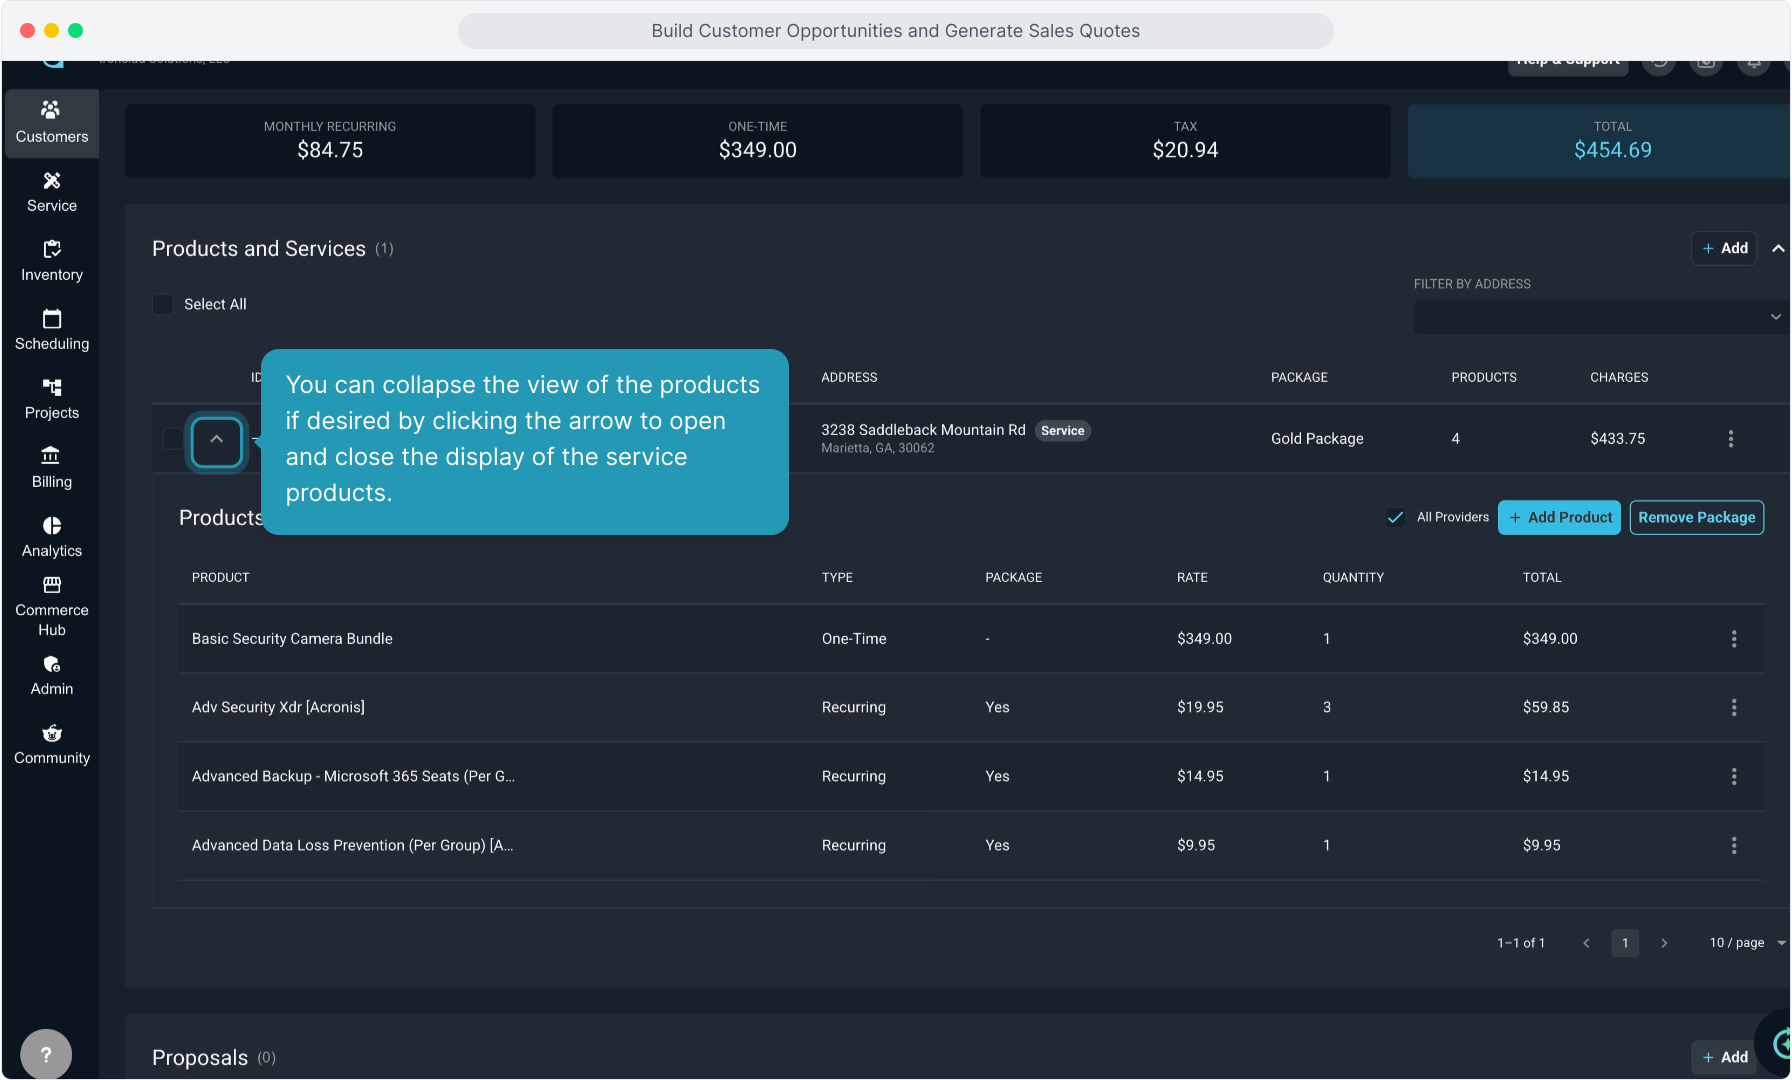
28. You can collapse the view of the products if desired by clicking the arrow to open and close the display of the service products.
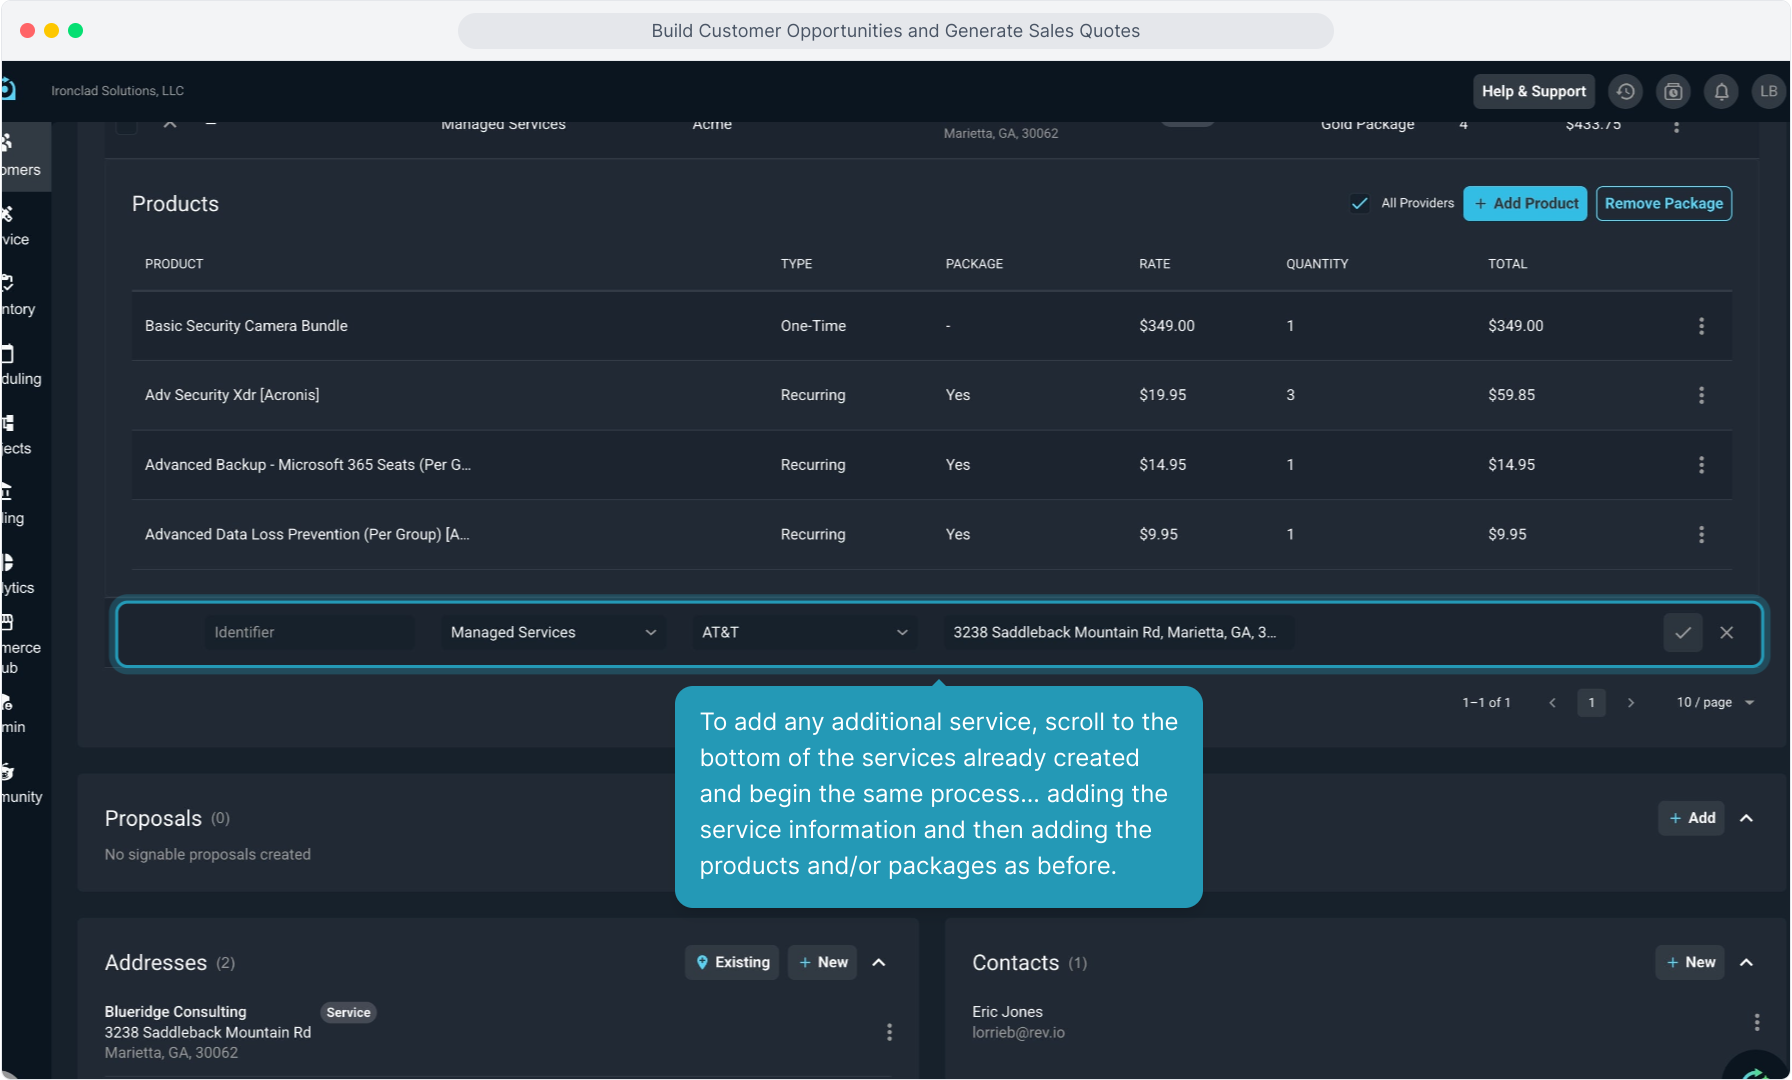
29. To add additional lines of service, click the Add button at the top of the quote screen.
Several reasons that you might want to add multiple separate services to a quote are if you are quoting different types of services or to have products display on the quote and on the bill separately.
Custom fields can be created that are unique to each Service Type so that you are capturing the data points that you need for the different types of services that you provide.
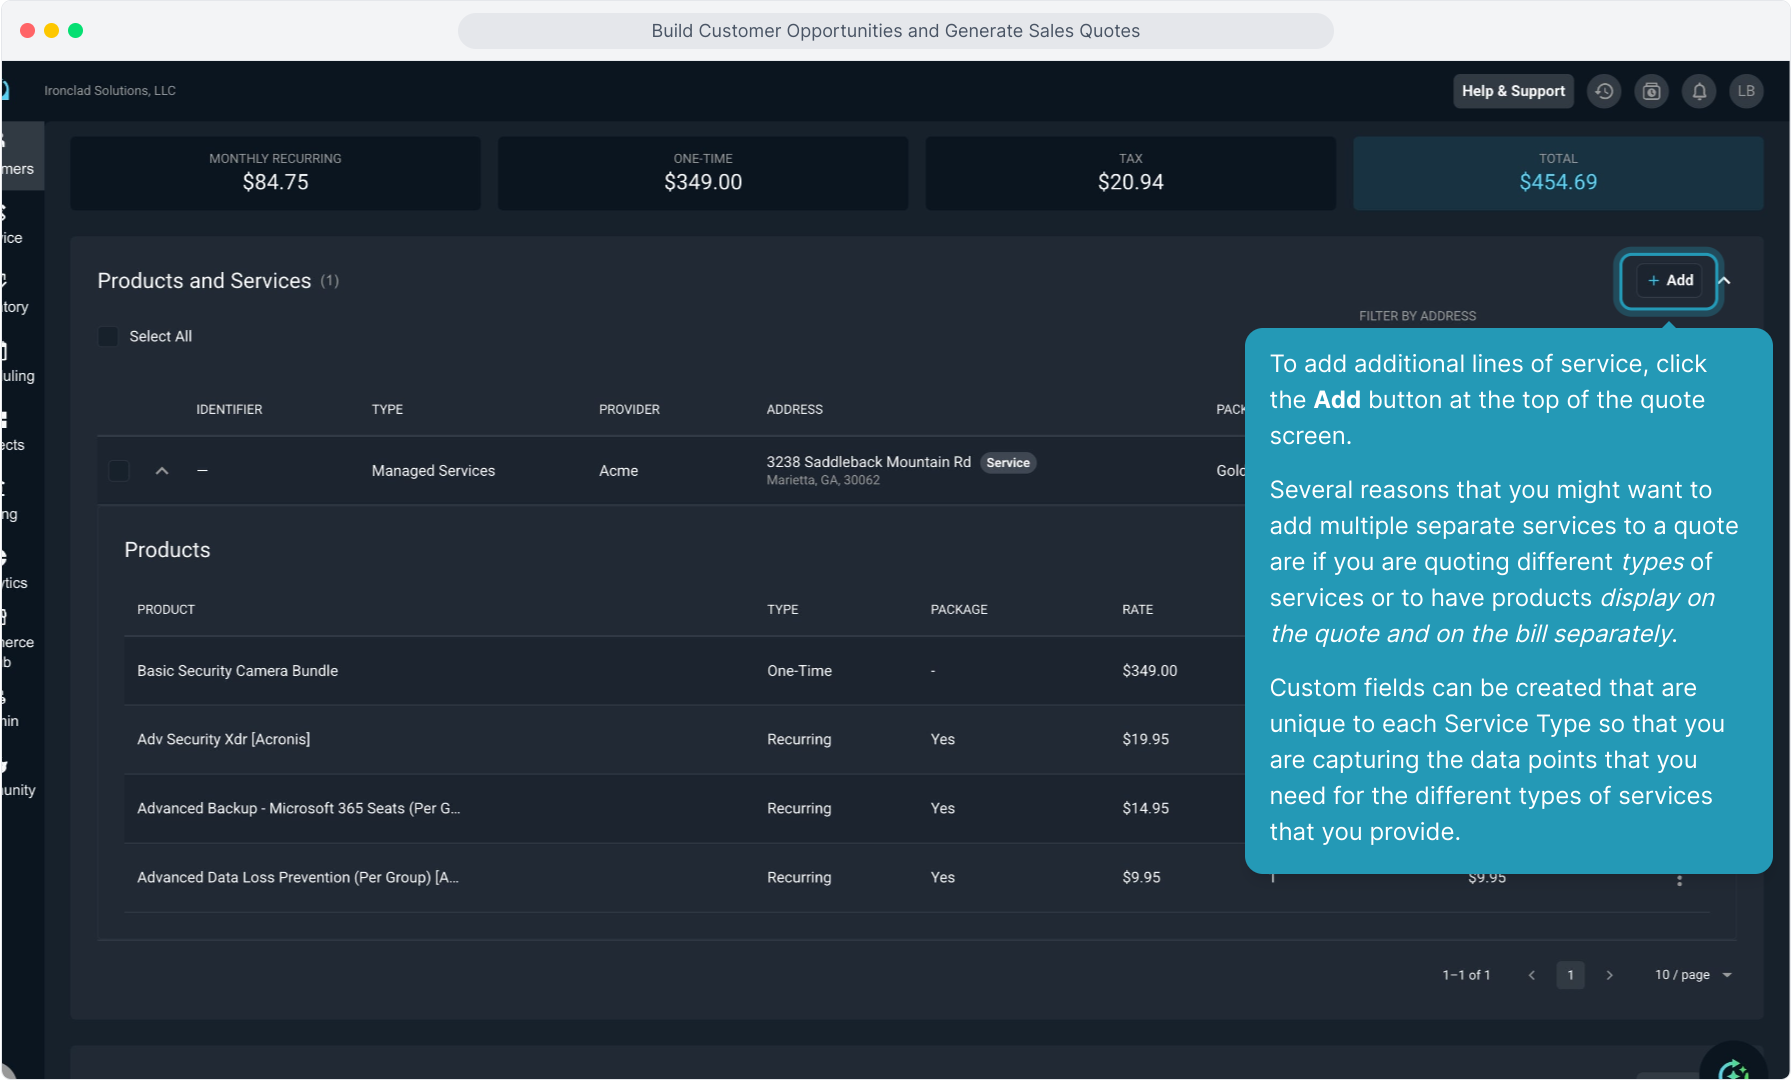
30. To add any additional service, scroll to the bottom of the services already created and begin the same process... adding the service information and then adding the products and/or packages as before.
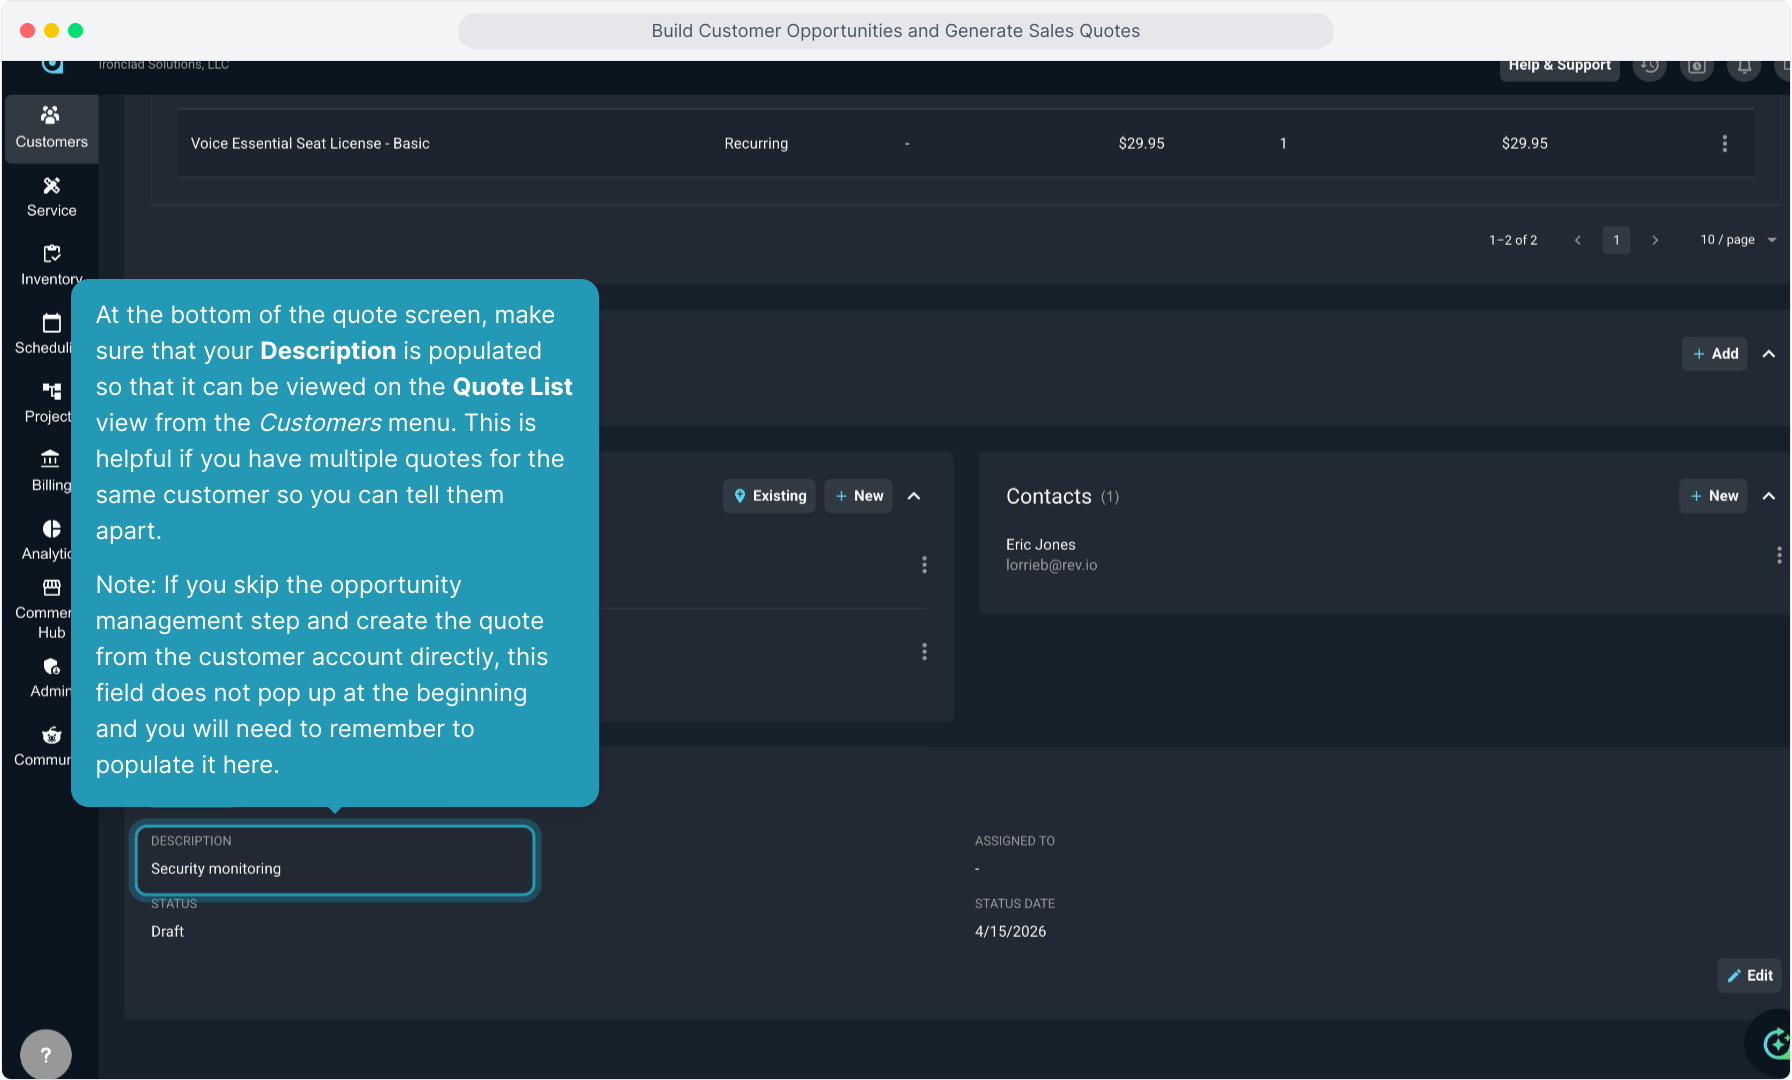
31. At the bottom of the quote screen, make sure that your Description is populated so that it can be viewed on the Quote List view from the Customers menu. This is helpful if you have multiple quotes for the same customer so you can tell them apart.
Note: If you skip the opportunity management step and create the quote from the customer account directly, this field does not pop up at the beginning and you will need to remember to populate it here.
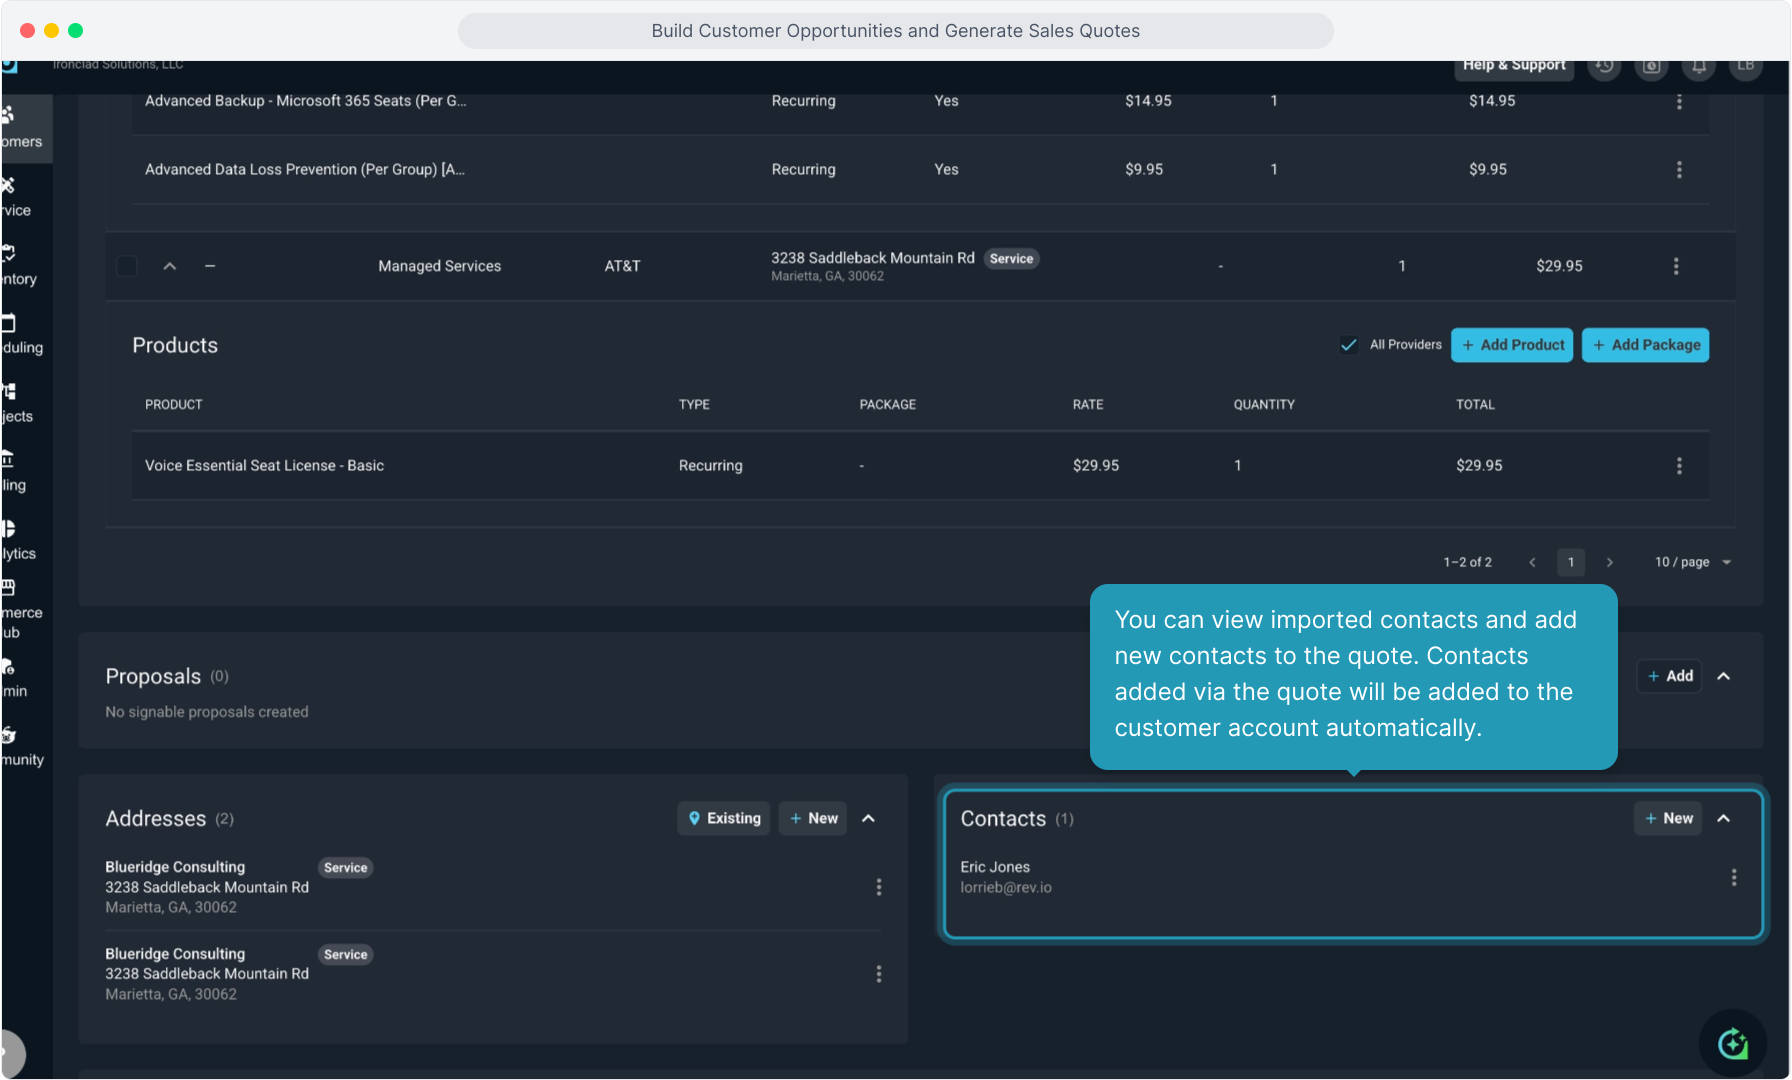
32. You can view imported contacts and add new contacts to the quote. Contacts added via the quote will be added to the customer account automatically.
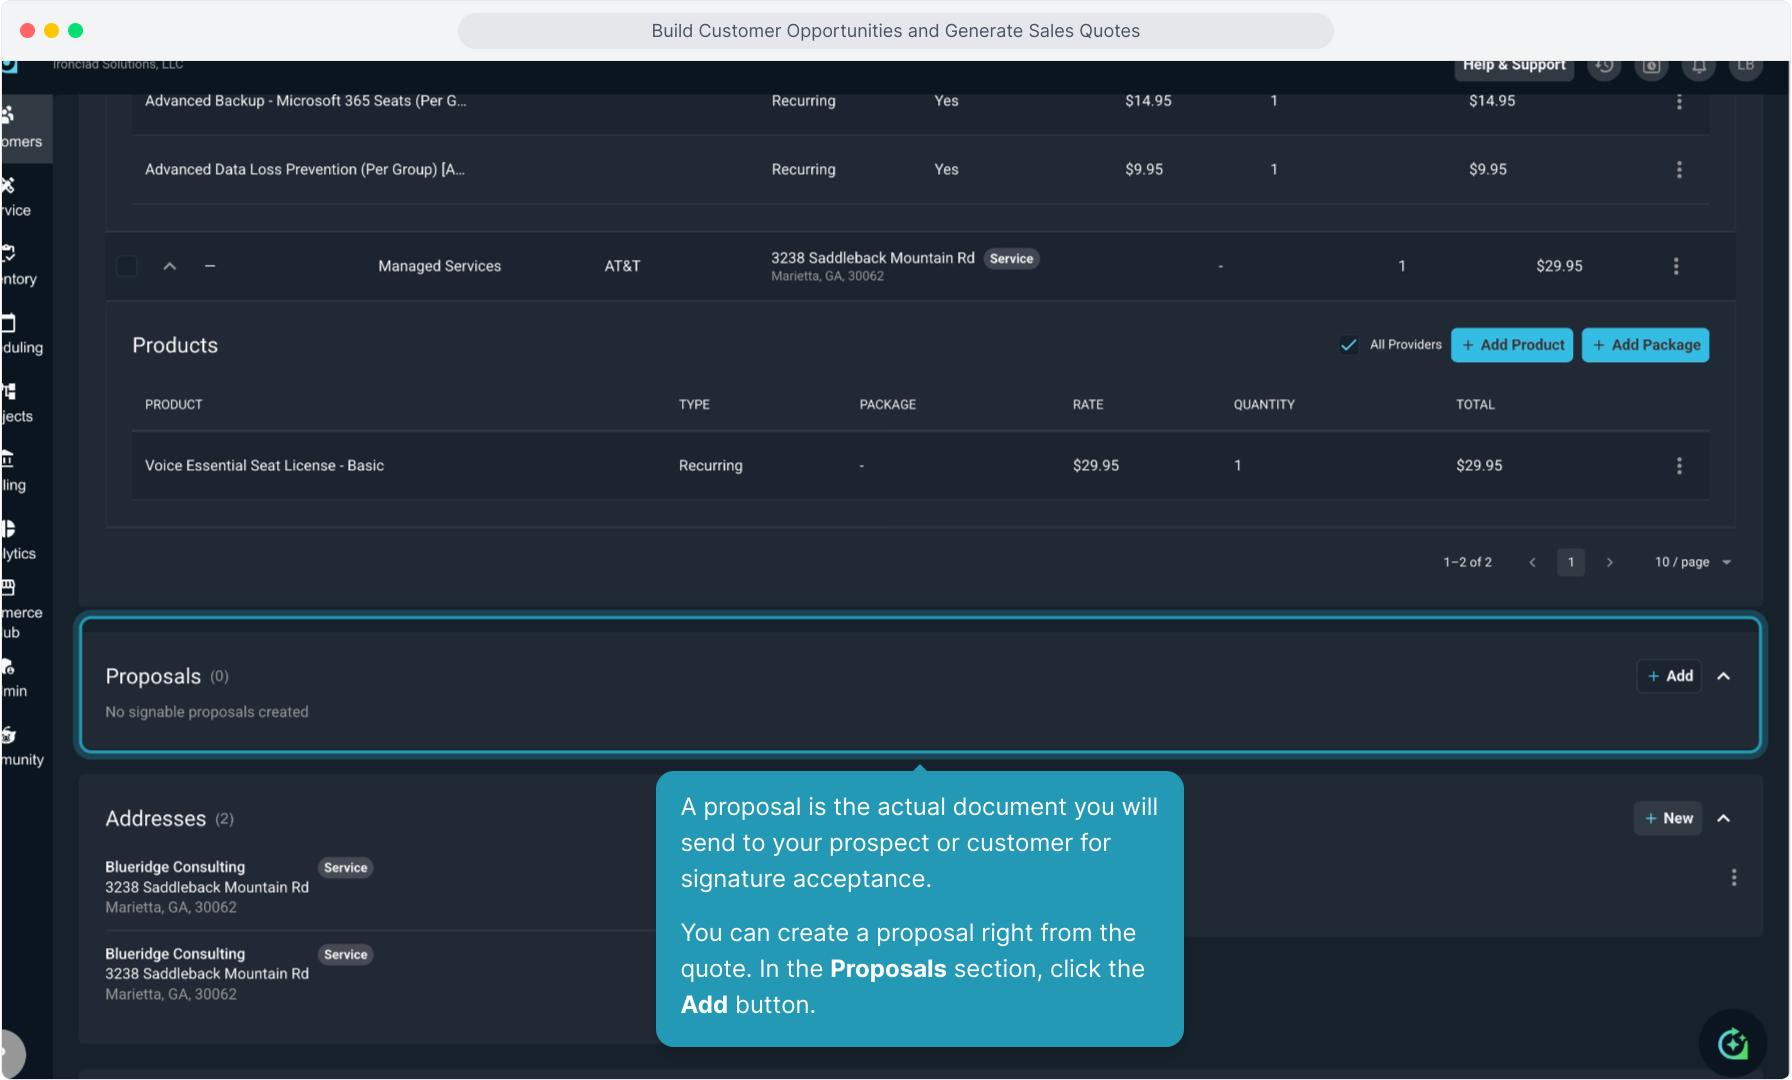
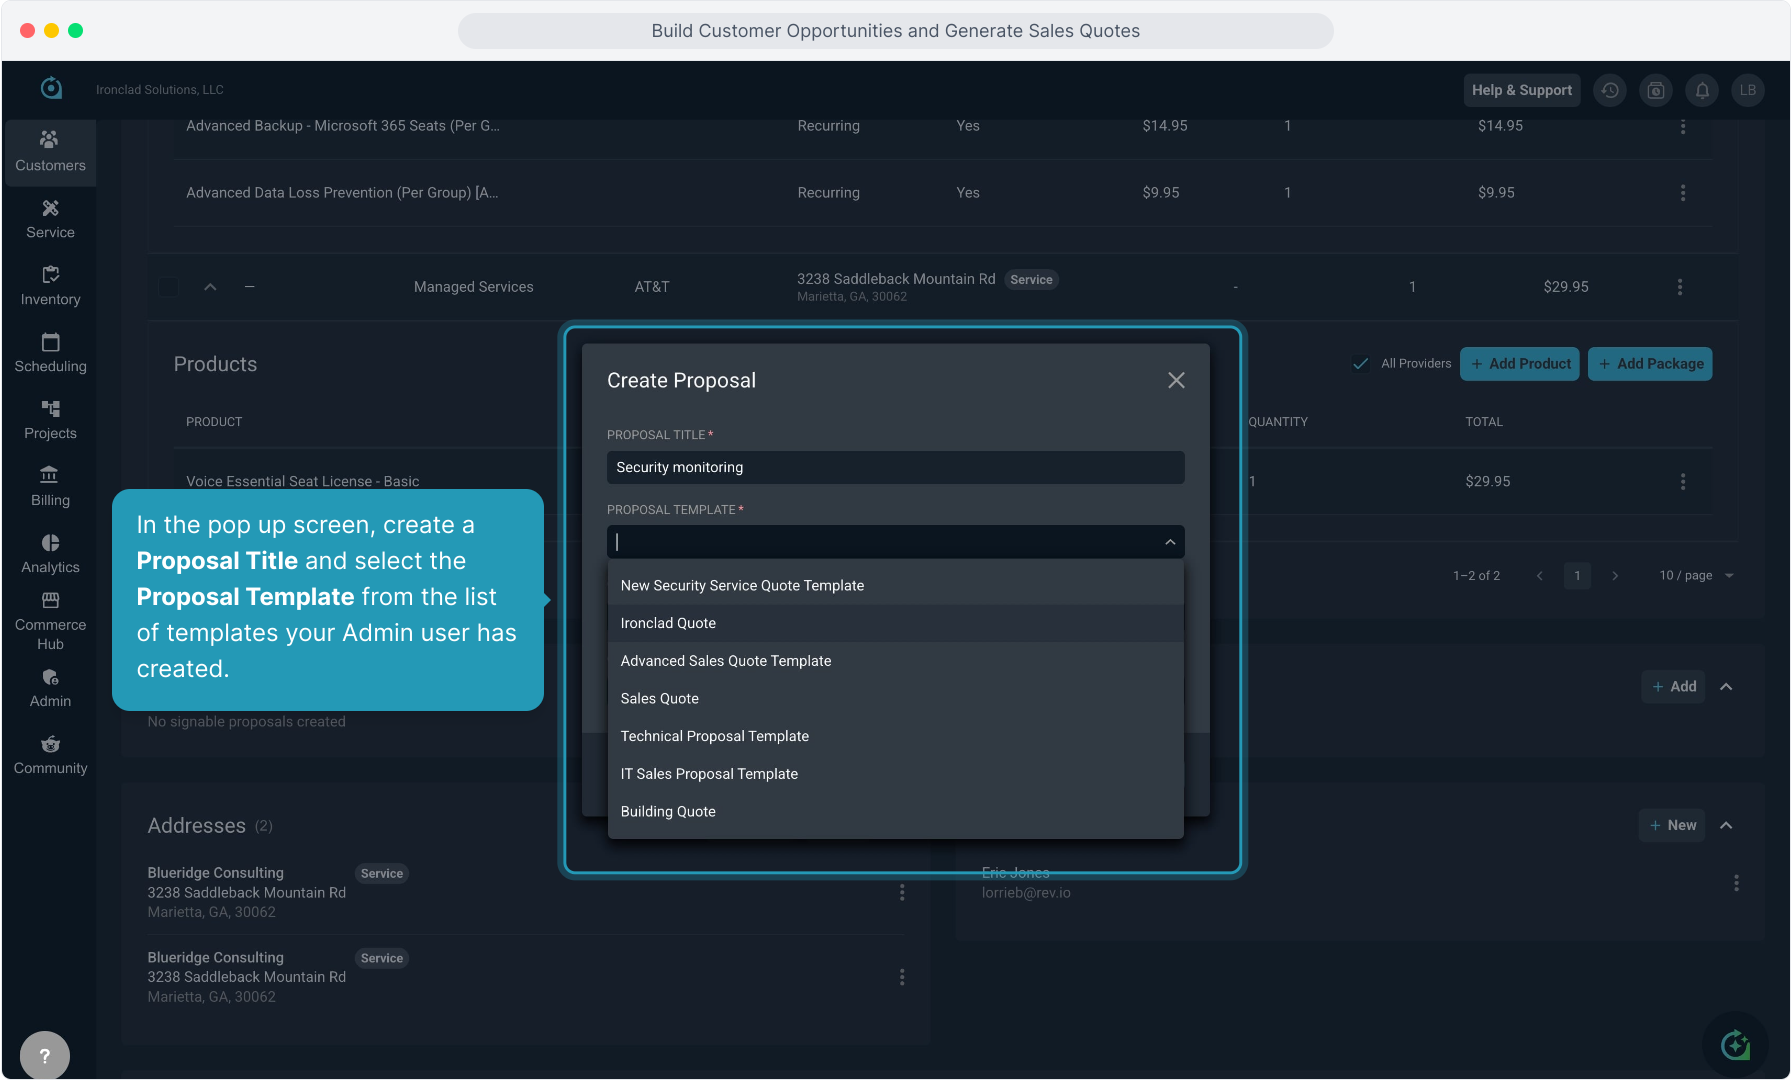
33. A proposal is the actual document you will send to your prospect or customer for signature acceptance.
You can create a proposal right from the quote. In the Proposals section, click the Add button.
34. In the pop up screen, create a Proposal Title and select the Proposal Template from the list of templates your Admin user has created.
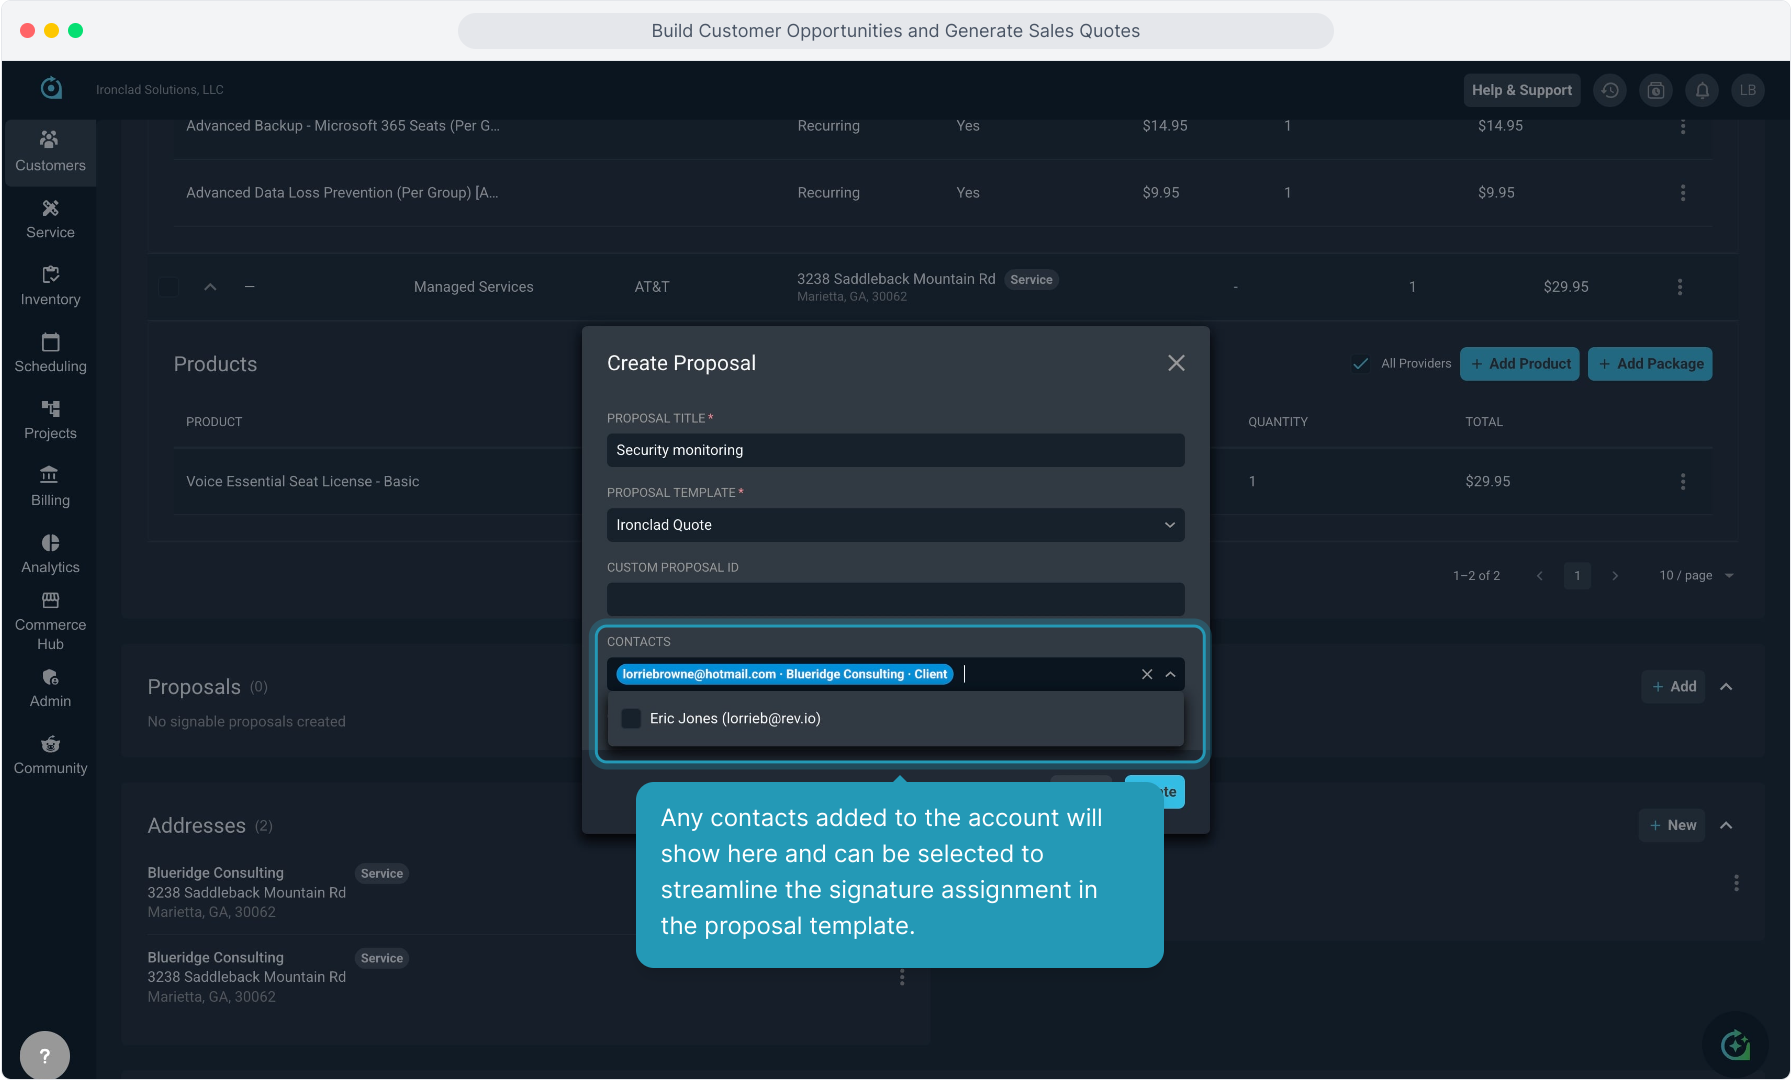
35. Any contacts added to the account will show here and can be selected to streamline the signature assignment in the proposal template.
36. After adding a contact, use the tiny down arrow icon to assign that user to the role in the proposal template.
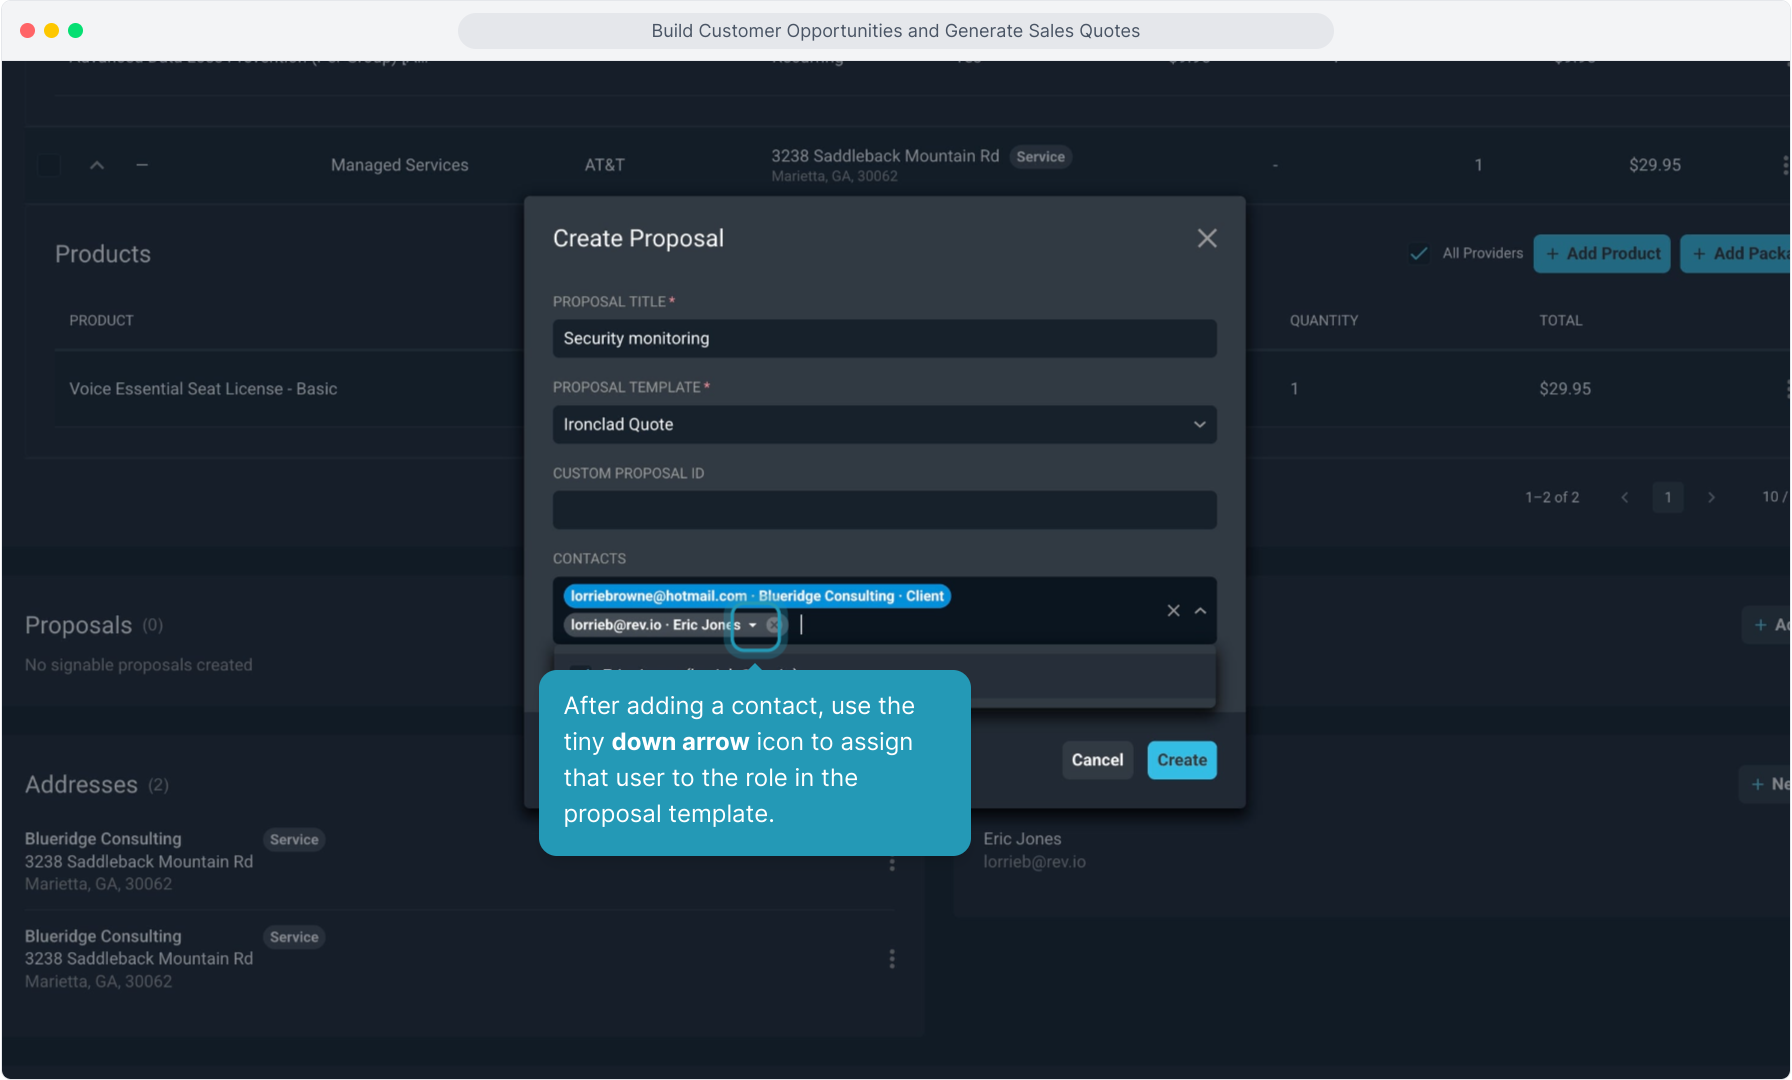
37. Clicking that arrow opens up the list of roles you can assign the contact to. The roles are defined in the proposal template that you have selected here.

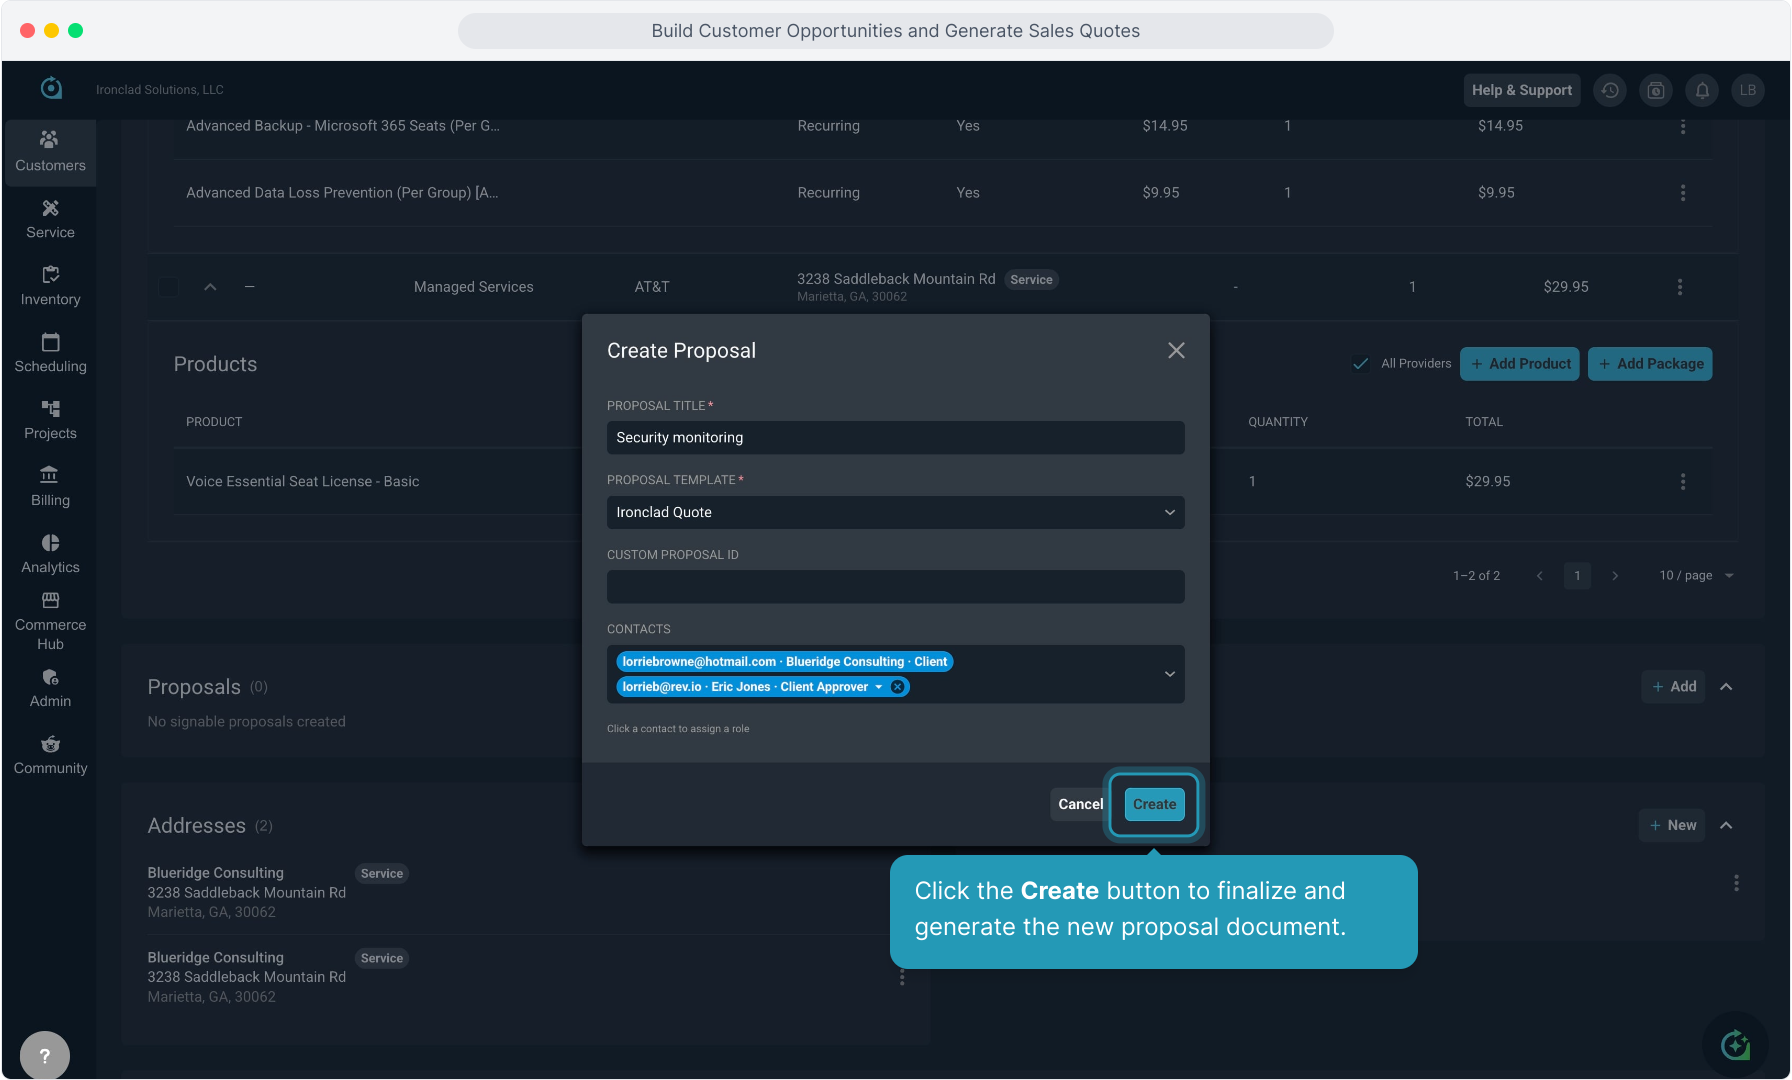
38. Click the Create button to finalize and generate the new proposal document.
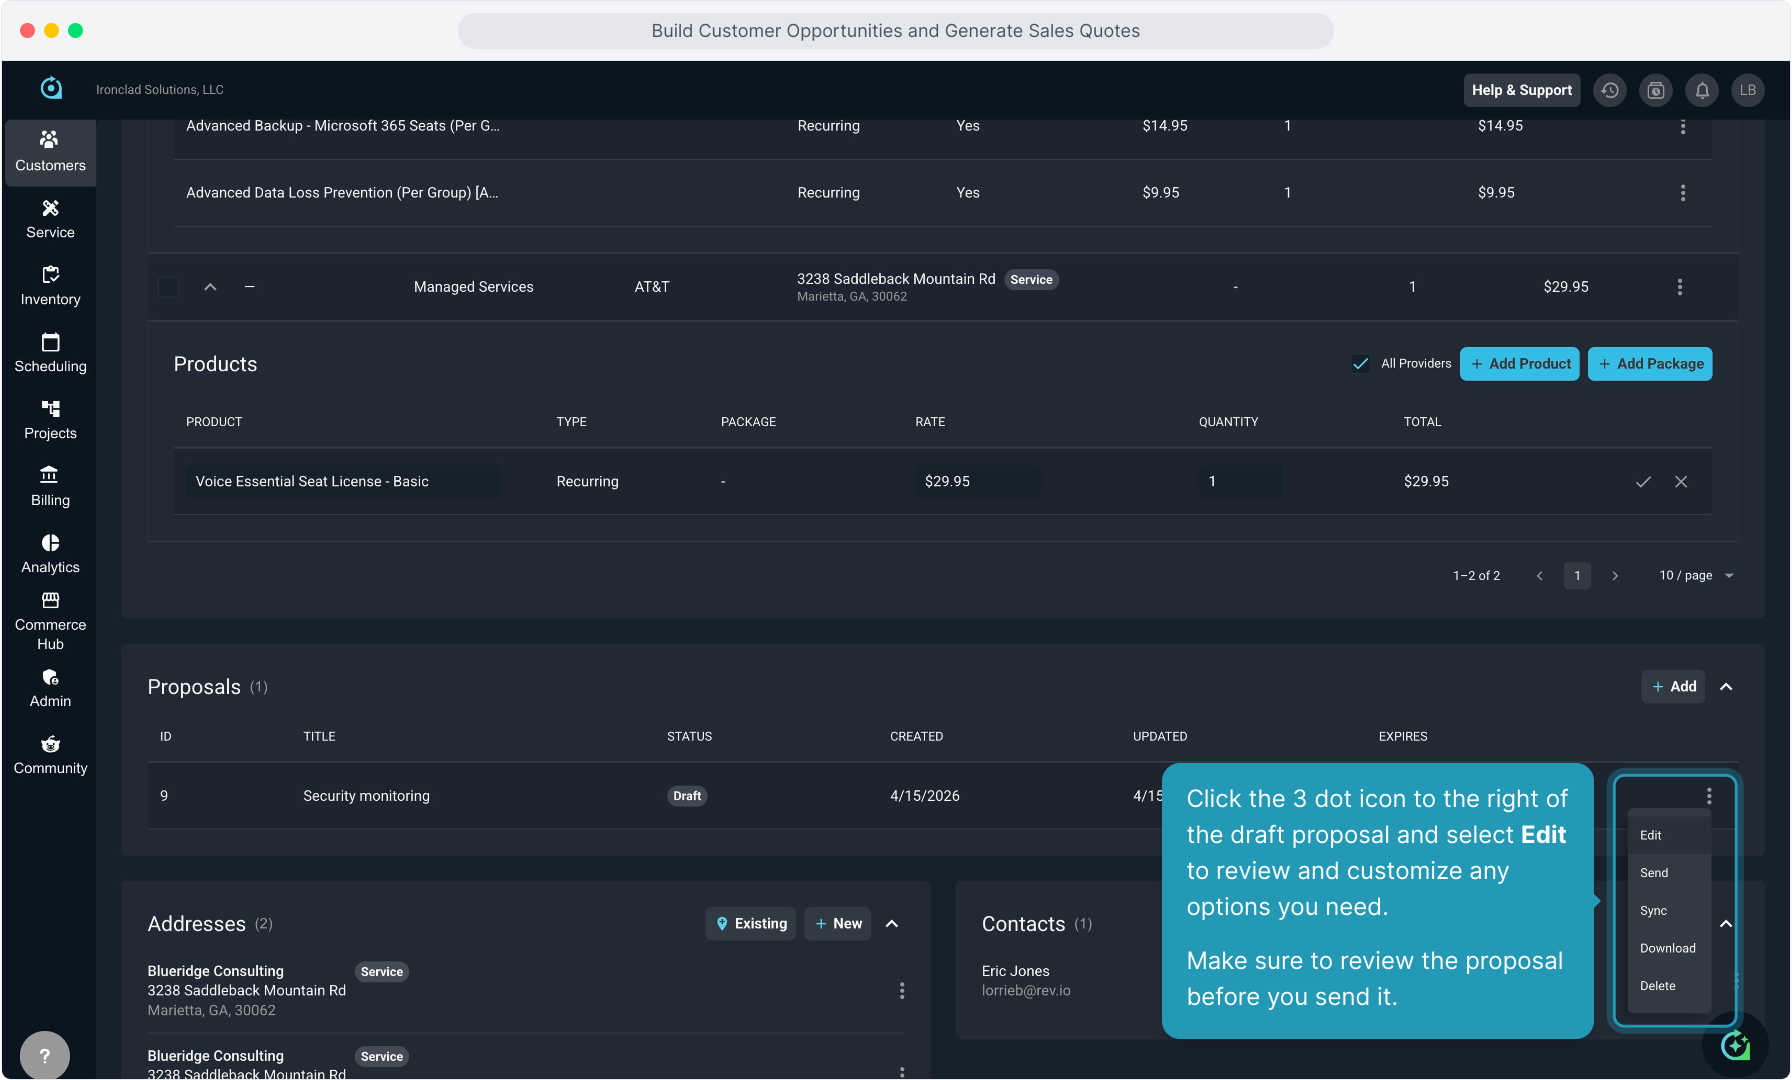
39. Click the 3 dot icon to the right of the draft proposal and select Edit to review and customize any options you need. Make sure to review the proposal before you send it.
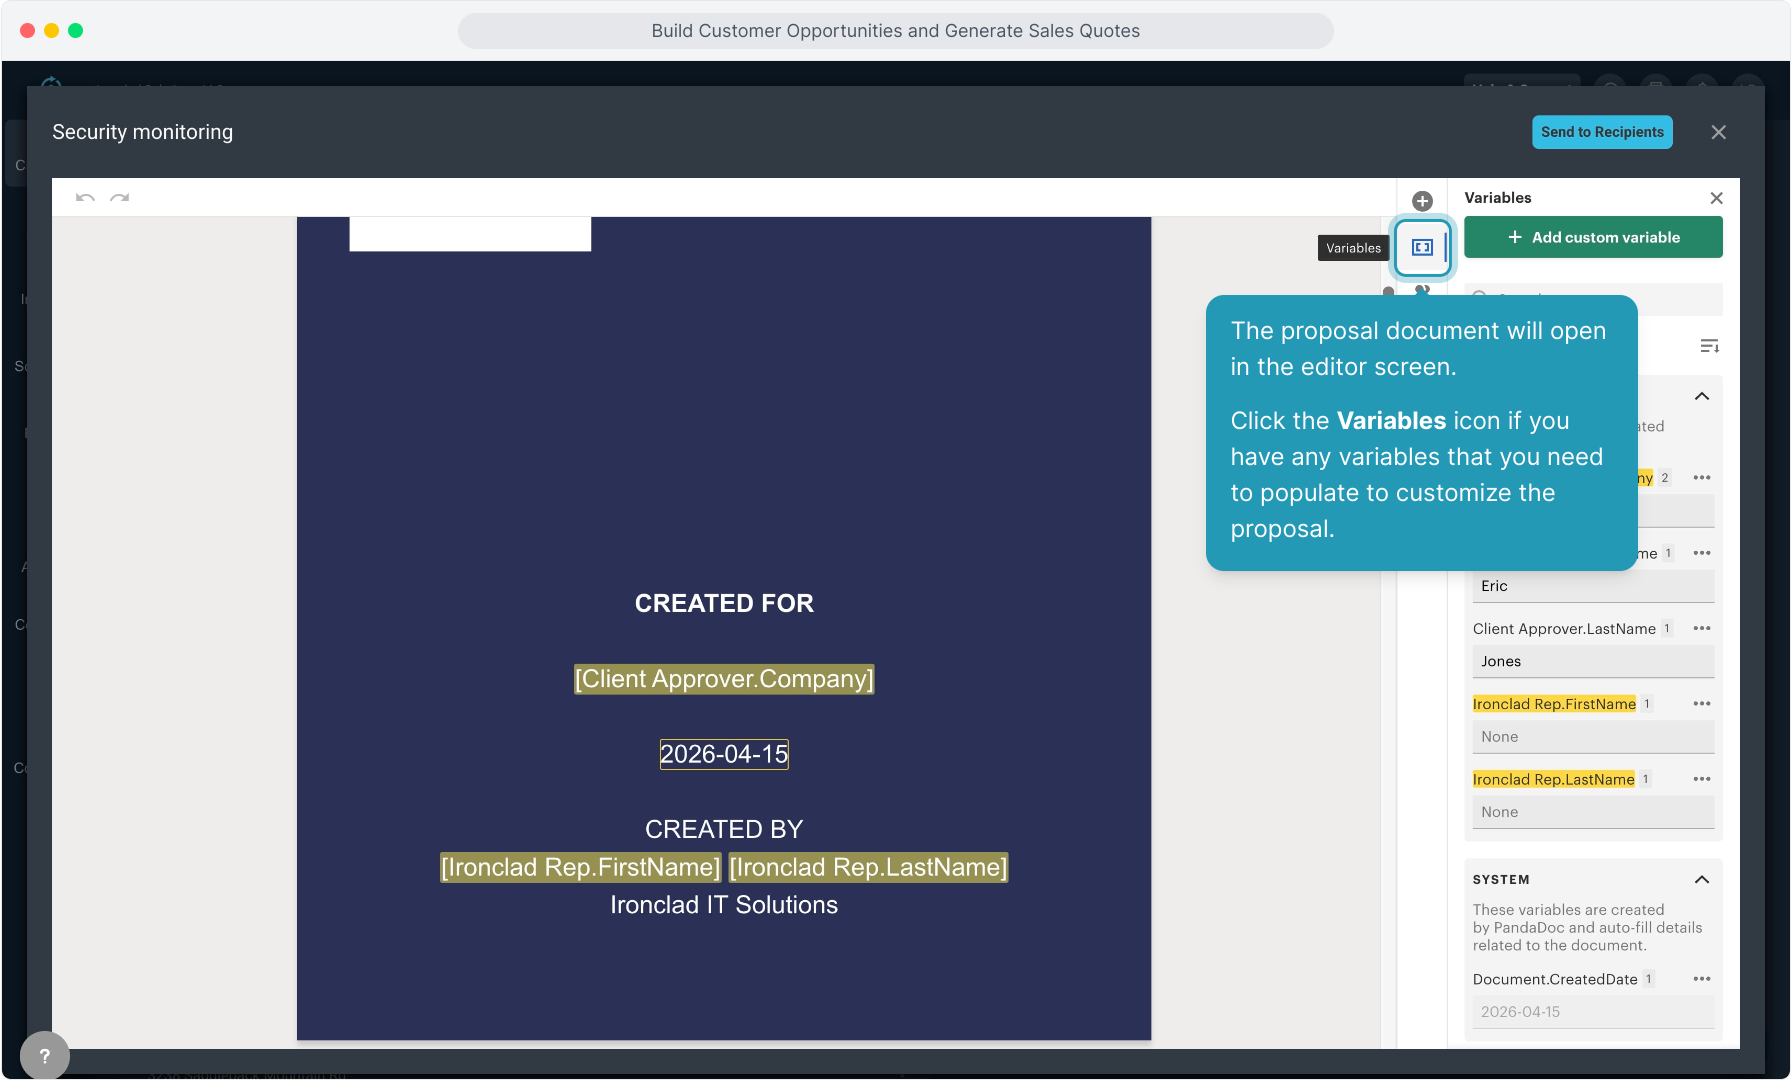
40. The proposal document will open in the editor screen. Click the Variables icon if you have any variables that you need to populate to customize the proposal.
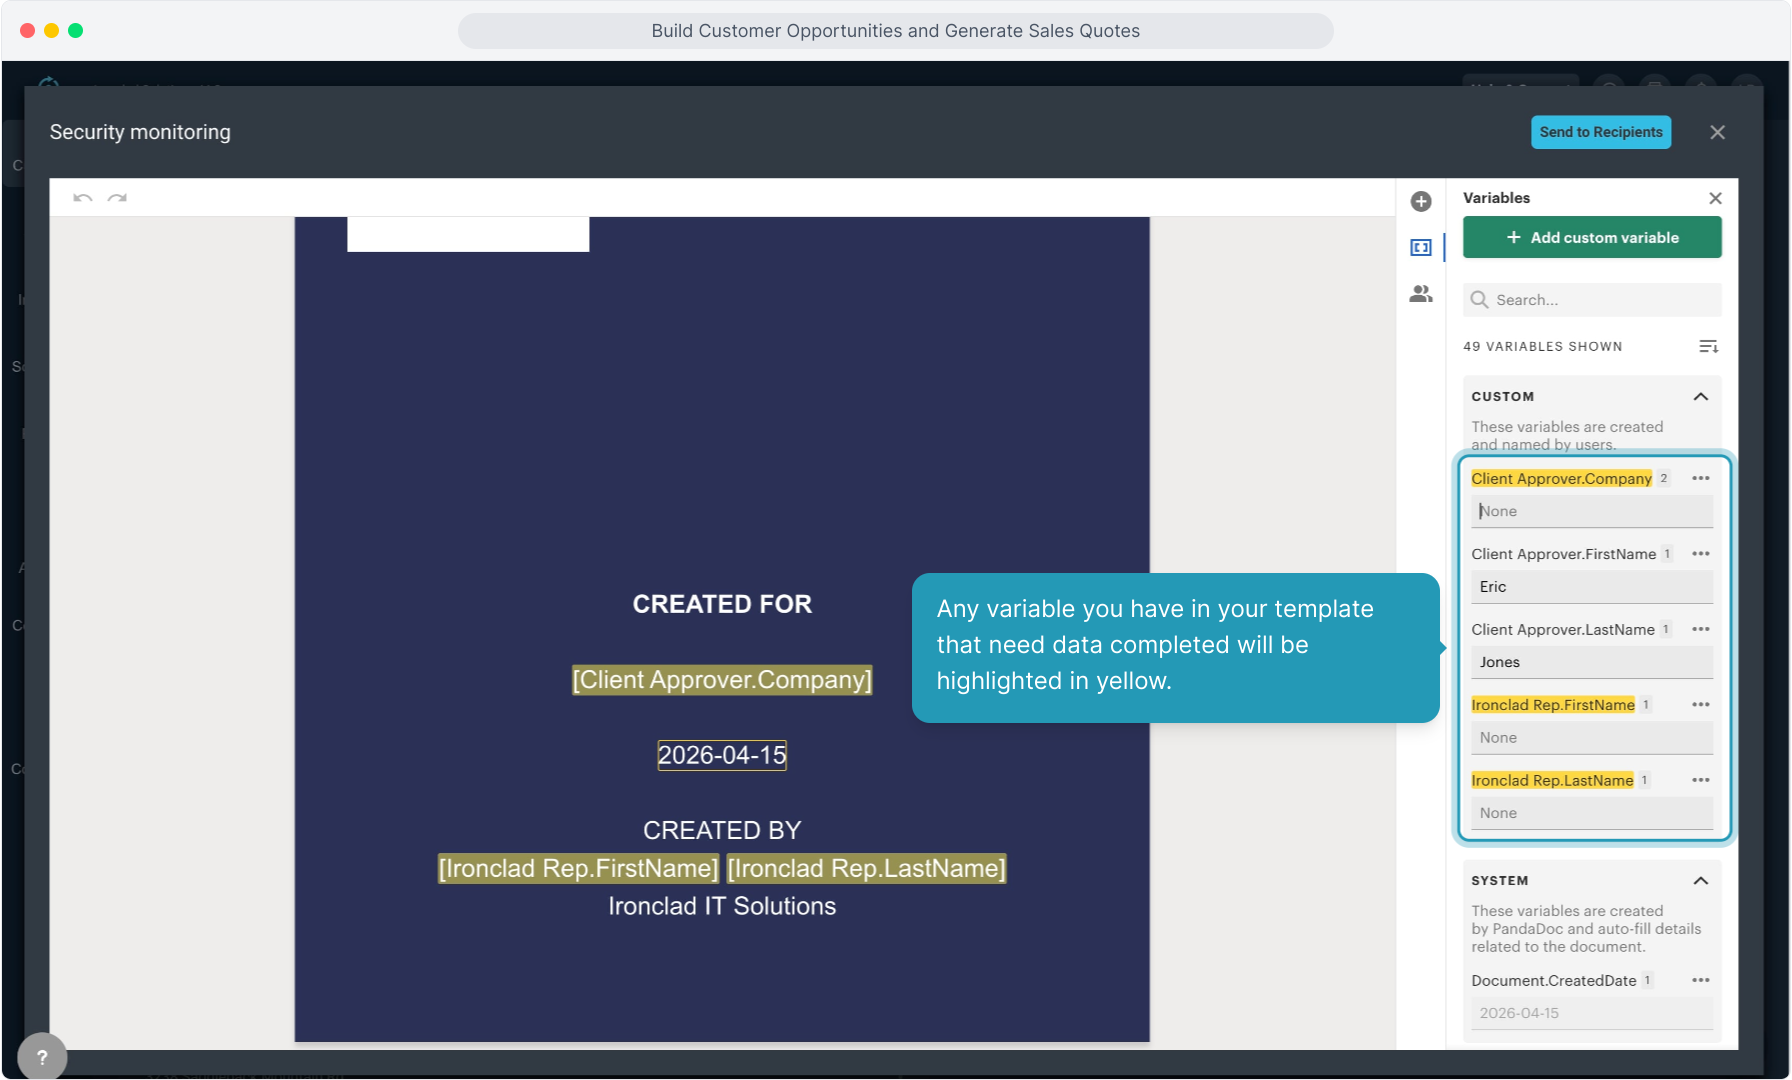
41. Any variable you have in your template that need data completed will be highlighted in yellow.
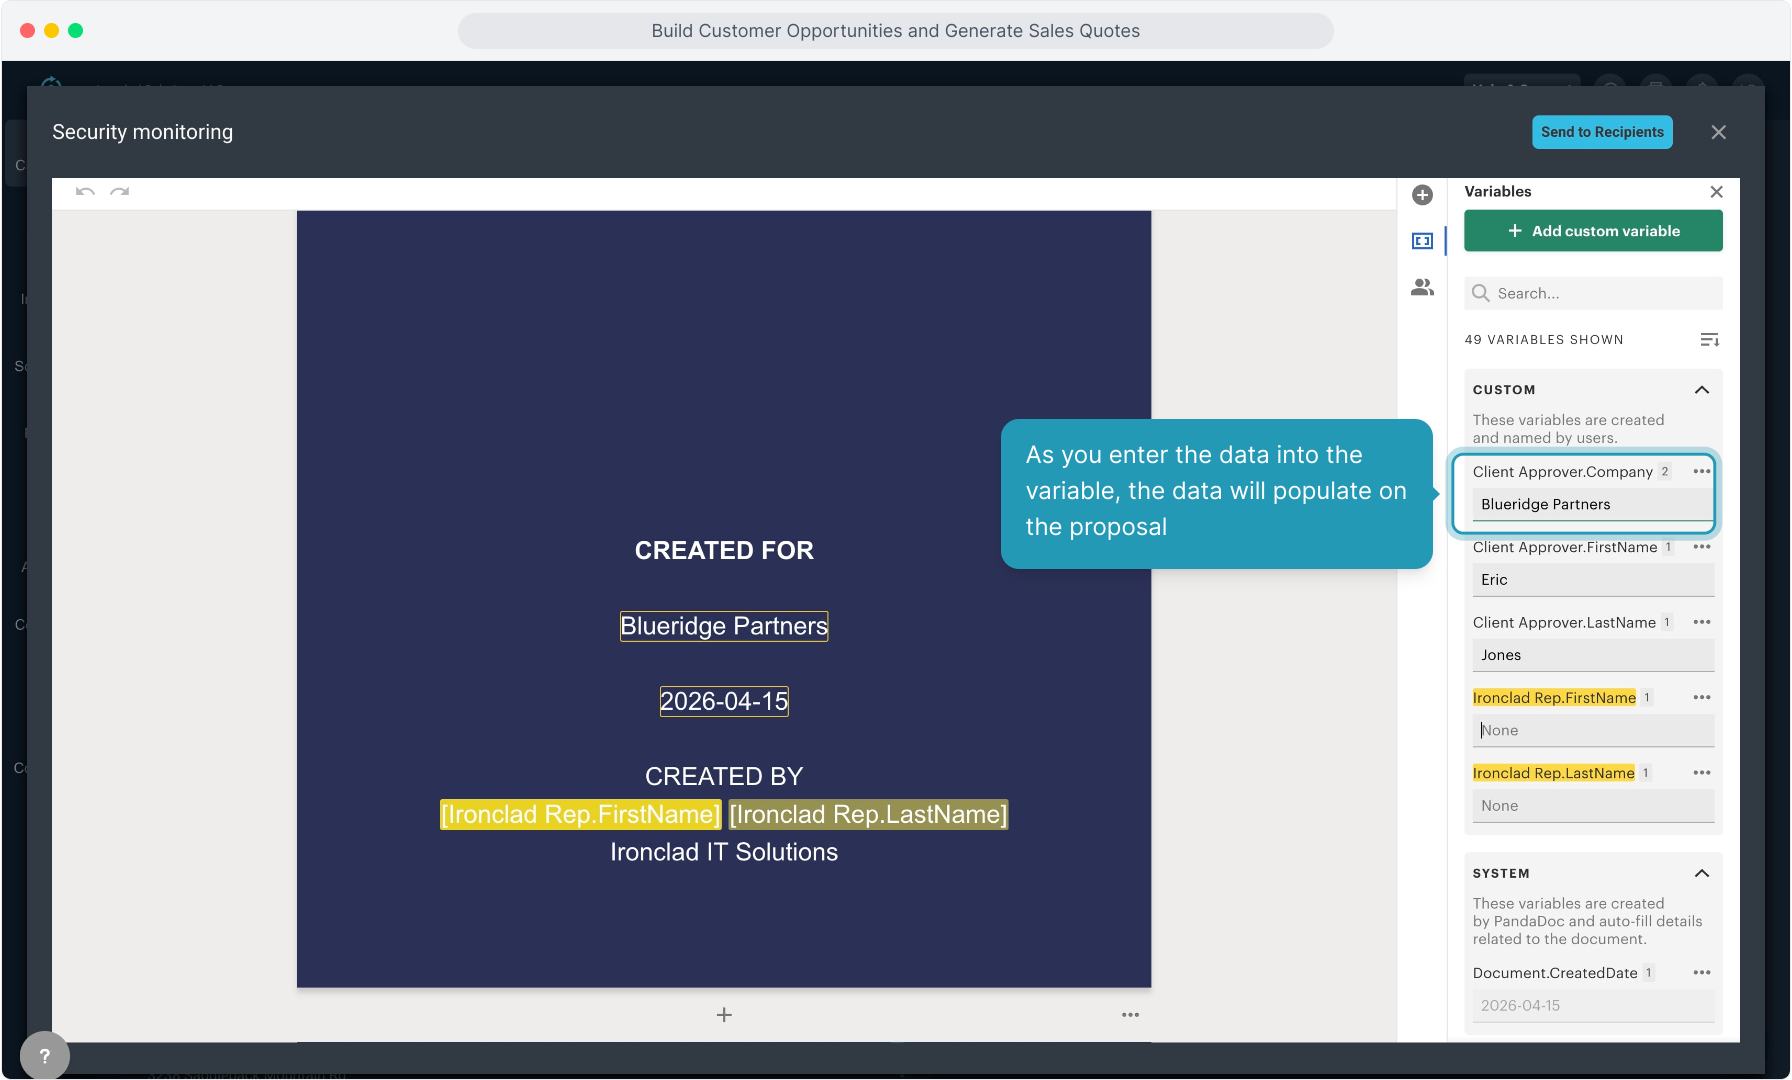
42. As you enter the data into the variable, the data will populate on the proposal
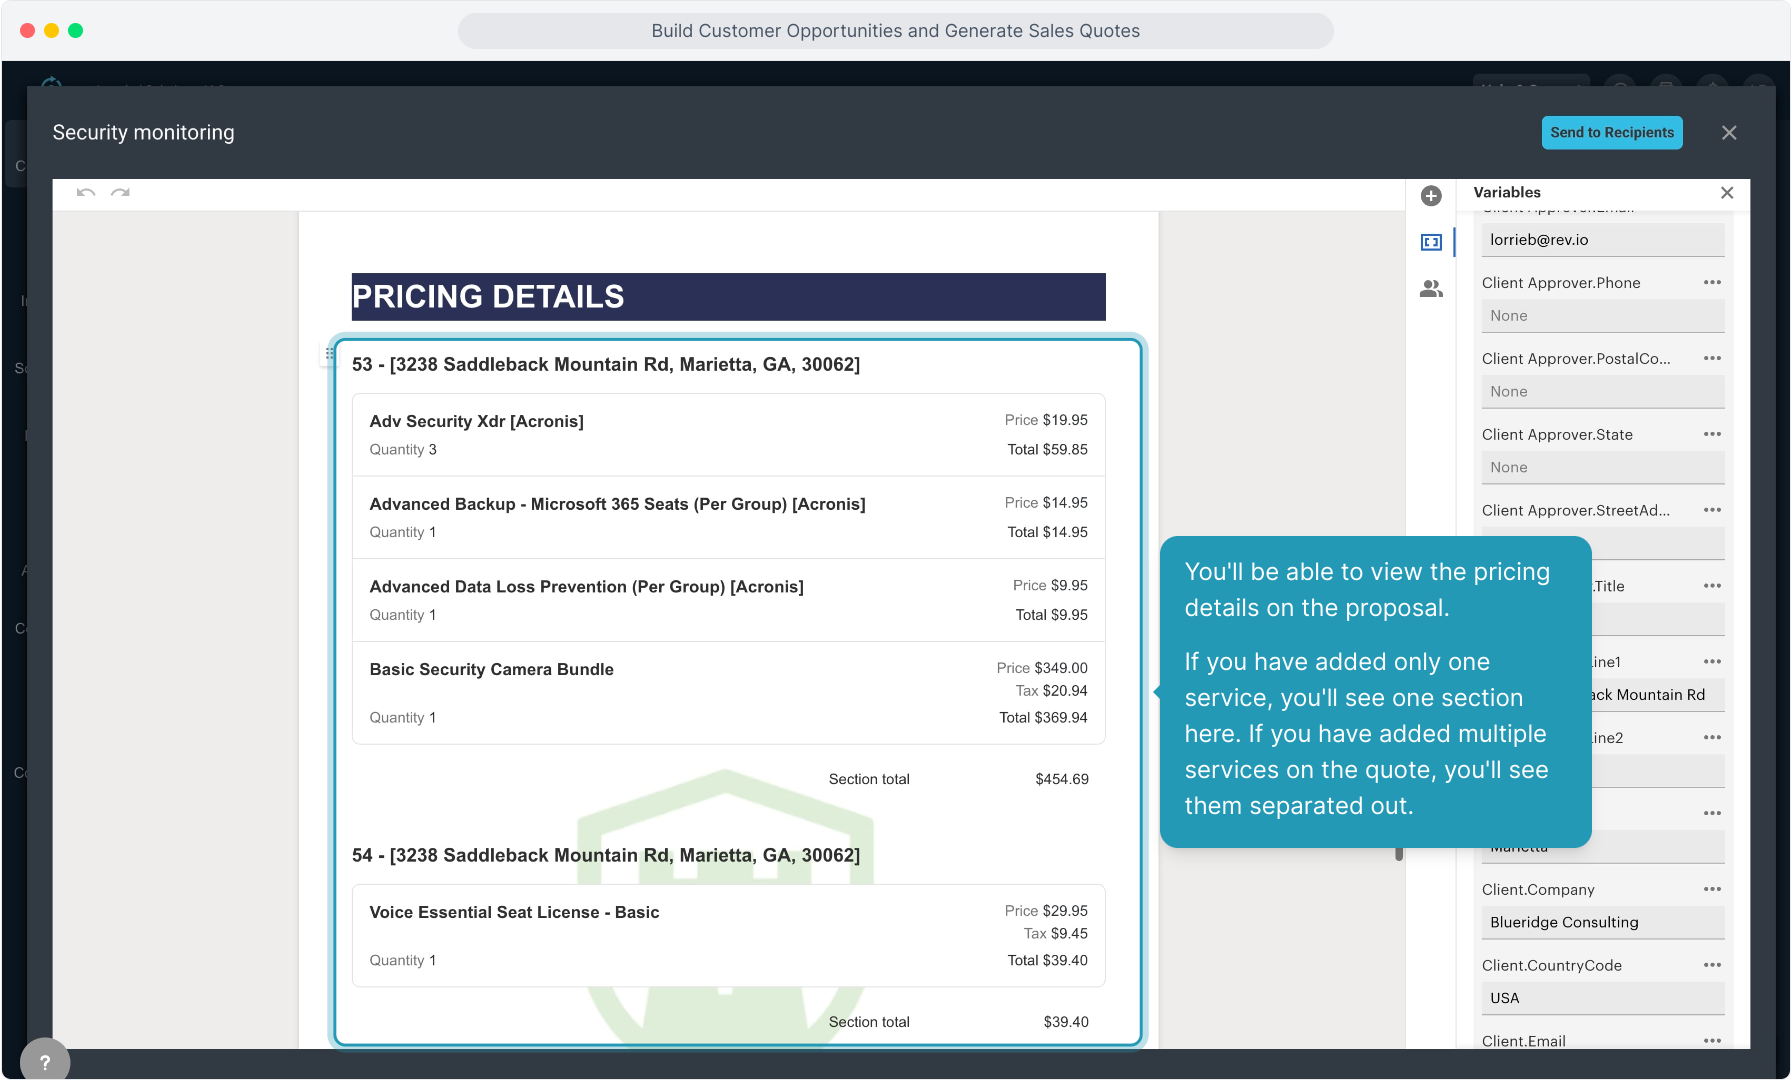
43. You'll be able to view the pricing details on the proposal.
If you have added only one service, you'll see one section here. If you have added multiple services on the quote, you'll see them separated out.
44. Make sure to go to the signature block and assign the signature(s) to the contacts you added to the quote.

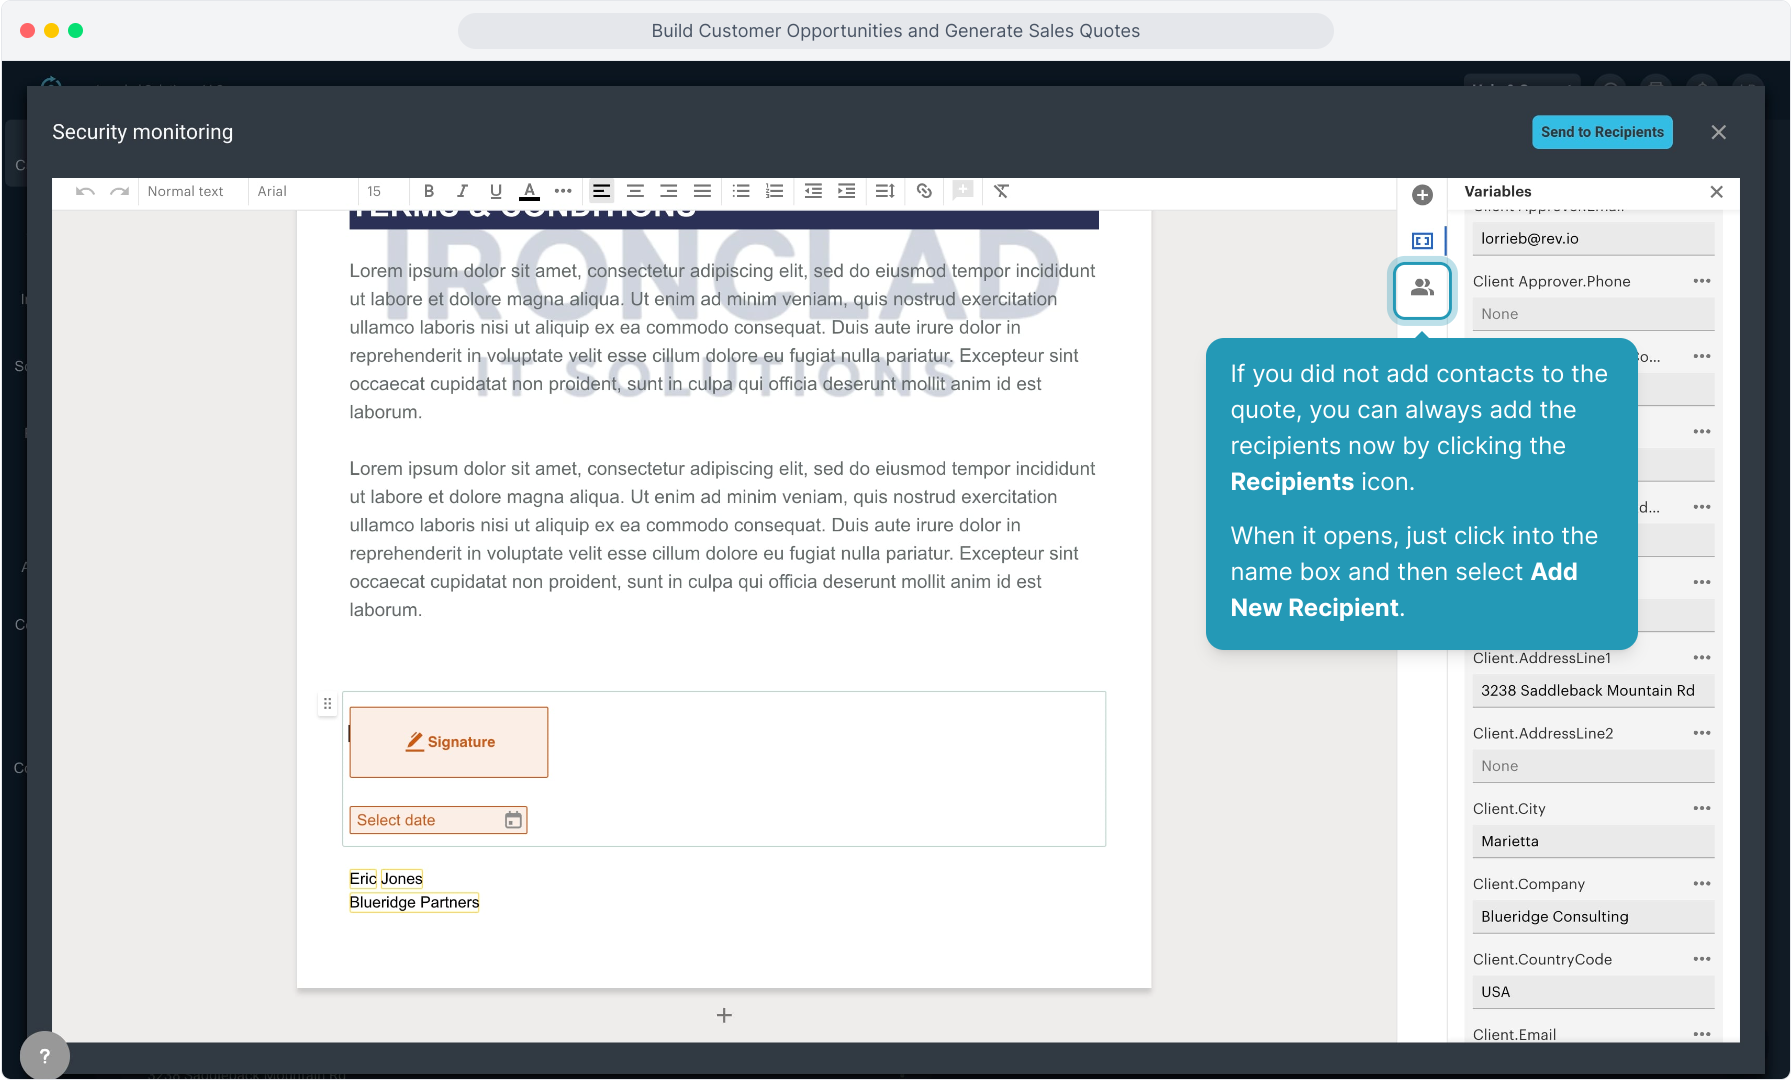
45. If you did not add contacts to the quote, you can always add the recipients now by clicking the Recipients icon.
When it opens, just click into the name box and then select Add New Recipient.
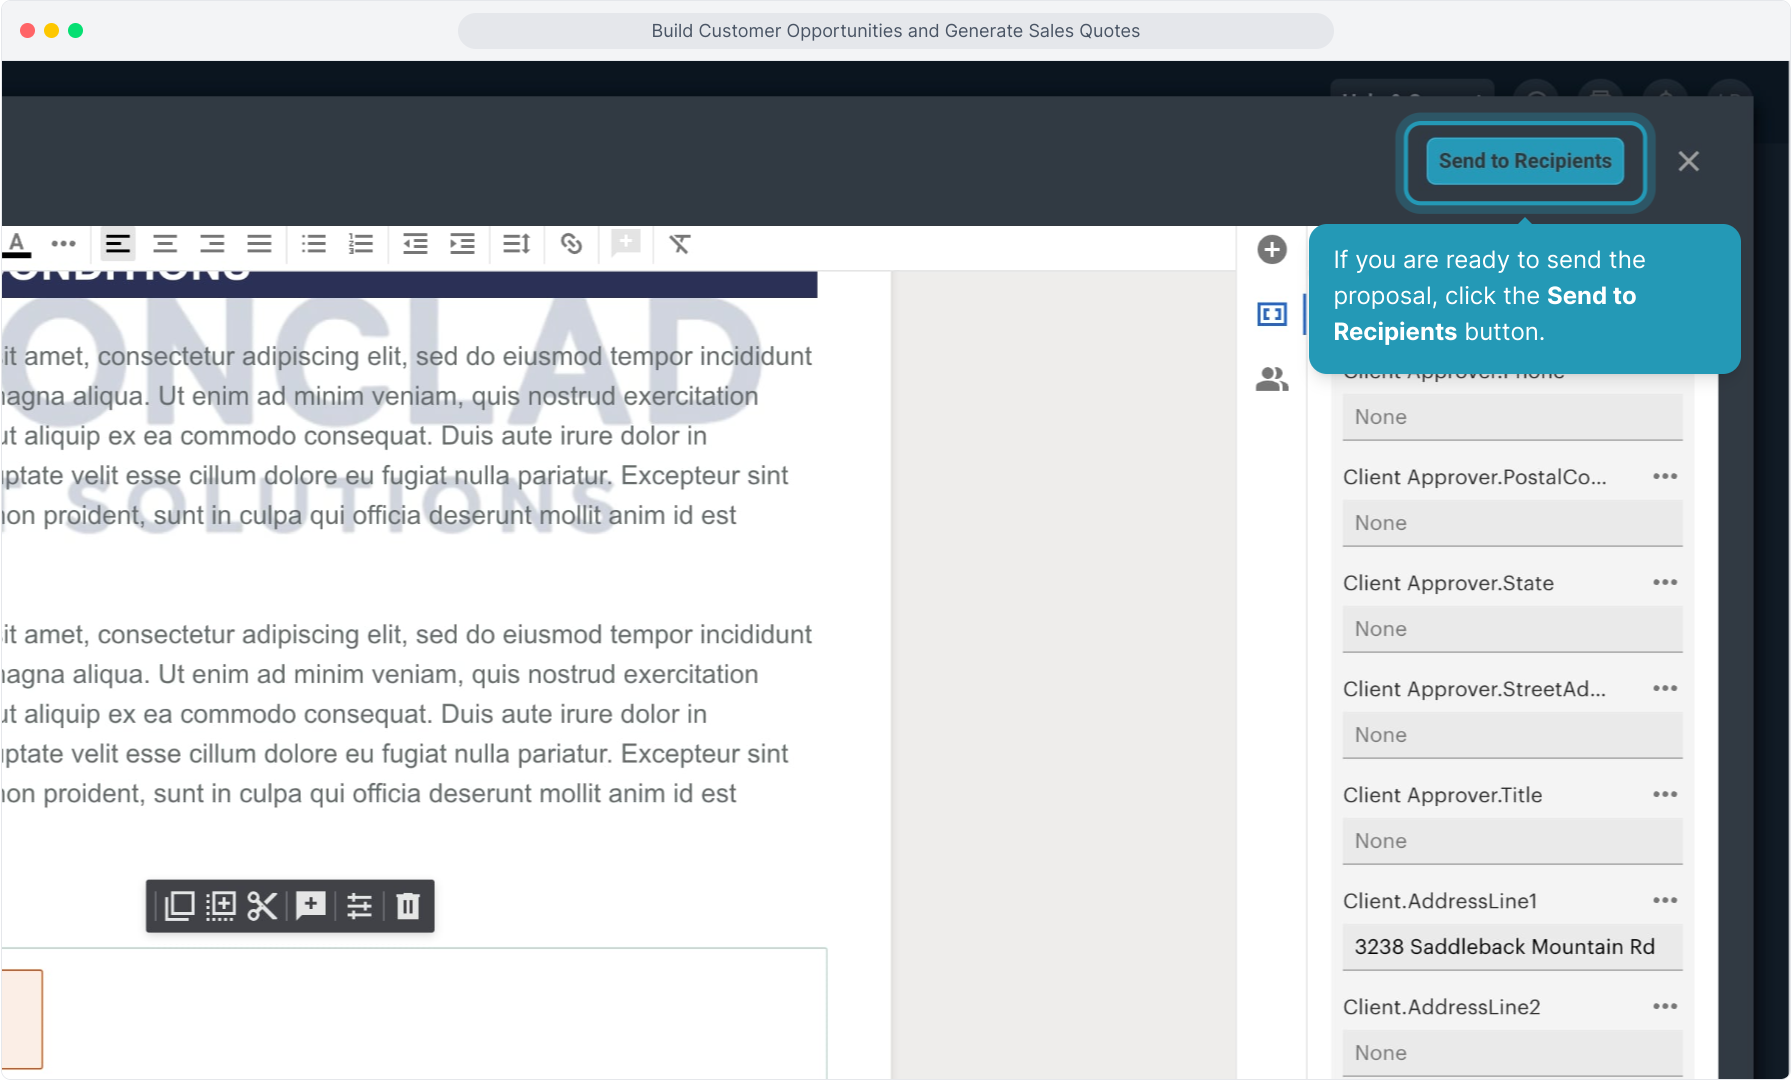
46. If you are ready to send the proposal, click the Send to Recipients button.
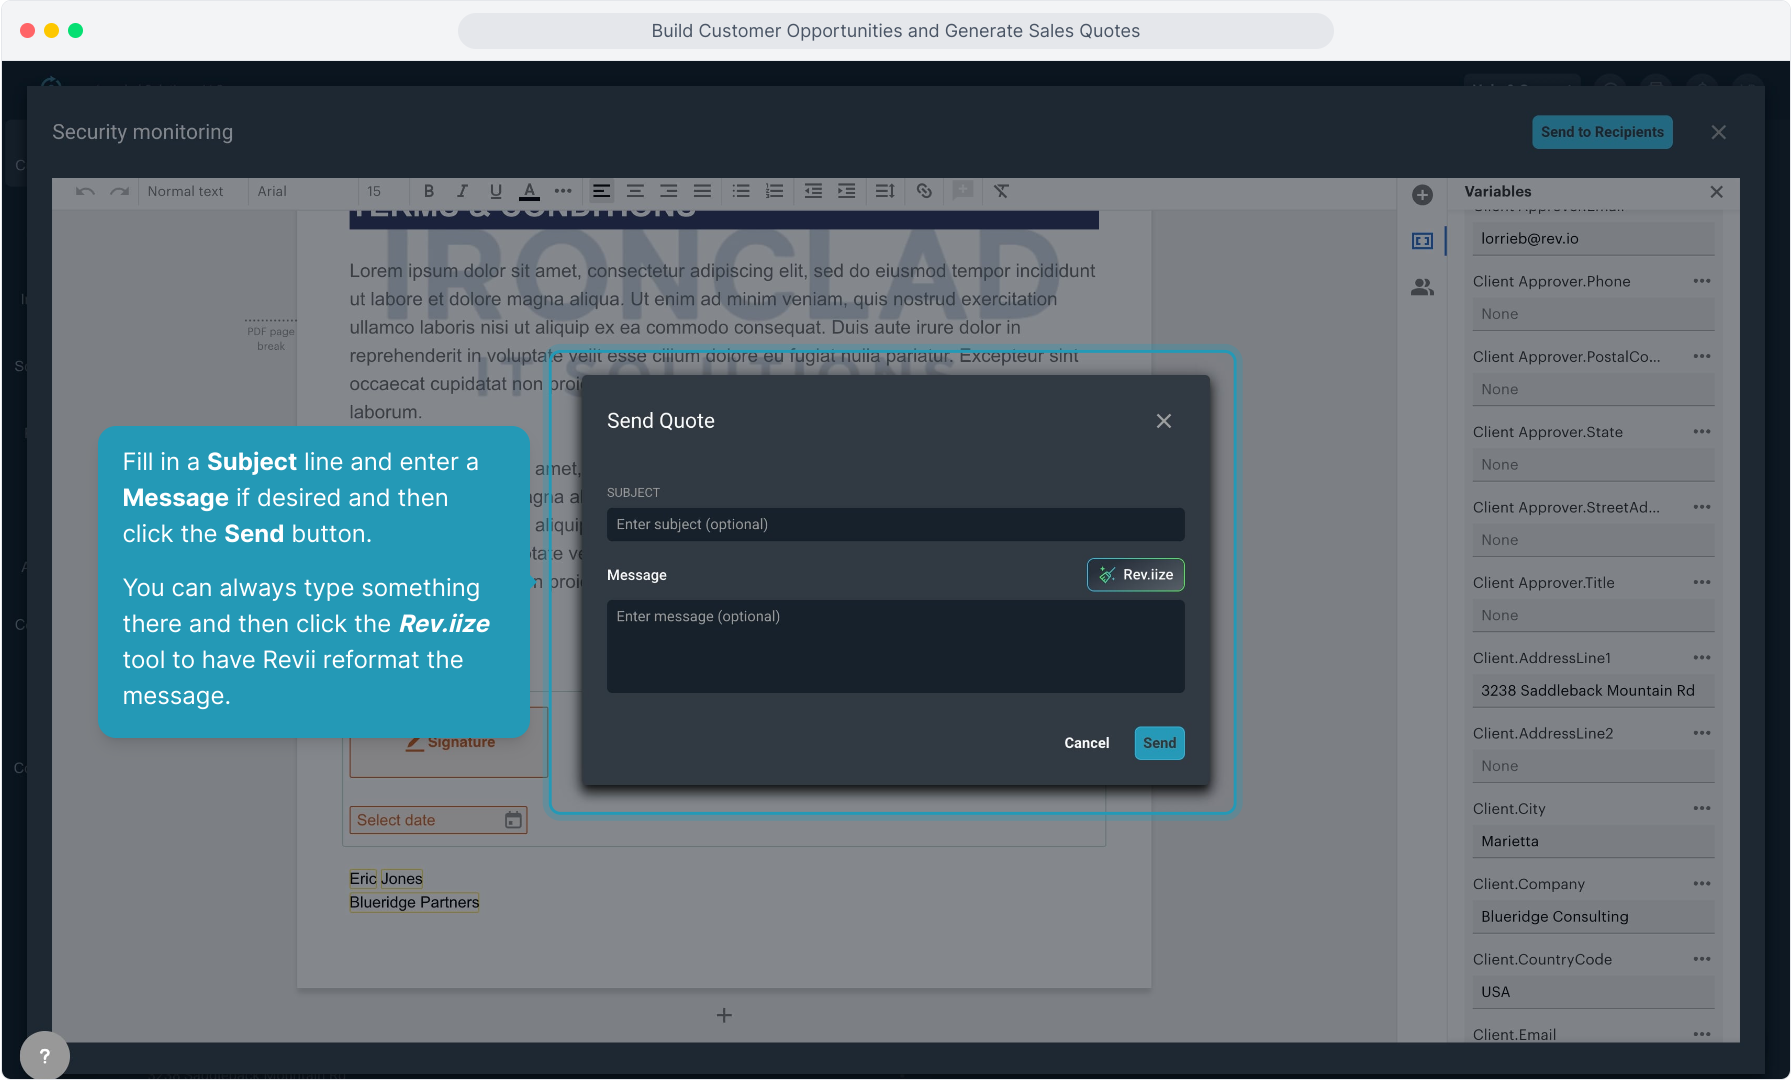
47. Fill in a Subject line and enter a Message if desired and then click the Send button.
You can always type something there and then click the Rev.iize tool to have Revii reformat the message.
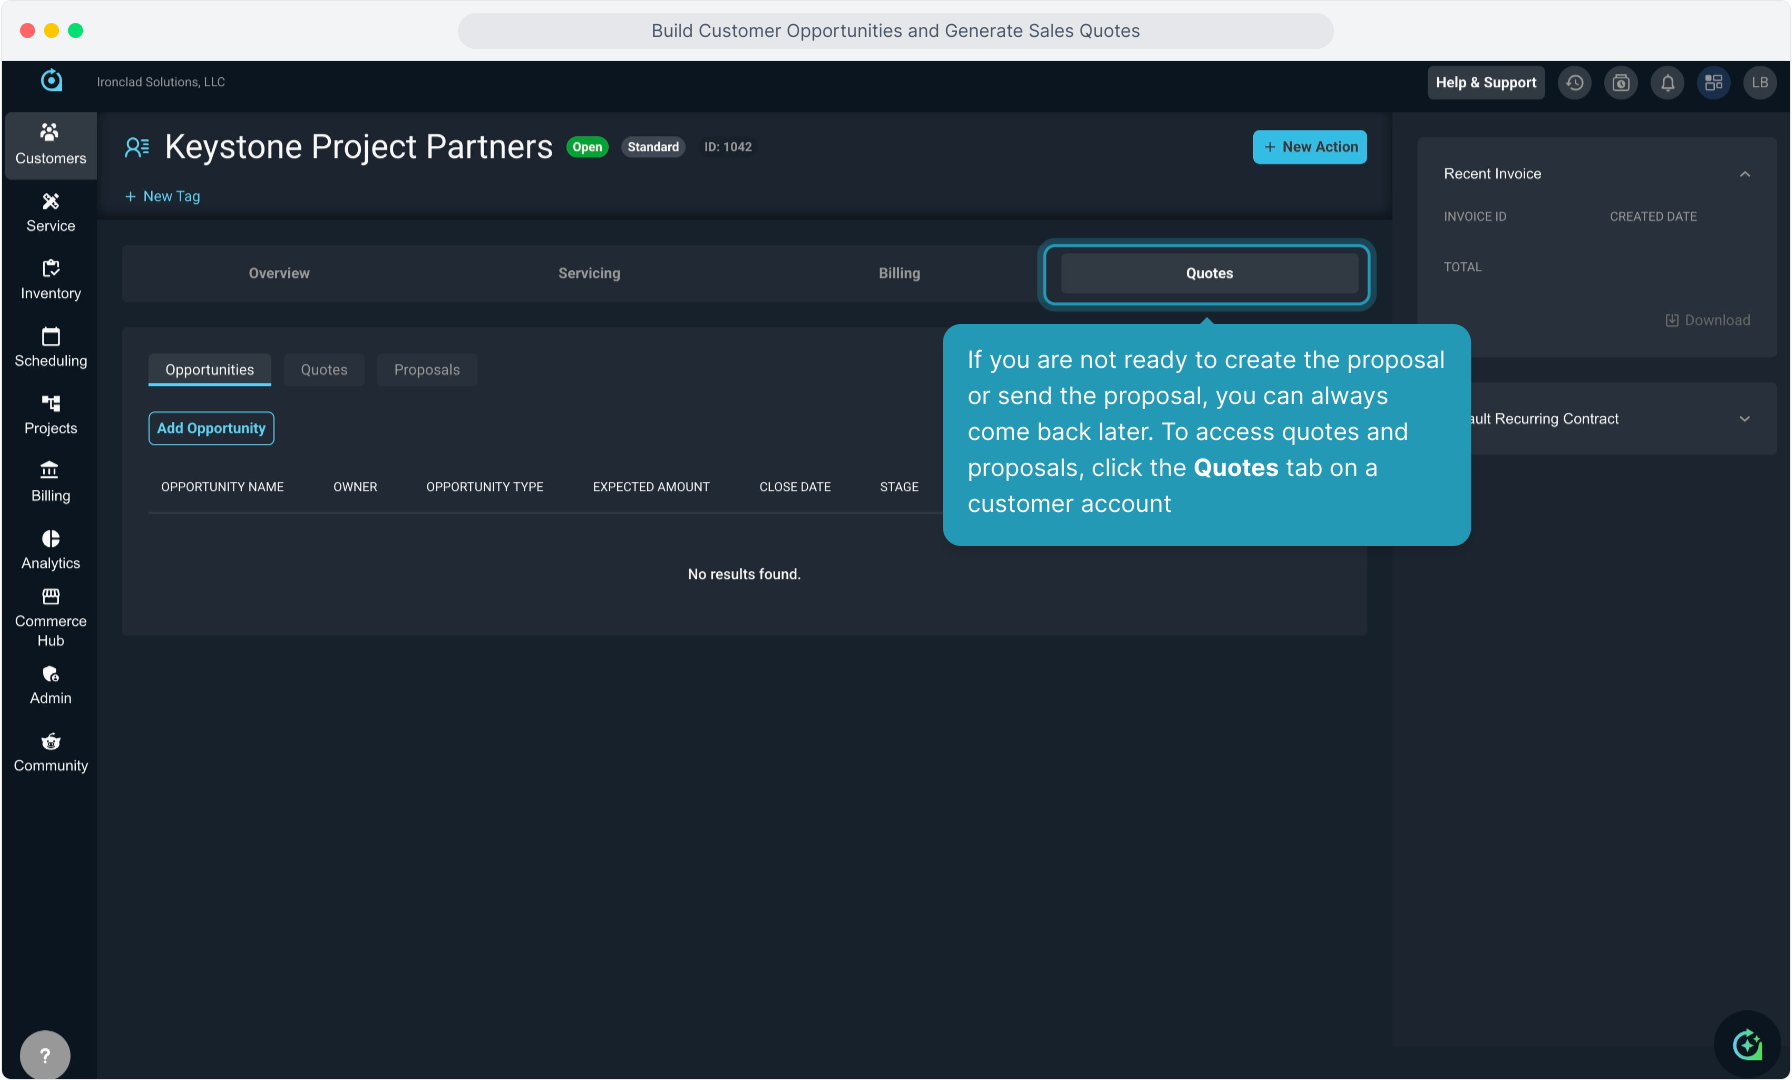
48. If you are not ready to create the proposal or send the proposal, you can always come back later. To access quotes and proposals, click the Quotes tab on a customer account
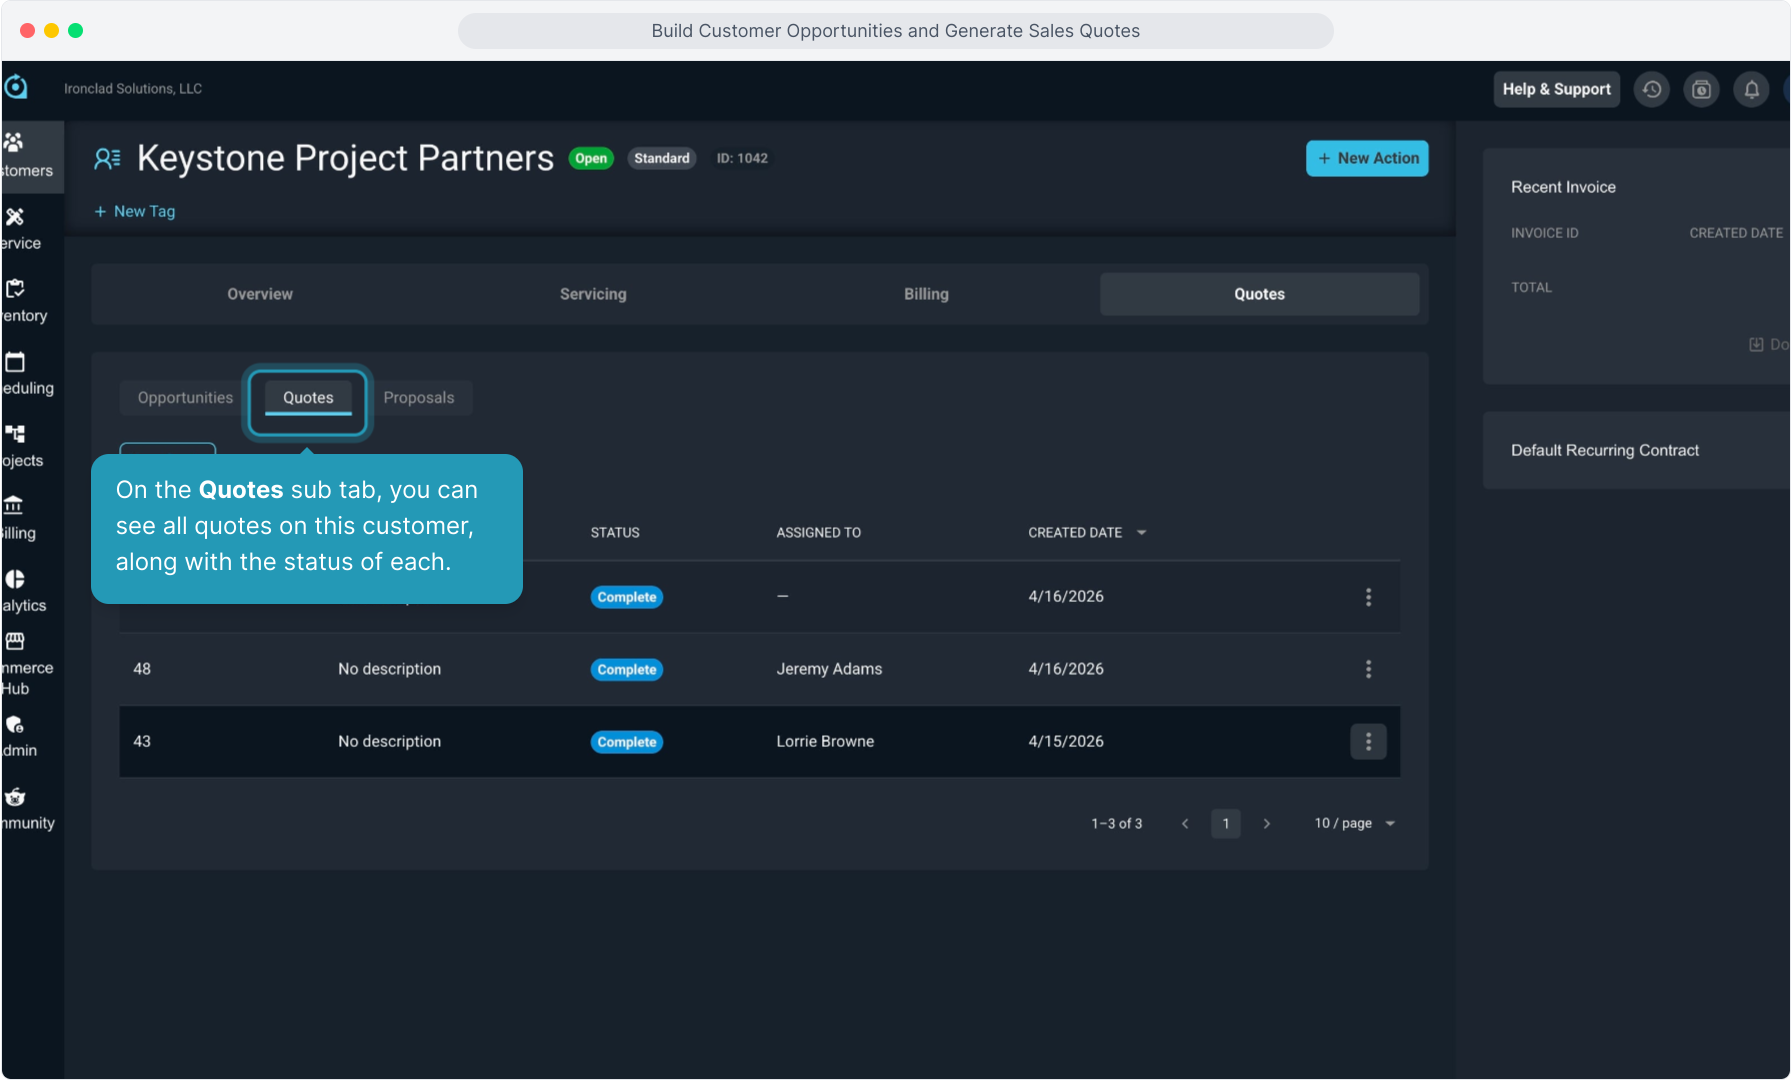
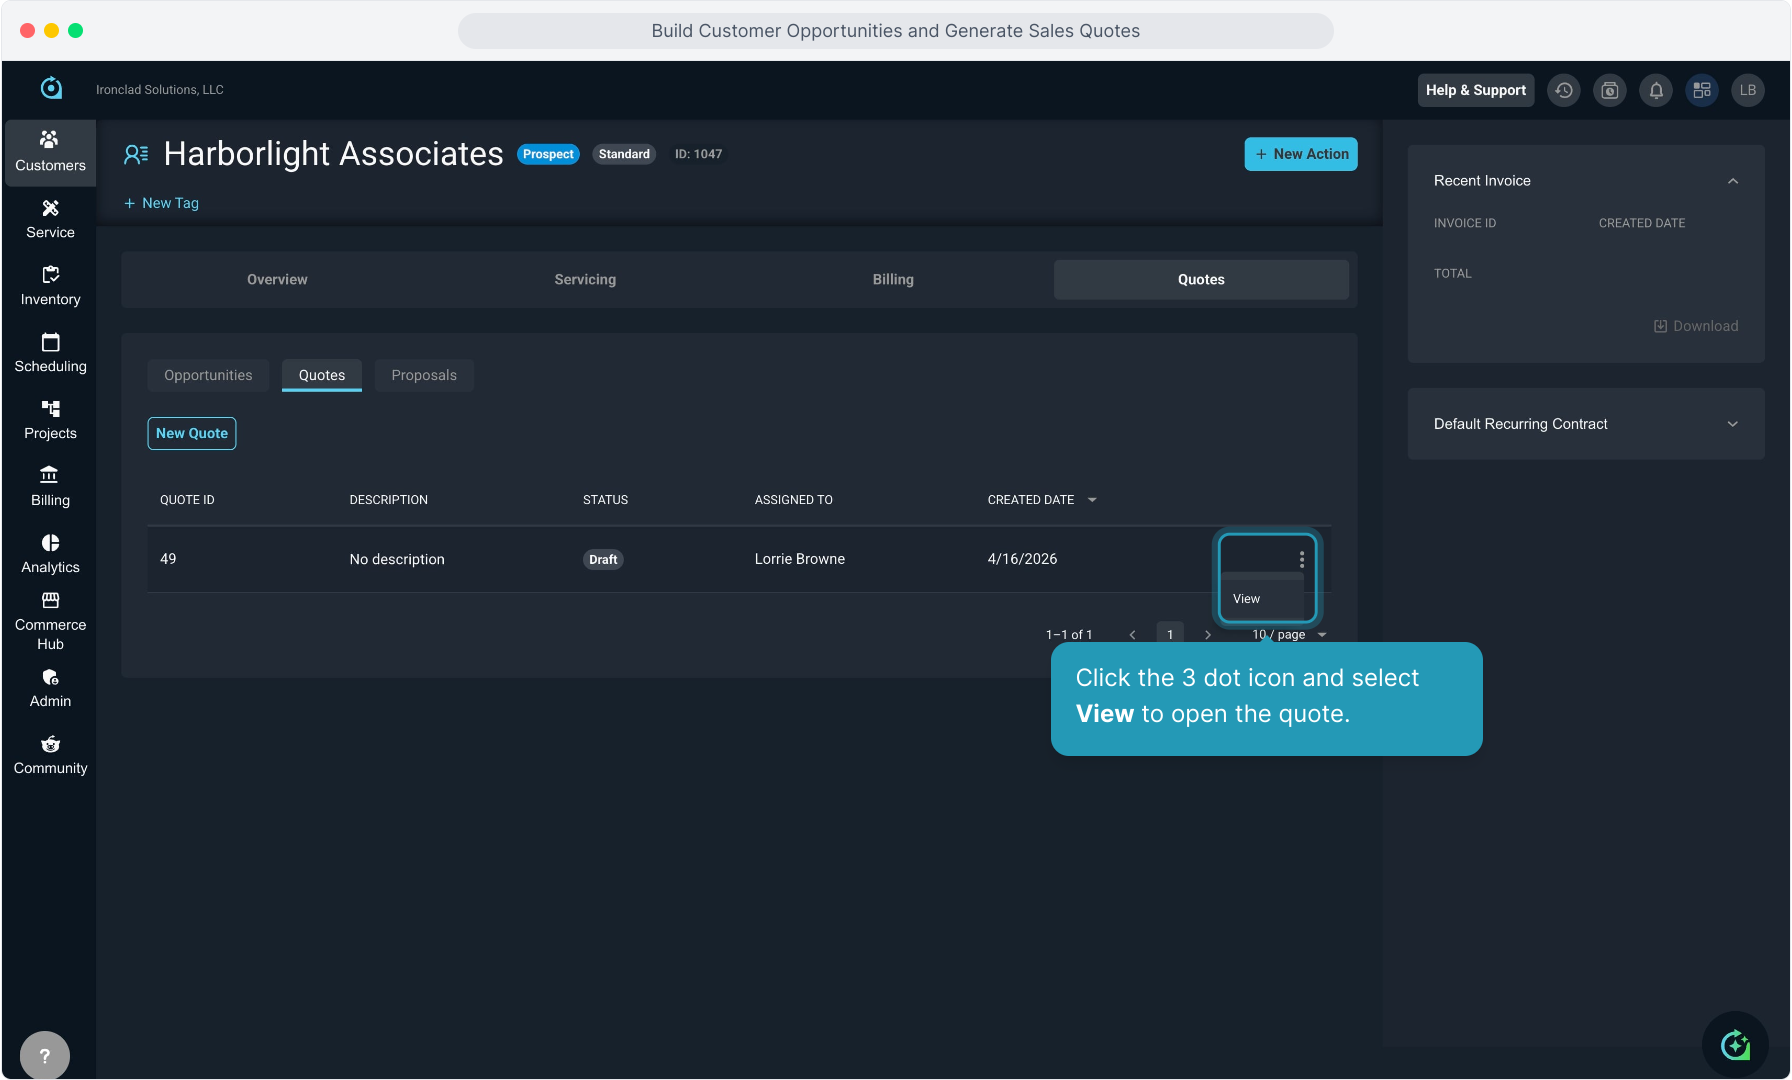
49. On the Quotes sub tab, you can see all quotes on this customer, along with the status of each.
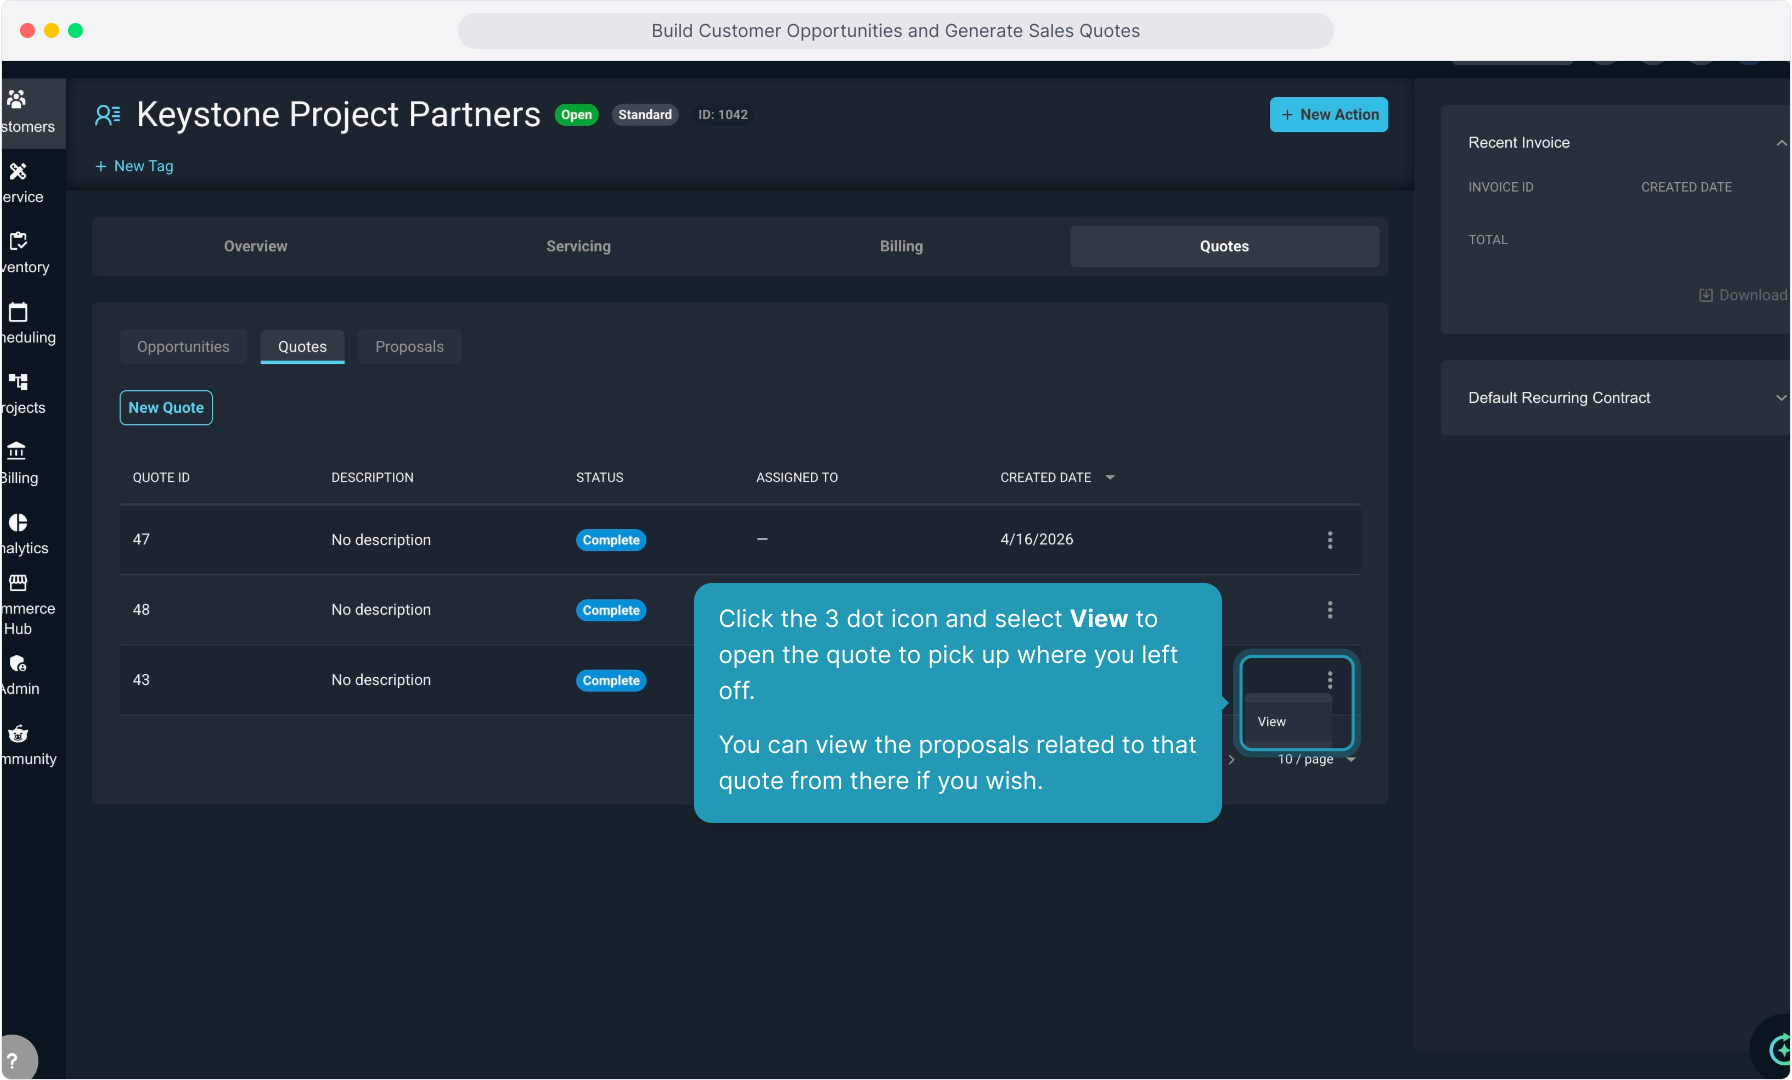
50. Click the 3 dot icon and select View to open the quote to pick up where you left off. You can view the proposals related to that quote from there if you wish.
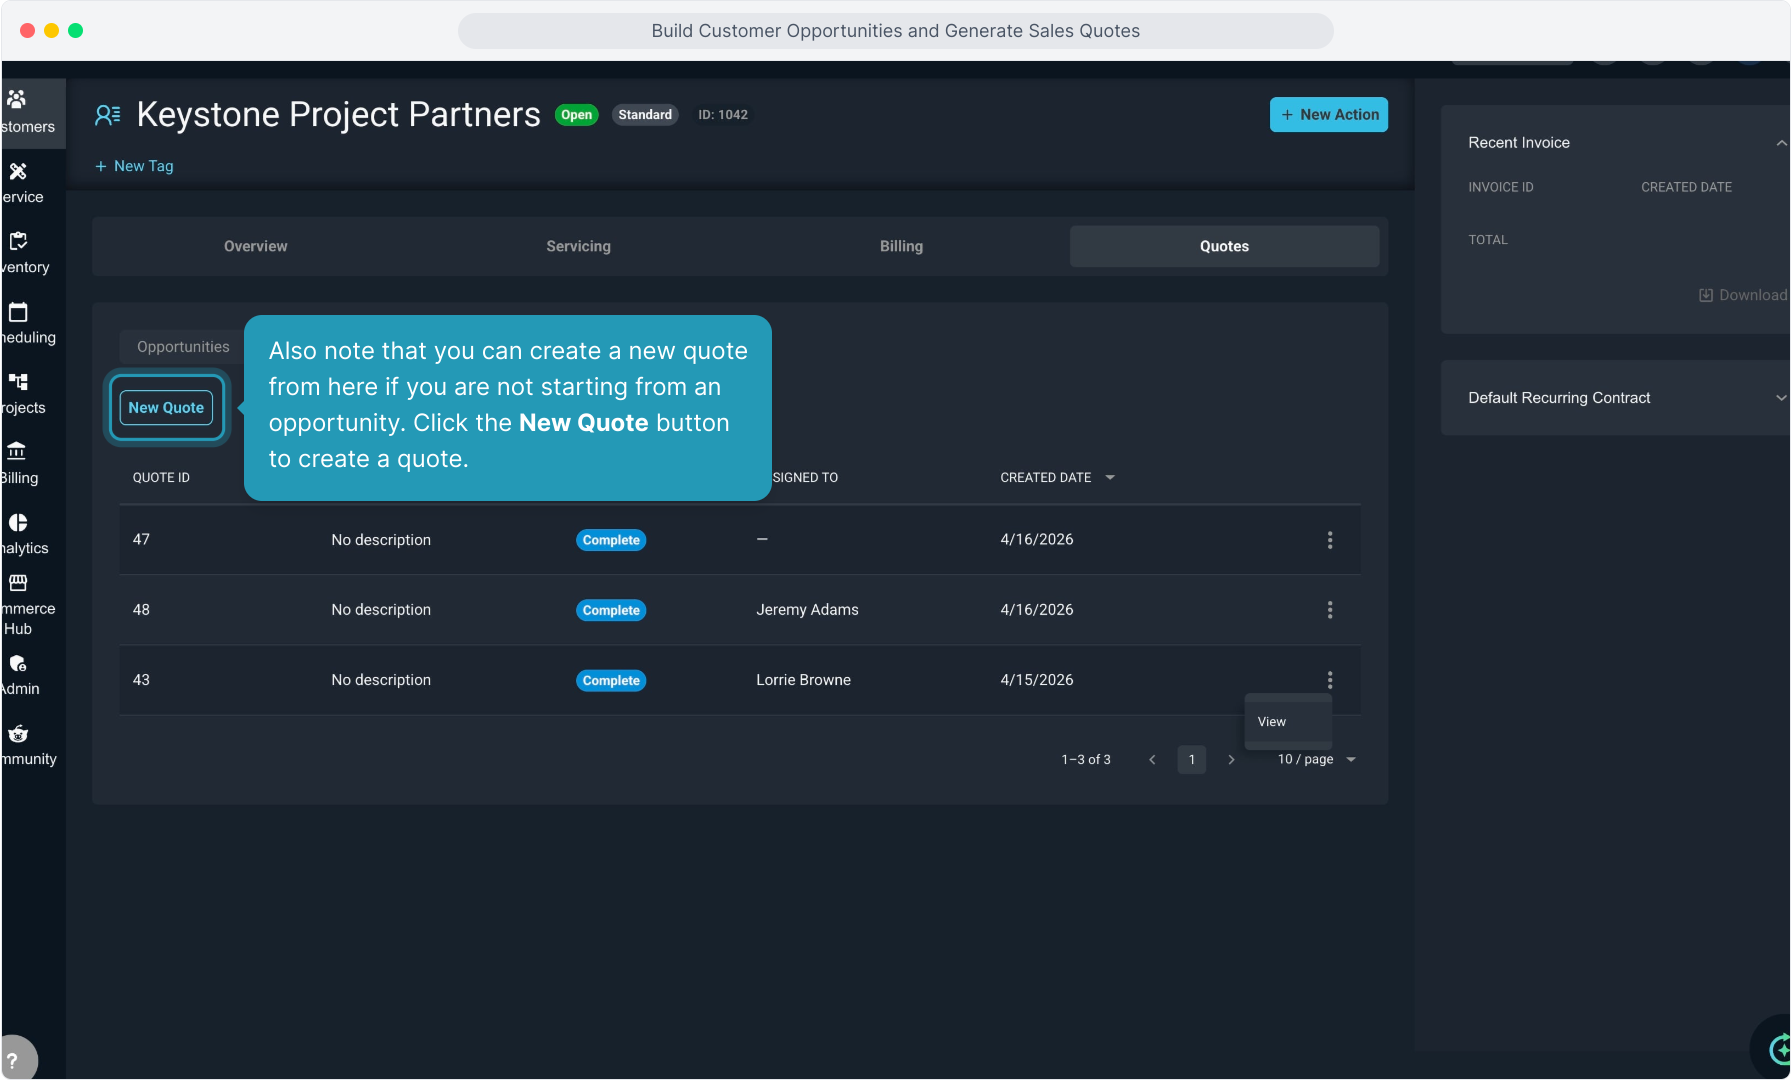
51. Also note that you can create a new quote from here if you are not starting from an opportunity. Click the New Quote button to create a quote.
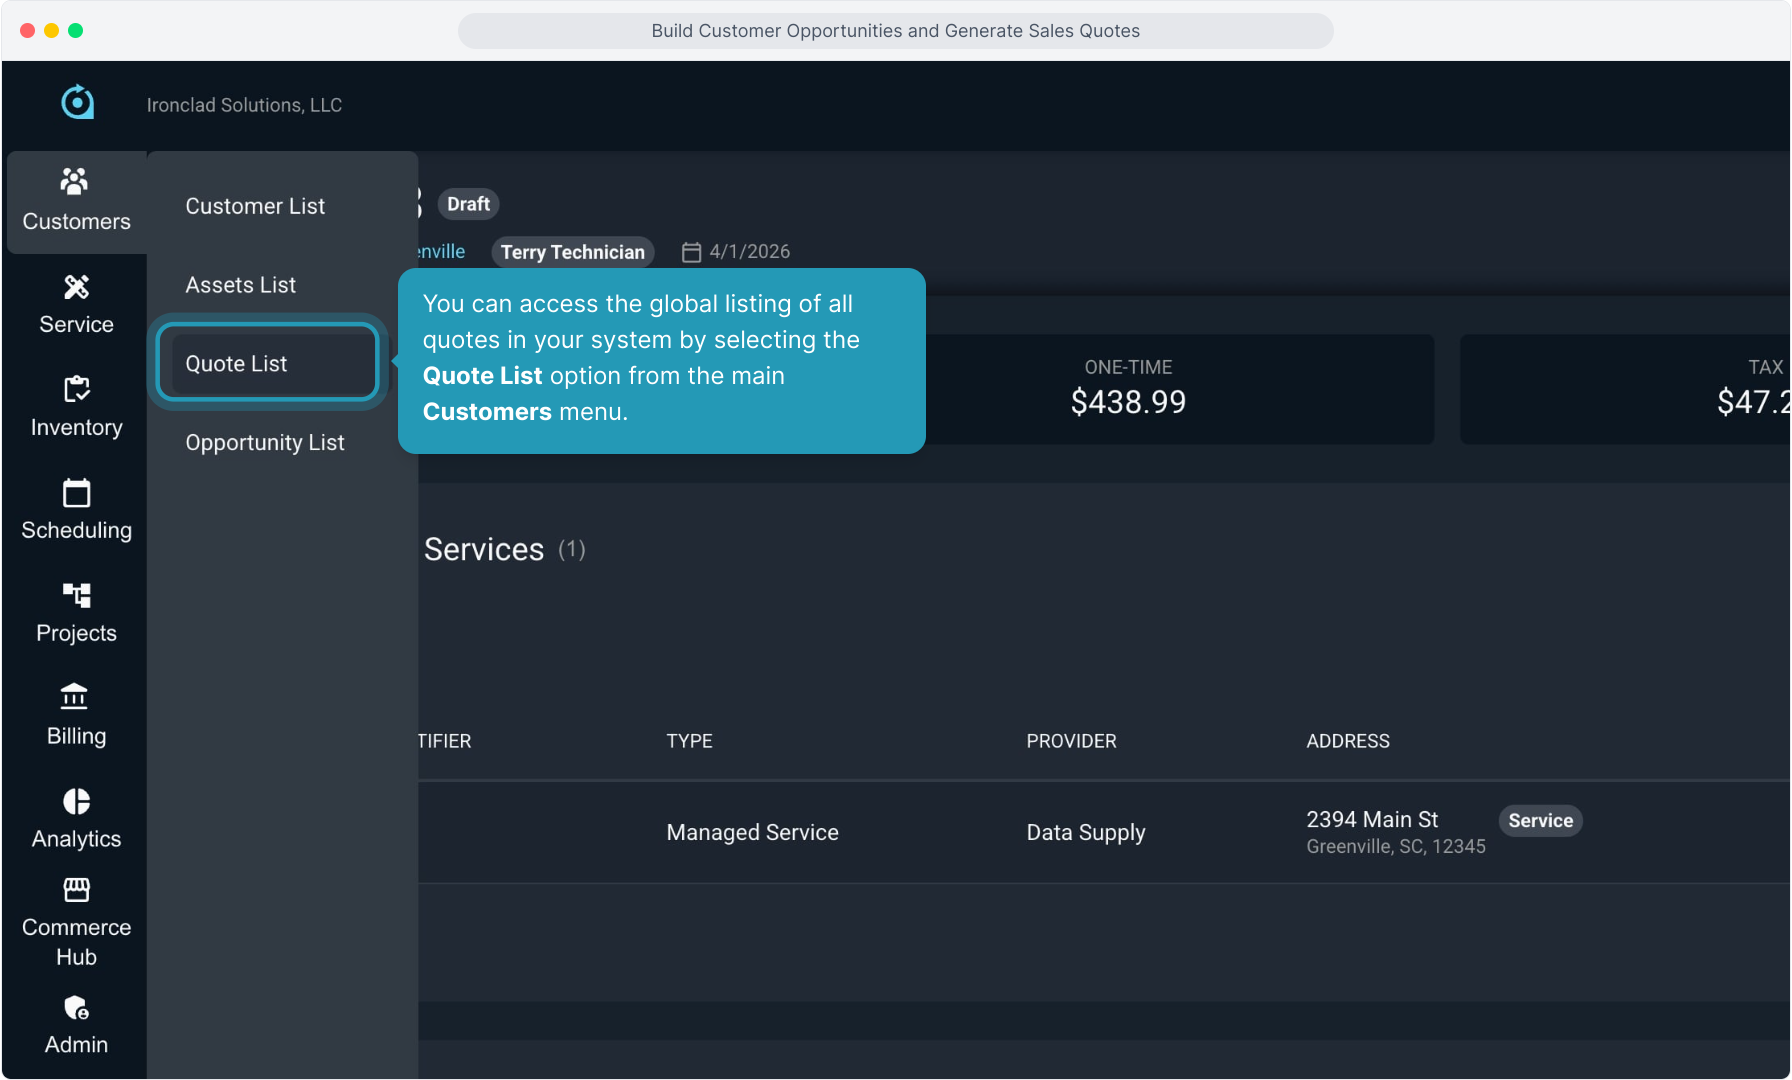
52. You can access the global listing of all quotes in your system by selecting the Quote List option from the main Customers menu.
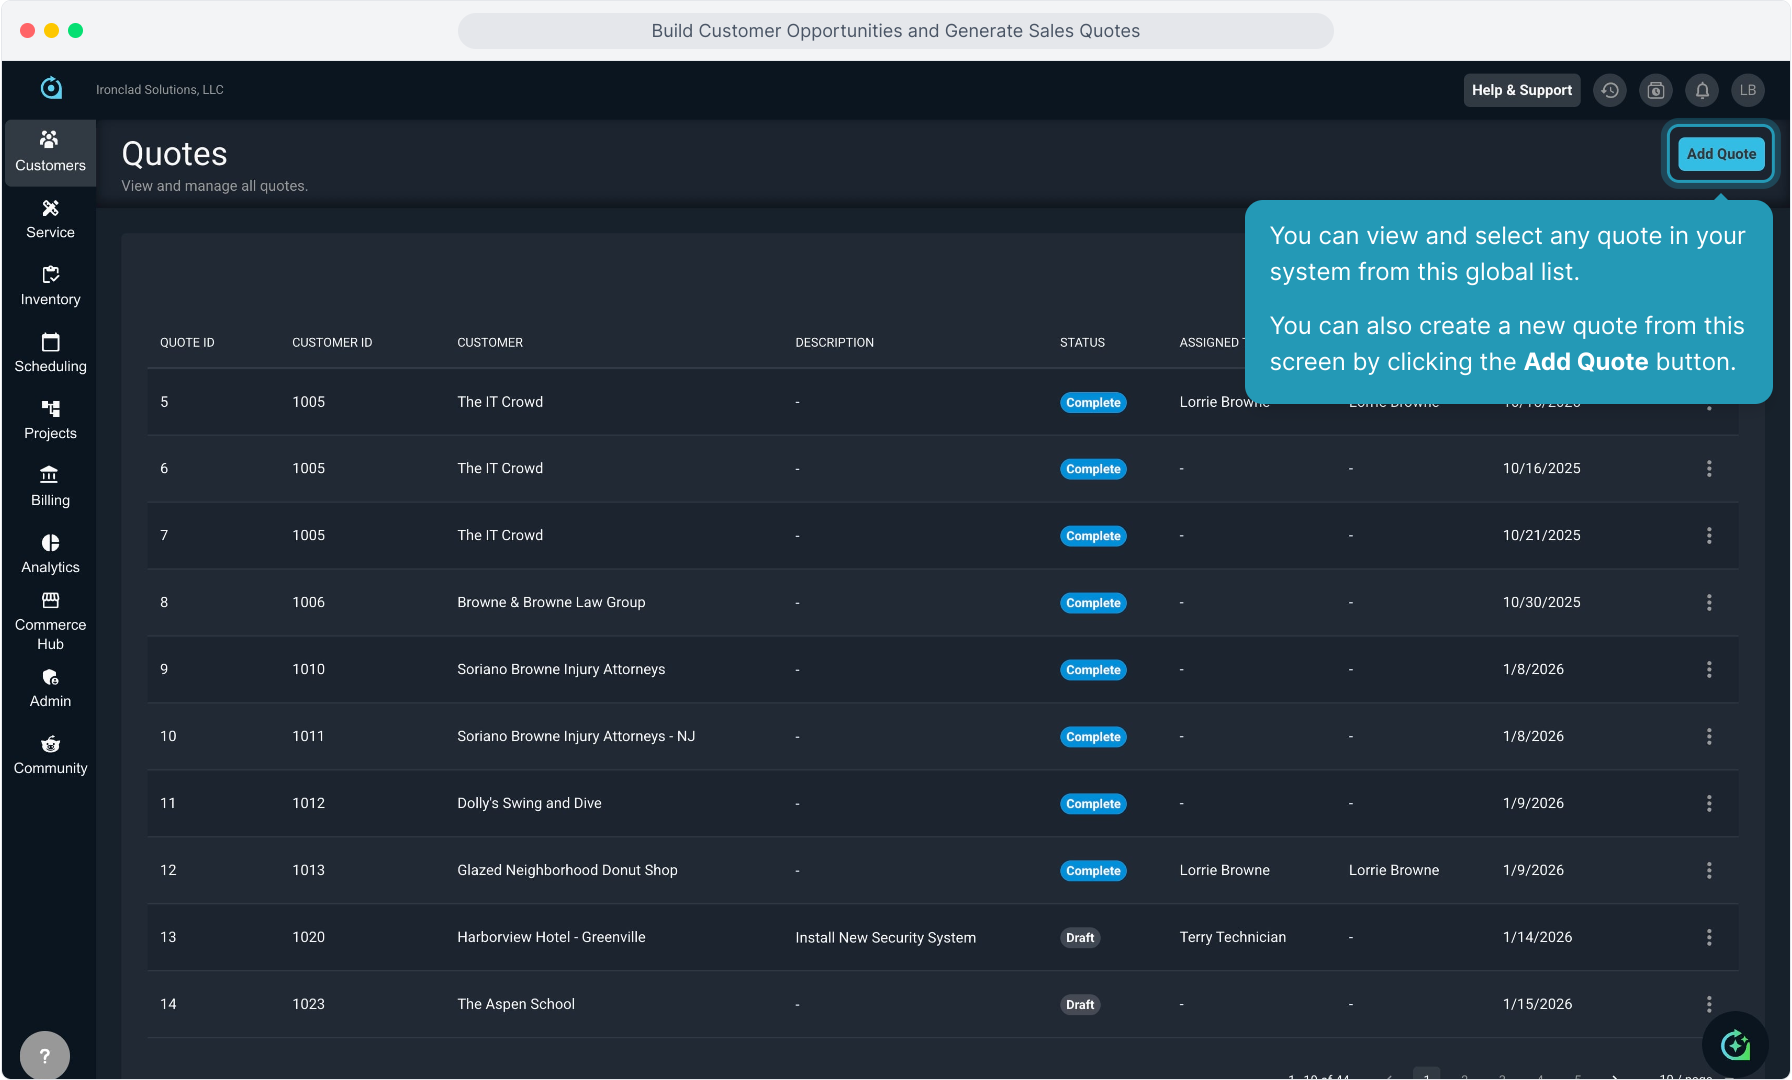
53. You can view and select any quote in your system from this global list. You can also create a new quote from this screen by clicking the Add Quote button.
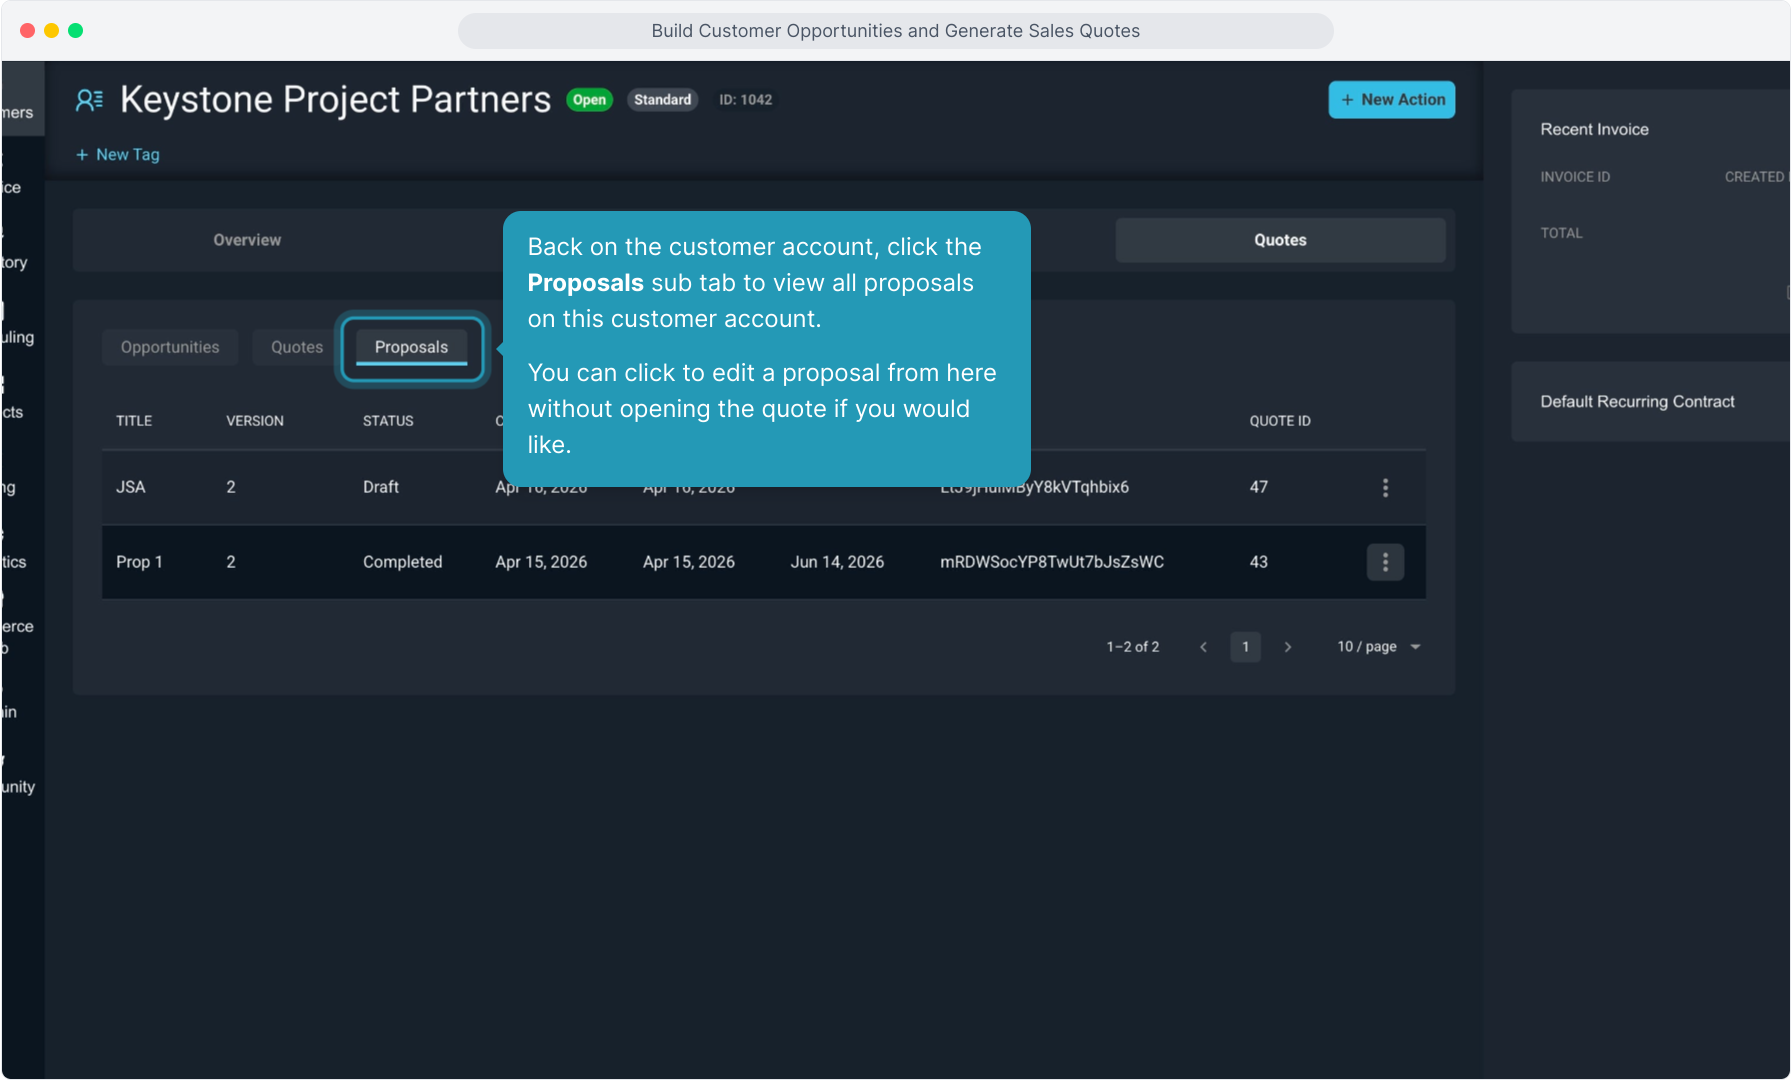
54. Back on the customer account, click the Proposals sub tab to view all proposals on this customer account.
You can click to edit a proposal from here without opening the quote if you would like.
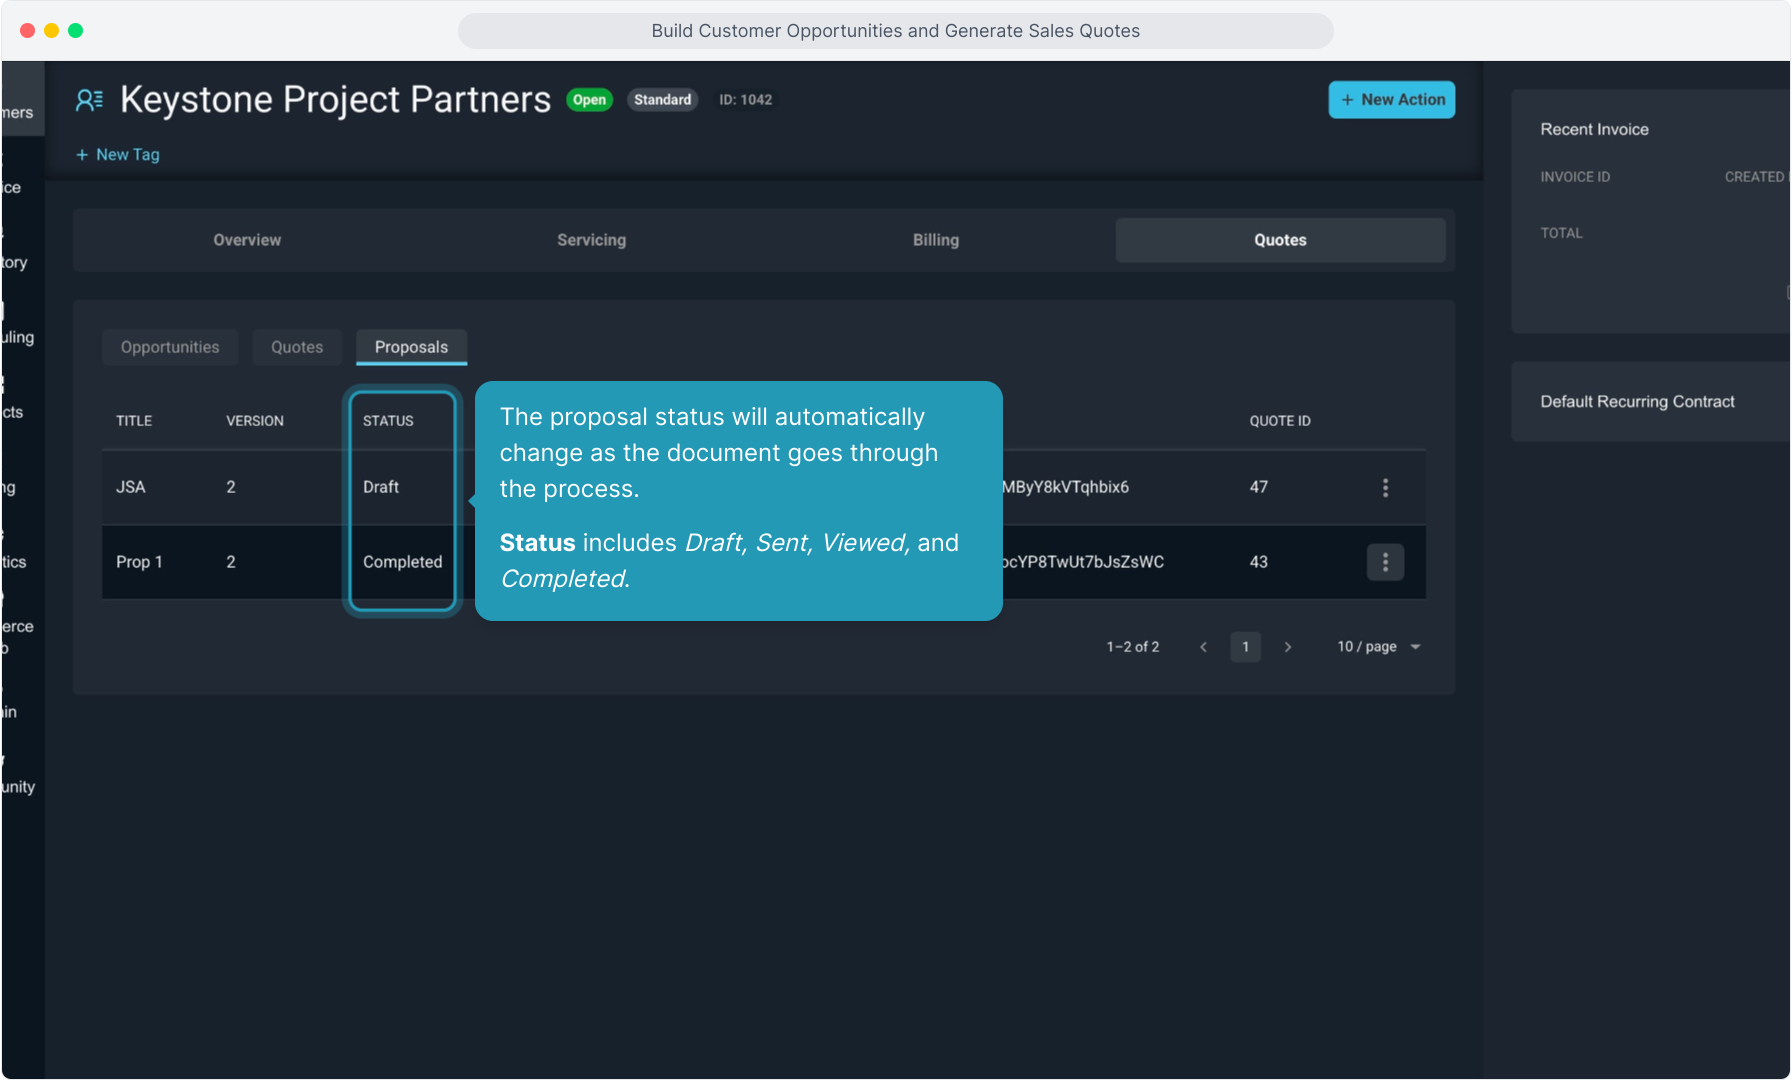
55. The proposal status will automatically change as the document goes through the process.
Status includes Draft, Sent, Viewed, and Completed.
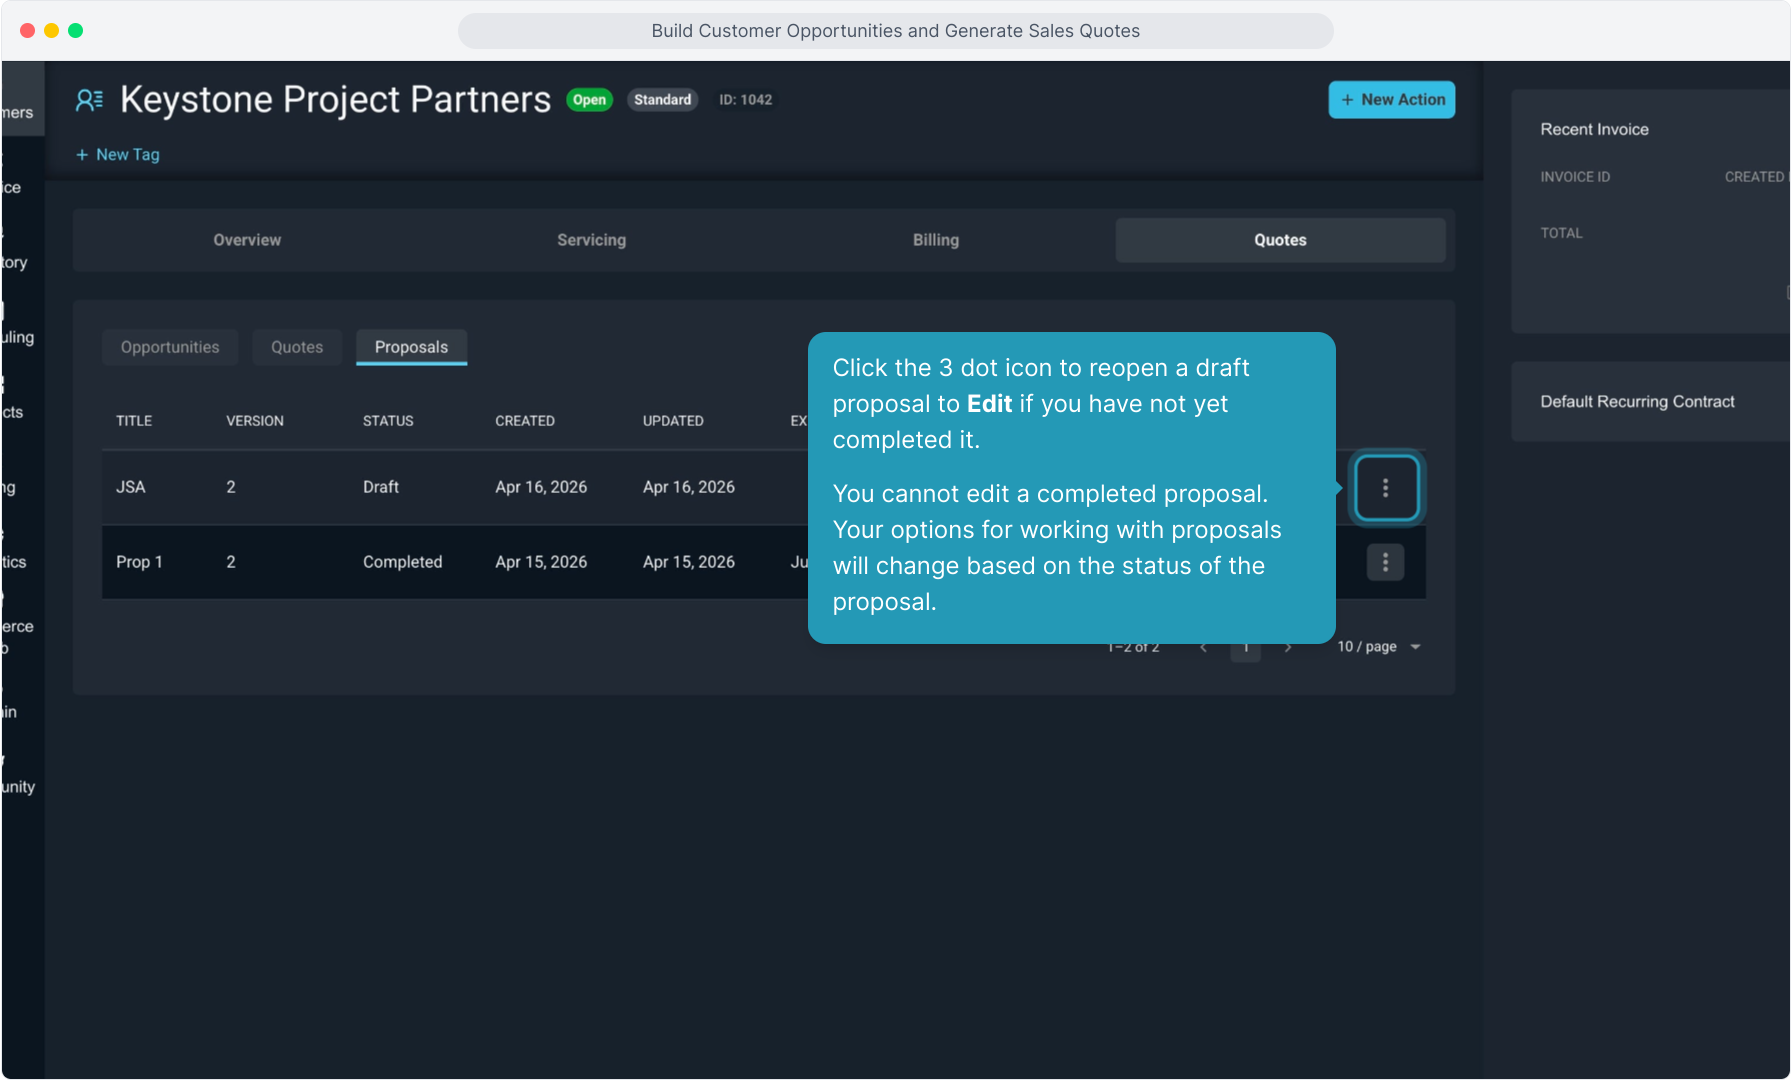
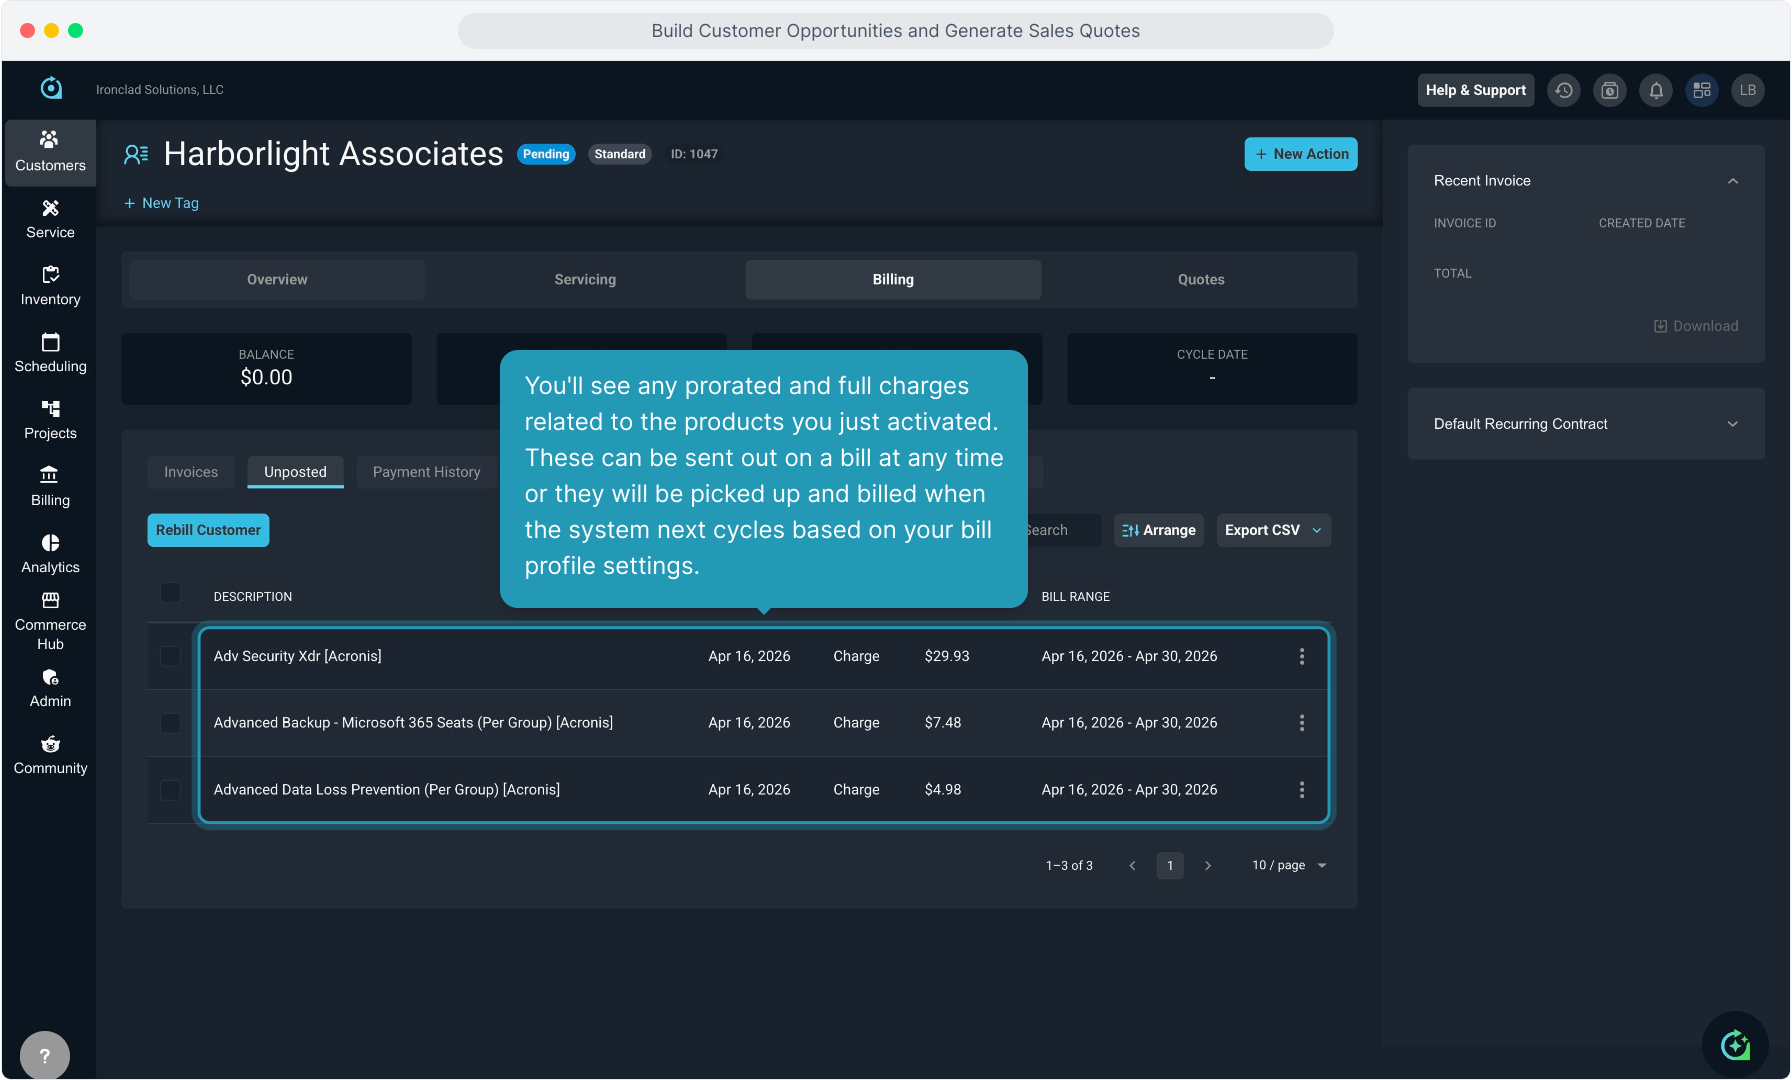
56. Click the 3 dot icon to reopen a draft proposal to Edit if you have not yet completed it.
You cannot edit a completed proposal. Your options for working with proposals will change based on the status of the proposal.
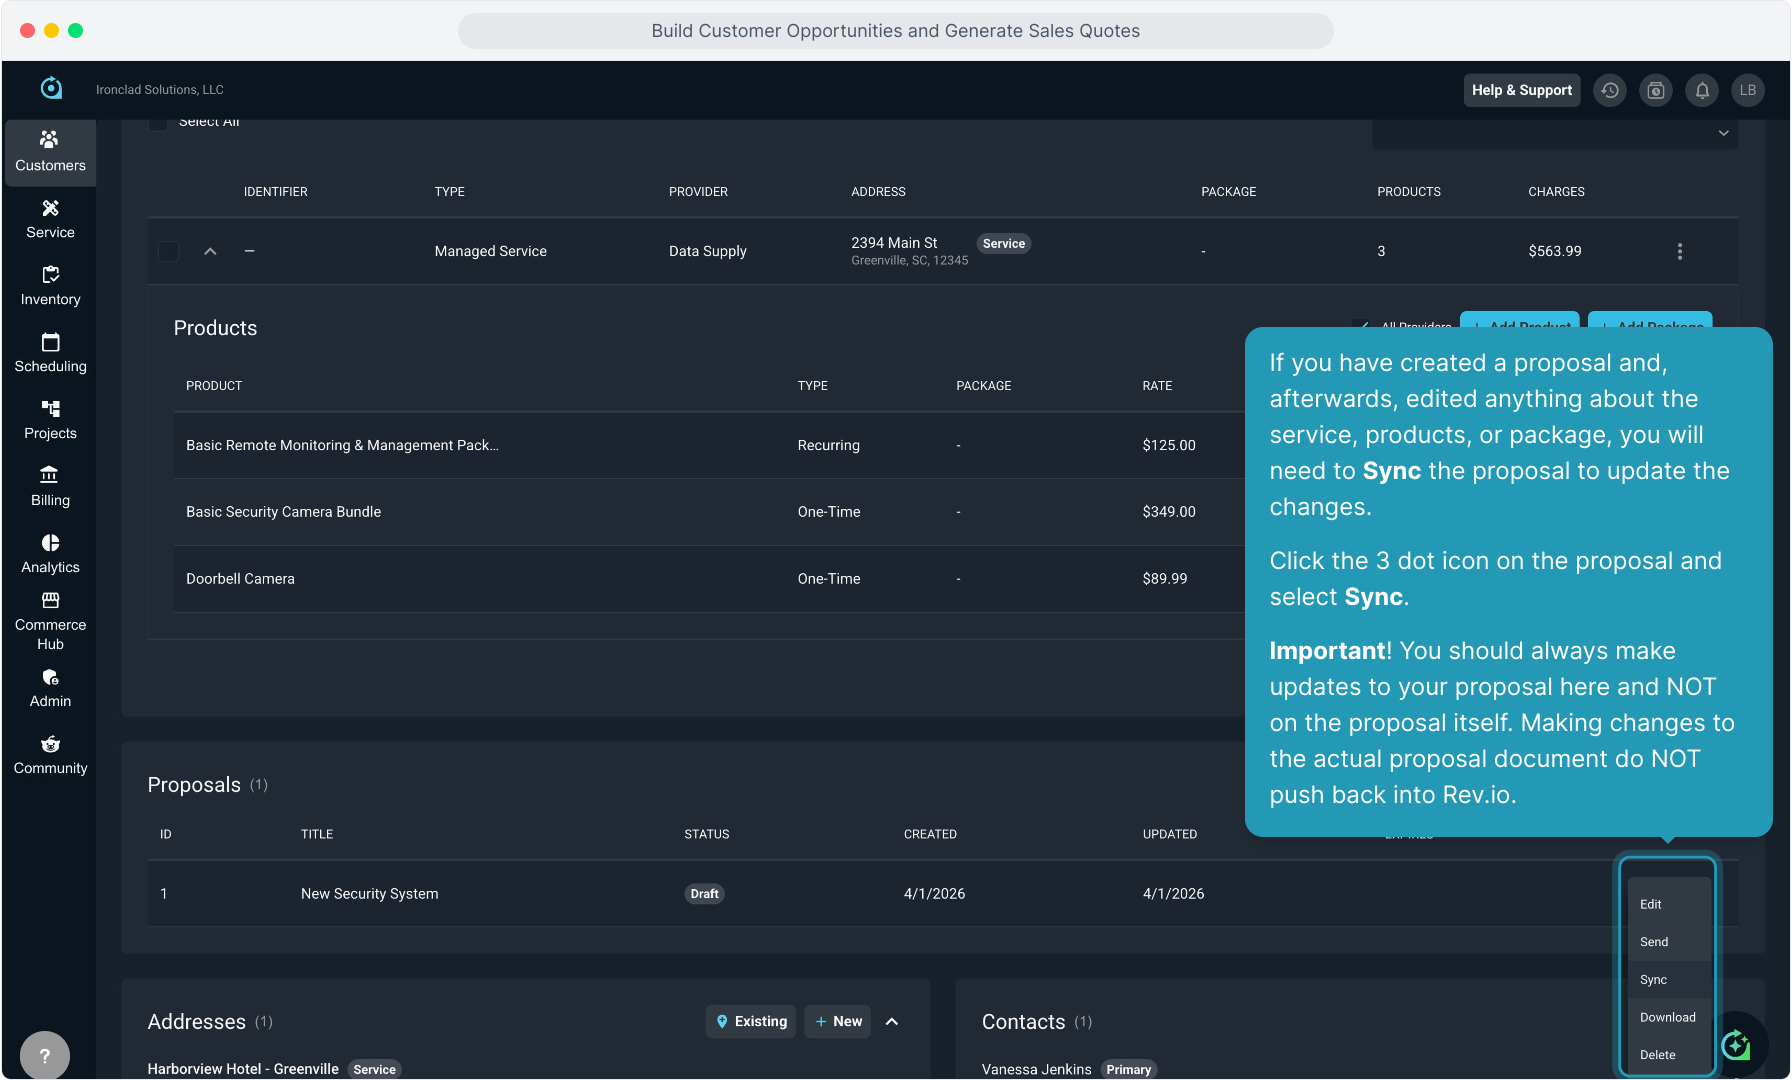
57. If you have created a proposal and, afterwards, edited anything about the service, products, or package, you will need to Sync the proposal to update the changes.
Click the 3 dot icon on the proposal and select Sync.
Important! You should always make updates to your proposal here and NOT on the proposal itself. Making changes to the actual proposal document do NOT push back into Rev.io.
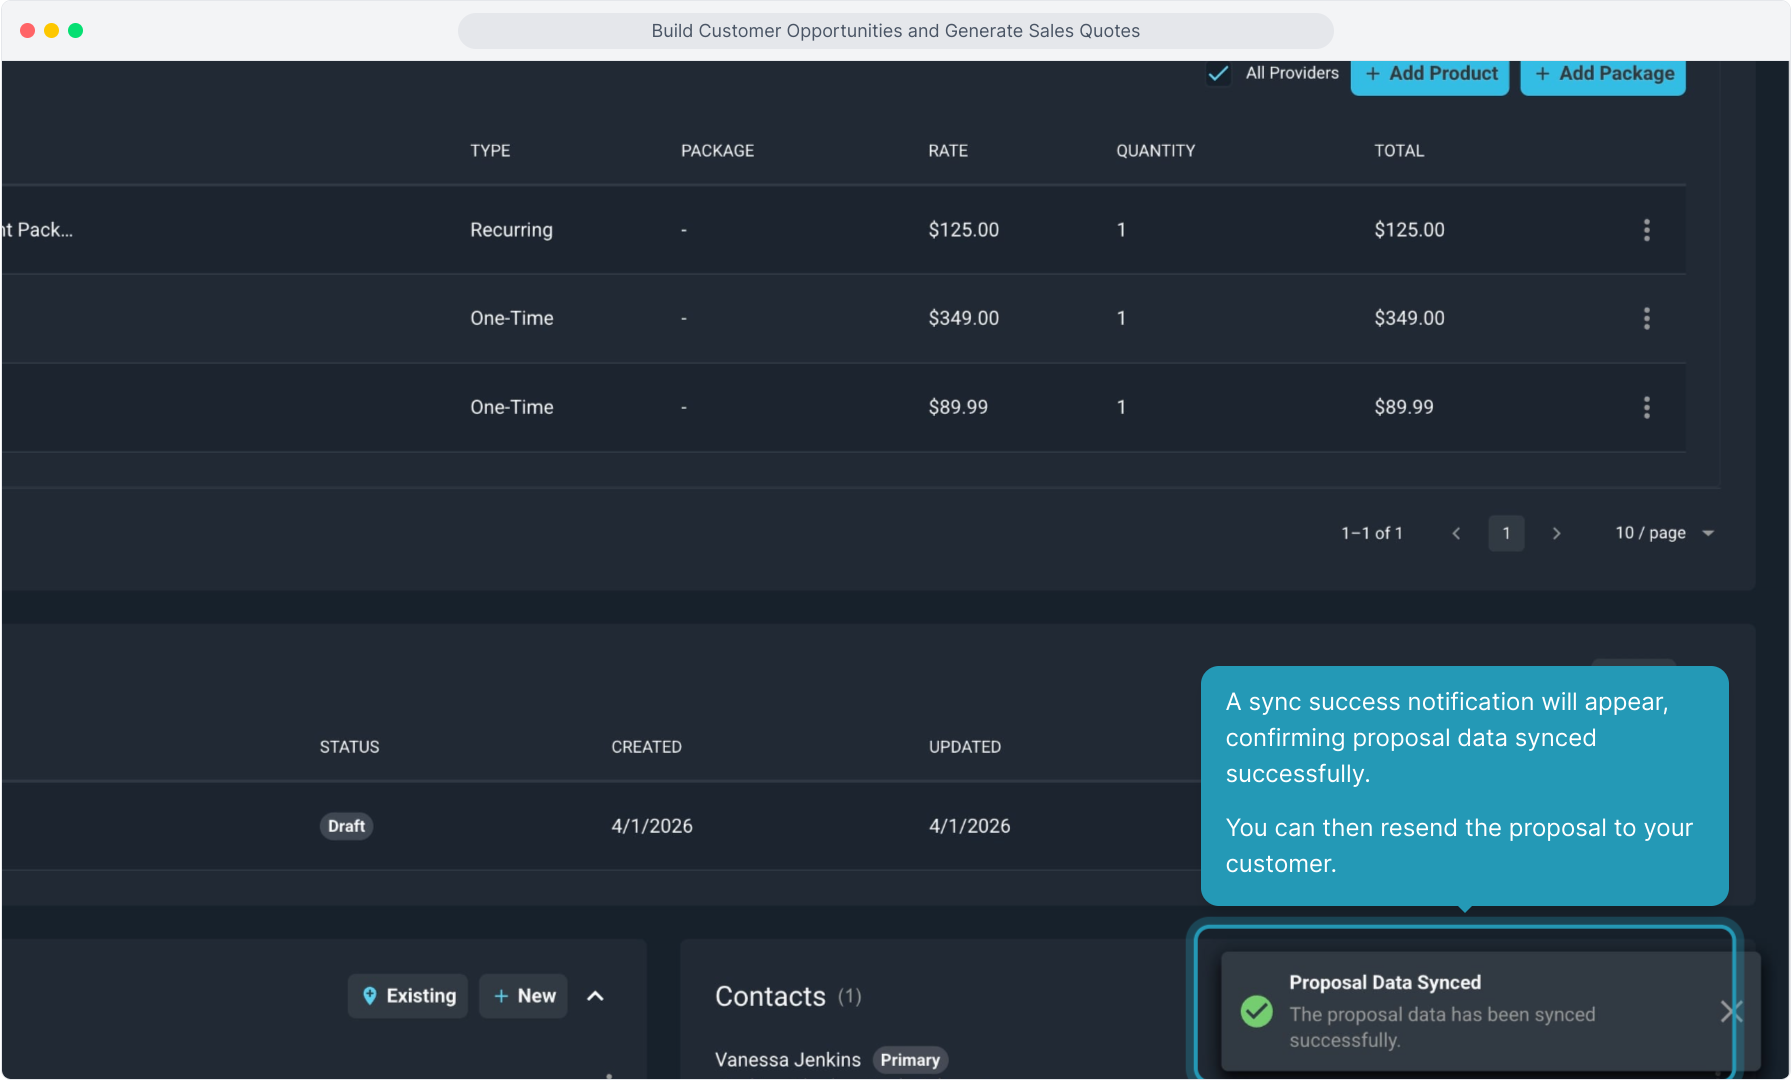
58. A sync success notification will appear, confirming proposal data synced successfully. You can then resend the proposal to your customer.
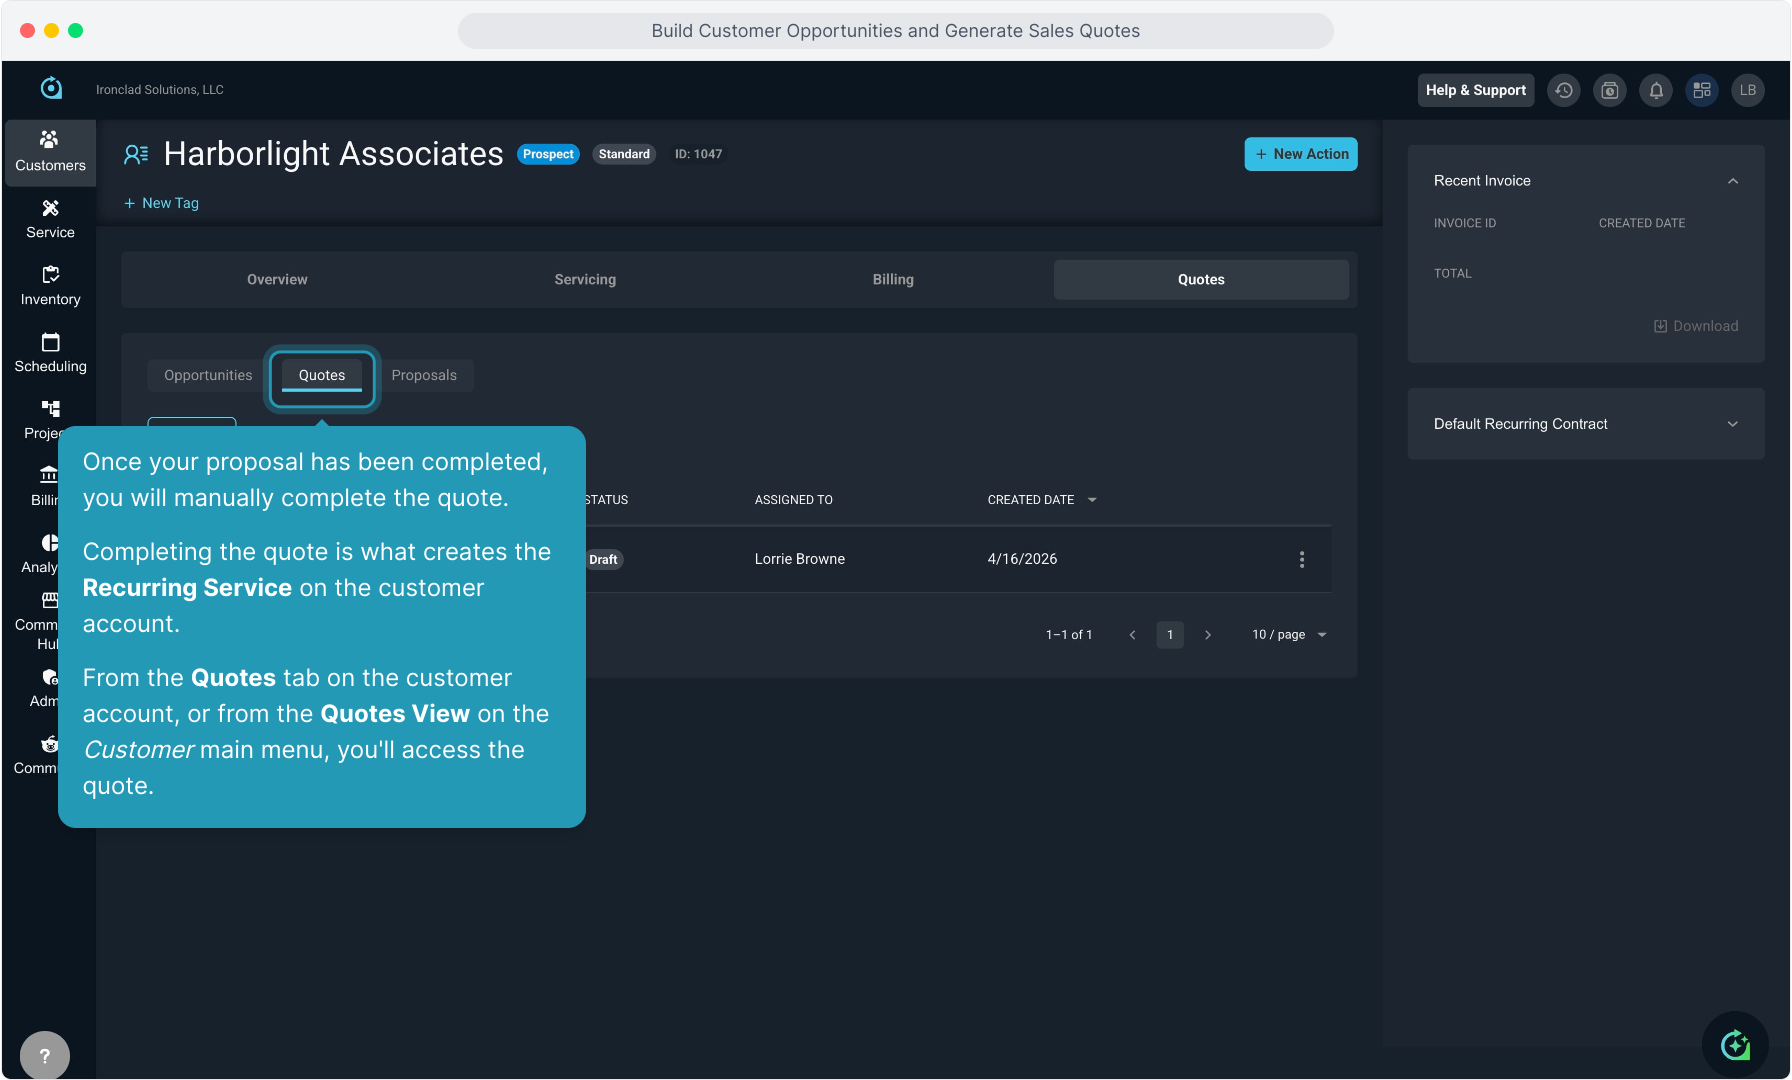
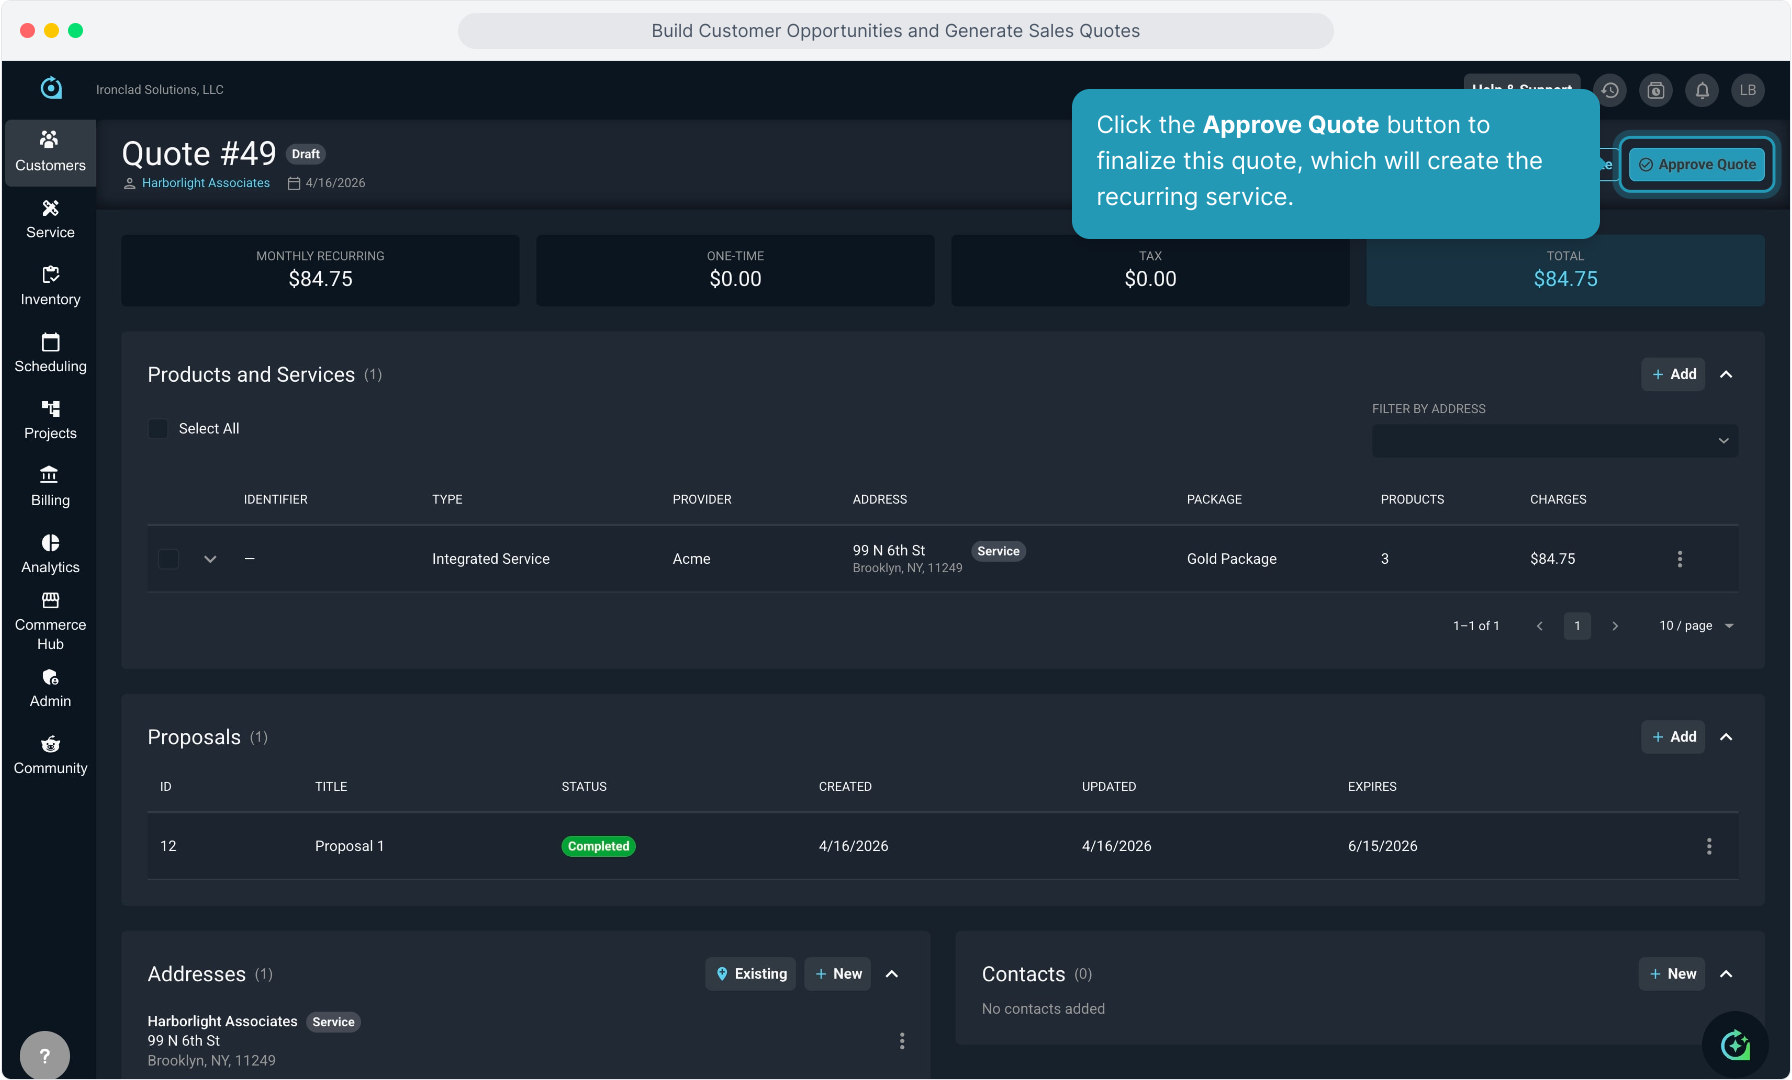
59. Once your proposal has been completed, you will manually complete the quote.
Completing the quote is what creates the Recurring Service on the customer account.
From the Quotes tab on the customer account, or from the Quotes View on the Customer main menu, you'll access the quote.
60. Click the 3 dot icon and select View to open the quote.
61. Click the Approve Quote button to finalize this quote, which will create the recurring service.
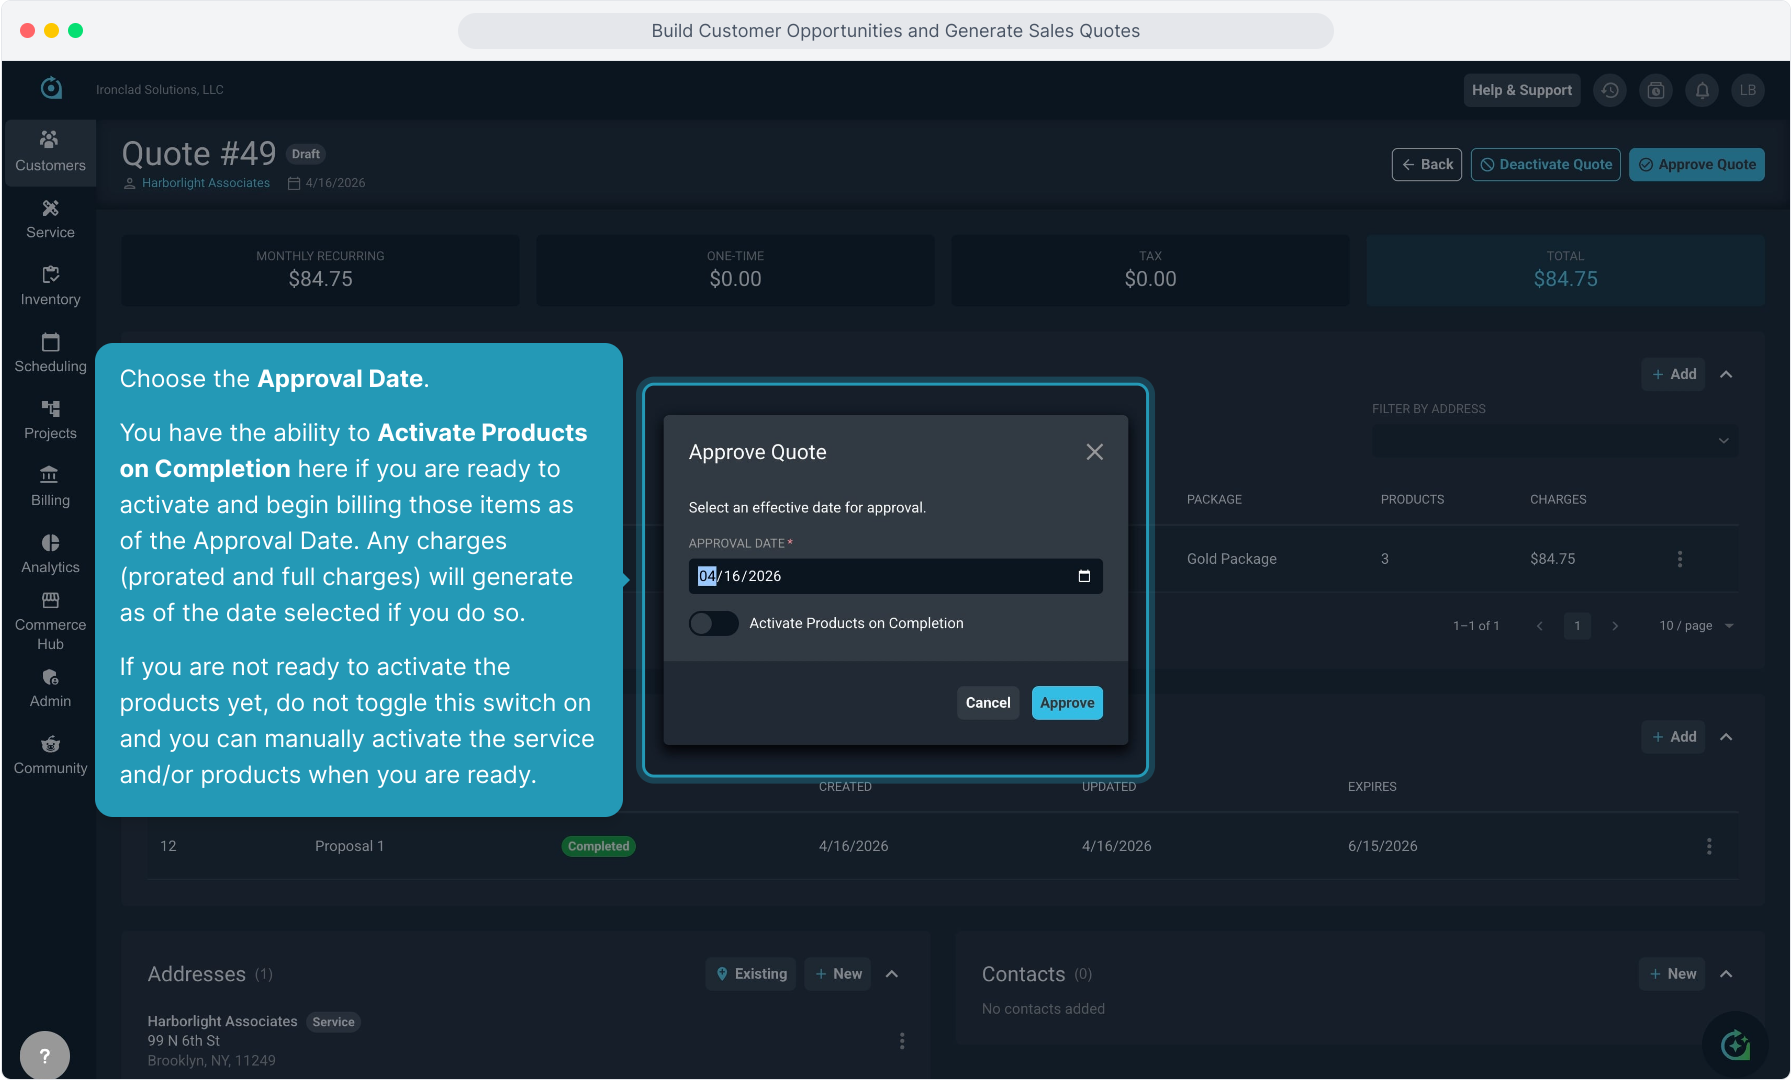
62. Choose the Approval Date.
You have the ability to Activate Products on Completion here if you are ready to activate and begin billing those items as of the Approval Date. Any charges (prorated and full charges) will generate as of the date selected if you do so.
If you are not ready to activate the products yet, do not toggle this switch on and you can manually activate the service and/or products when you are ready.
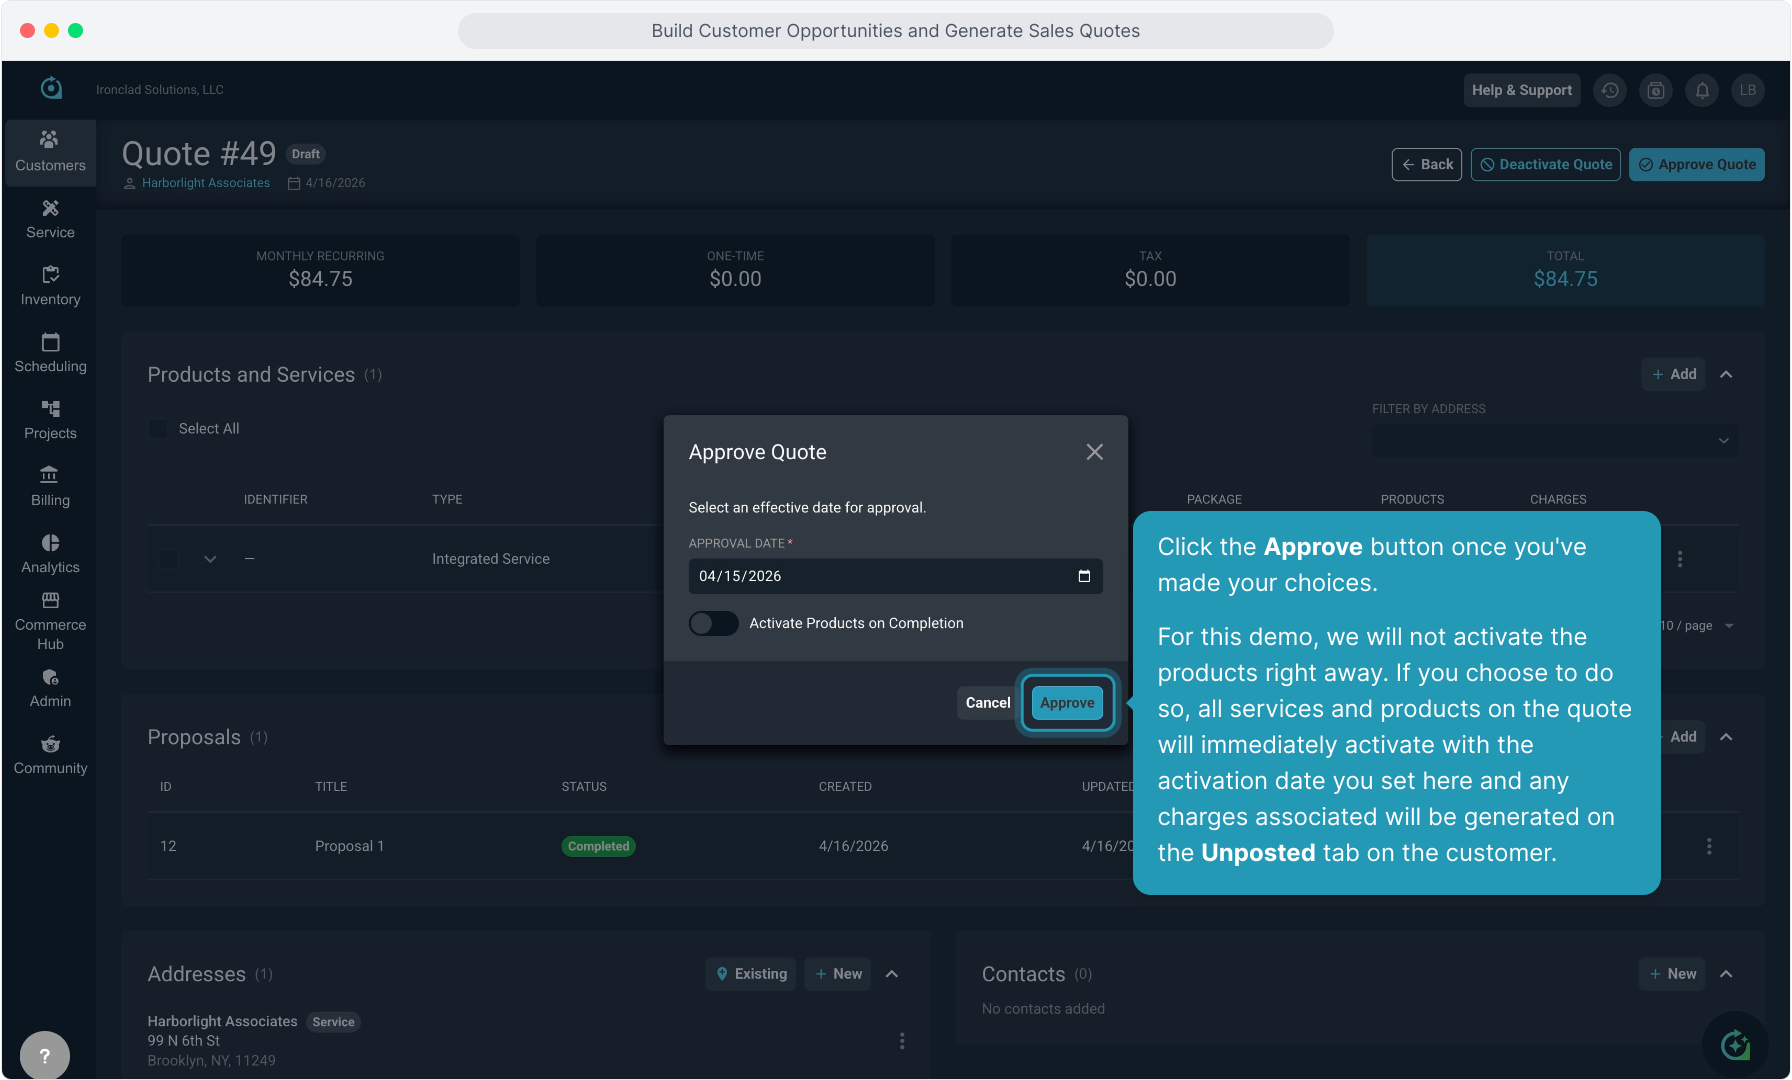
63. Click the Approve button once you've made your choices.
For this demo, we will not activate the products right away. If you choose to do so, all services and products on the quote will immediately activate with the activation date you set here and any charges associated will be generated on the Unposted tab on the customer.
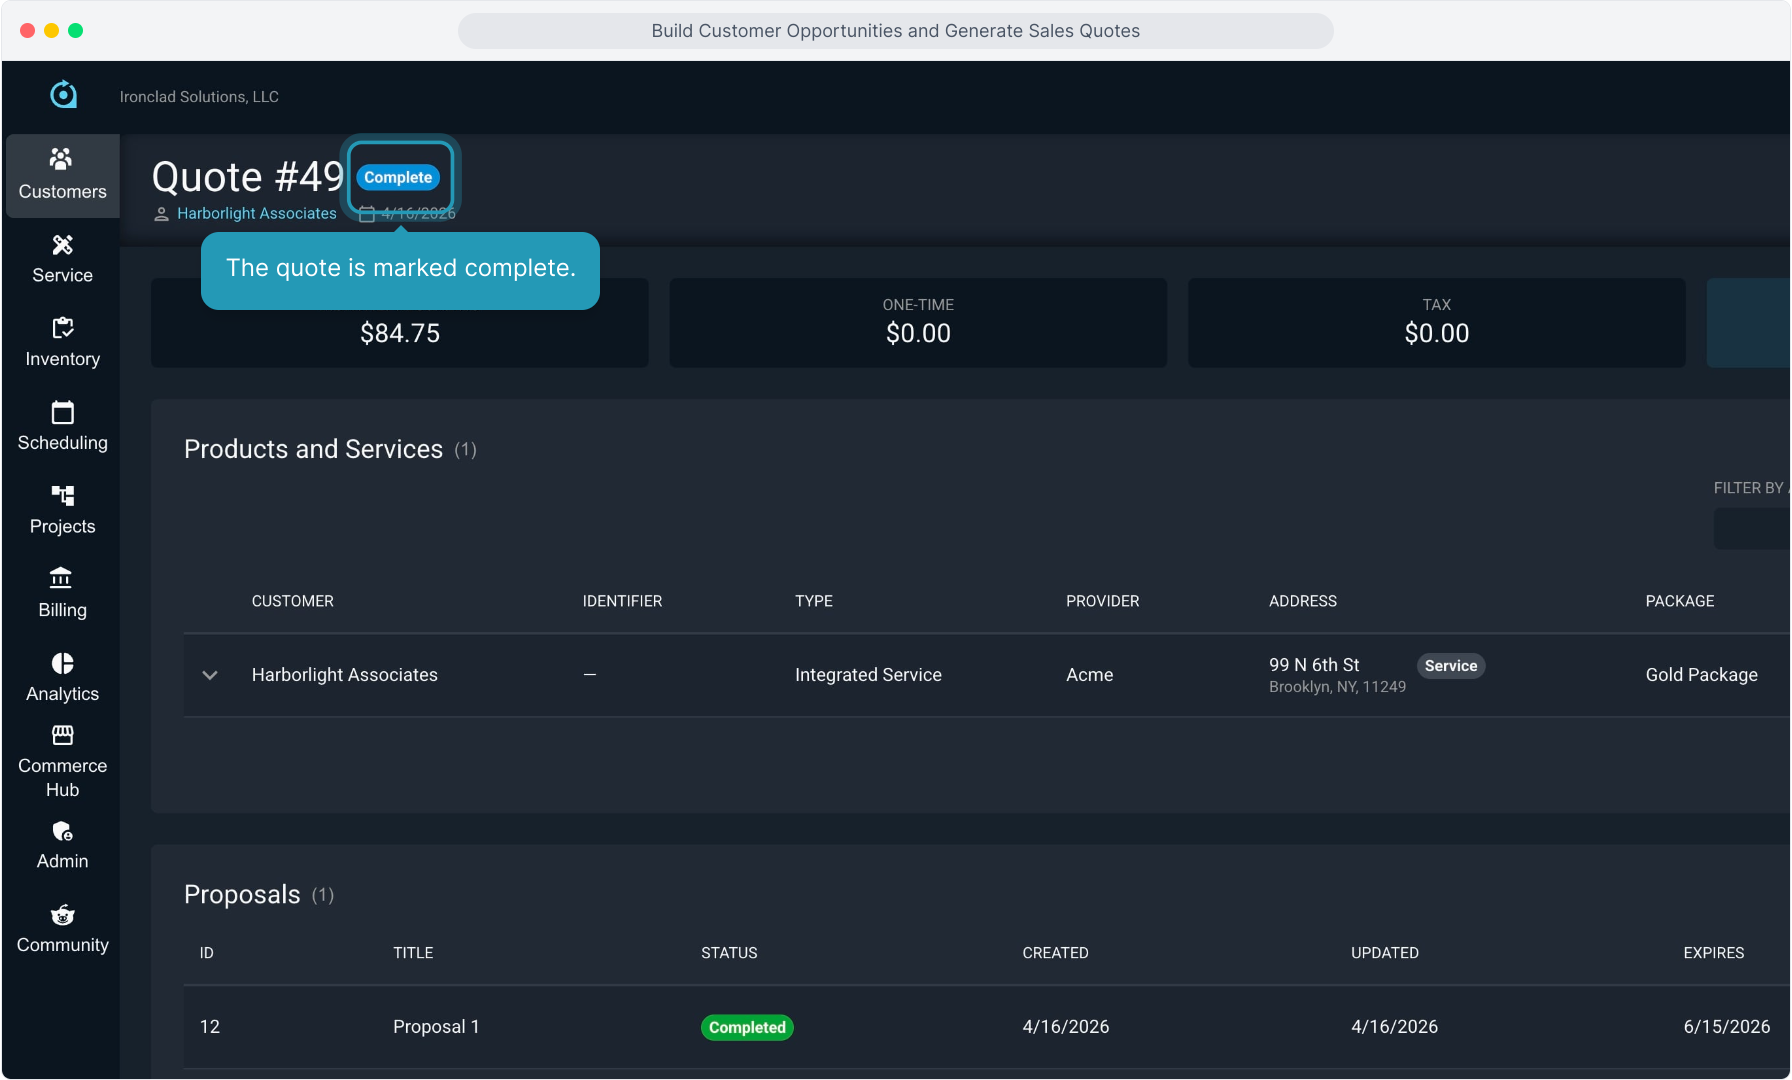
64. The quote is marked complete.
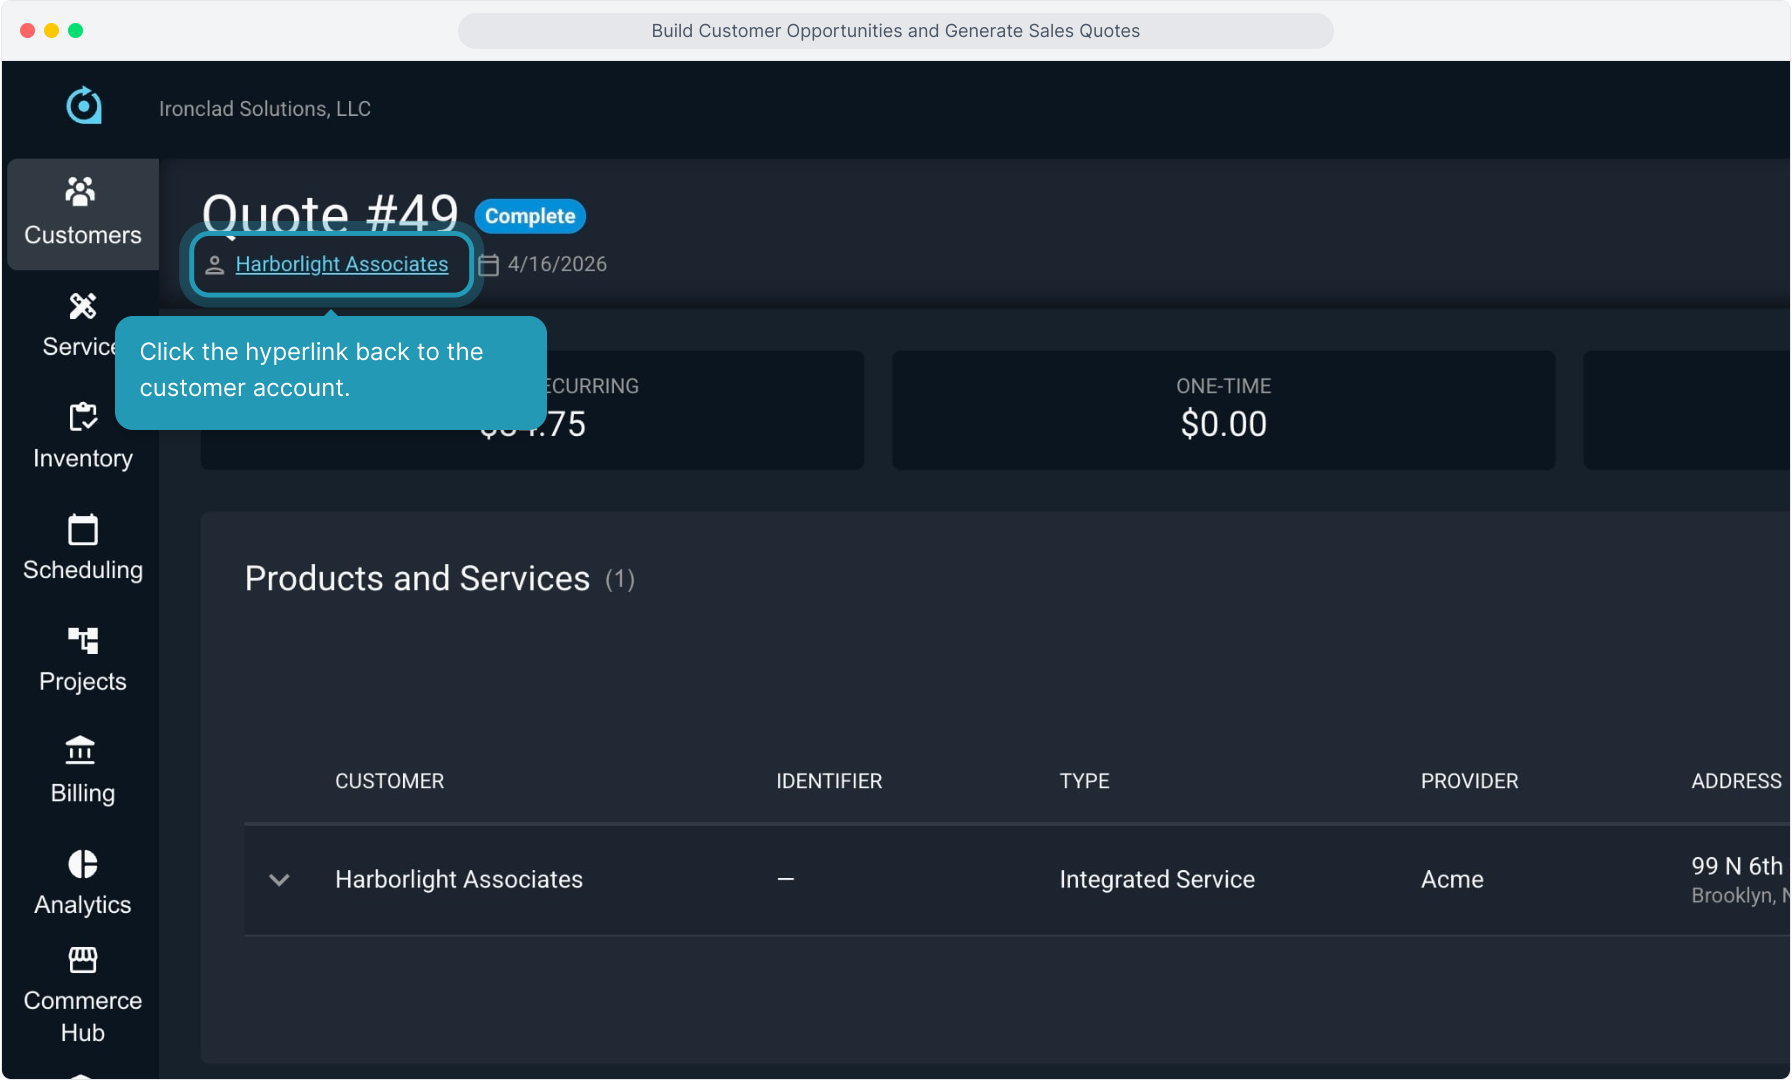
65. Click the hyperlink back to the customer account.
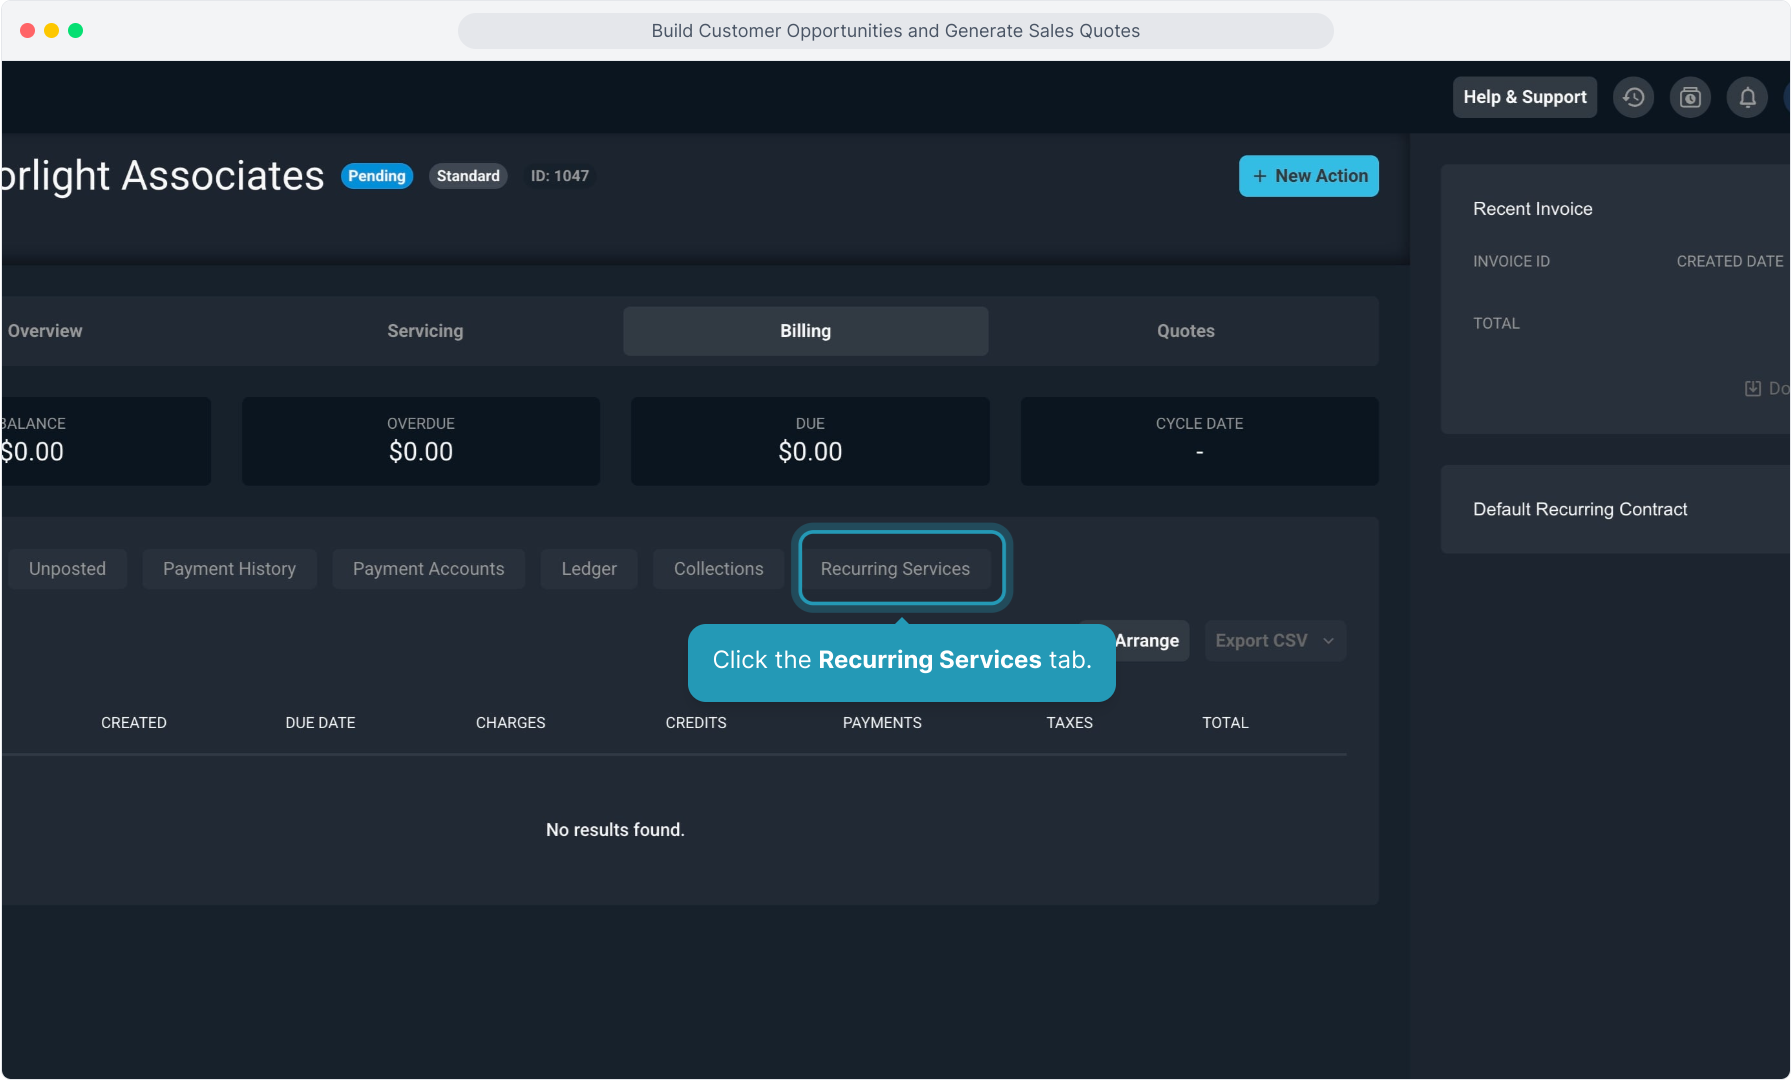
66. Click the Billing tab.

67. Click the Recurring Services tab.
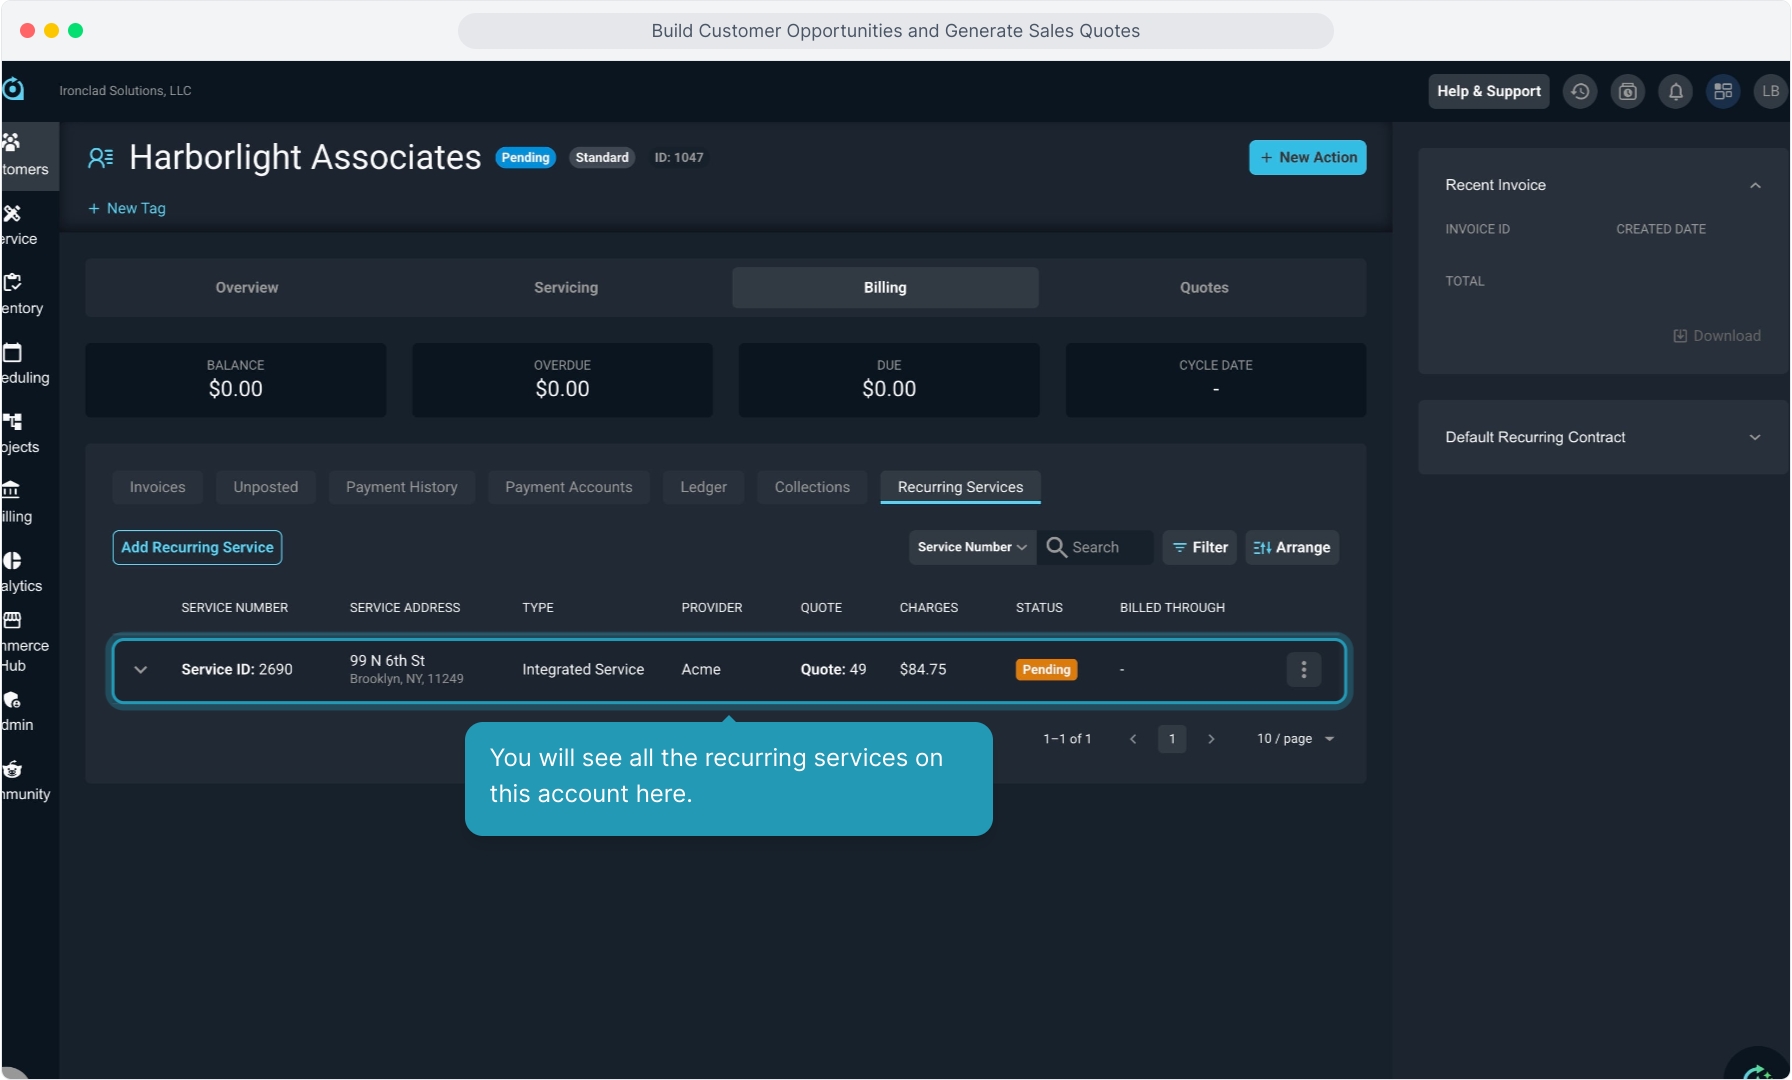
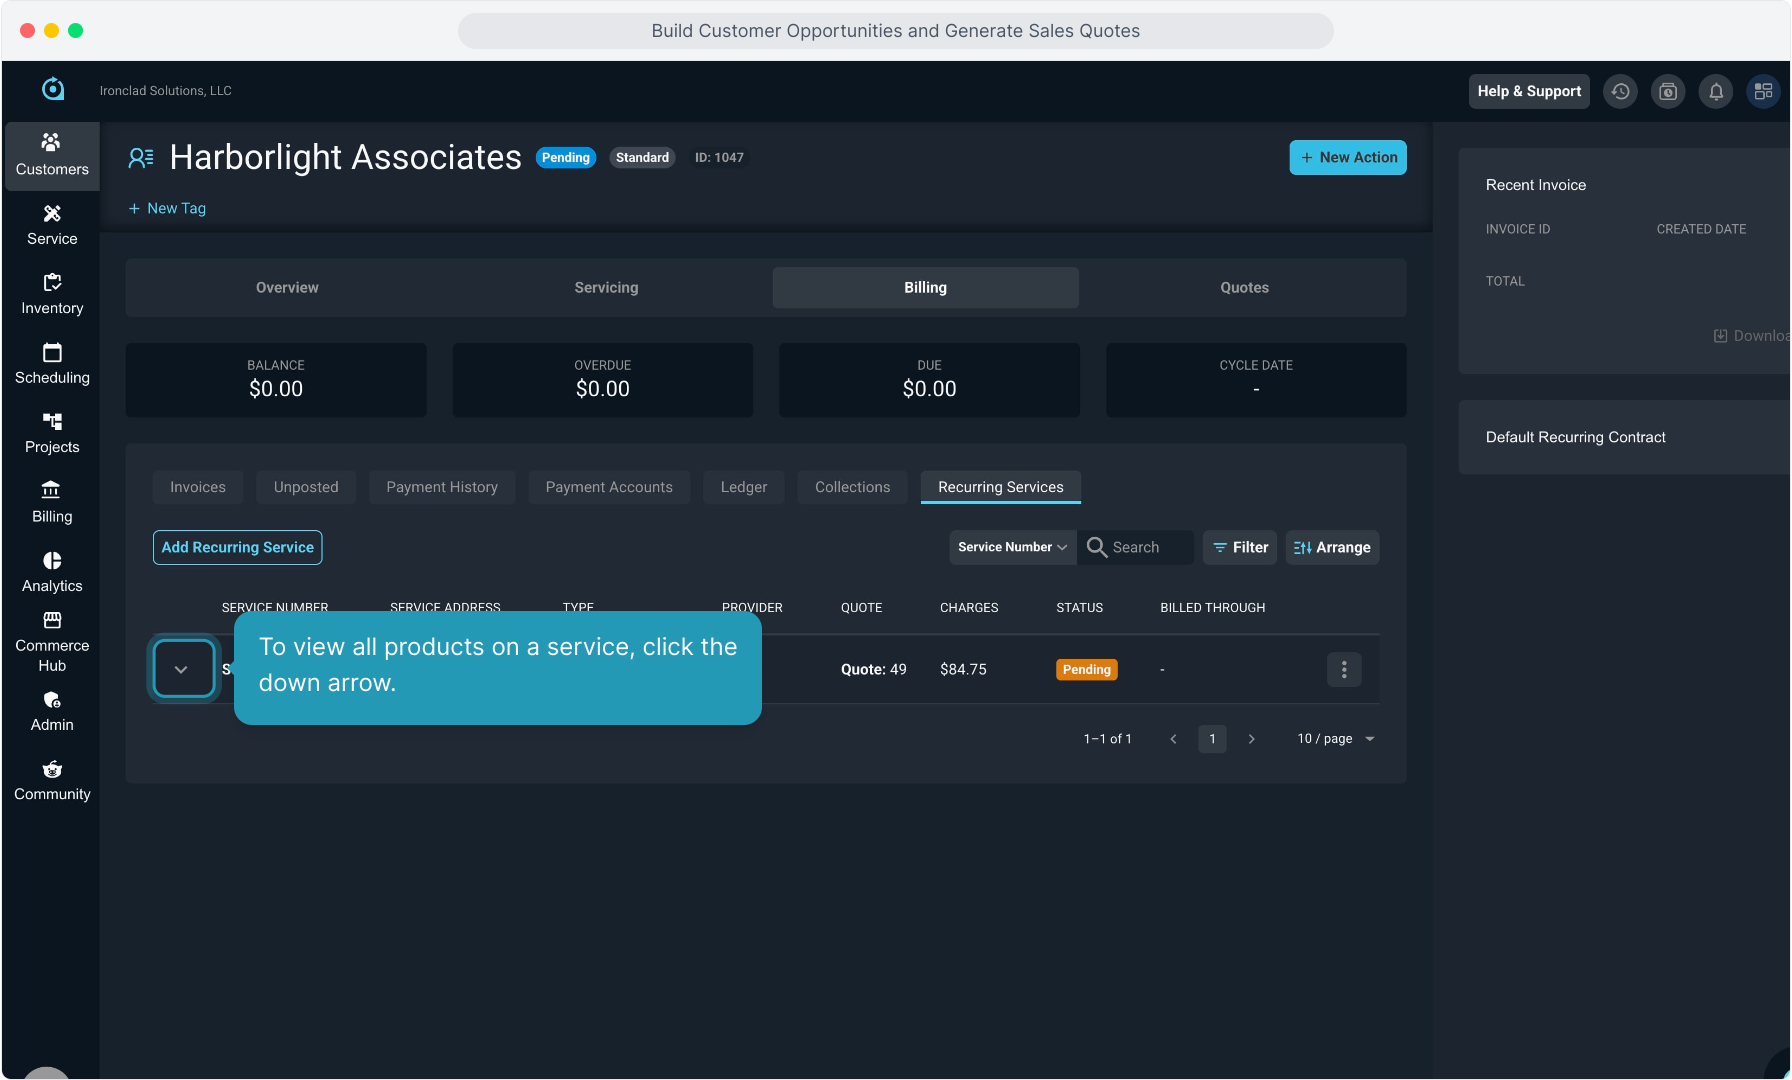
68. You will see all the recurring services on this account here.
69. To view all products on a service, click the down arrow.
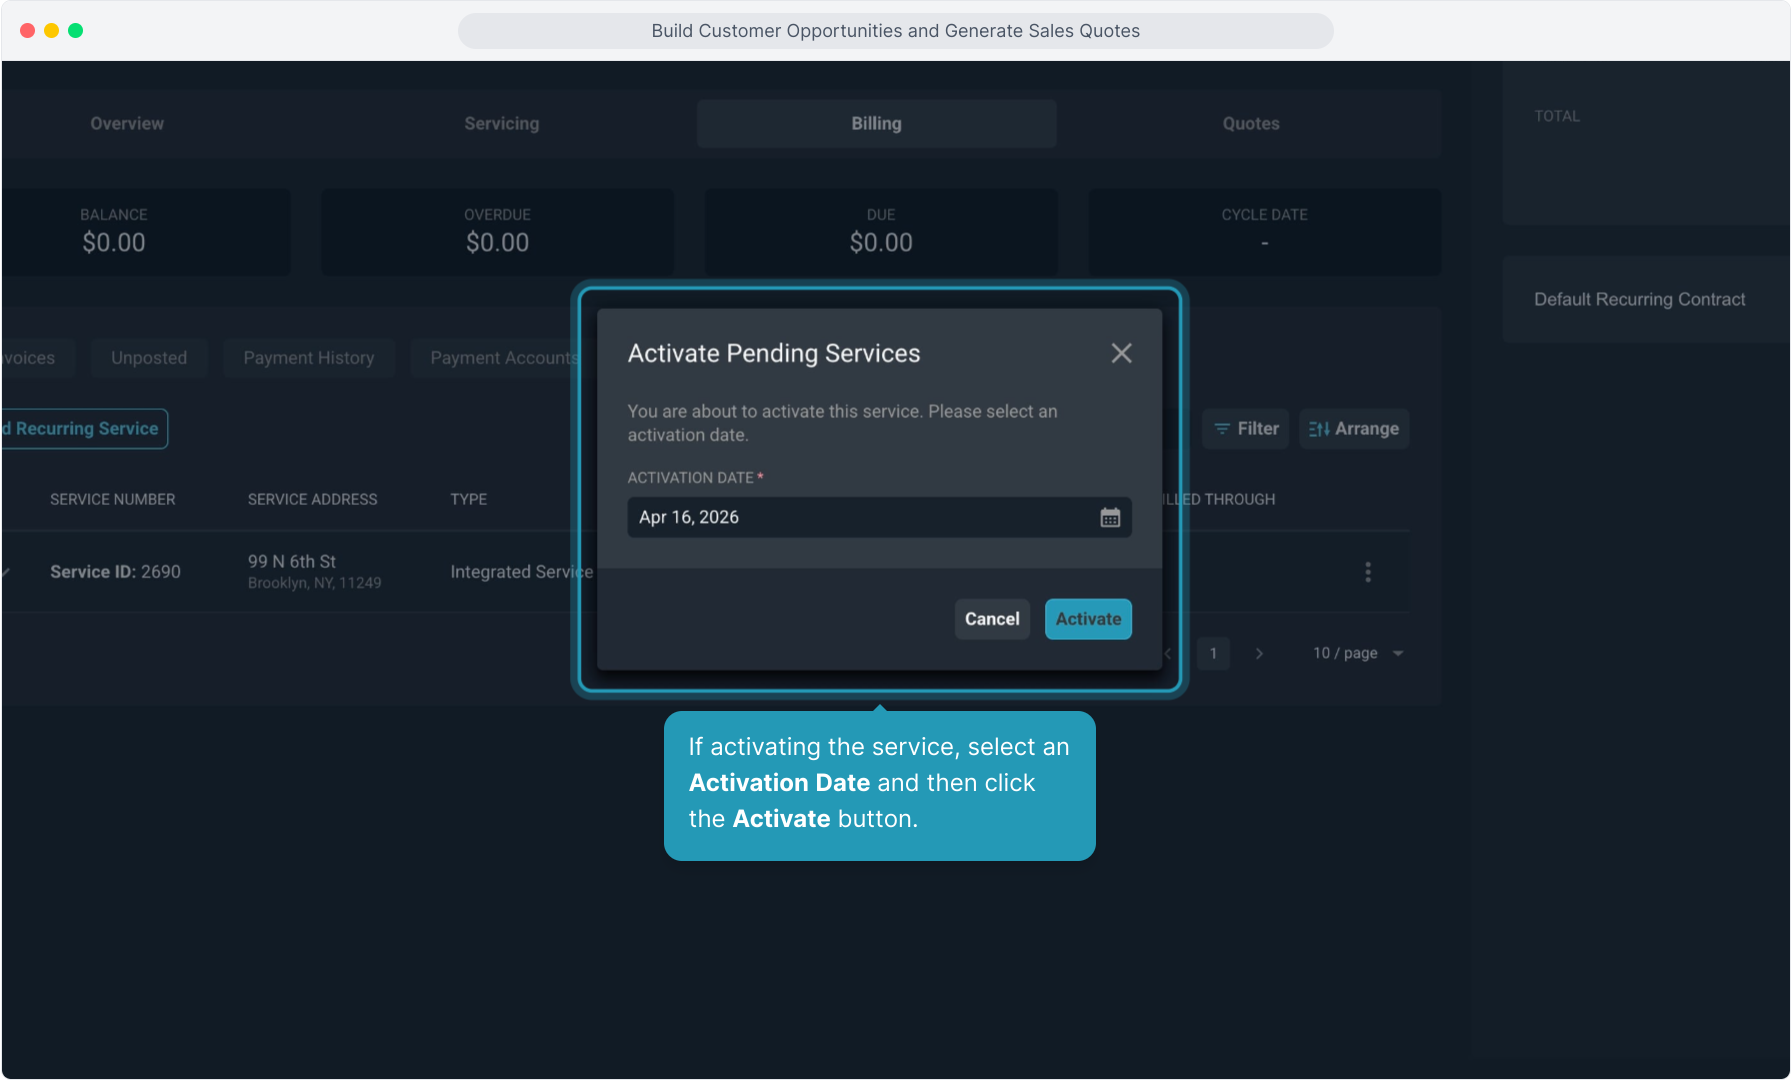
70. Click the 3 dot icon to the right of a service to either Edit Recurring Service or to Activate Service.

71. If activating the service, select an Activation Date and then click the Activate button.
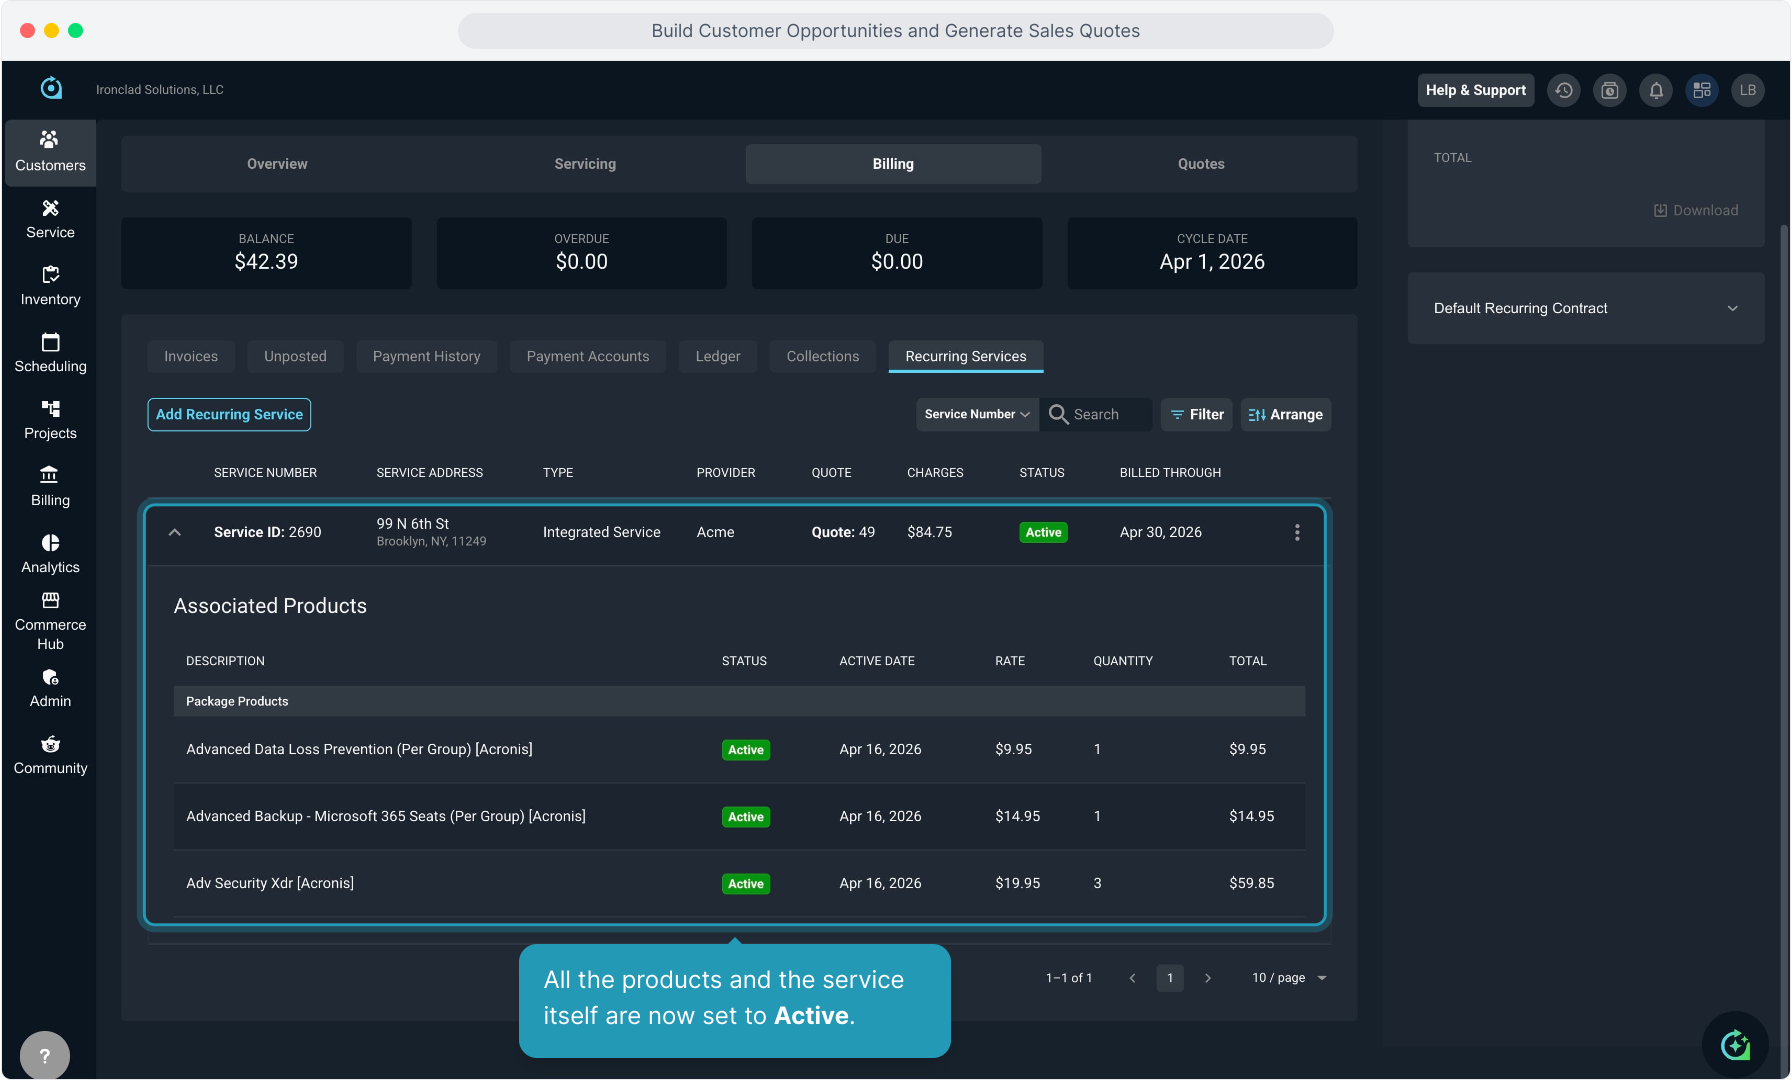
72. All the products and the service itself are now set to Active.
73. Click the Unposted tab to view the charges generated from the products you activated.
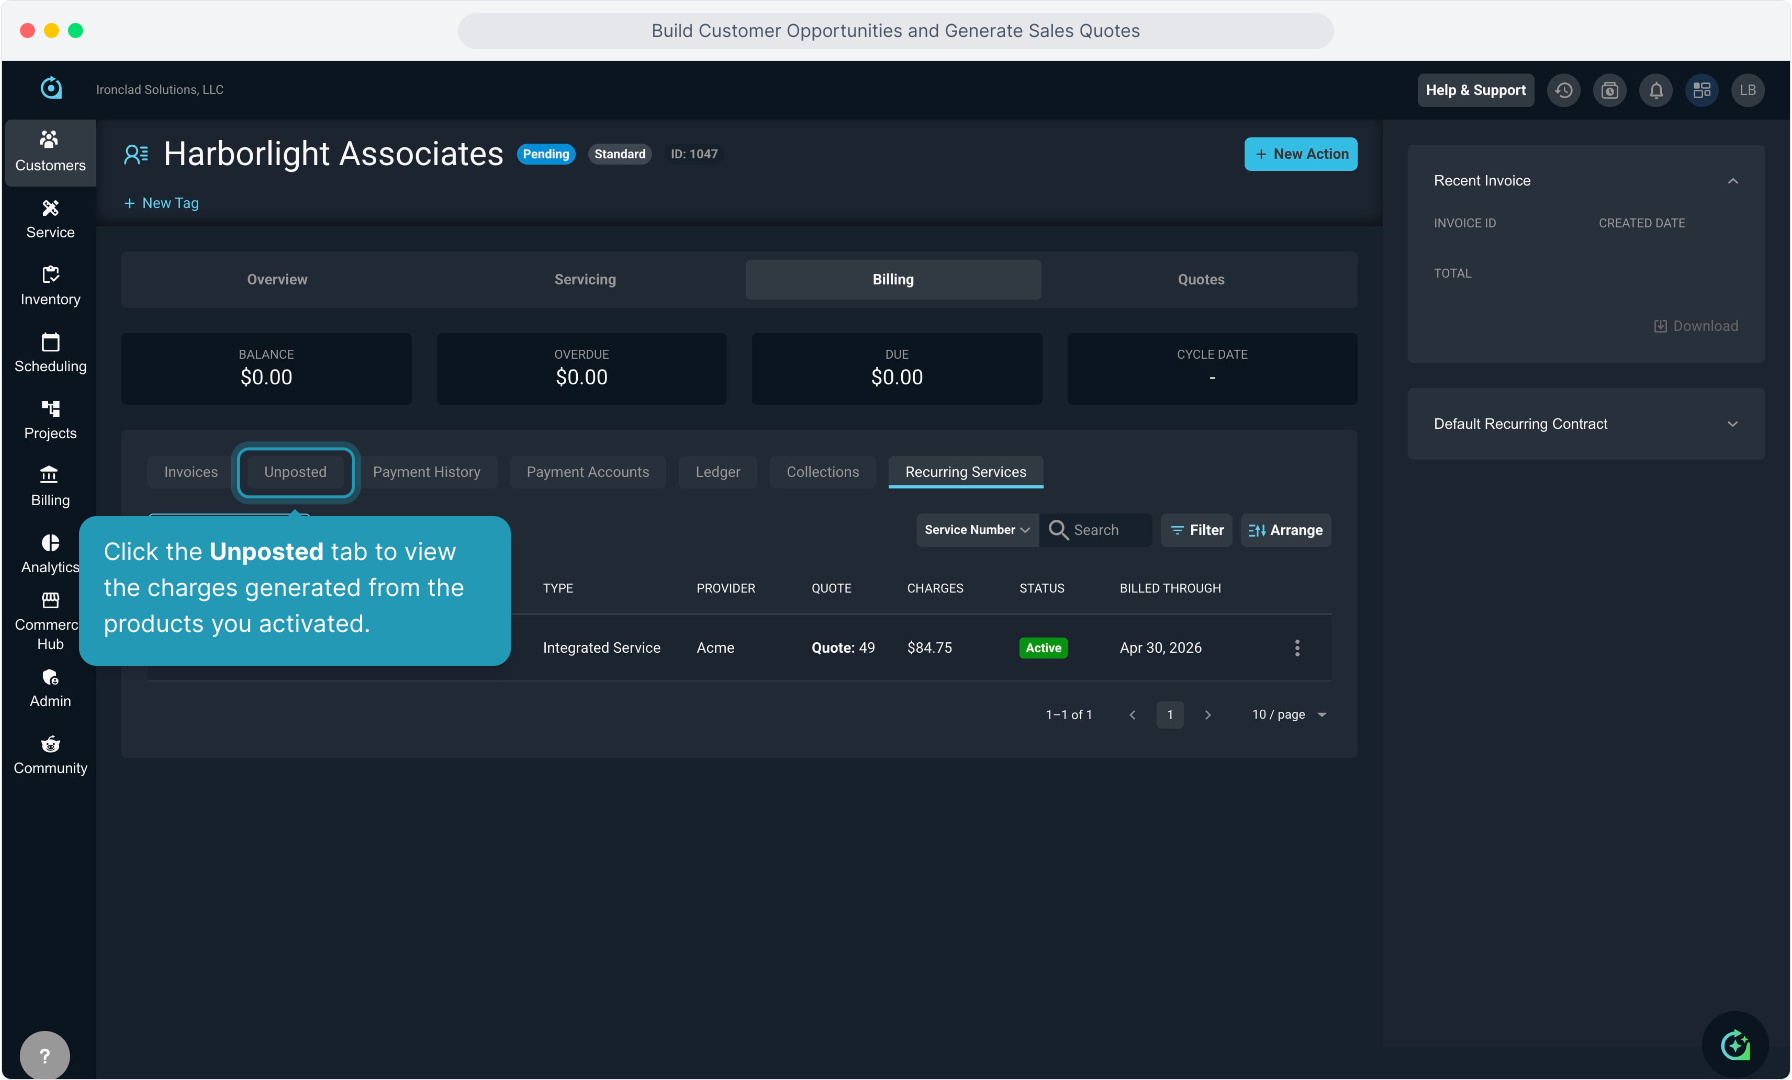
74. You'll see any prorated and full charges related to the products you just activated. These can be sent out on a bill at any time or they will be picked up and billed when the system next cycles based on your bill profile settings.
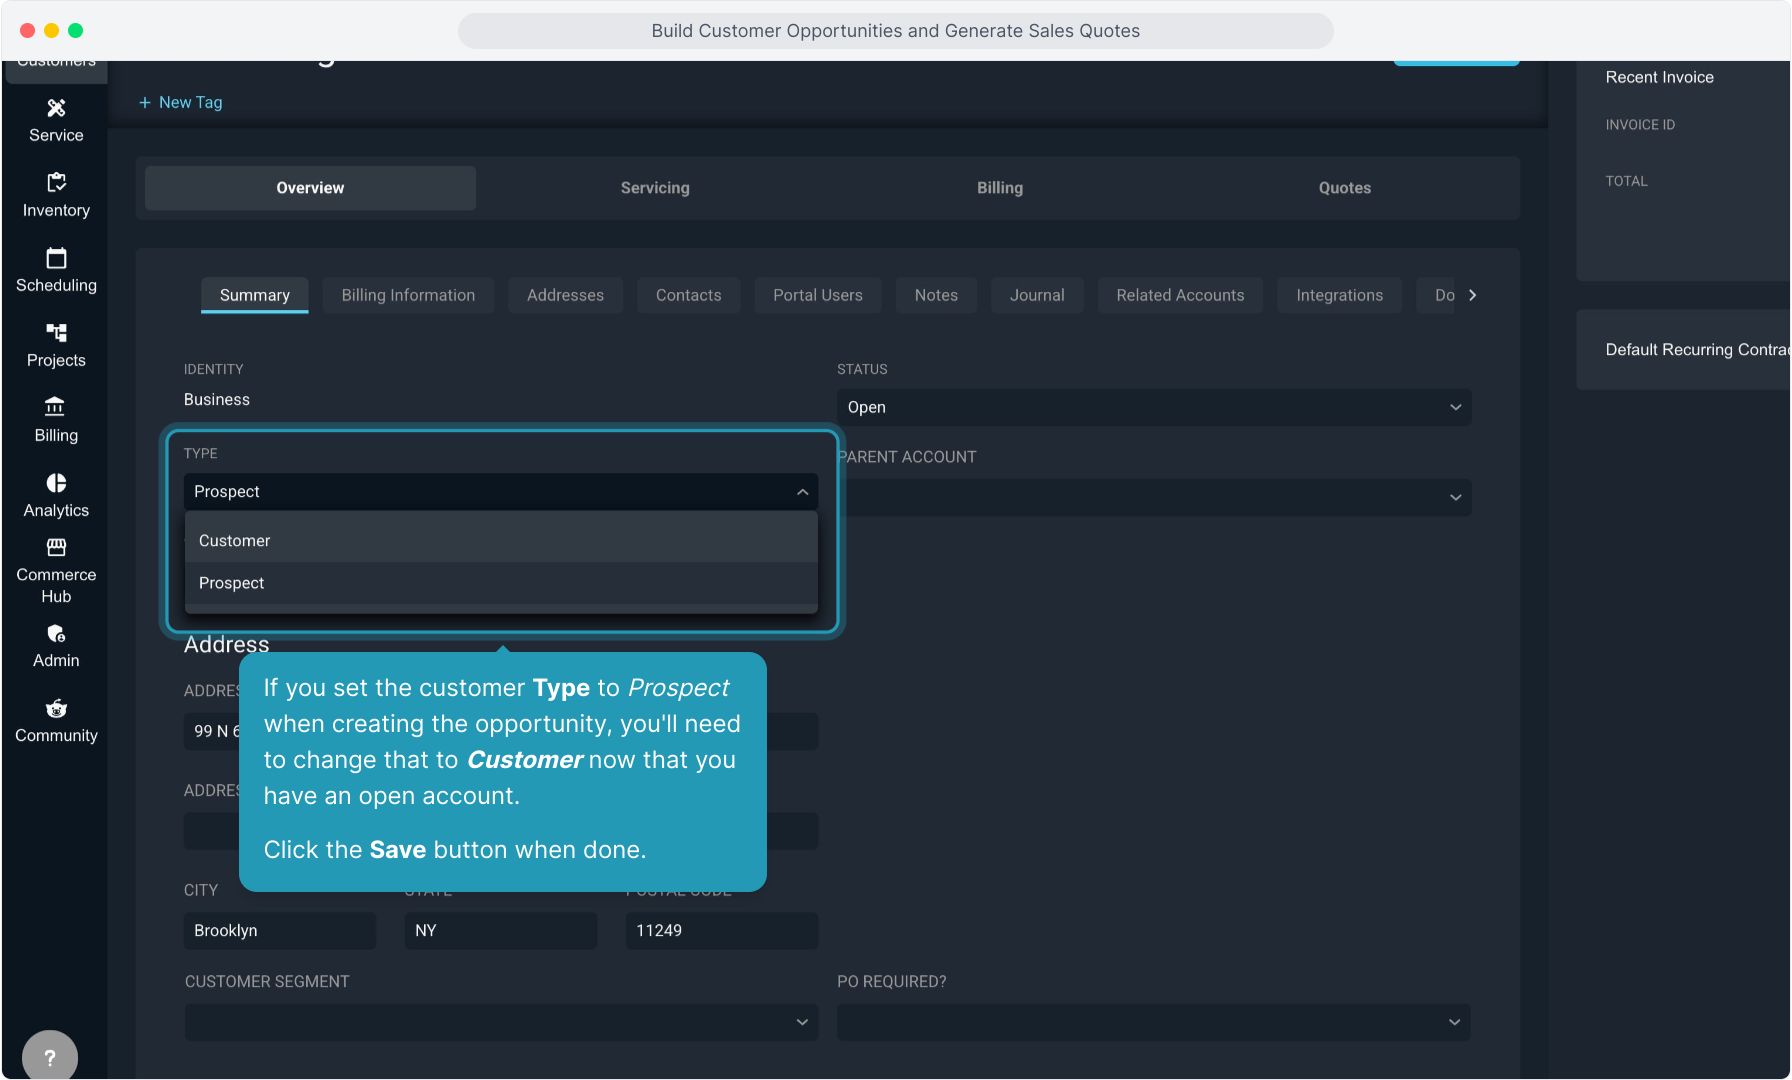
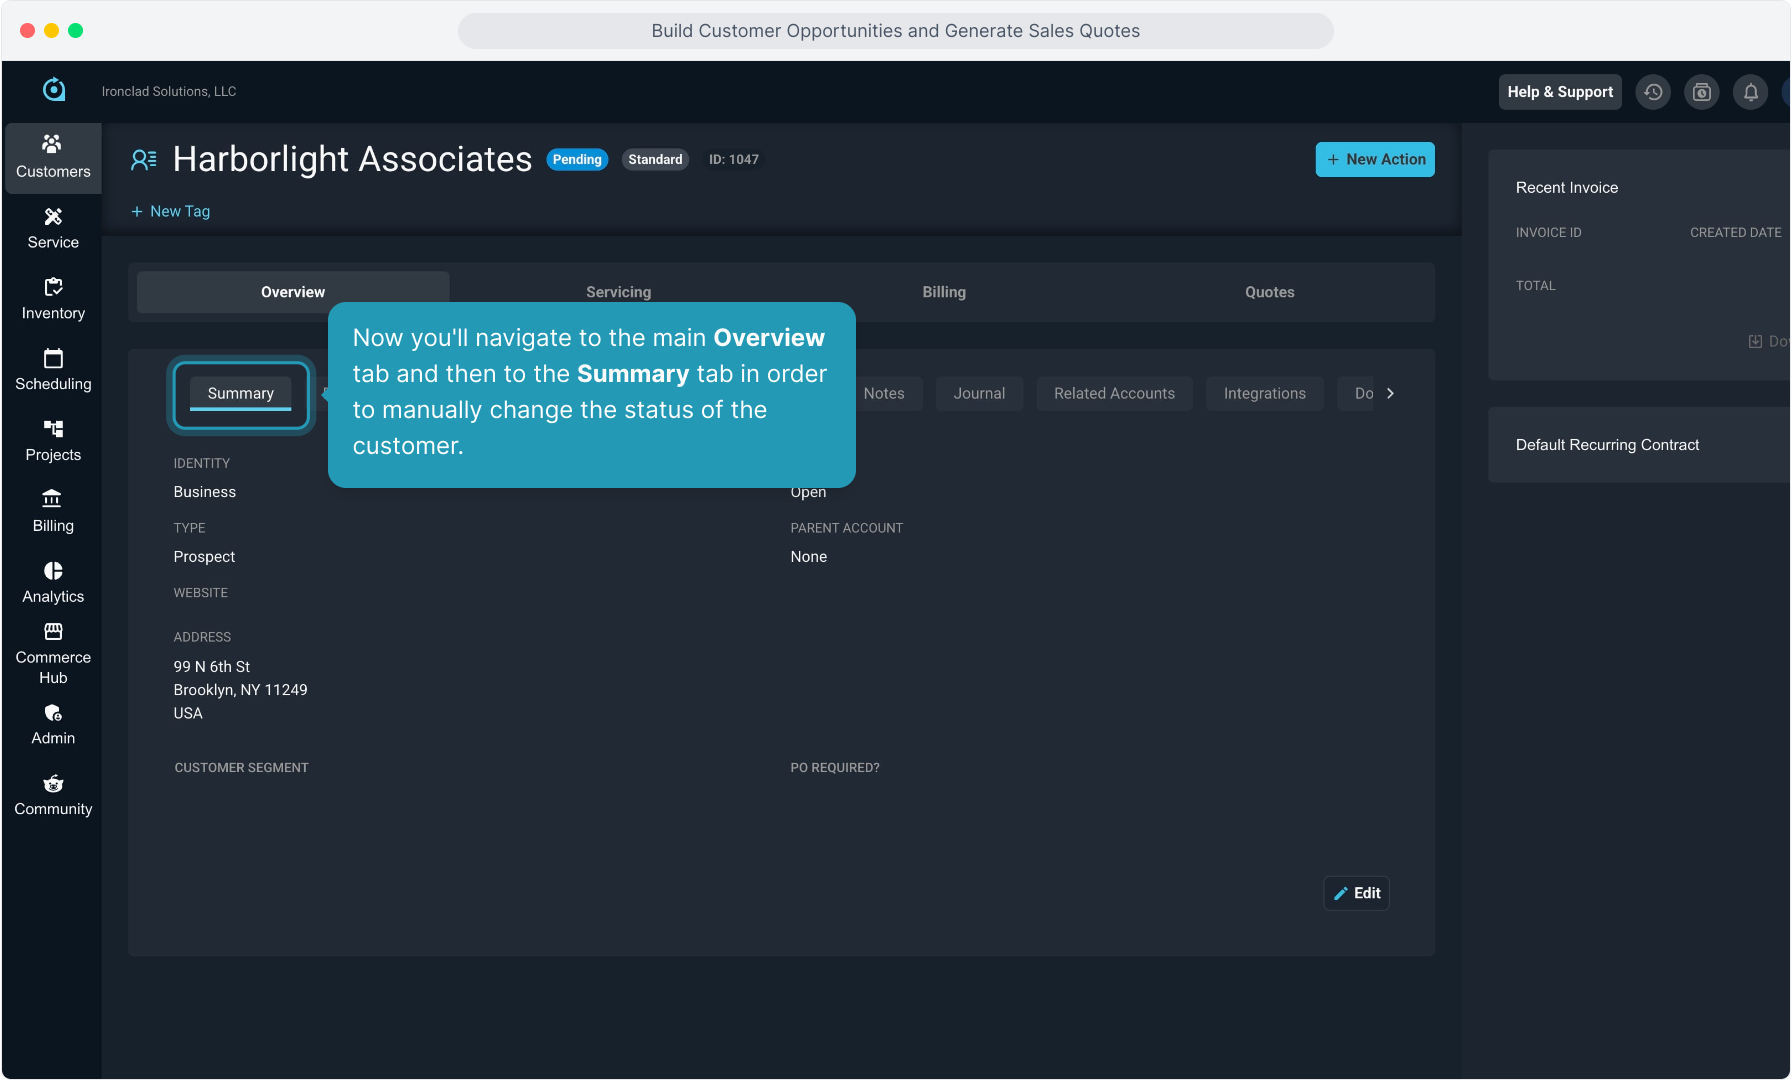
75. Now you'll navigate to the main Overview tab and then to the Summary tab in order to manually change the status of the customer.
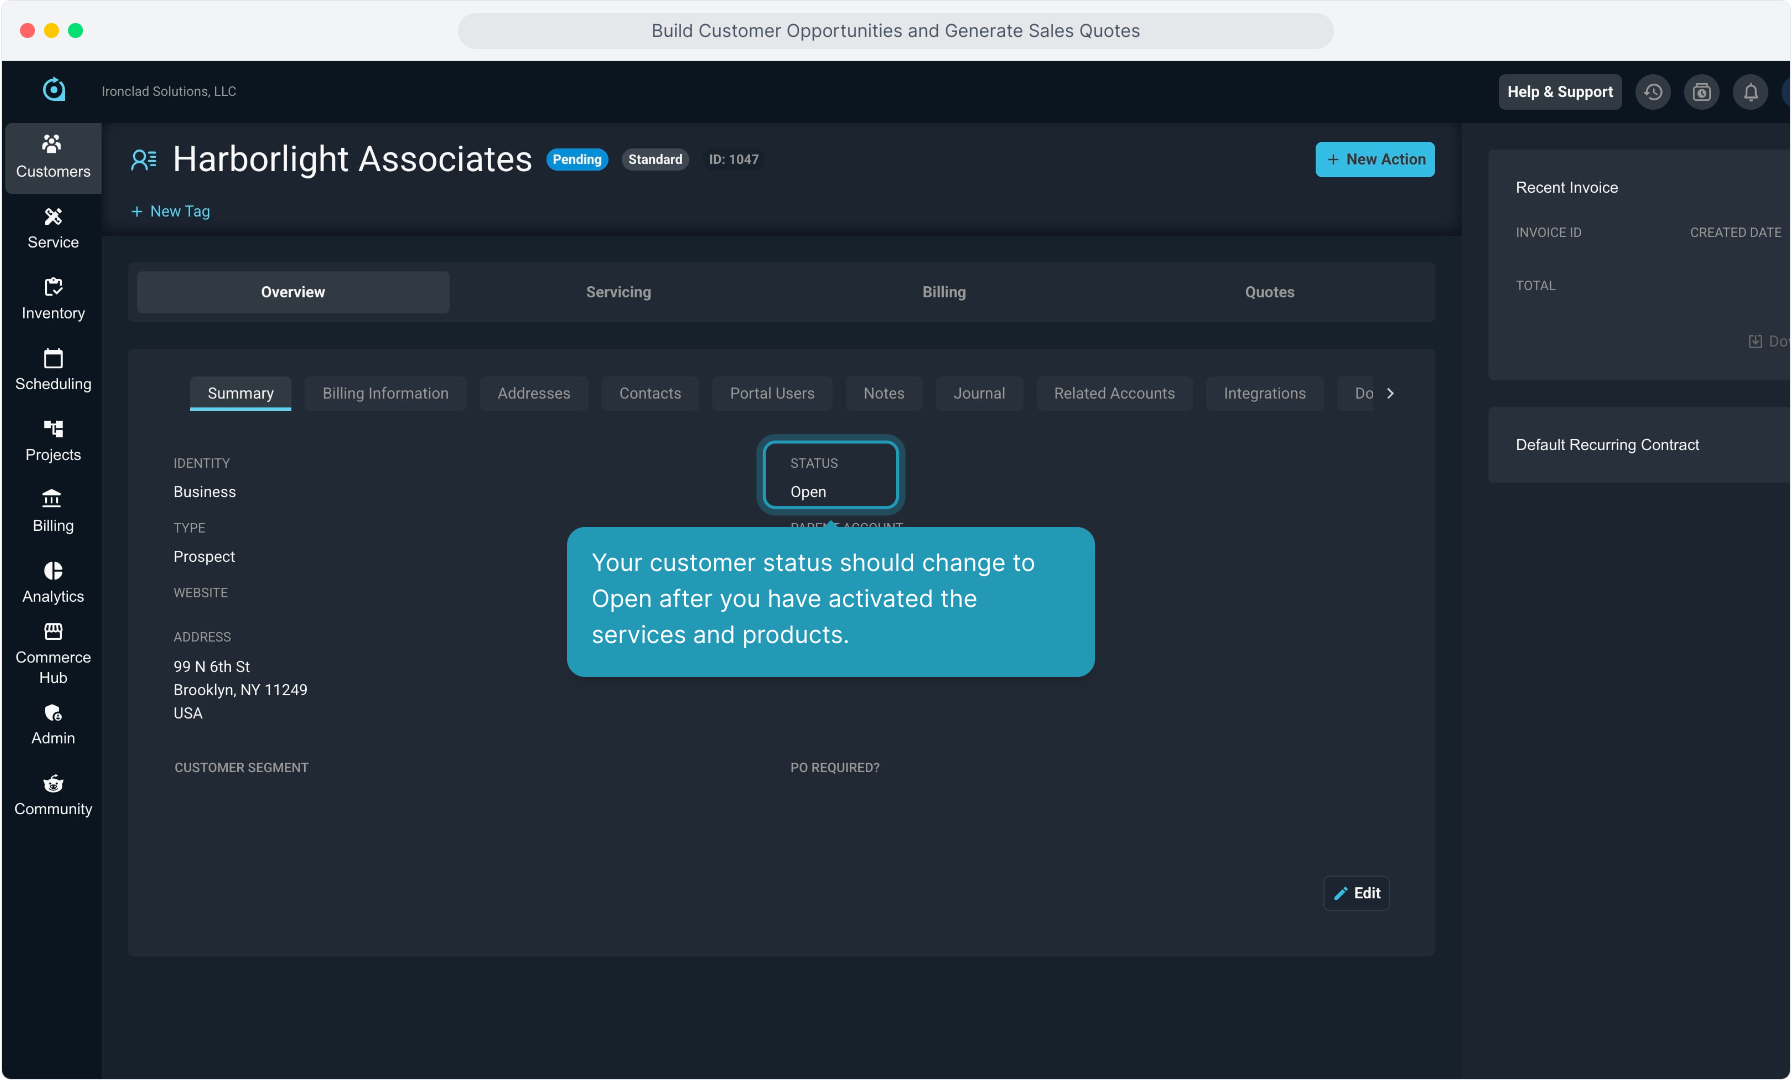
76. Your customer status should change to Open after you have activated the services and products.
77. Click the Edit button.
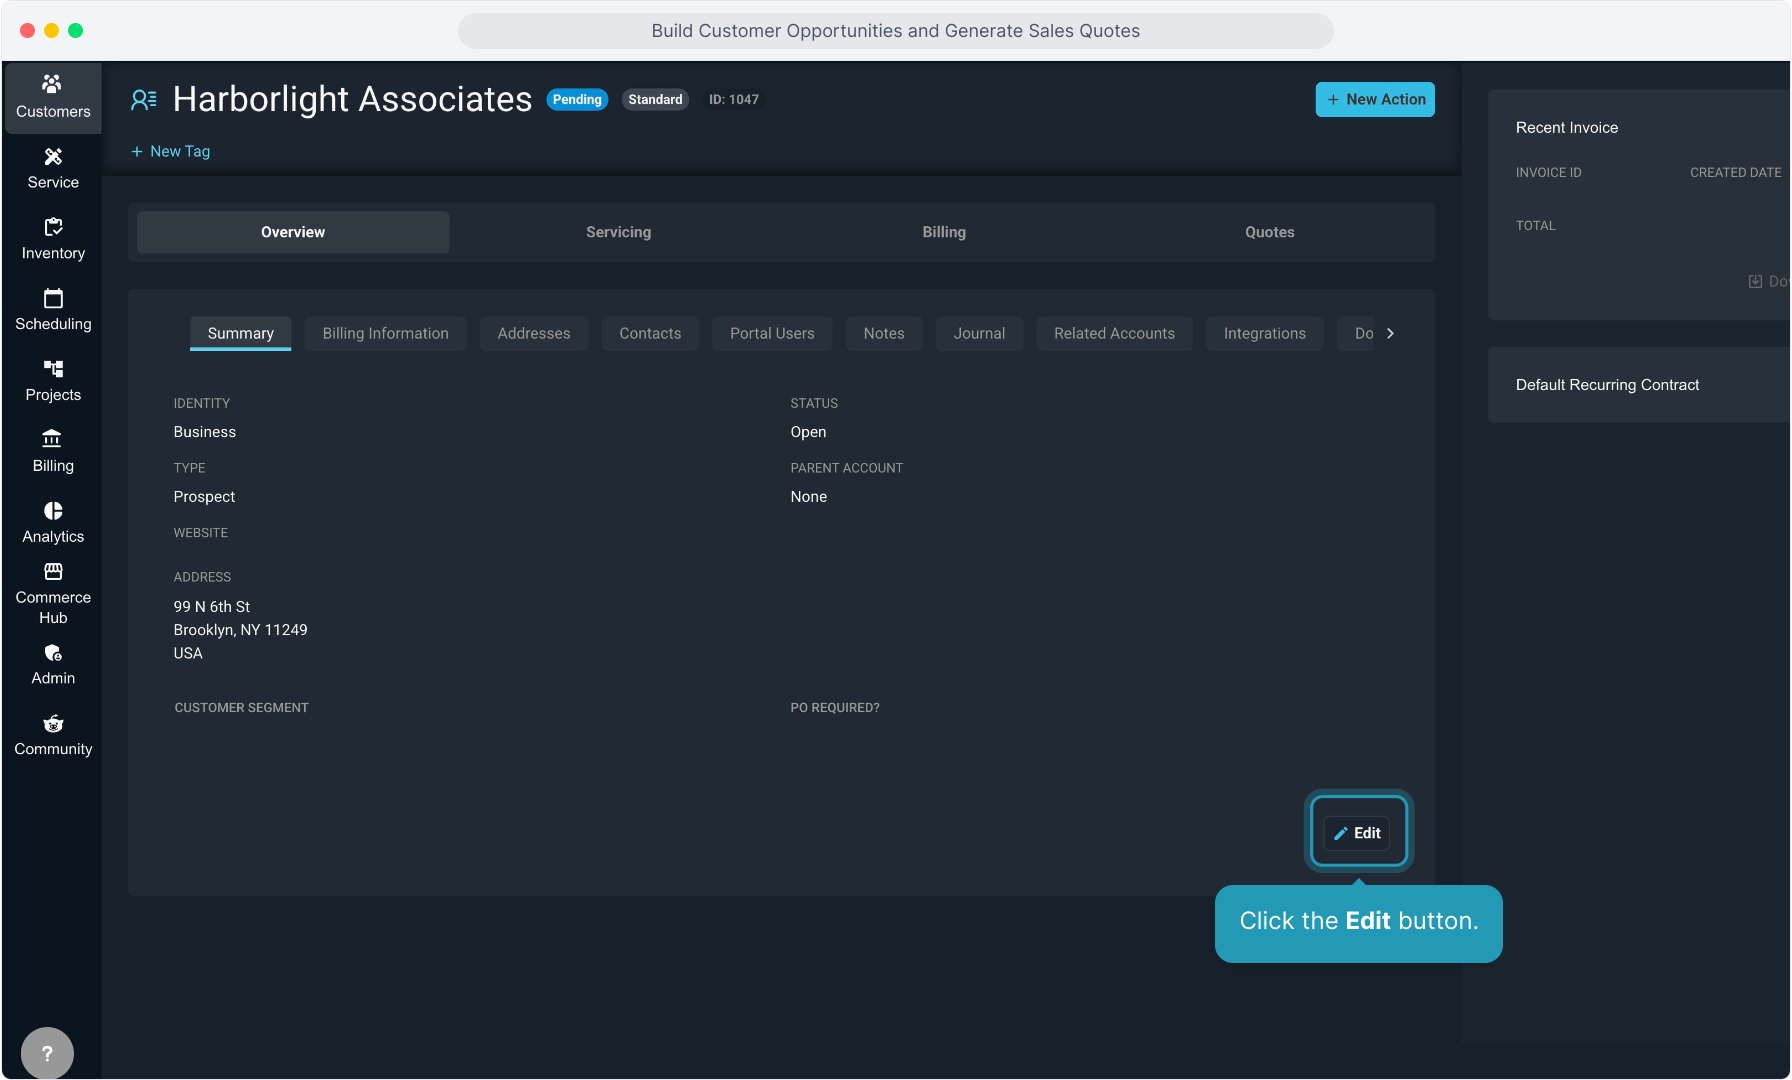
78. If you set the customer Type to Prospect when creating the opportunity, you'll need to change that to Customer now that you have an open account. Click the Save button when done.