How To Guide: Billing - Charges Generated from Quotes
1. Introduction
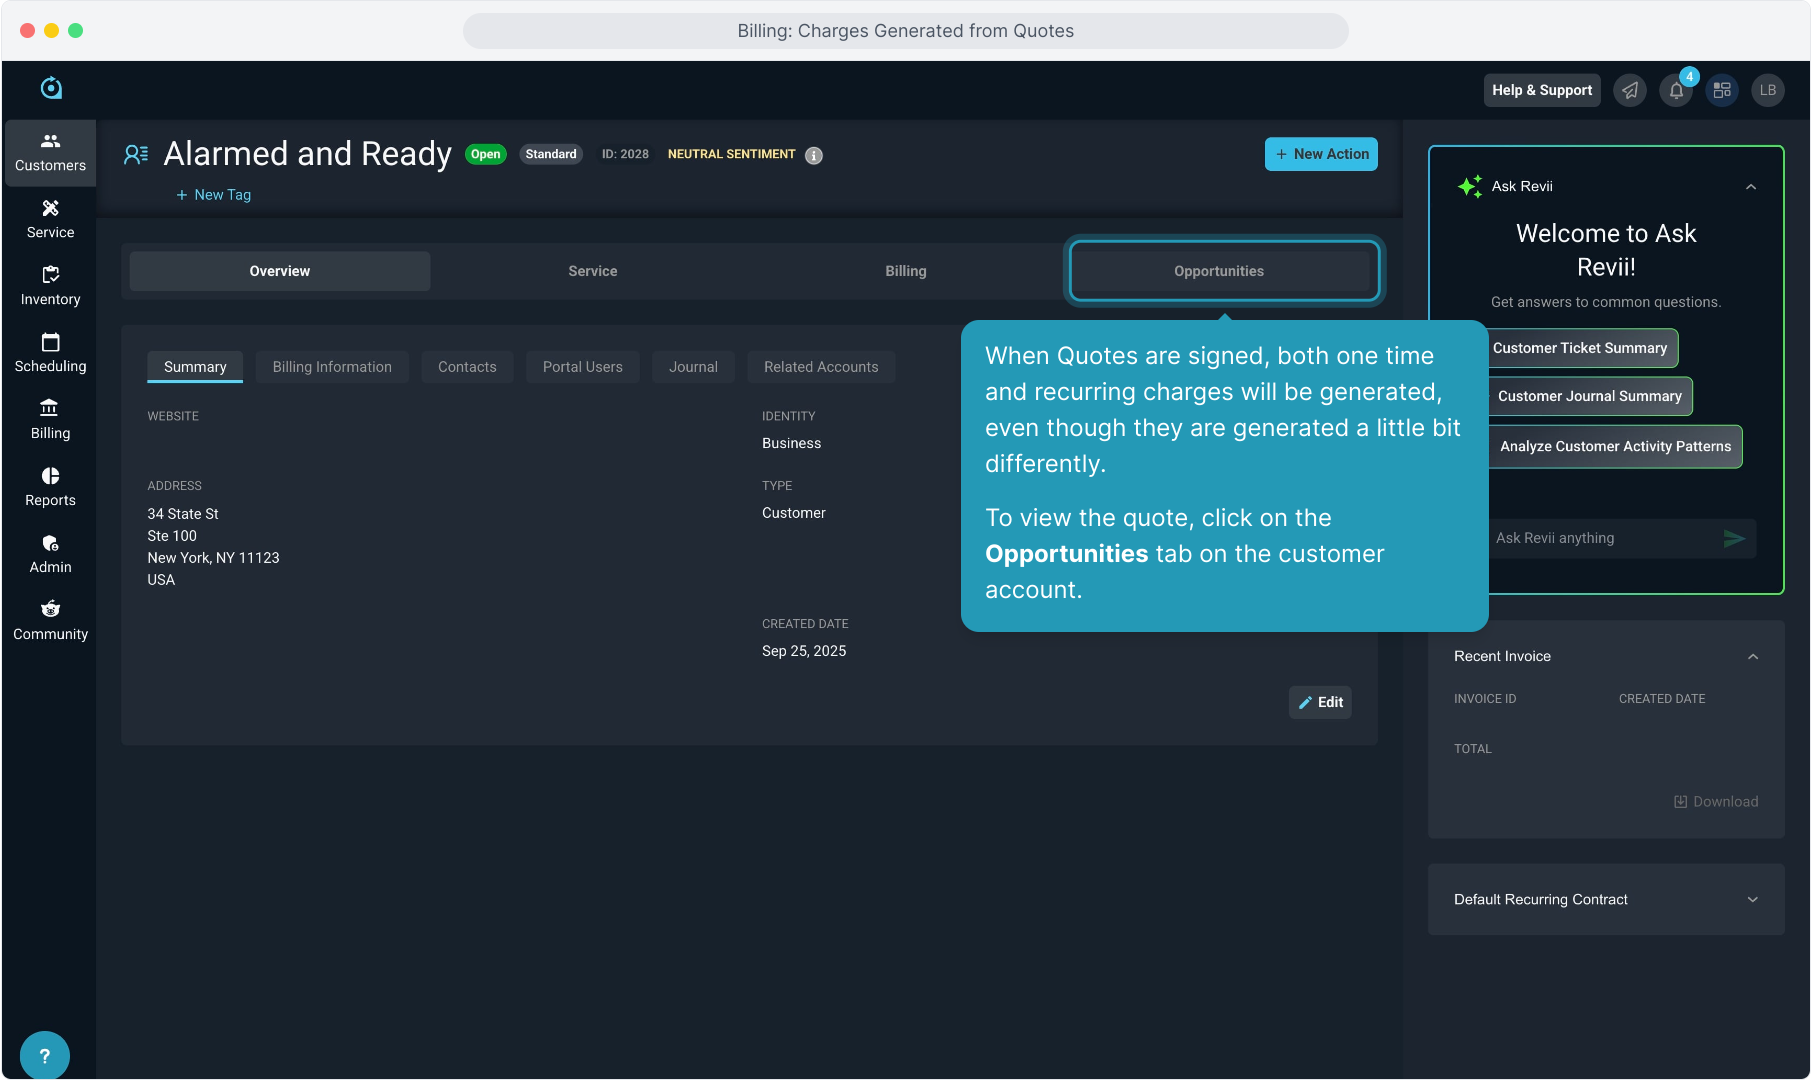
2. When Quotes are signed, both one time and recurring charges will be generated, even though they are generated a little bit differently.
To view the quote, click on the Opportunities tab on the customer account.
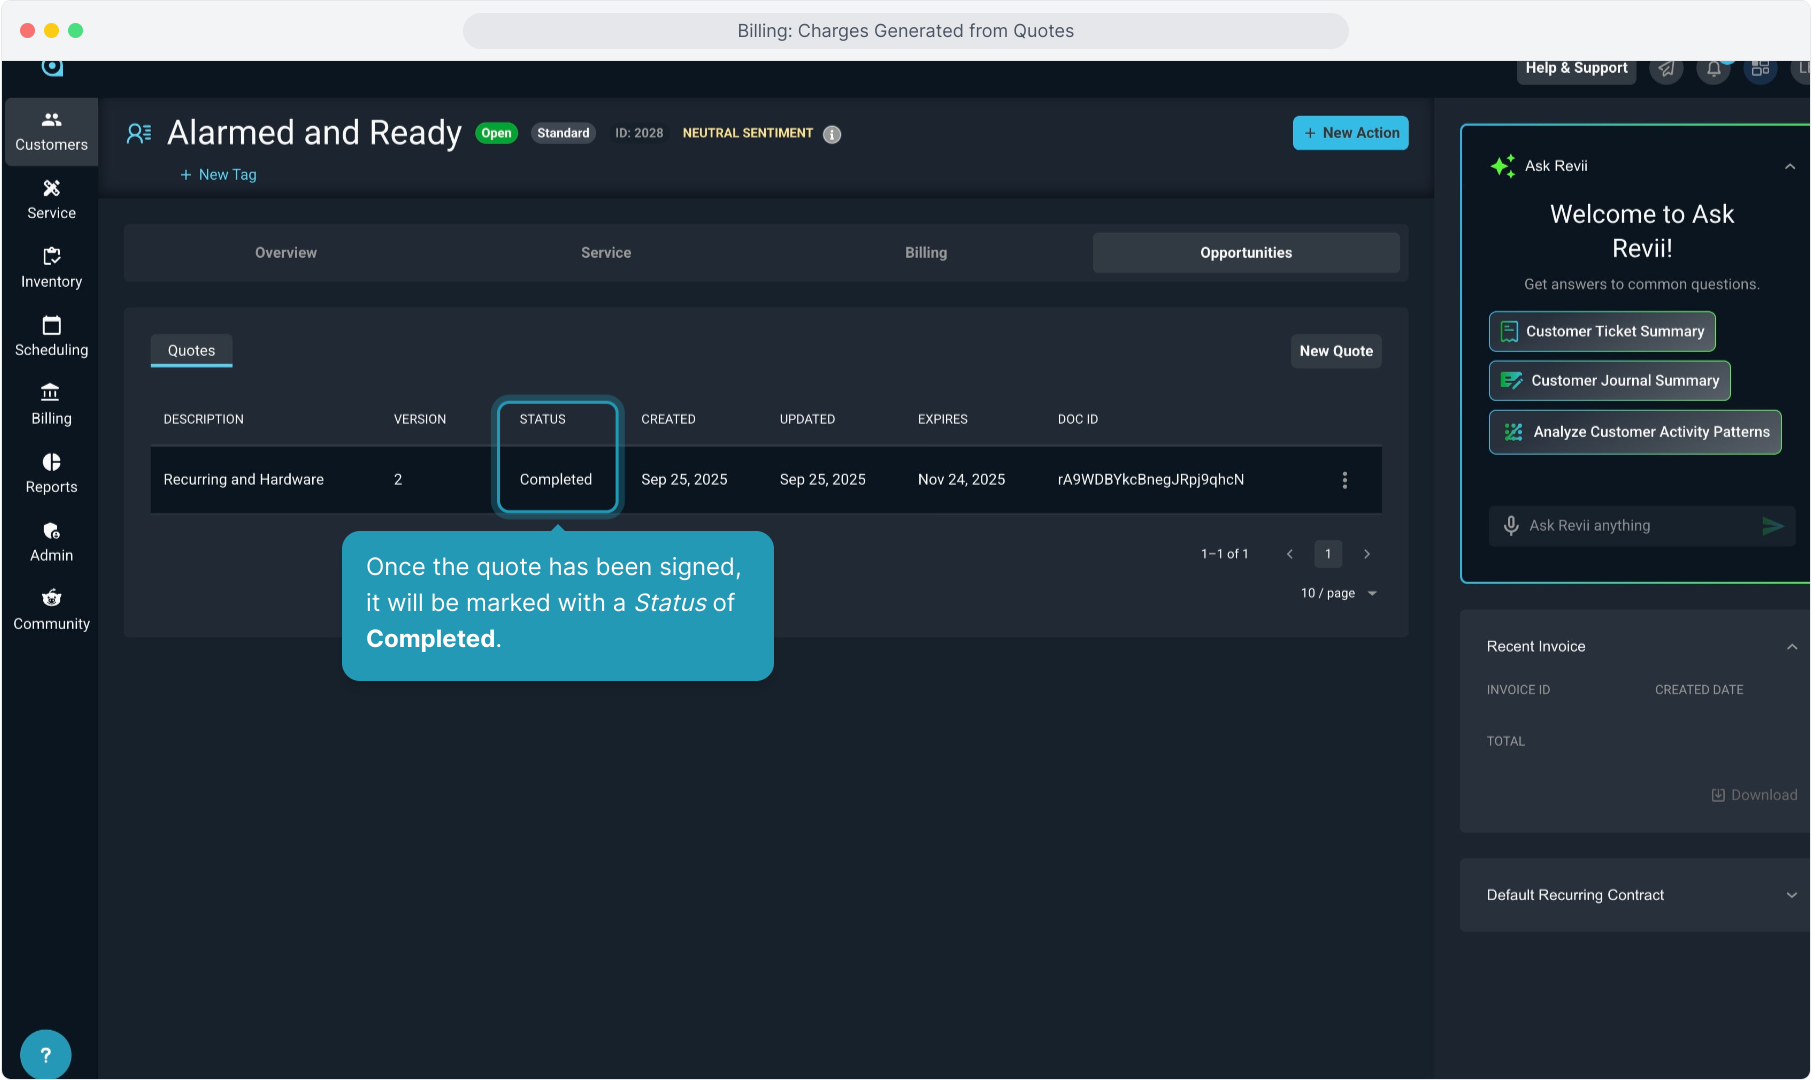
3. Once the quote has been signed, it will be marked with a Status of Completed.
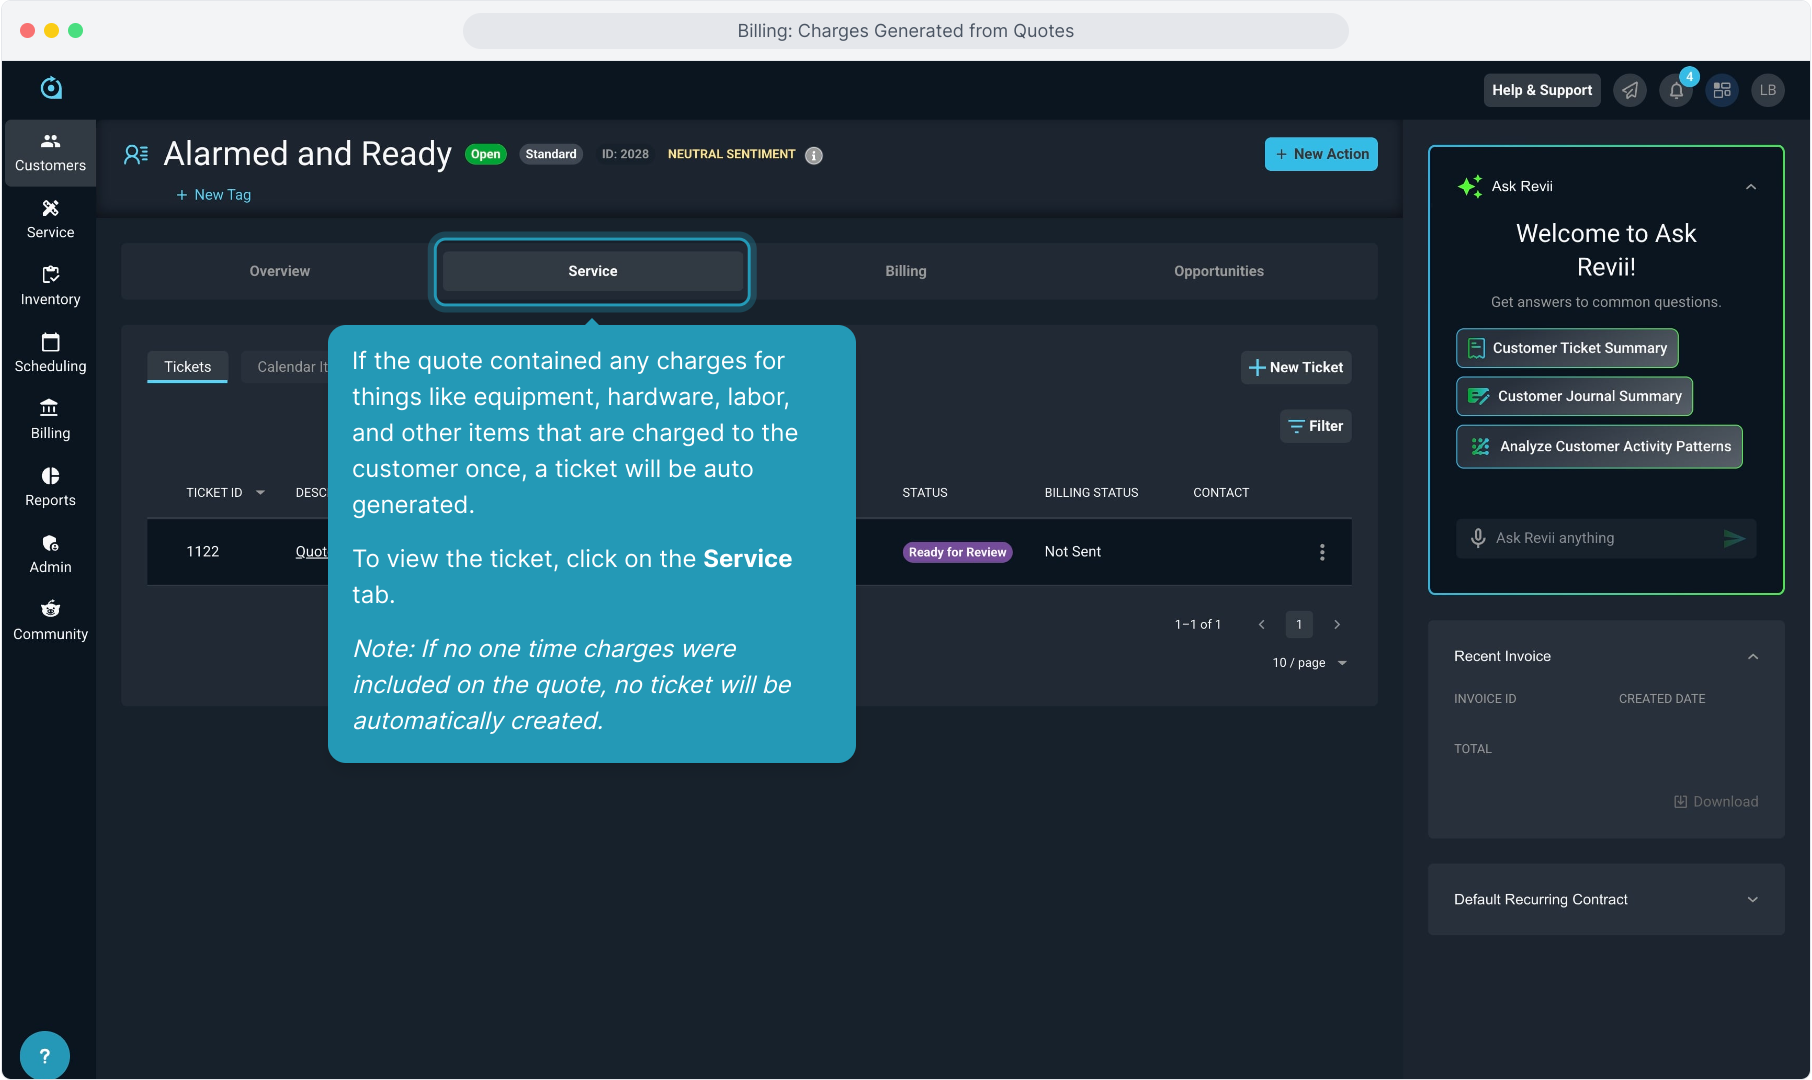
4. If the quote contained any charges for things like equipment, hardware, labor, and other items that are charged to the customer once, a ticket will be auto generated.
To view the ticket, click on the Service tab.
Note: If no one time charges were included on the quote, no ticket will be automatically created.
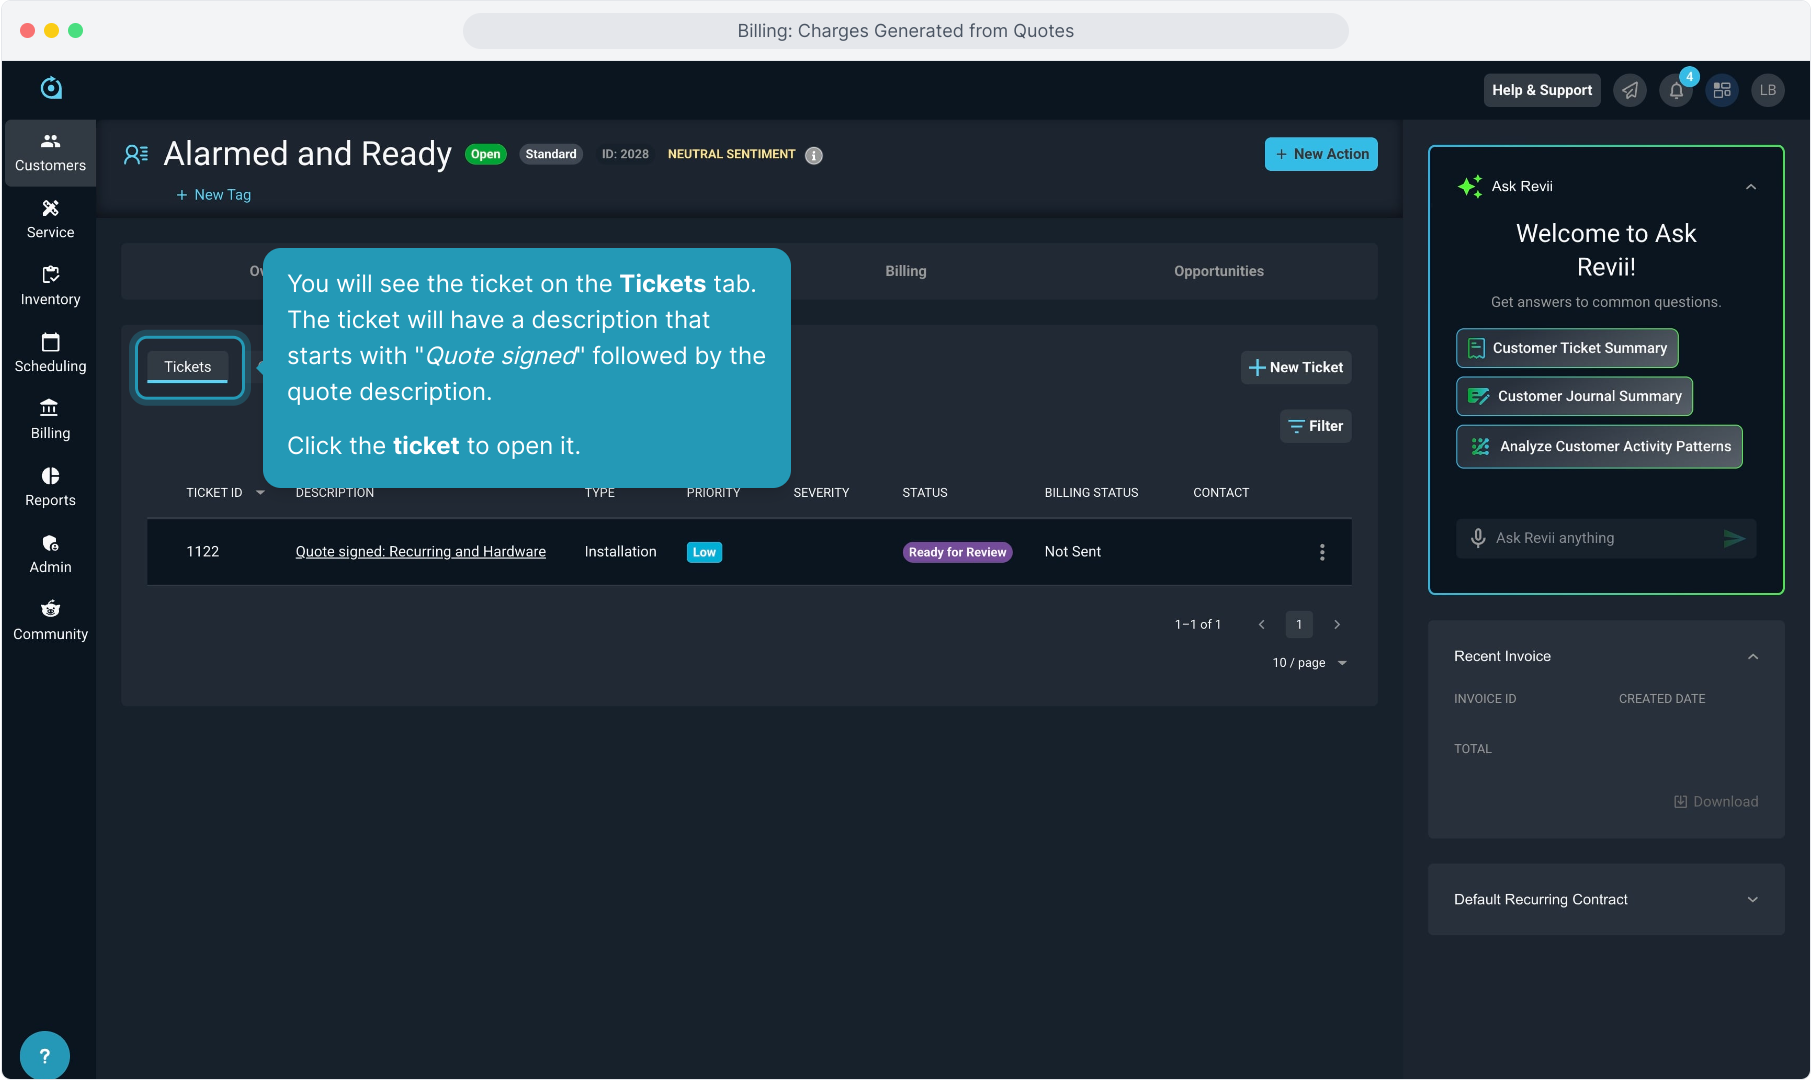
5. You will see the ticket on the Tickets tab. The ticket will have a description that starts with "Quote signed" followed by the quote description.
Click the ticket to open it.
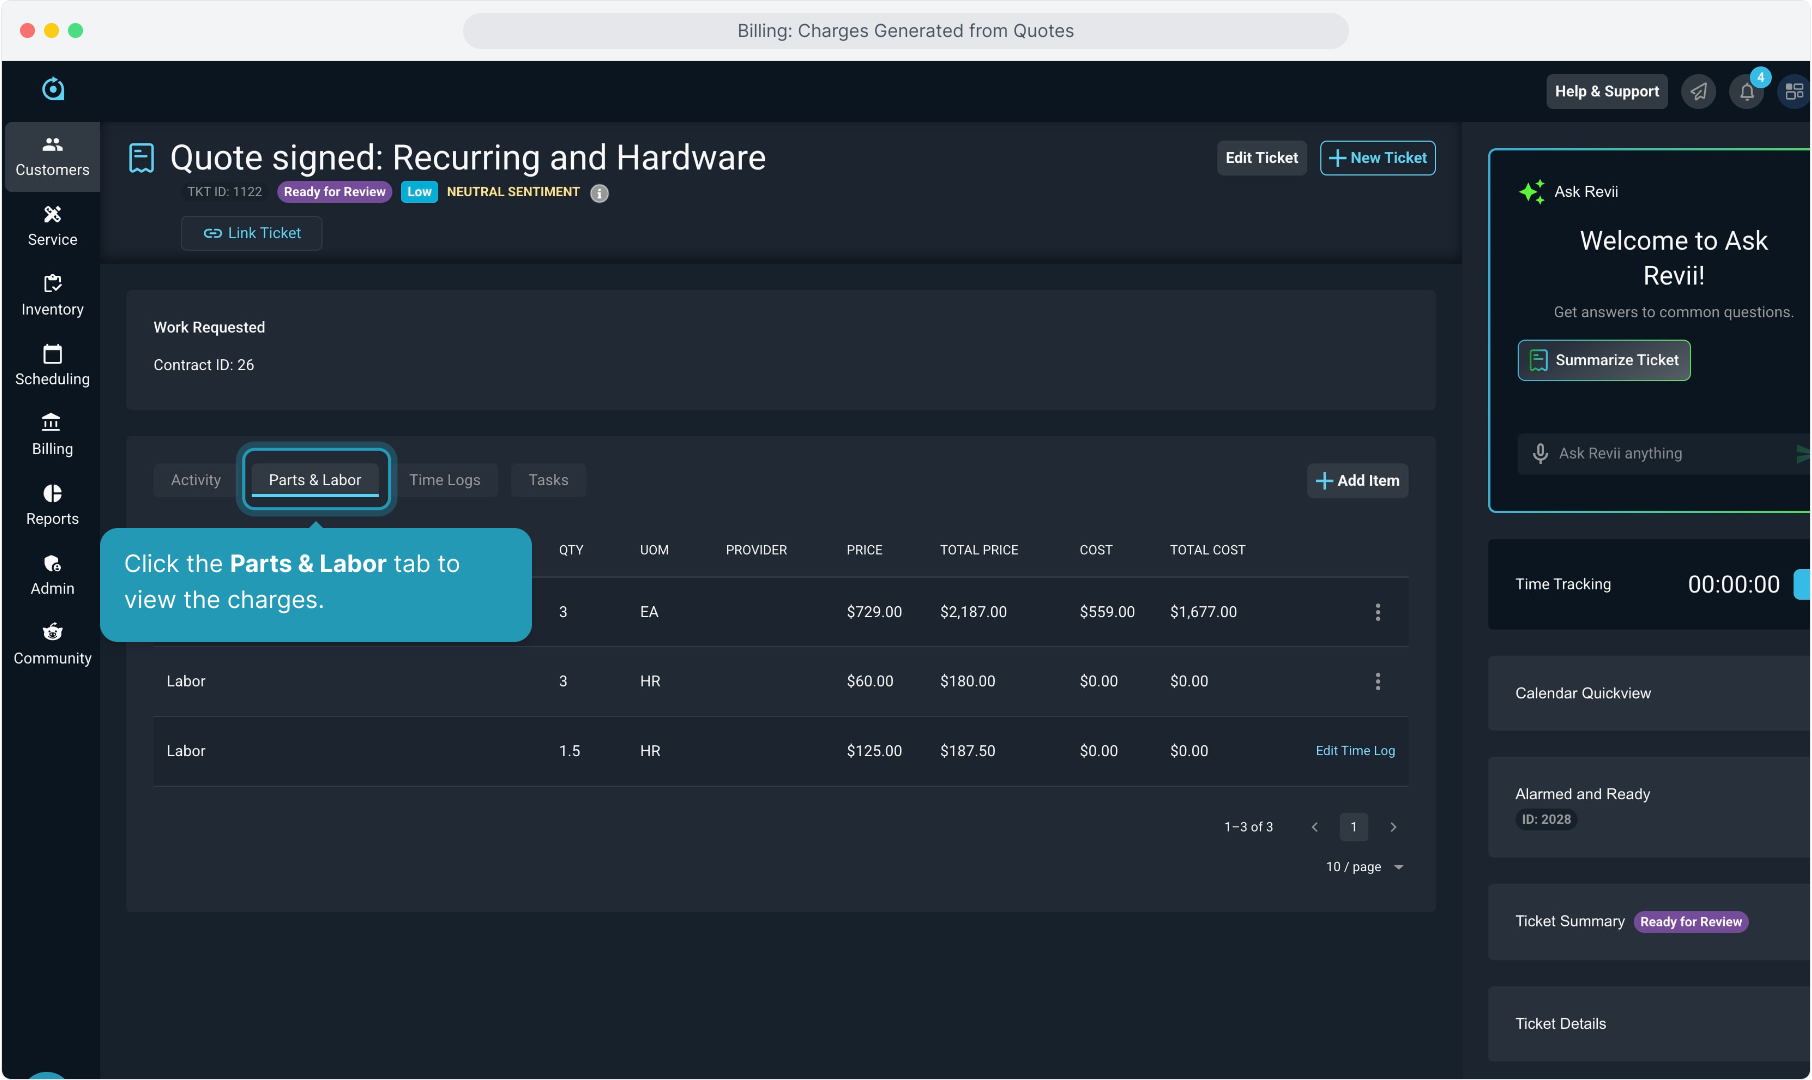
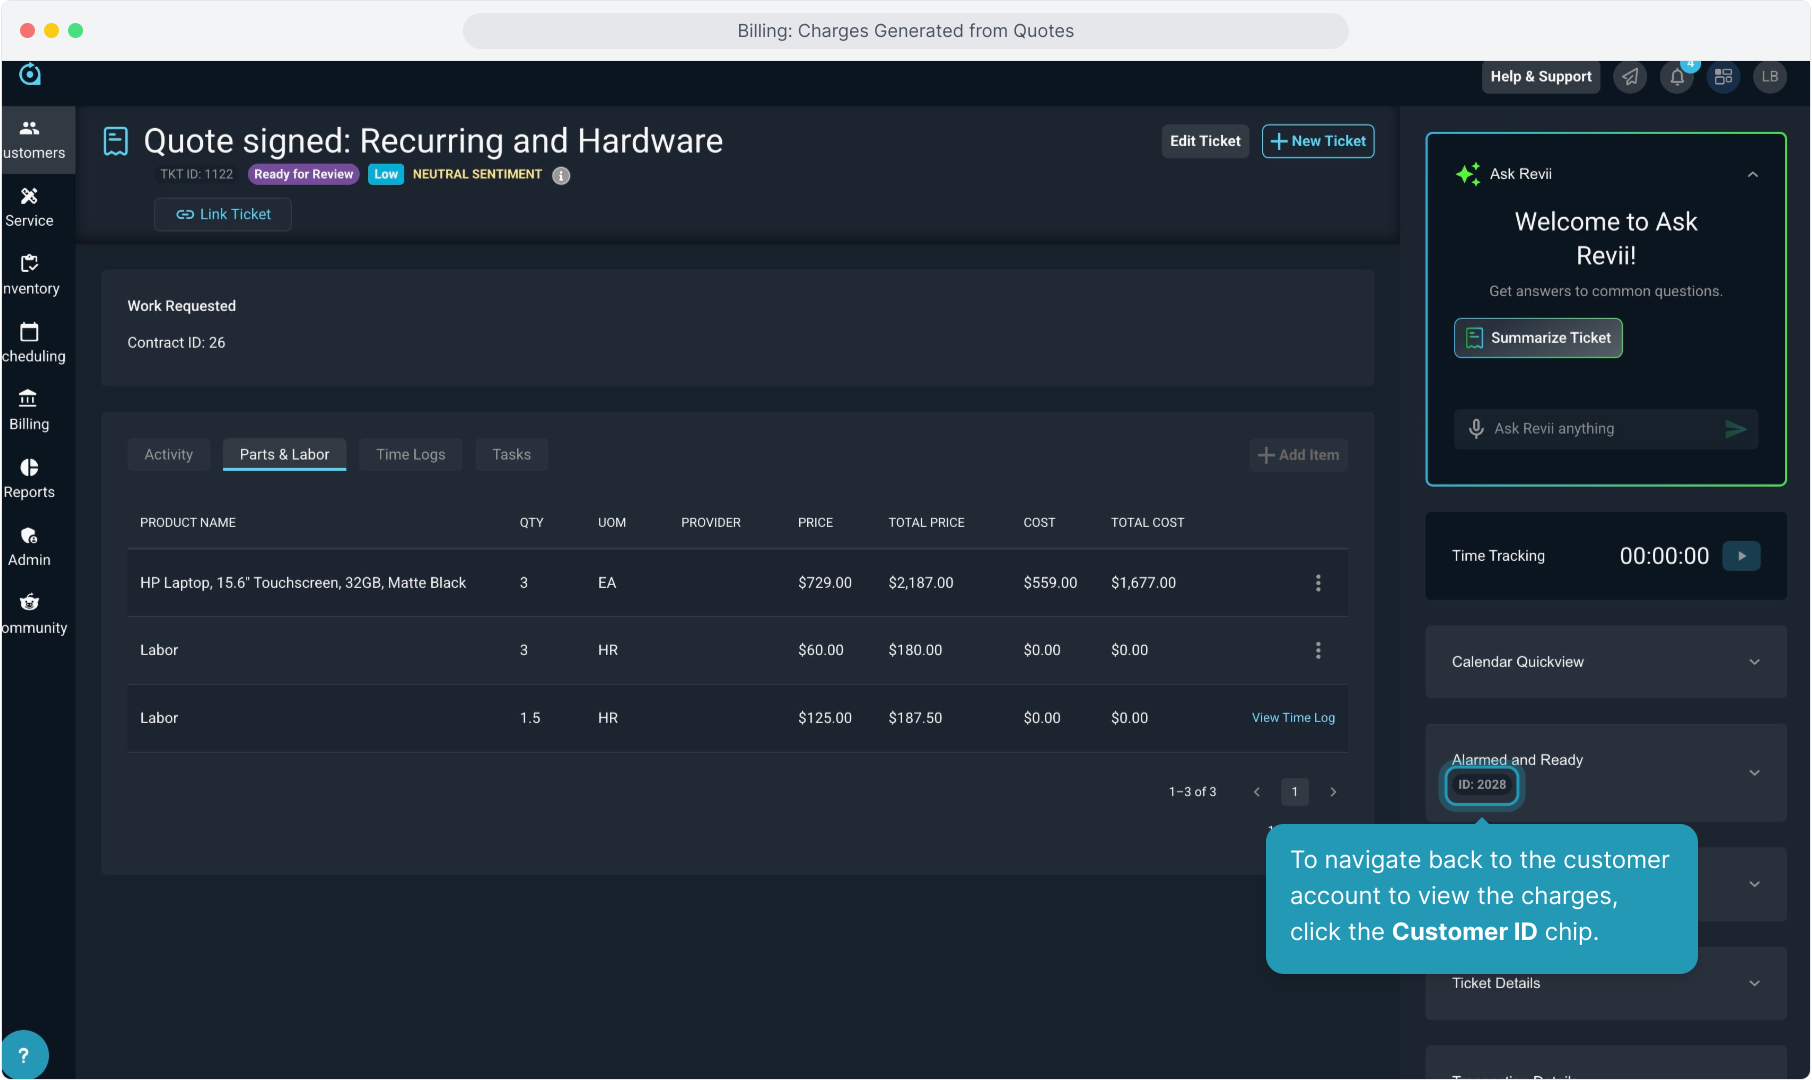
6. Click the Parts & Labor tab to view the charges.
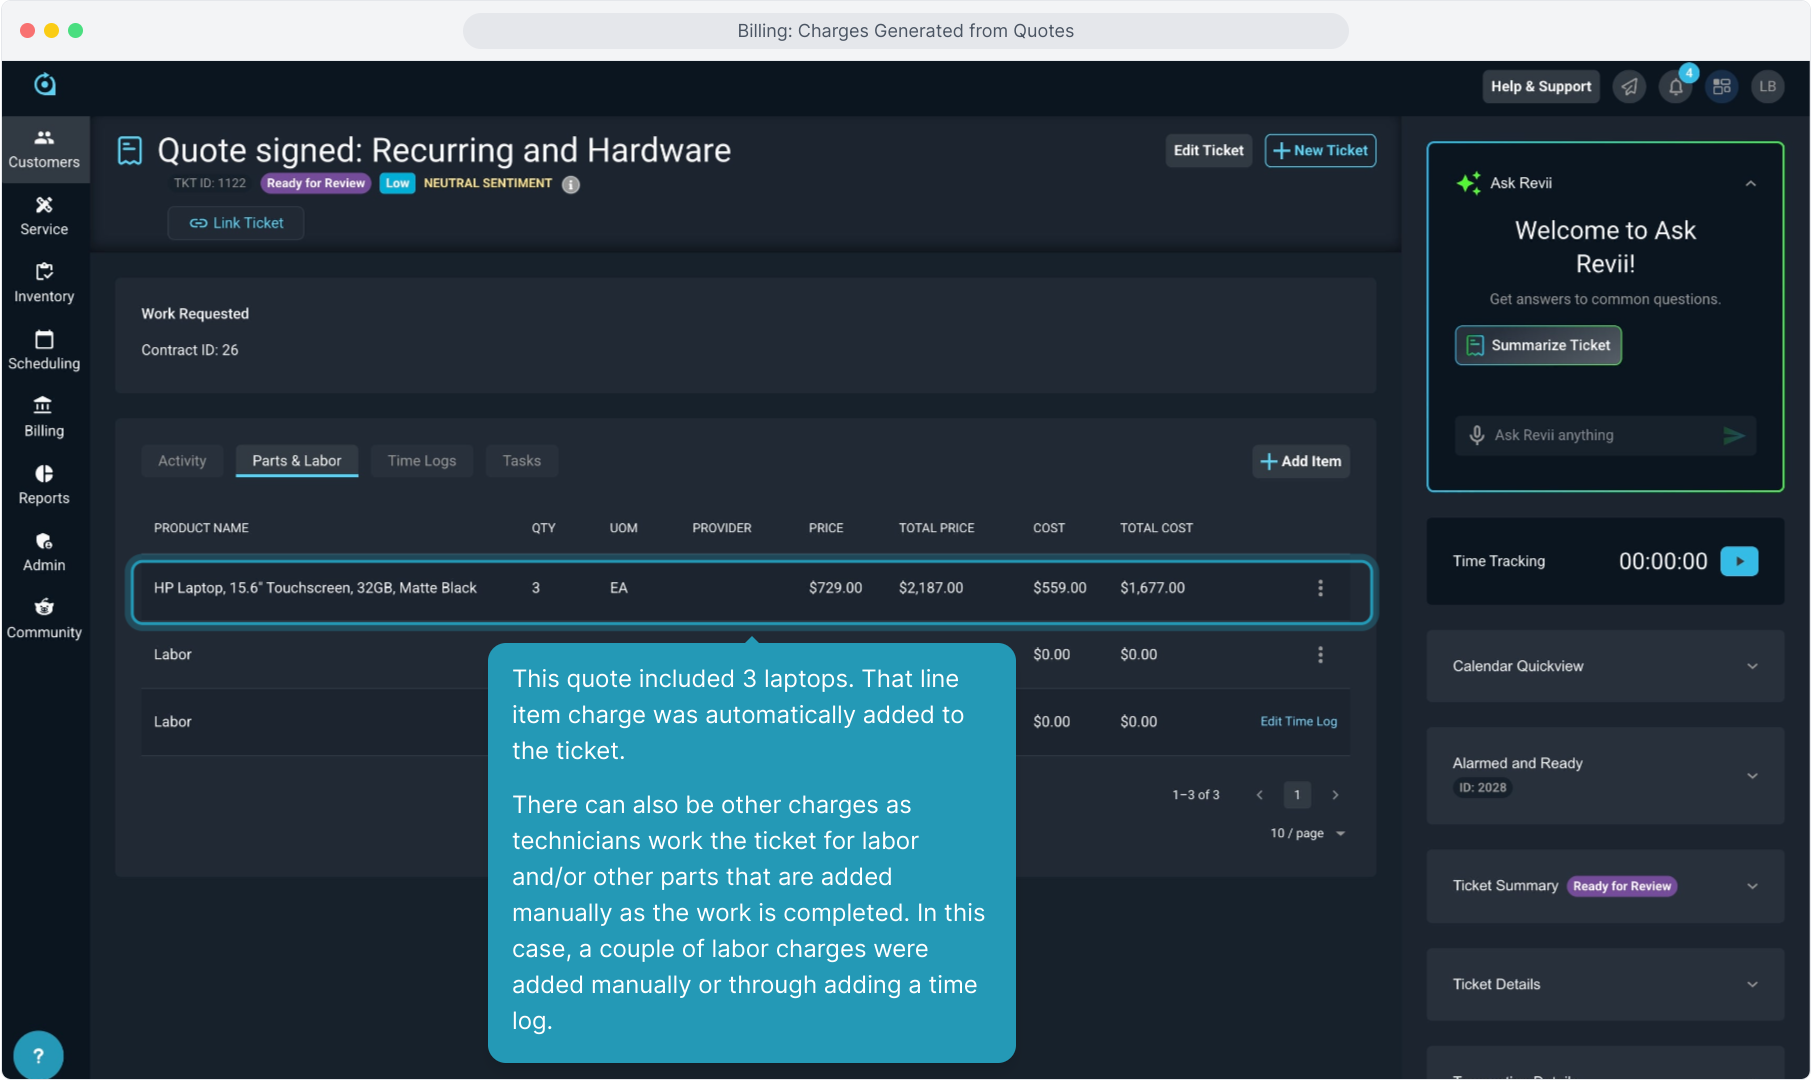
7. This quote included 3 laptops. That line item charge was automatically added to the ticket.
There can also be other charges as technicians work the ticket for labor and/or other parts that are added manually as the work is completed. In this case, a couple of labor charges were added manually or through adding a time log.
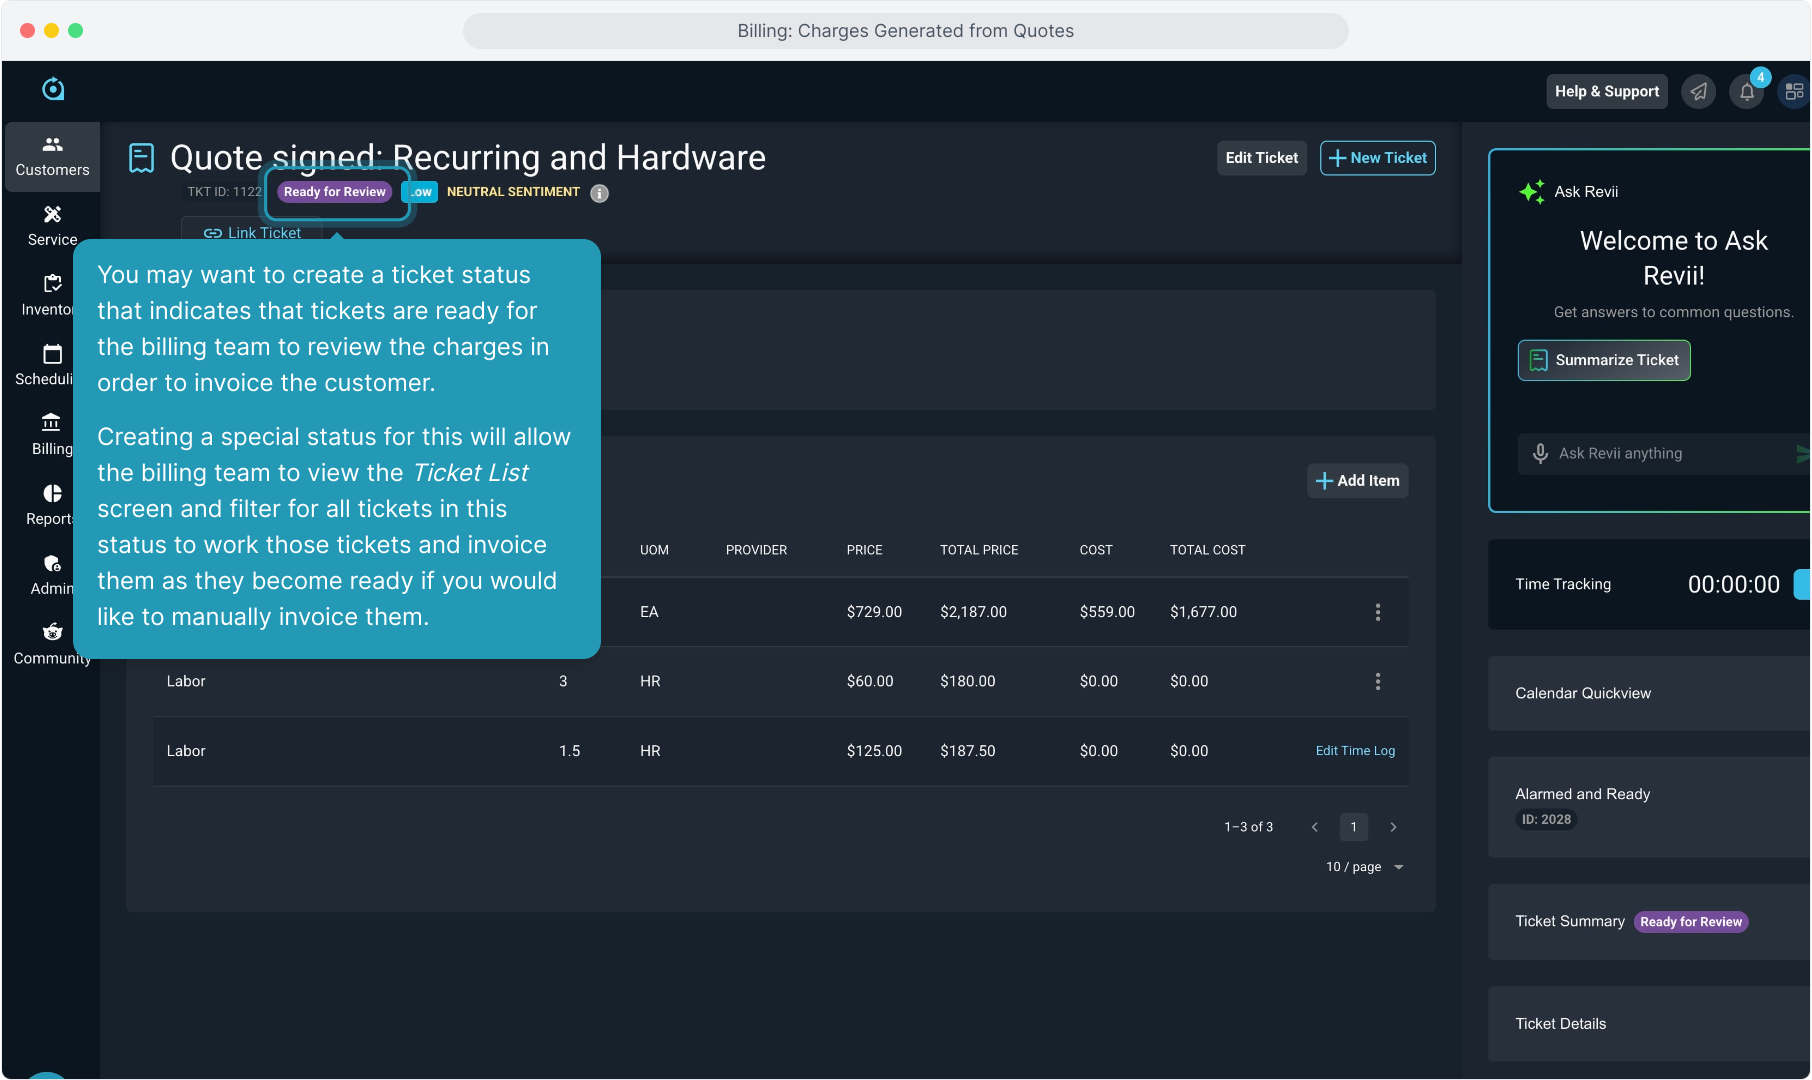
8. You may want to create a ticket status that indicates that tickets are ready for the billing team to review the charges in order to invoice the customer.
Creating a special status for this will allow the billing team to view the Ticket List screen and filter for all tickets in this status to work those tickets and invoice them as they become ready if you would like to manually invoice them.
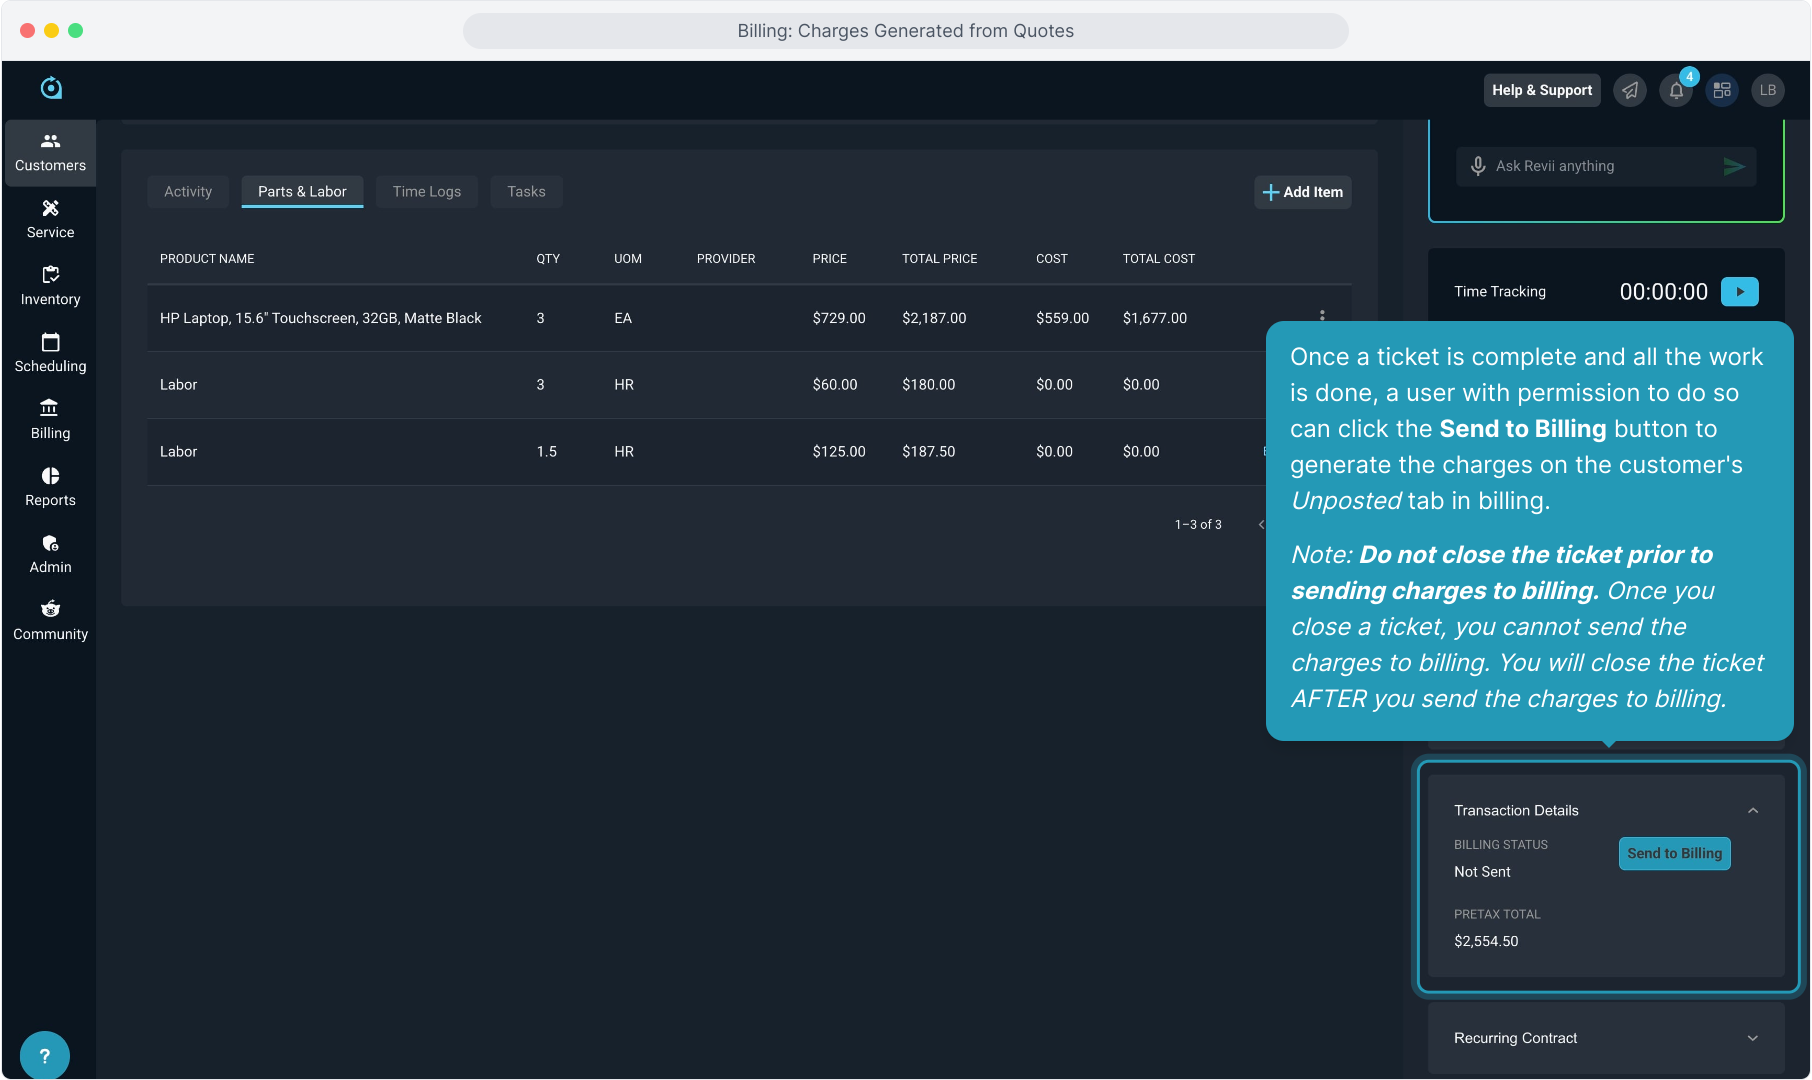
9. Once a ticket is complete and all the work is done, a user with permission to do so can click the Send to Billing button to generate the charges on the customer's Unposted tab in billing.
Note: Do not close the ticket prior to sending charges to billing. Once you close a ticket, you cannot send the charges to billing. You will close the ticket AFTER you send the charges to billing.
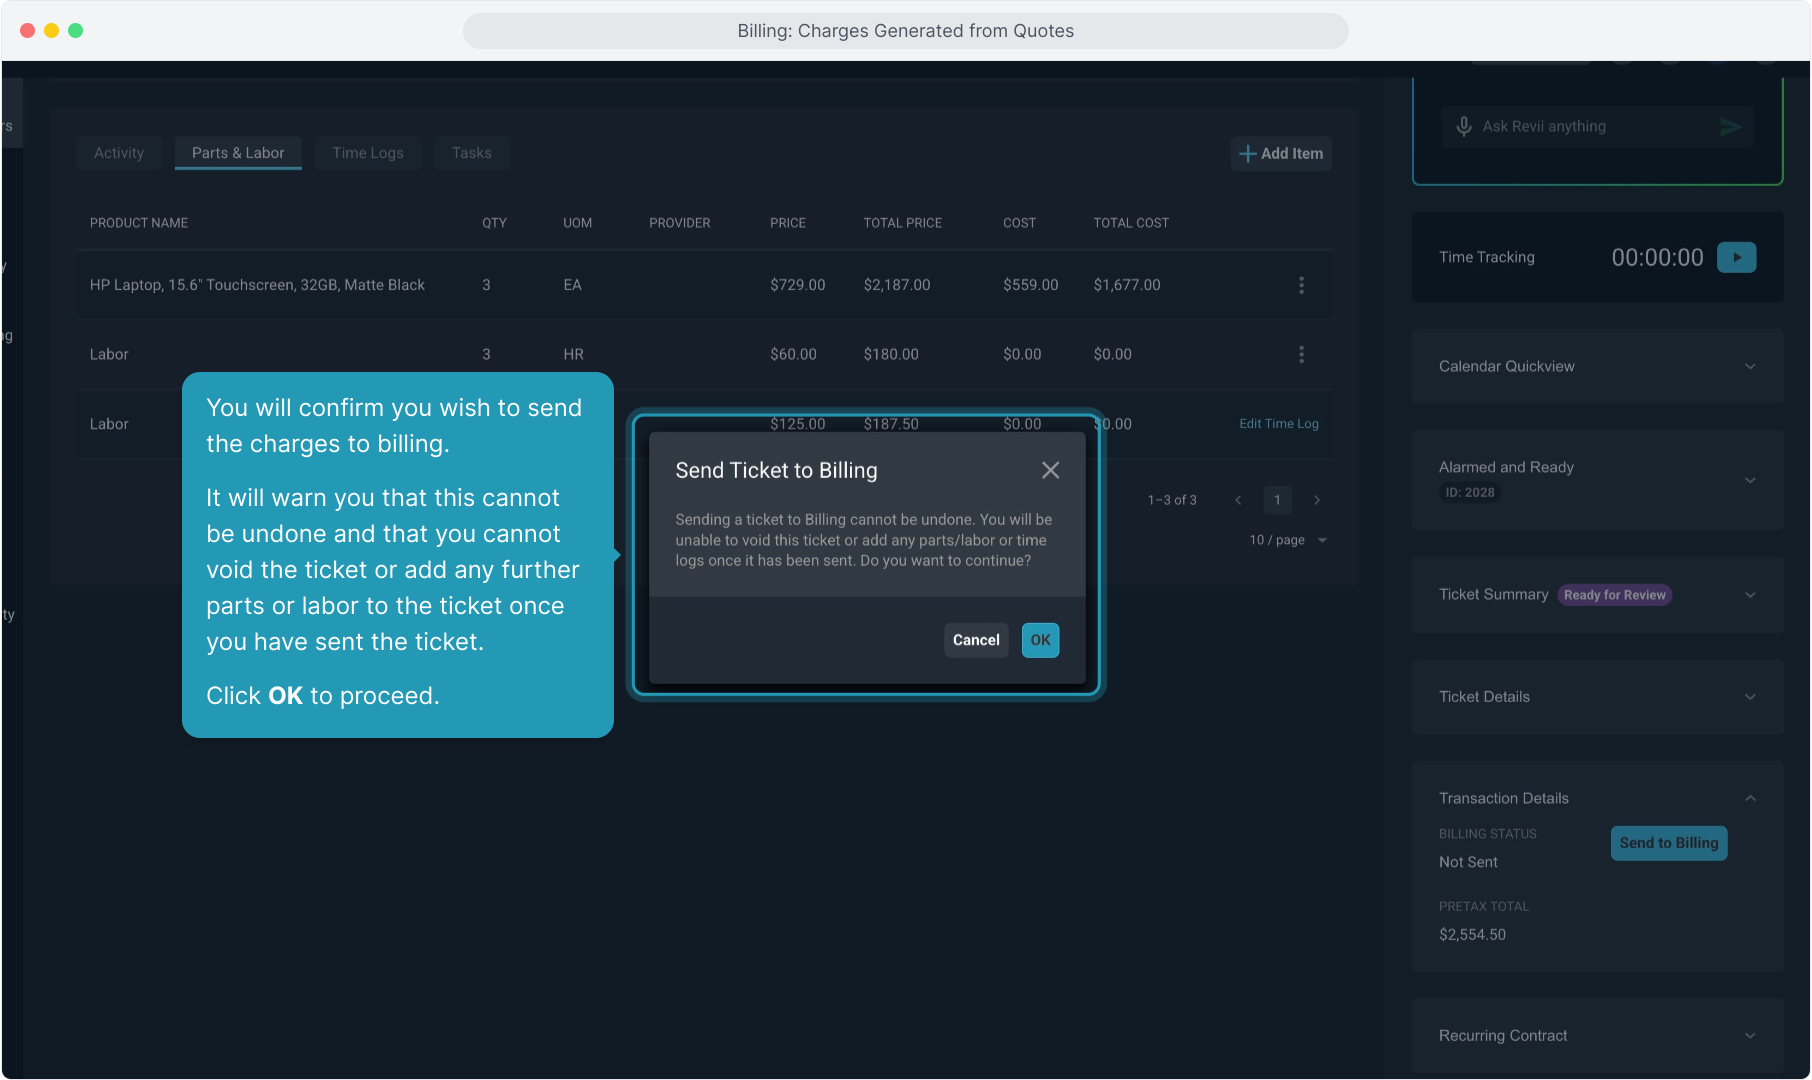
10. You will confirm you wish to send the charges to billing.
It will warn you that this cannot be undone and that you cannot void the ticket or add any further parts or labor to the ticket once you have sent the ticket.
Click OK to proceed.
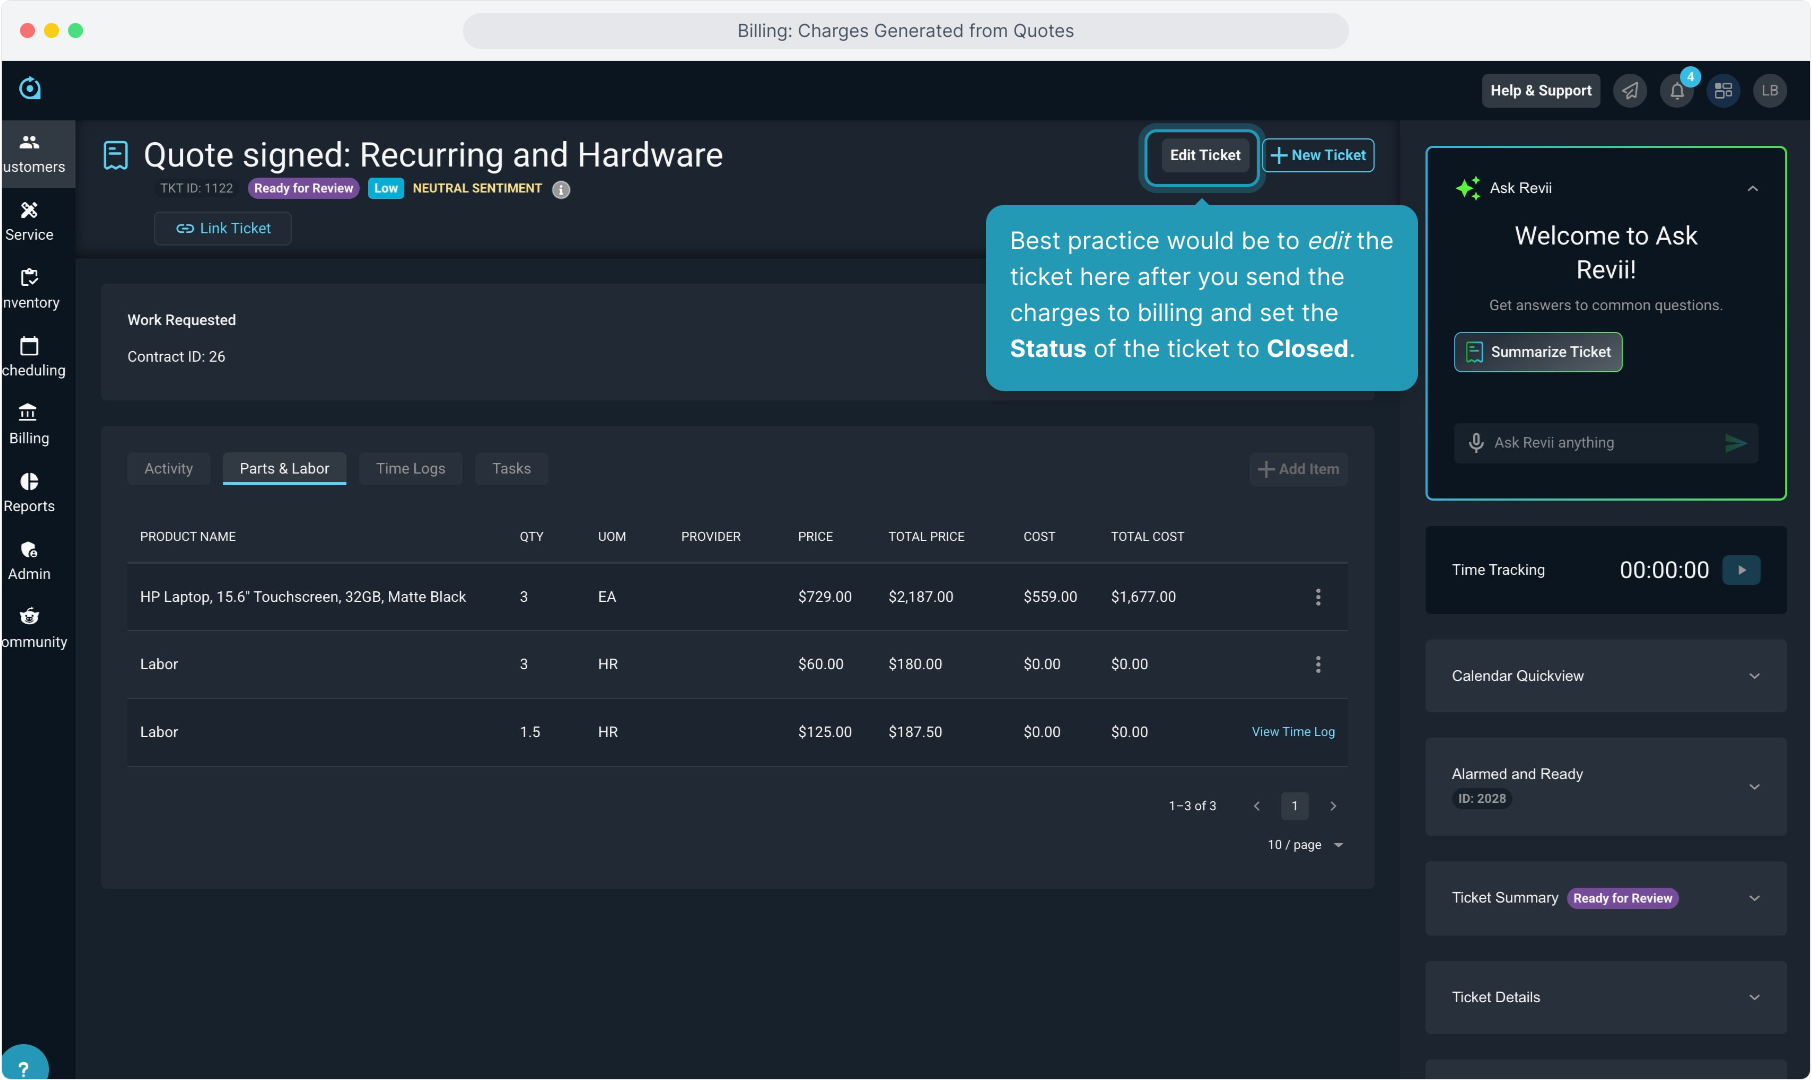
11. Best practice would be to edit the ticket here after you send the charges to billing and set the Status of the ticket to Closed.
12. To navigate back to the customer account to view the charges, click the Customer ID chip.
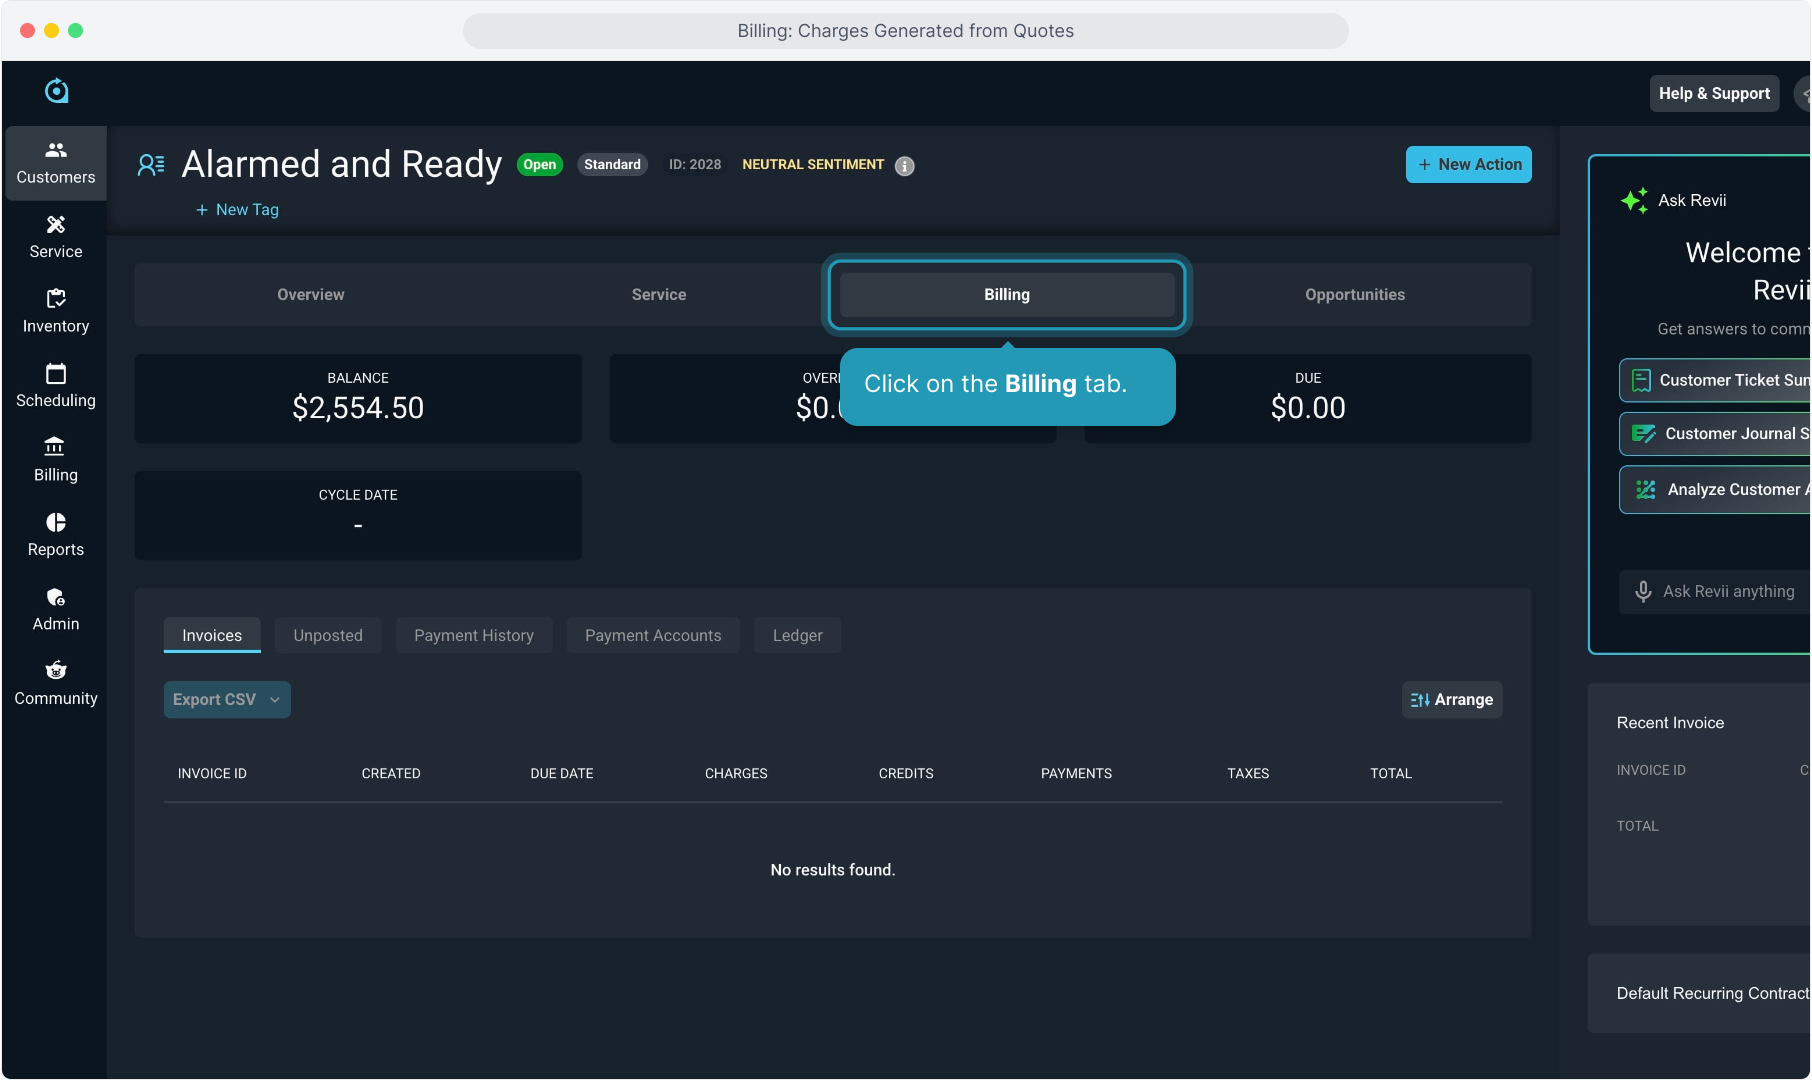
13. Click on the Billing tab.
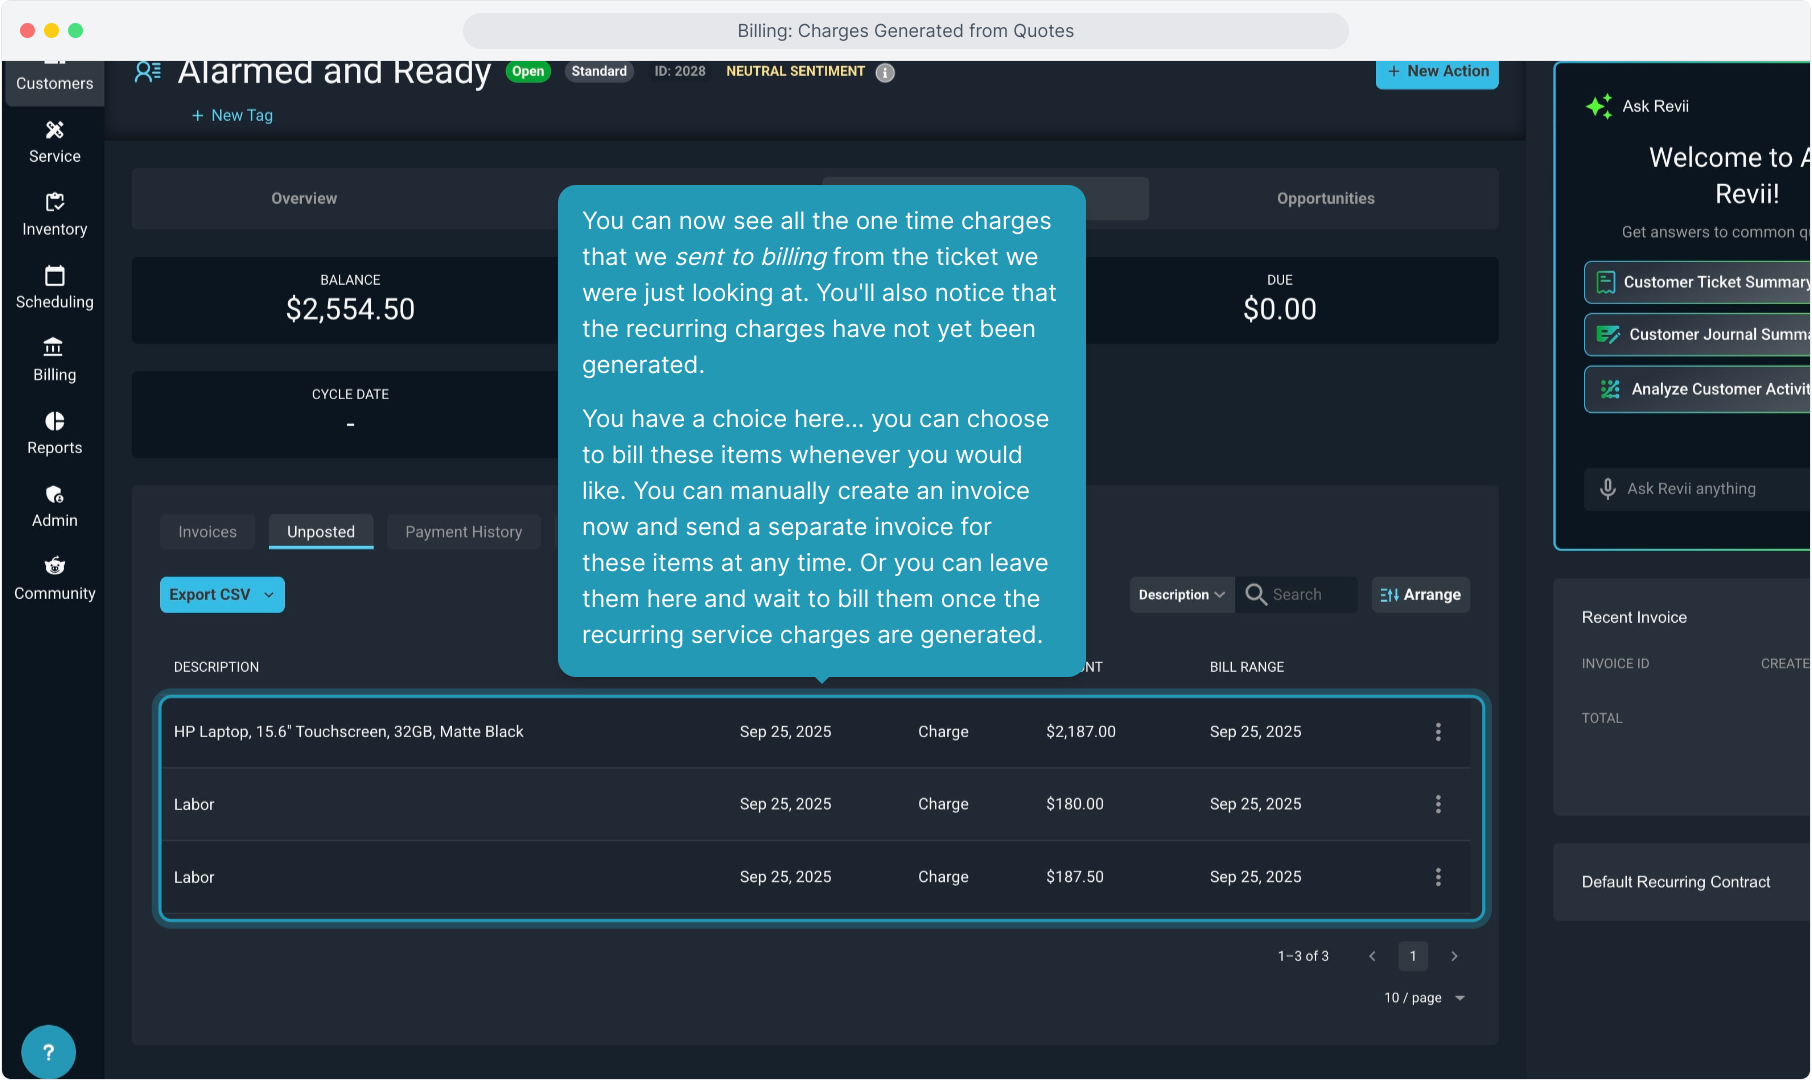
14. Then click on the Unposted tab. The Unposted tab is the "holding area" for all charges that have been generated on the account that have not yet been sent out to the customer on an invoice.
Anything on the Unposted tab will be picked up and included the next time an invoice is generated on the account.

15. You can now see all the one time charges that we sent to billing from the ticket we were just looking at. You'll also notice that the recurring charges have not yet been generated.
You have a choice here... you can choose to bill these items whenever you would like. You can manually create an invoice now and send a separate invoice for these items at any time. Or you can leave them here and wait to bill them once the recurring service charges are generated.
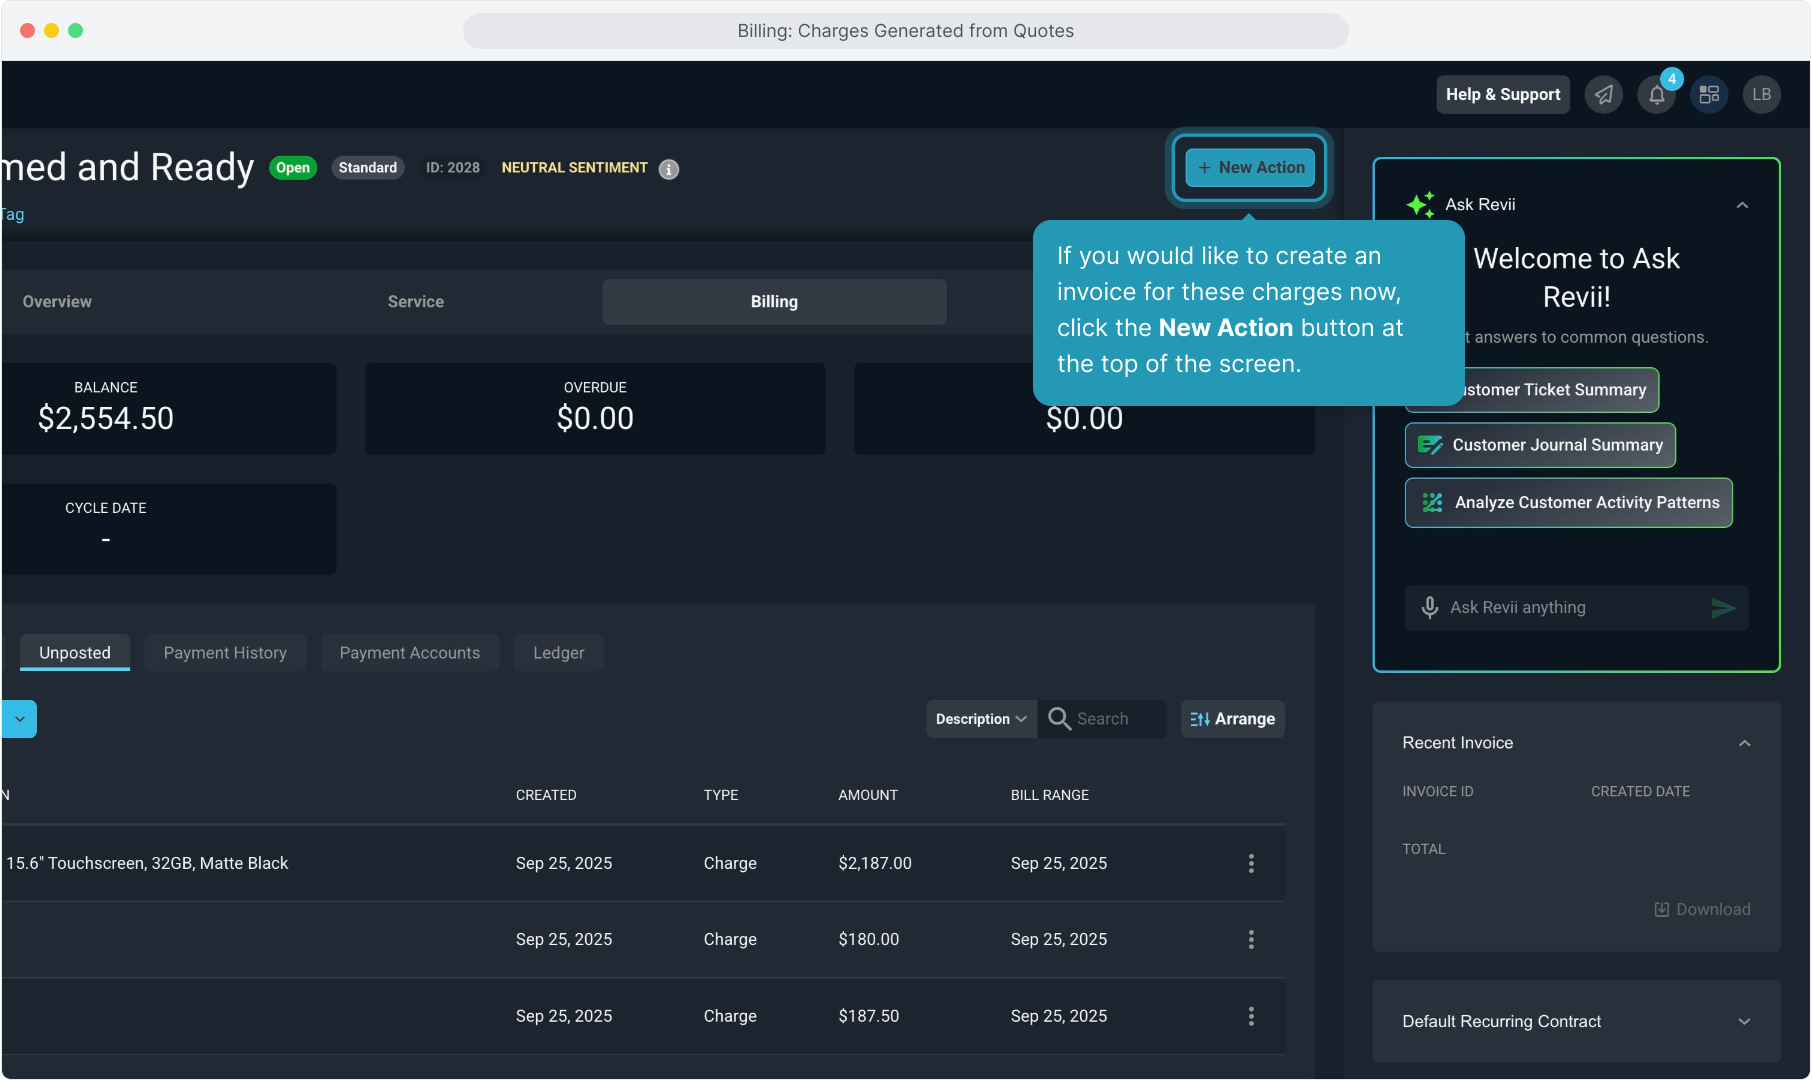
16. If you would like to create an invoice for these charges now, click the New Action button at the top of the screen.
17. Click Invoice.

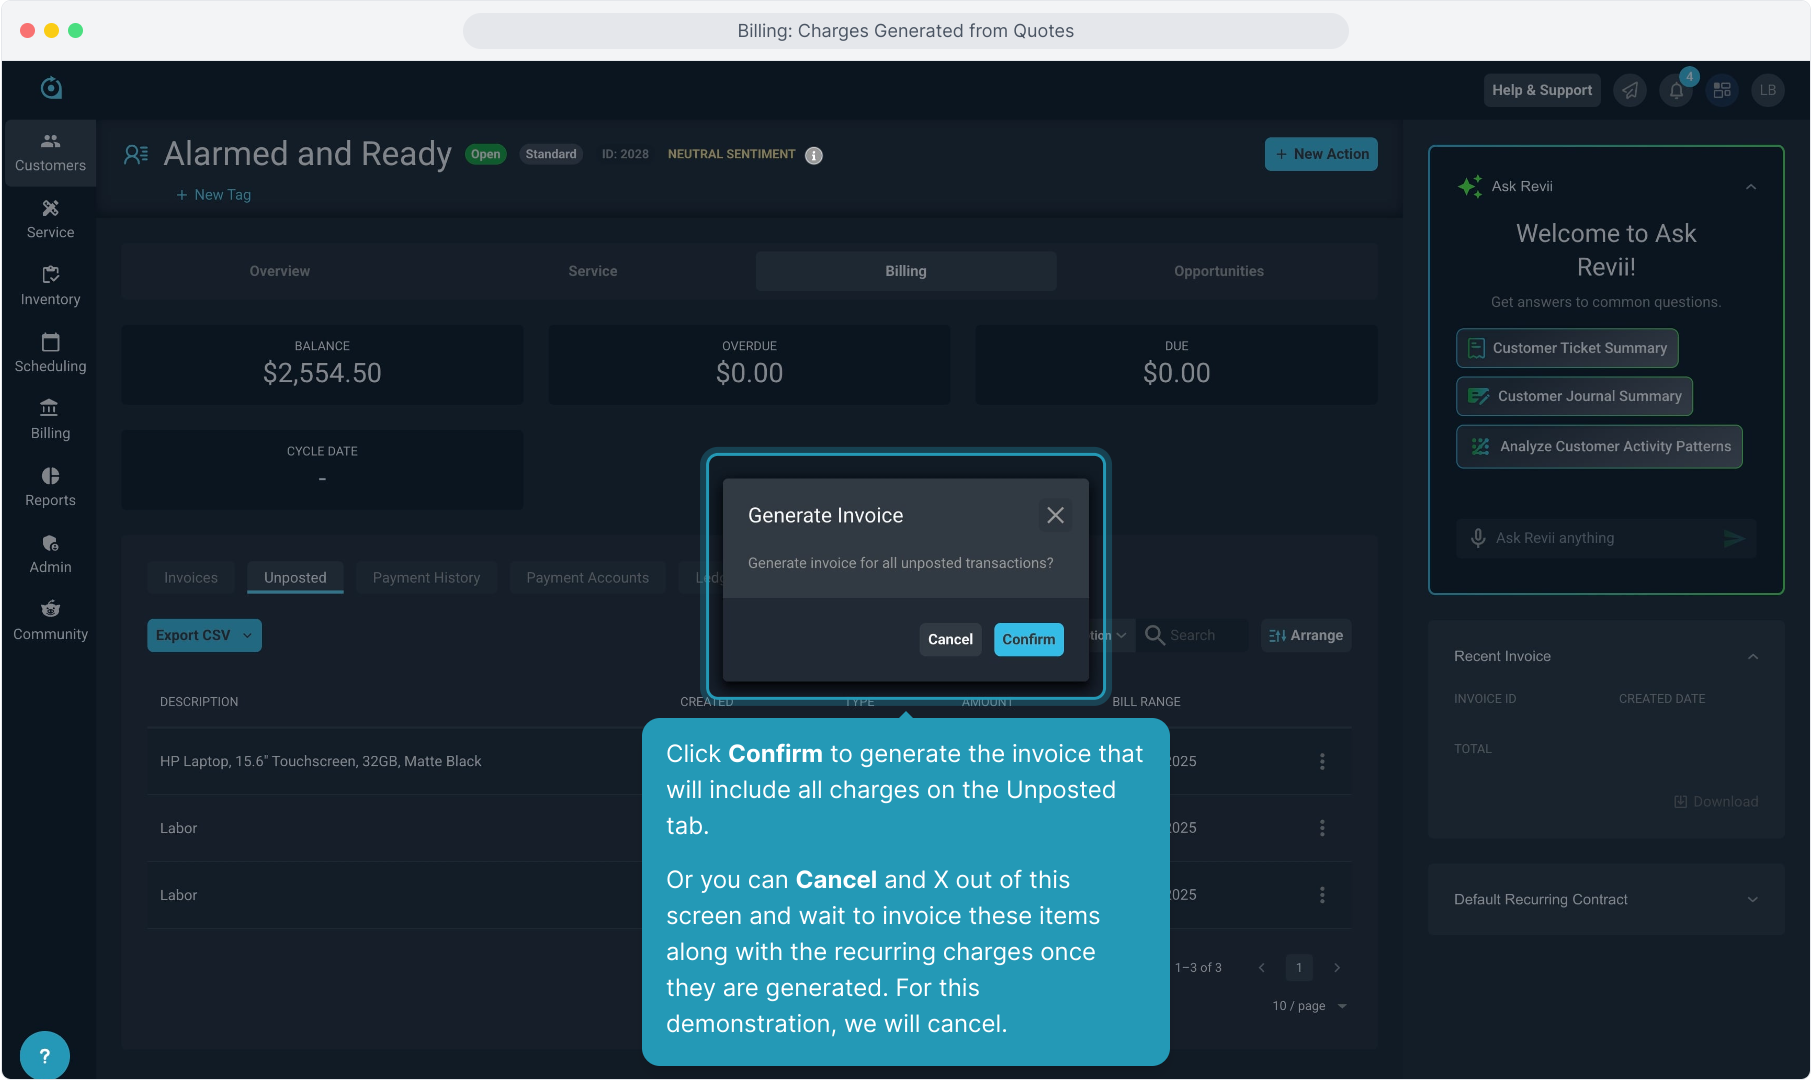
18. Click Confirm to generate the invoice that will include all charges on the Unposted tab.
Or you can Cancel and X out of this screen and wait to invoice these items along with the recurring charges once they are generated. For this demonstration, we will cancel.
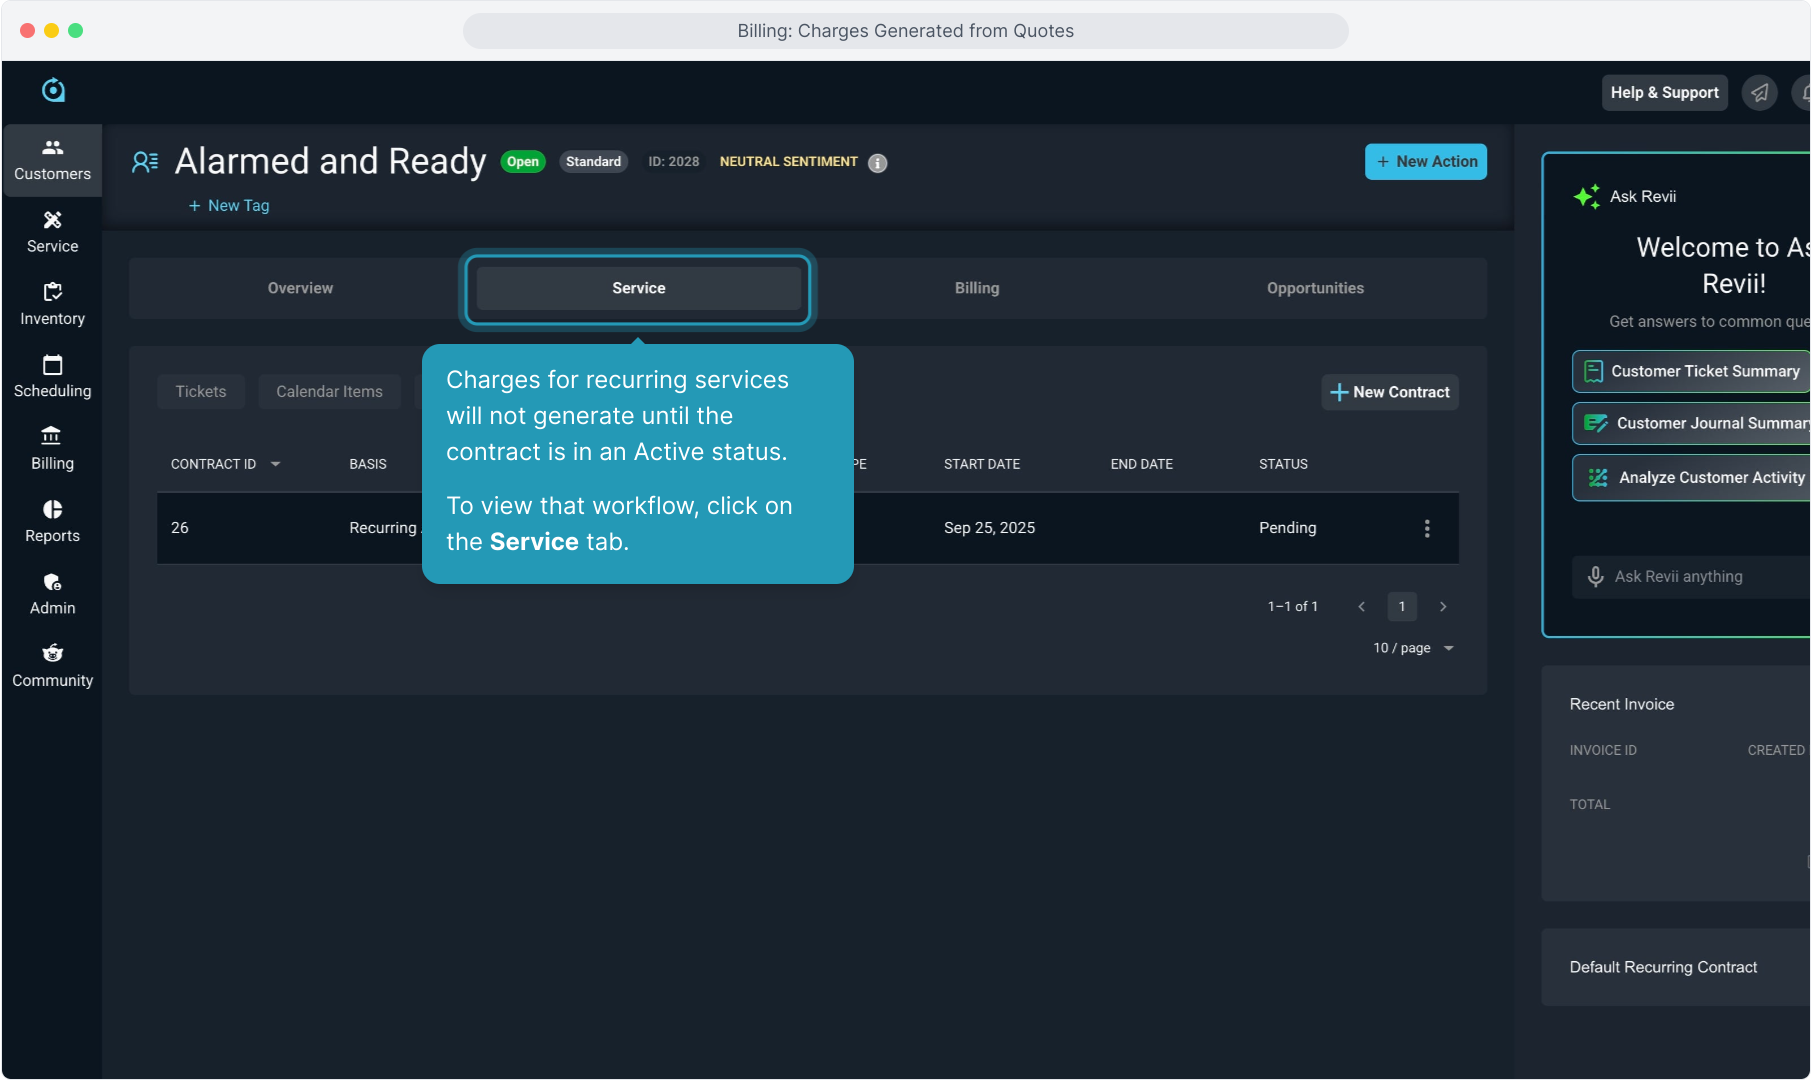
19. Charges for recurring services will not generate until the contract is in an Active status.
To view that workflow, click on the Service tab.
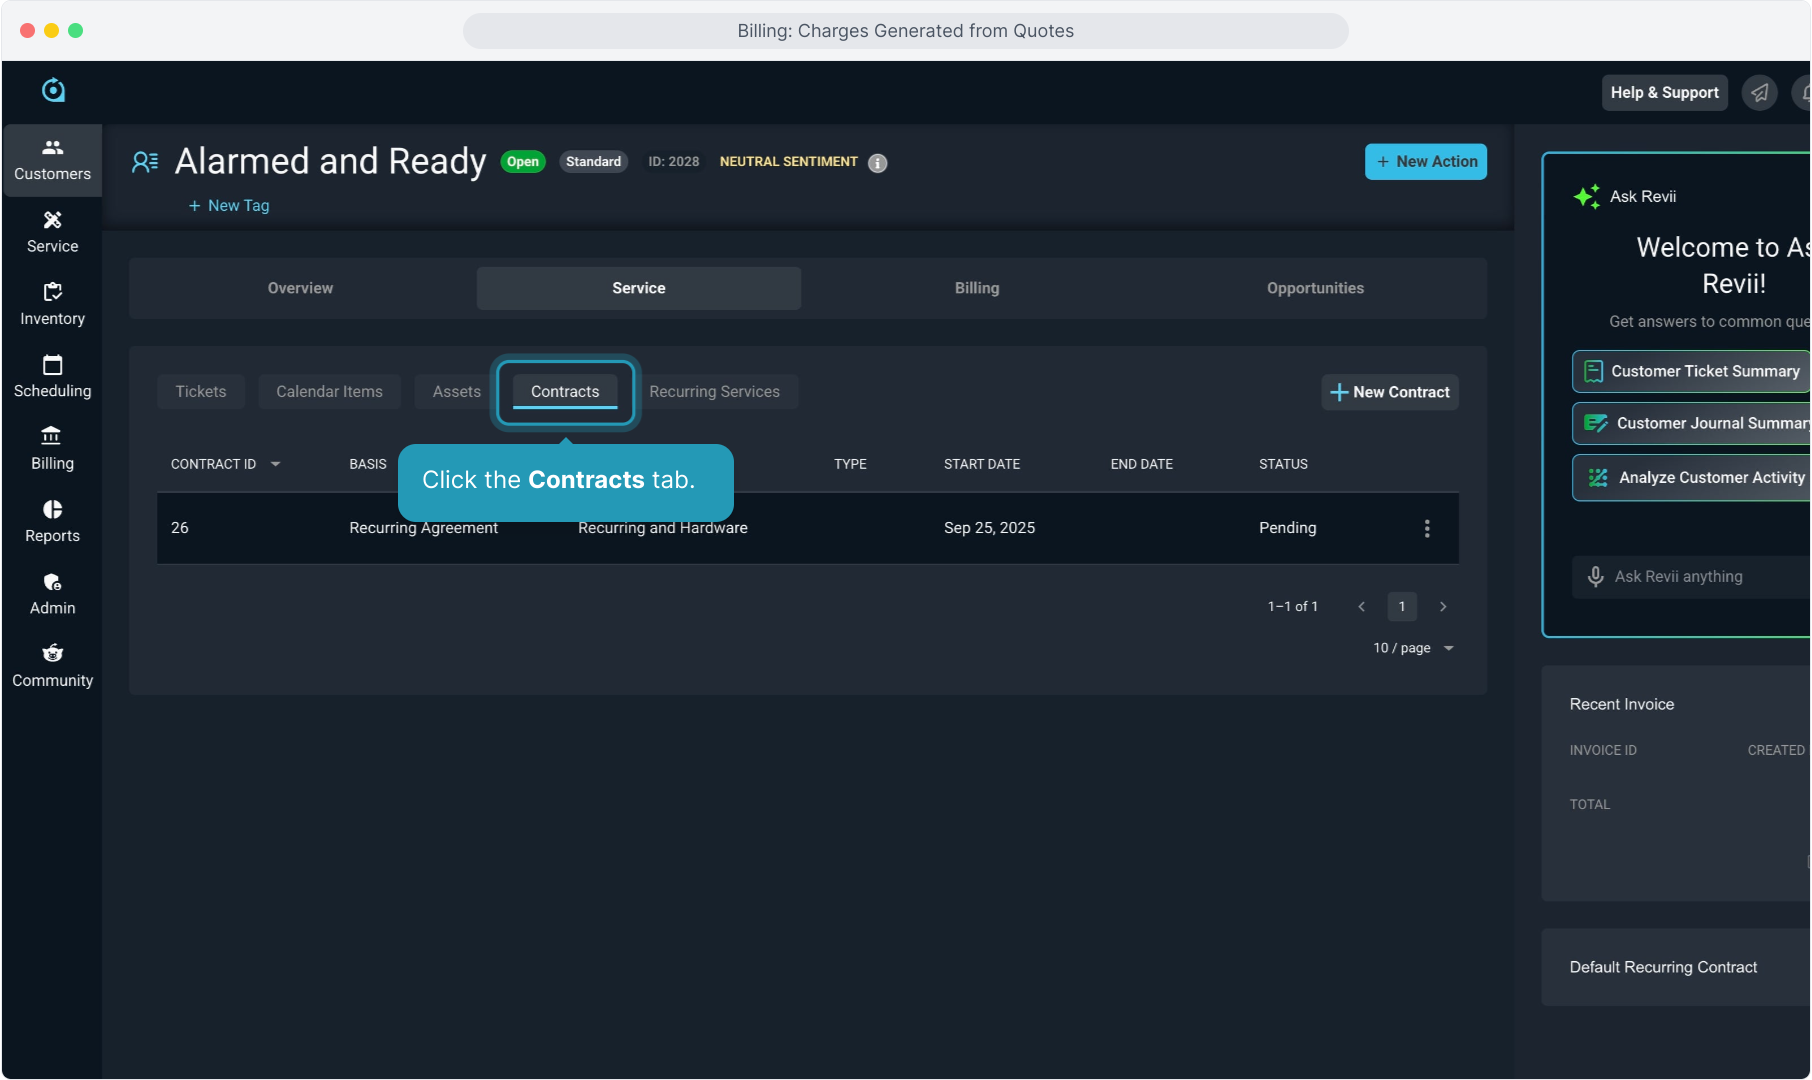
20. Click the Contracts tab.
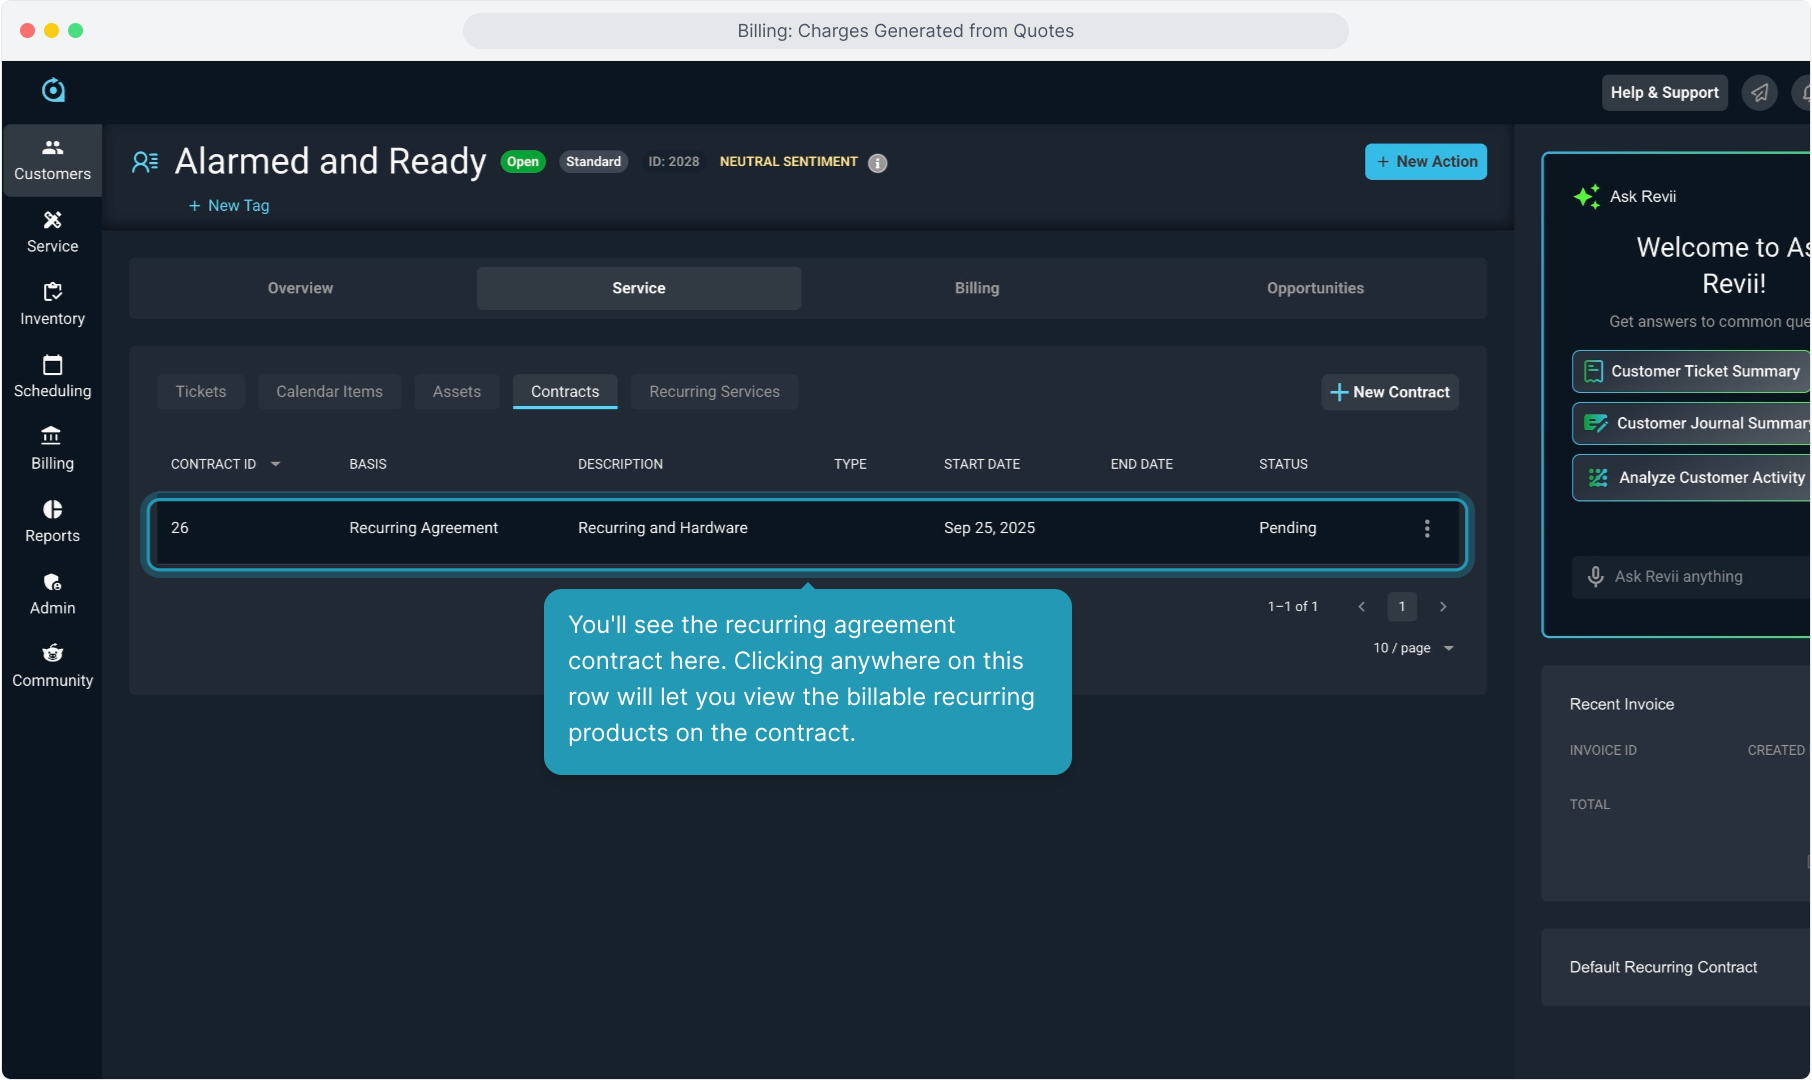
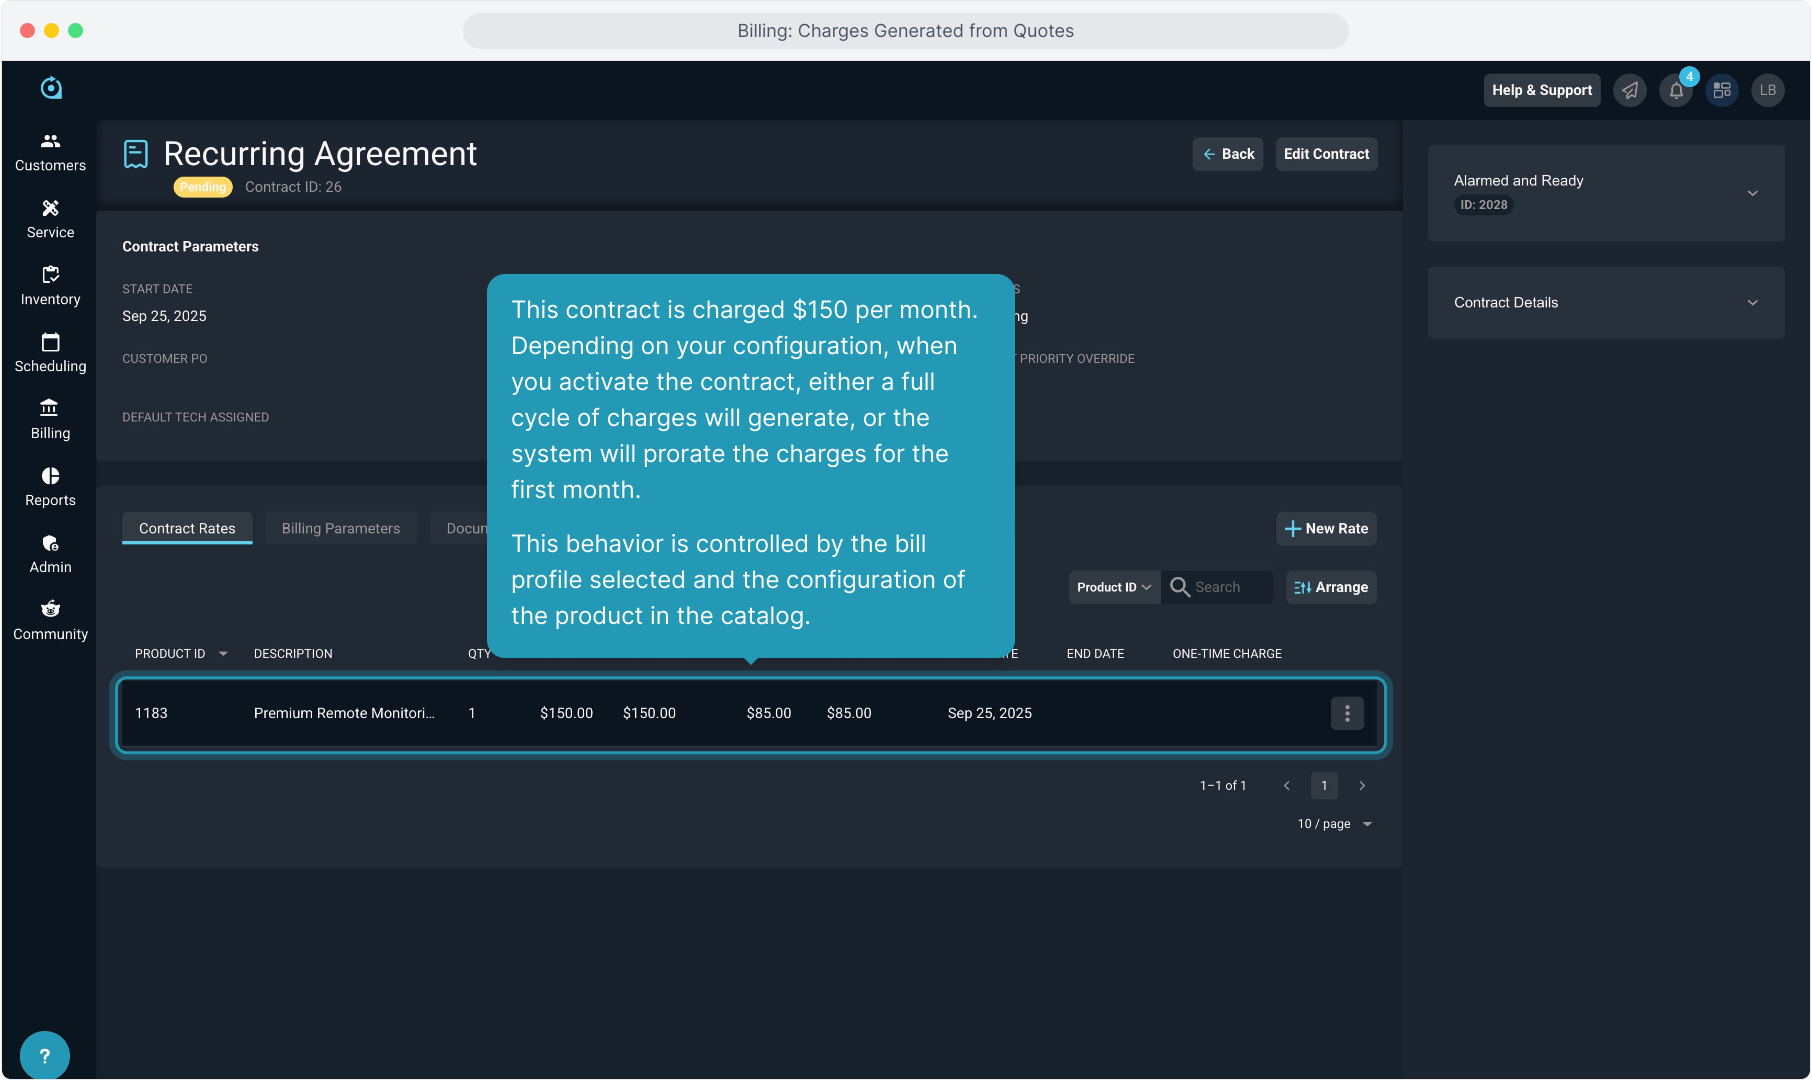
21. You'll see the recurring agreement contract here. Clicking anywhere on this row will let you view the billable recurring products on the contract.
22. This contract is charged $150 per month. Depending on your configuration, when you activate the contract, either a full cycle of charges will generate, or the system will prorate the charges for the first month.
This behavior is controlled by the bill profile selected and the configuration of the product in the catalog.
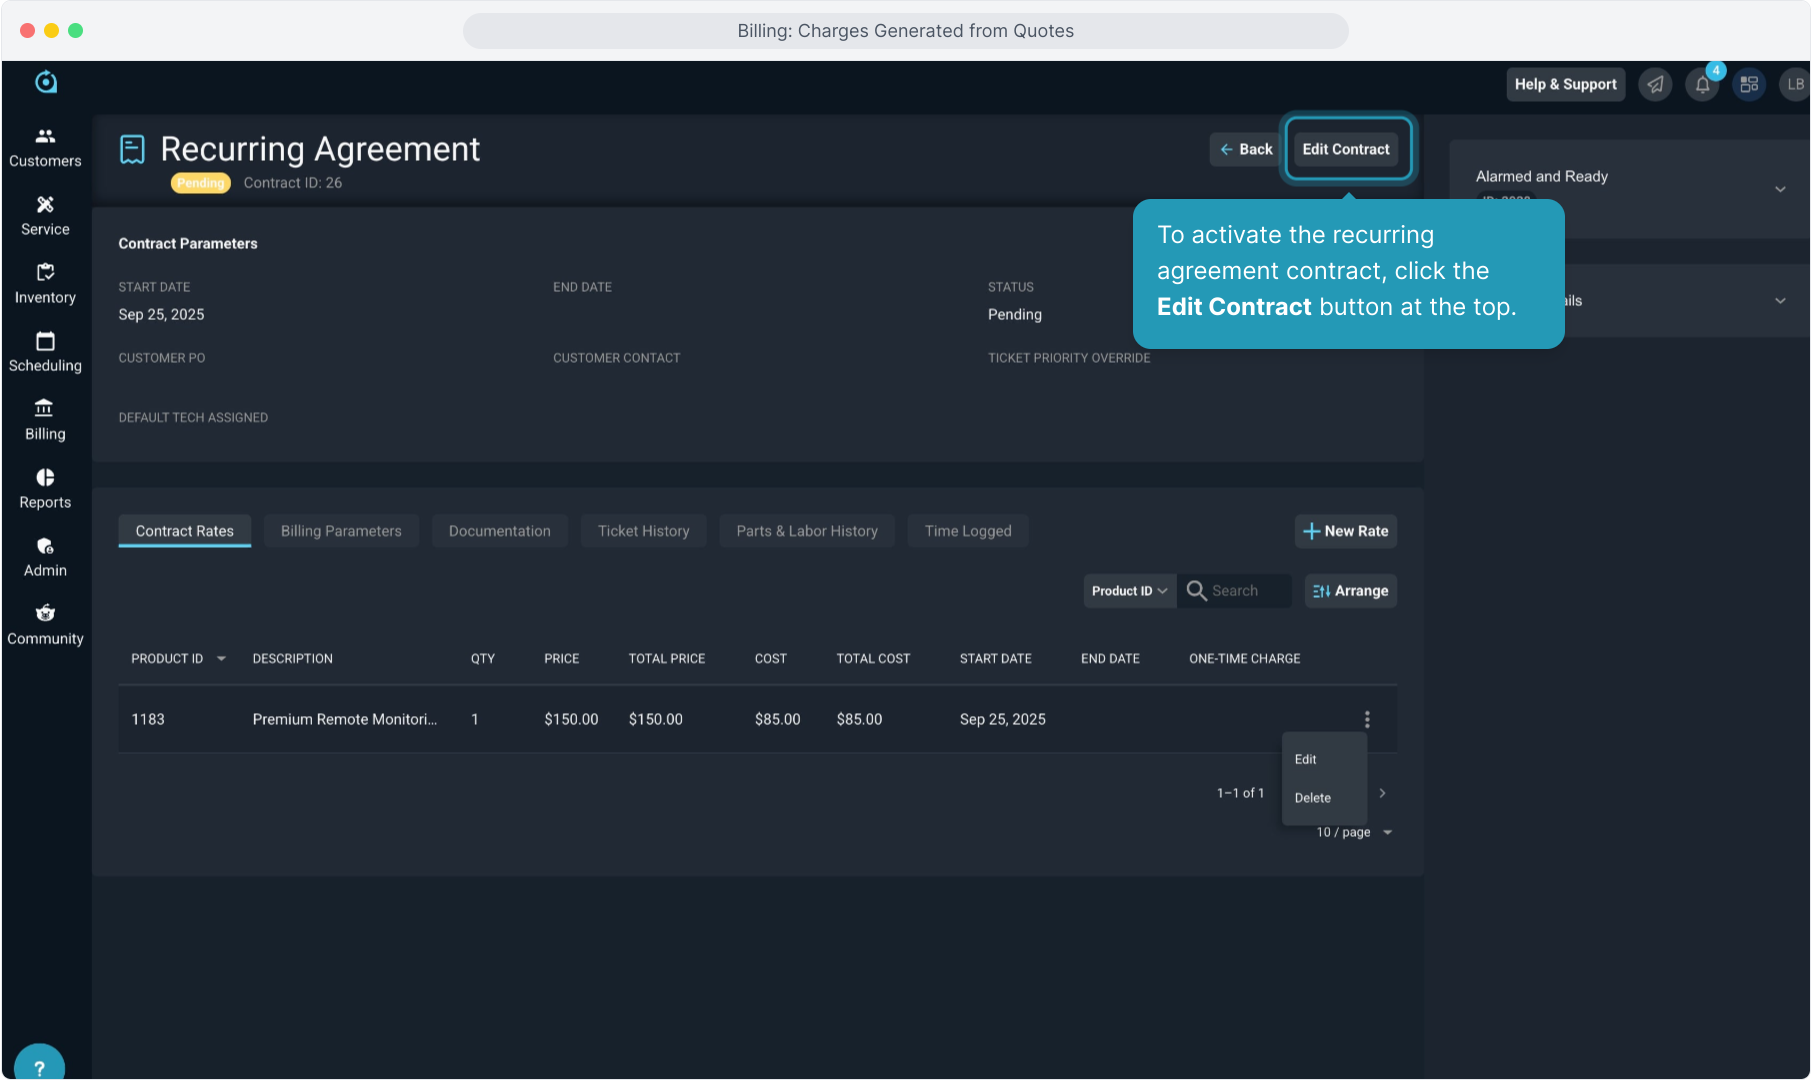
23. To activate the recurring agreement contract, click the Edit Contract button at the top.
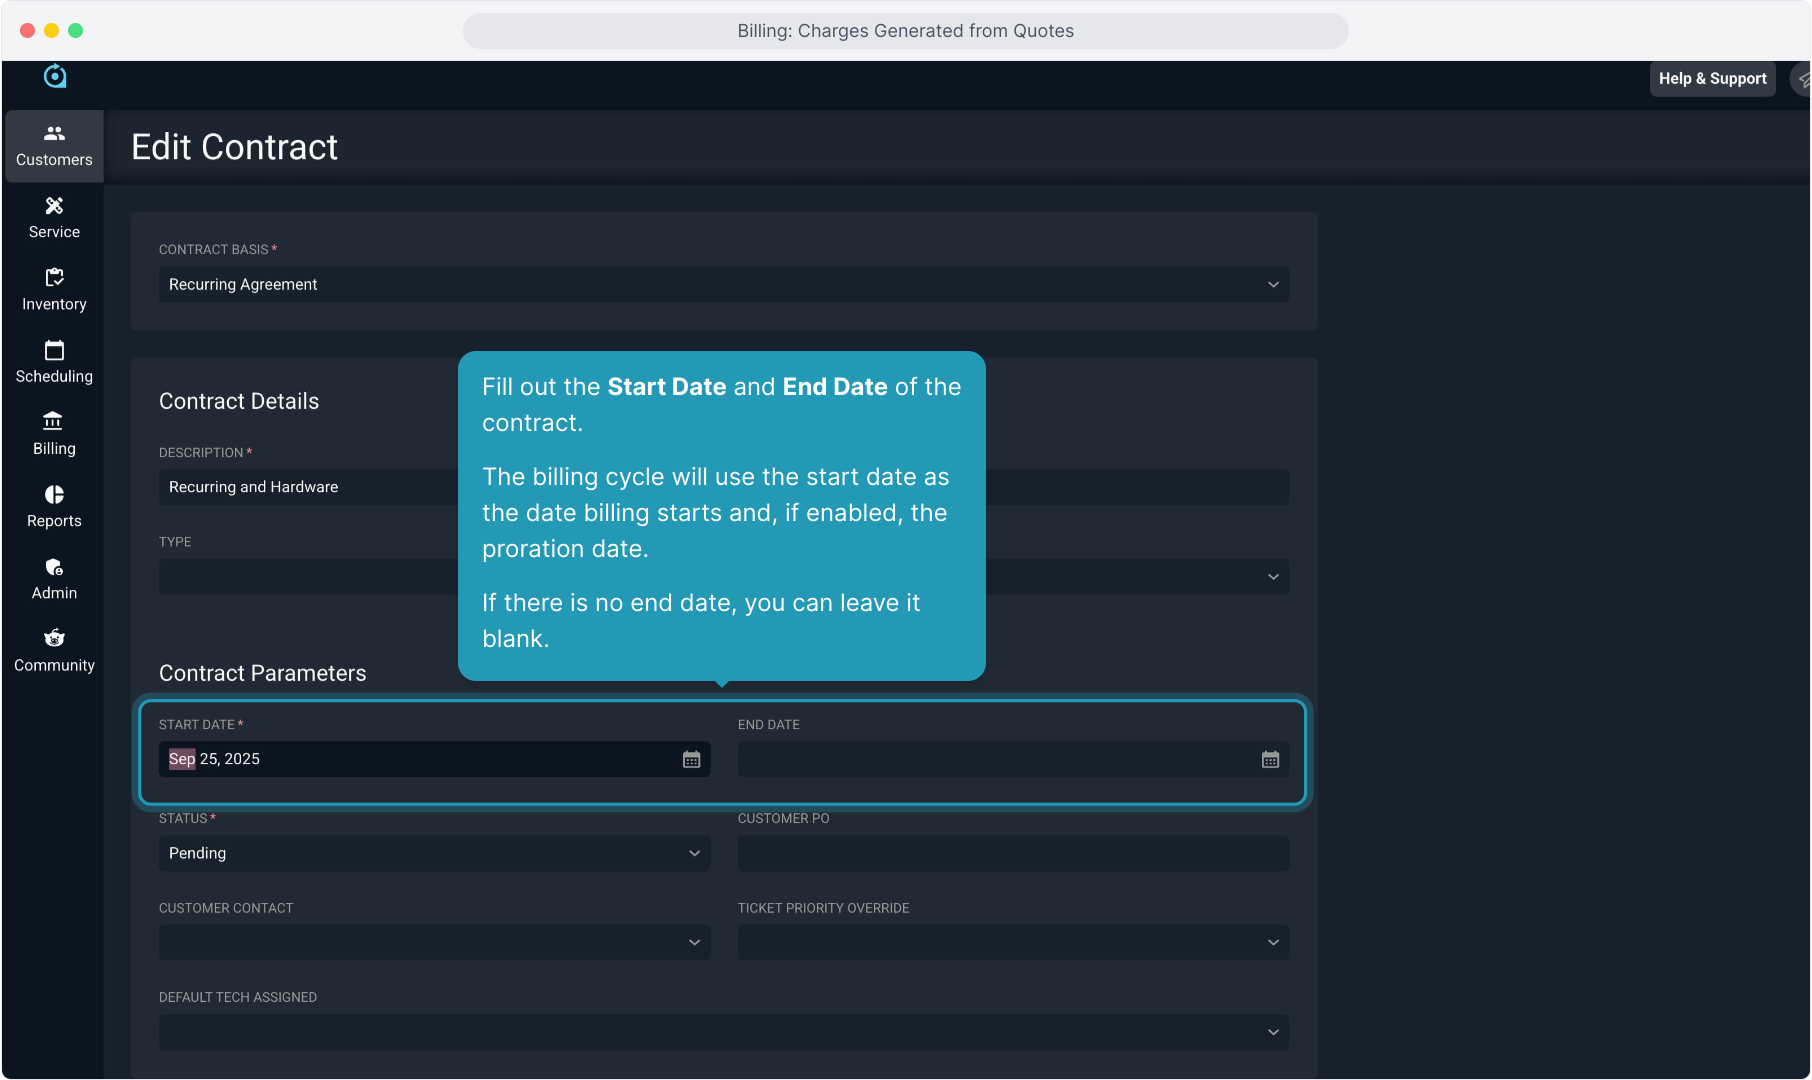
24. Fill out the Start Date and End Date of the contract.
The billing cycle will use the start date as the date billing starts and, if enabled, the proration date.
If there is no end date, you can leave it blank.
25. Select Active from the Status drop down menu.
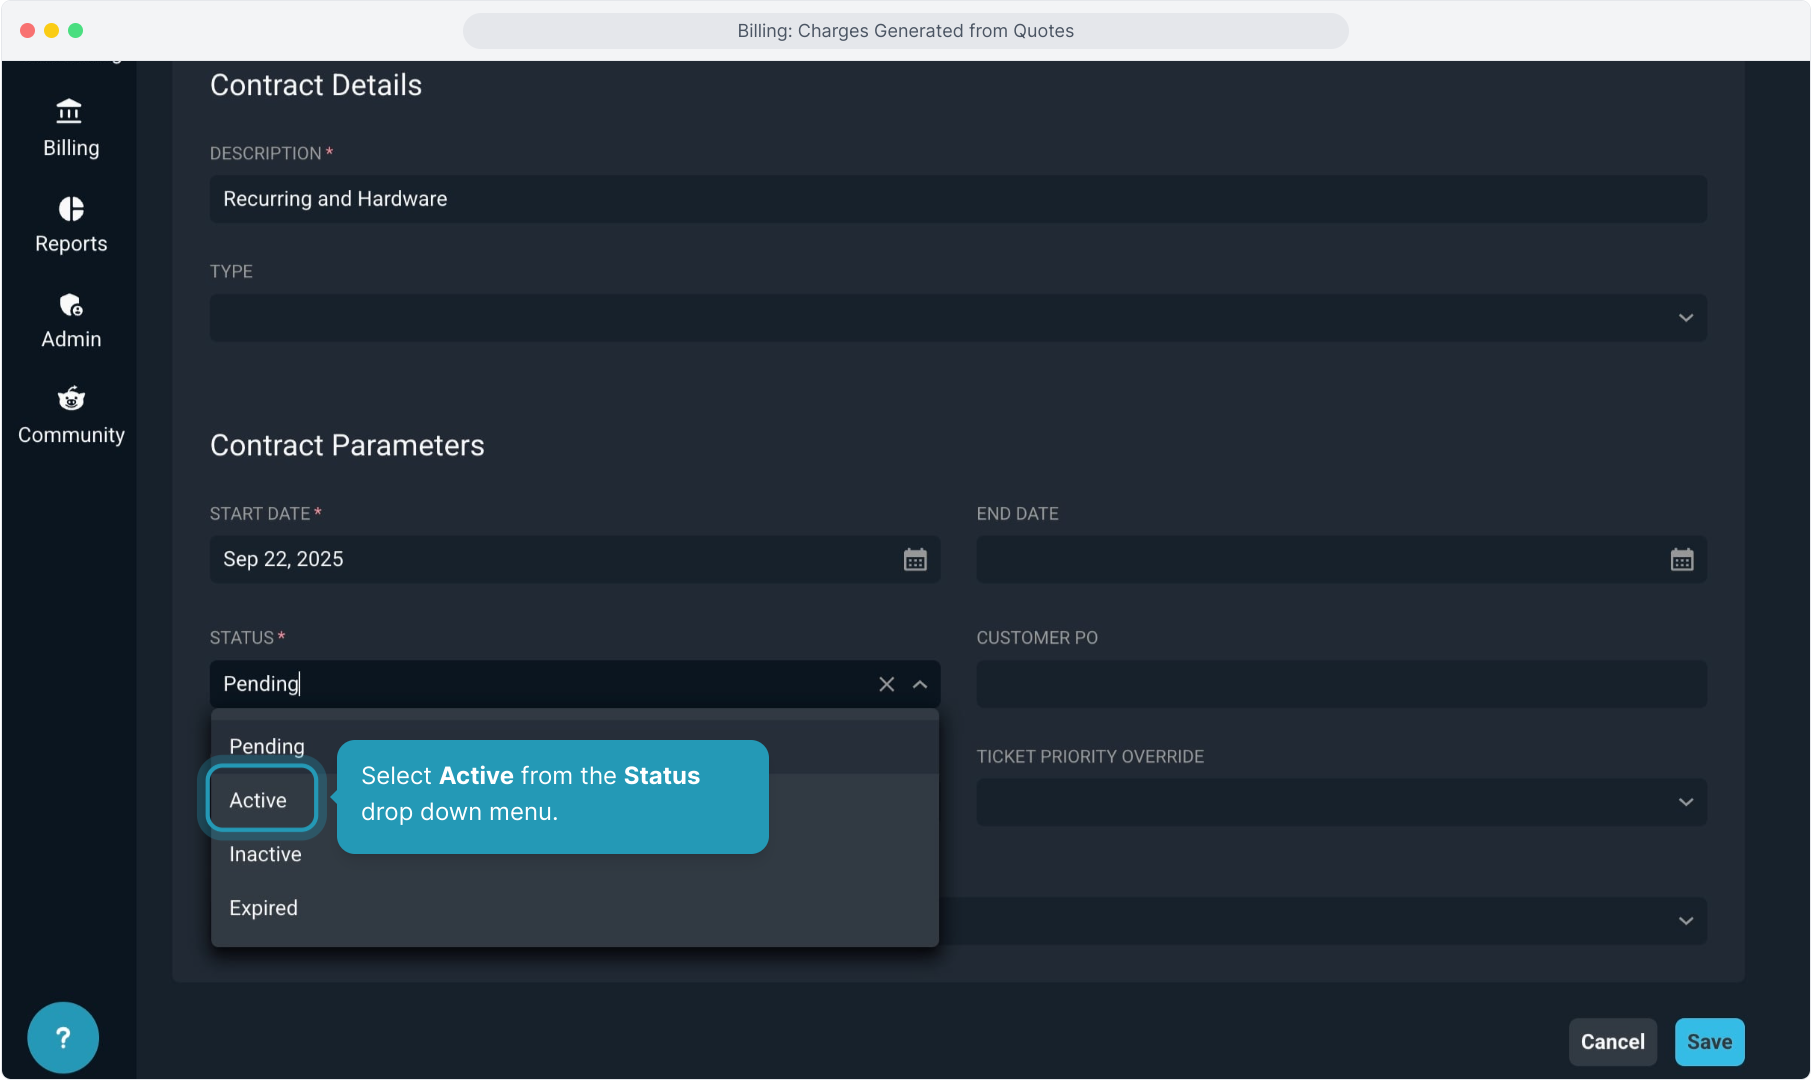
26. Click Save and the contract will be activated and the system will generate any charges that need to be billed.

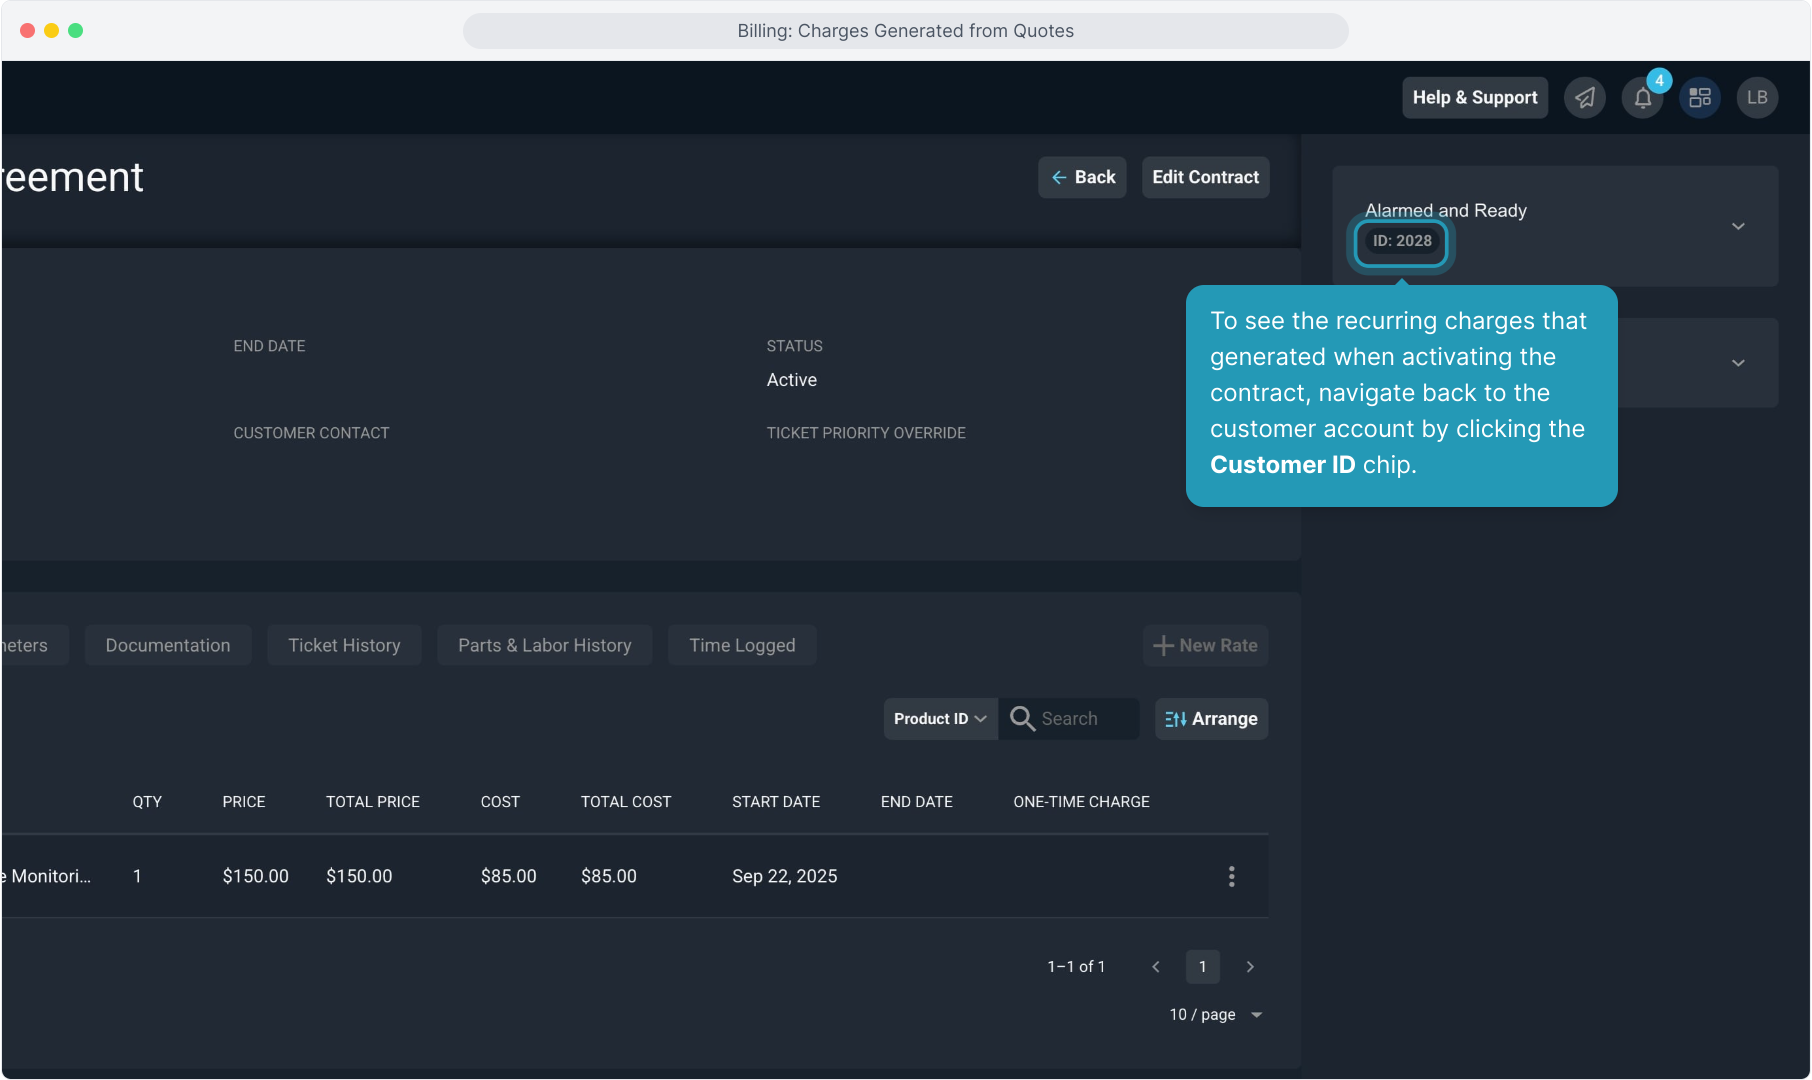
27. To see the recurring charges that generated when activating the contract, navigate back to the customer account by clicking the Customer ID chip.
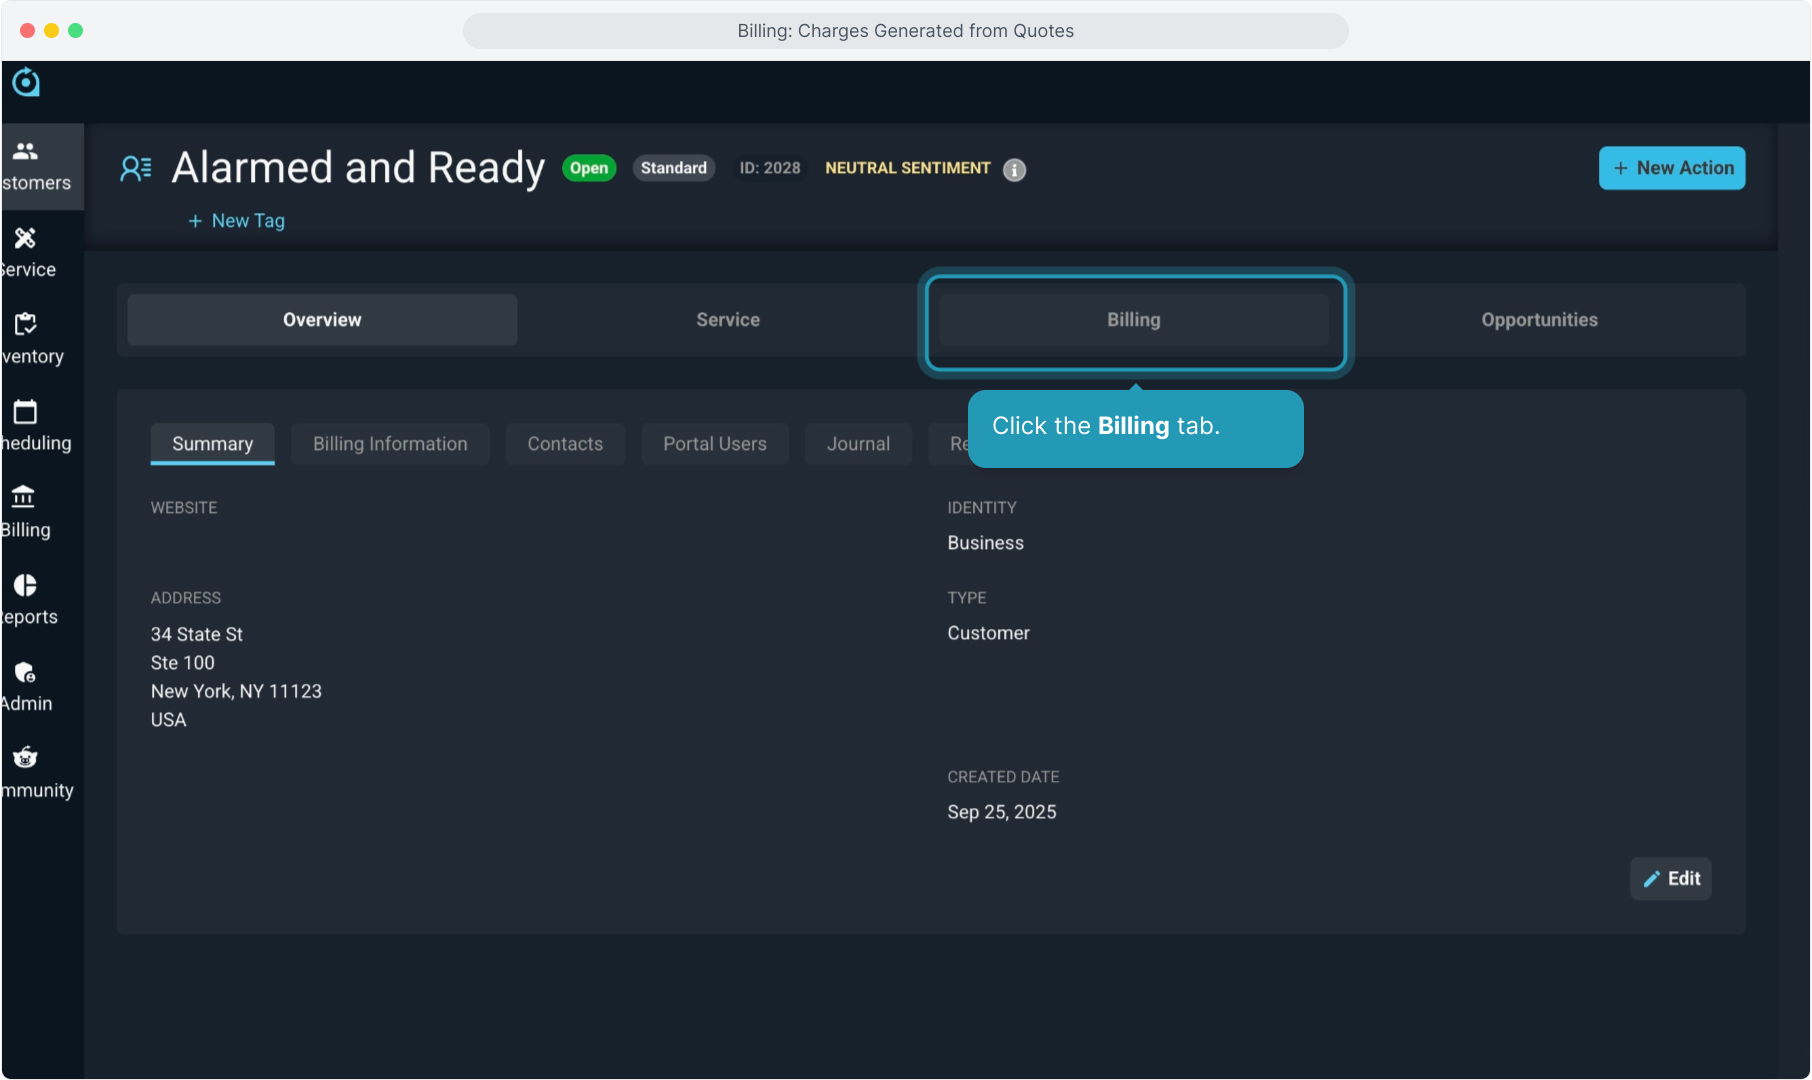
28. Click the Billing tab.
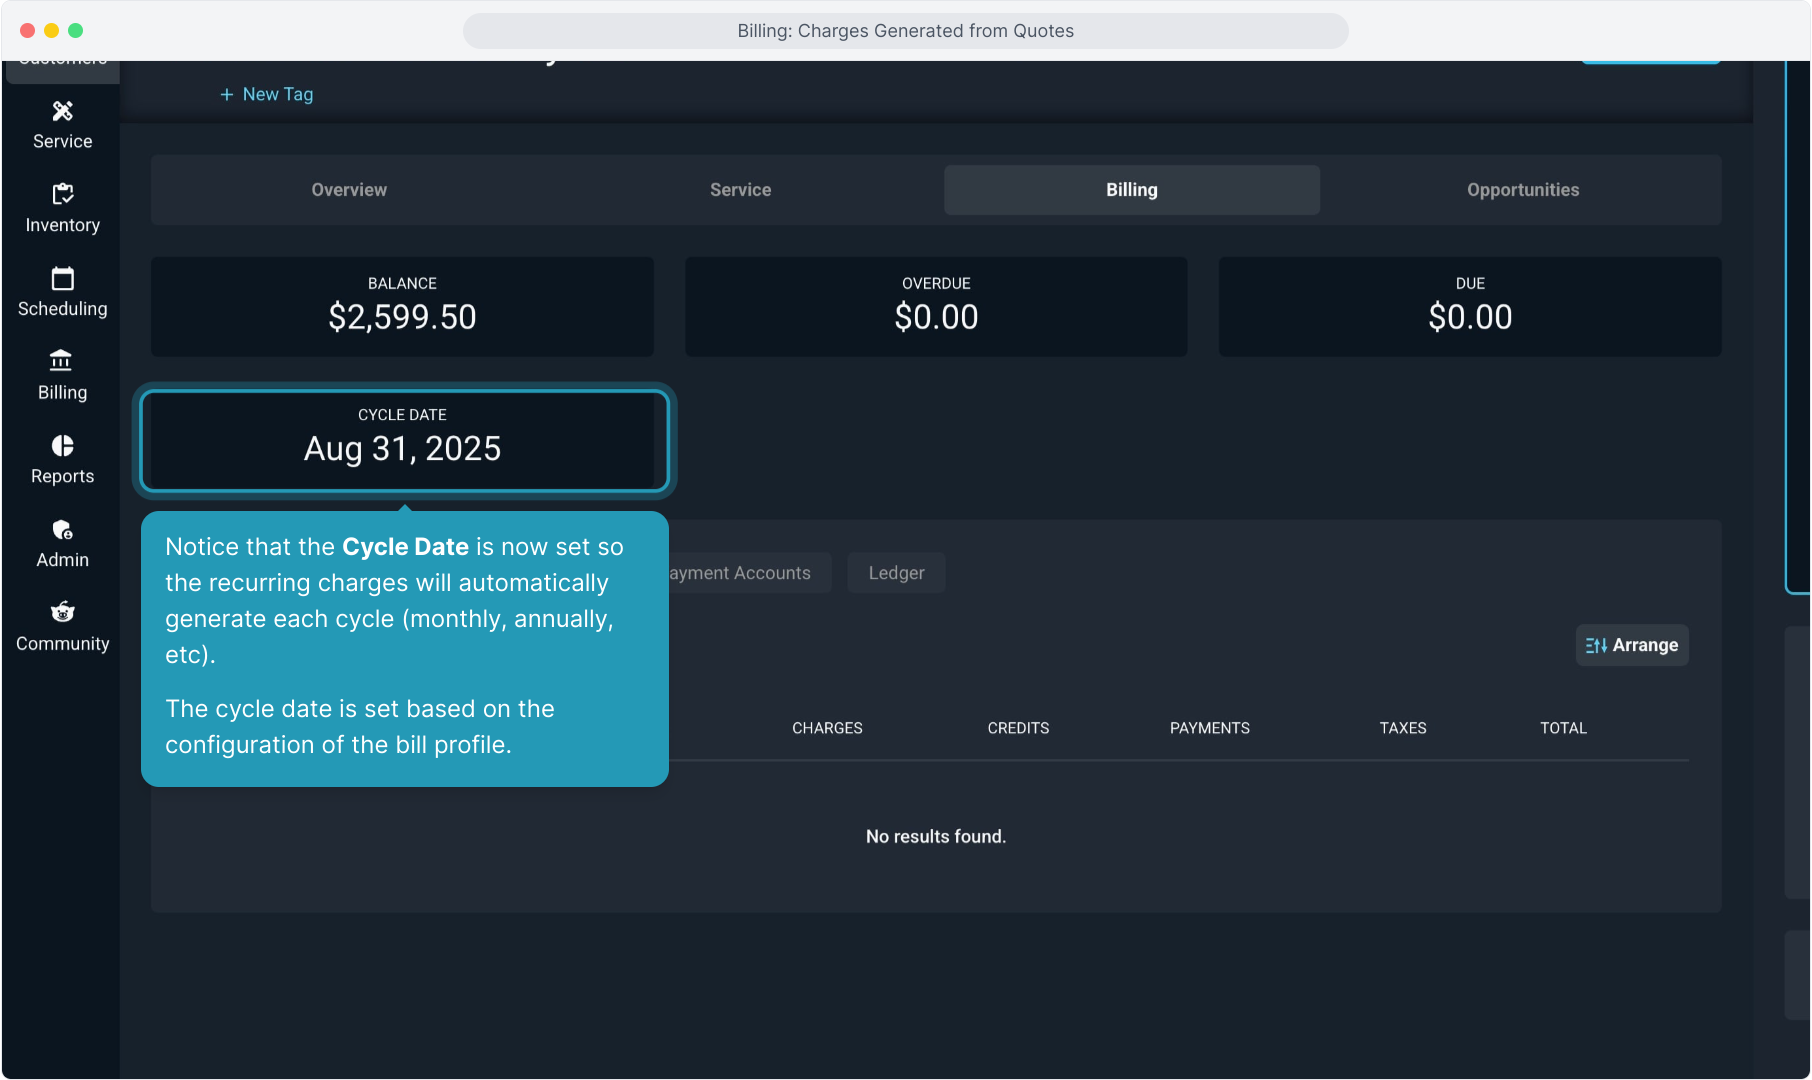
29. Notice that the Cycle Date is now set so the recurring charges will automatically generate each cycle (monthly, annually, etc).
The cycle date is set based on the configuration of the bill profile.
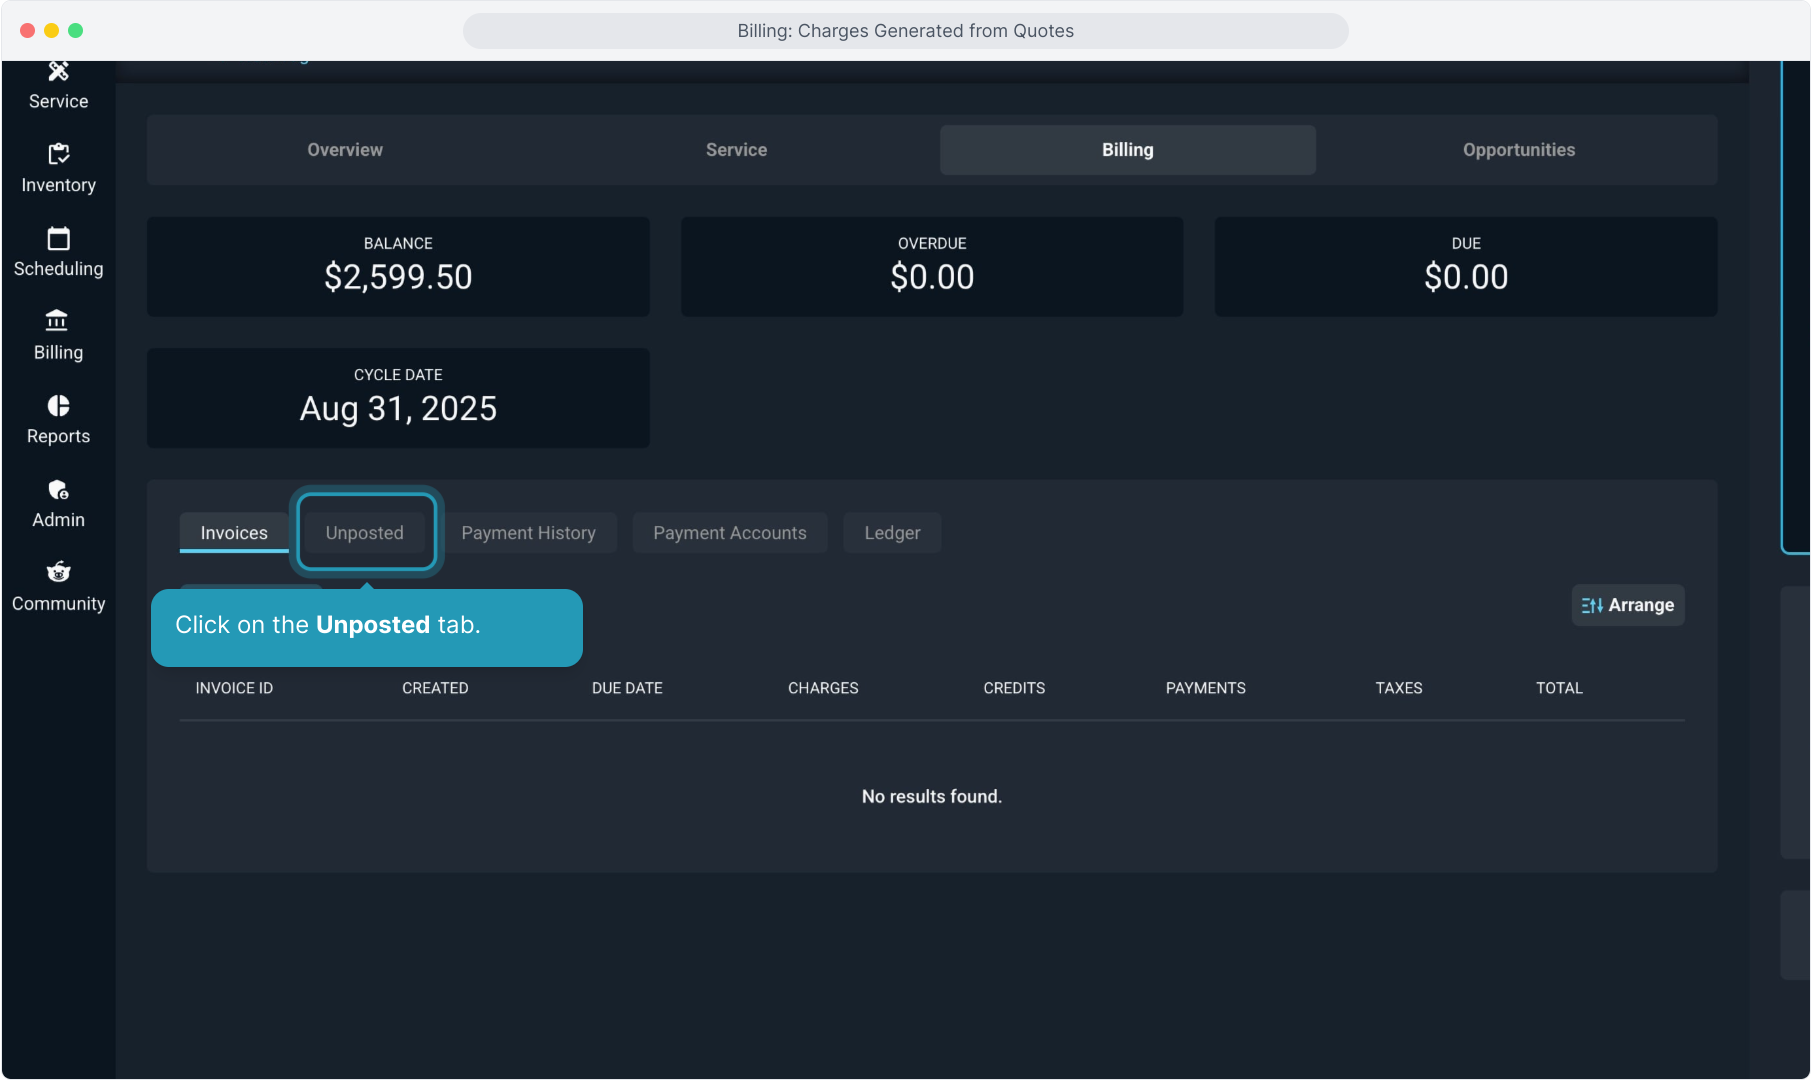
30. Click on the Unposted tab.
31. You'll see all the one time charges we added earlier through the ticket and now you will also see the charge for the recurring agreement.
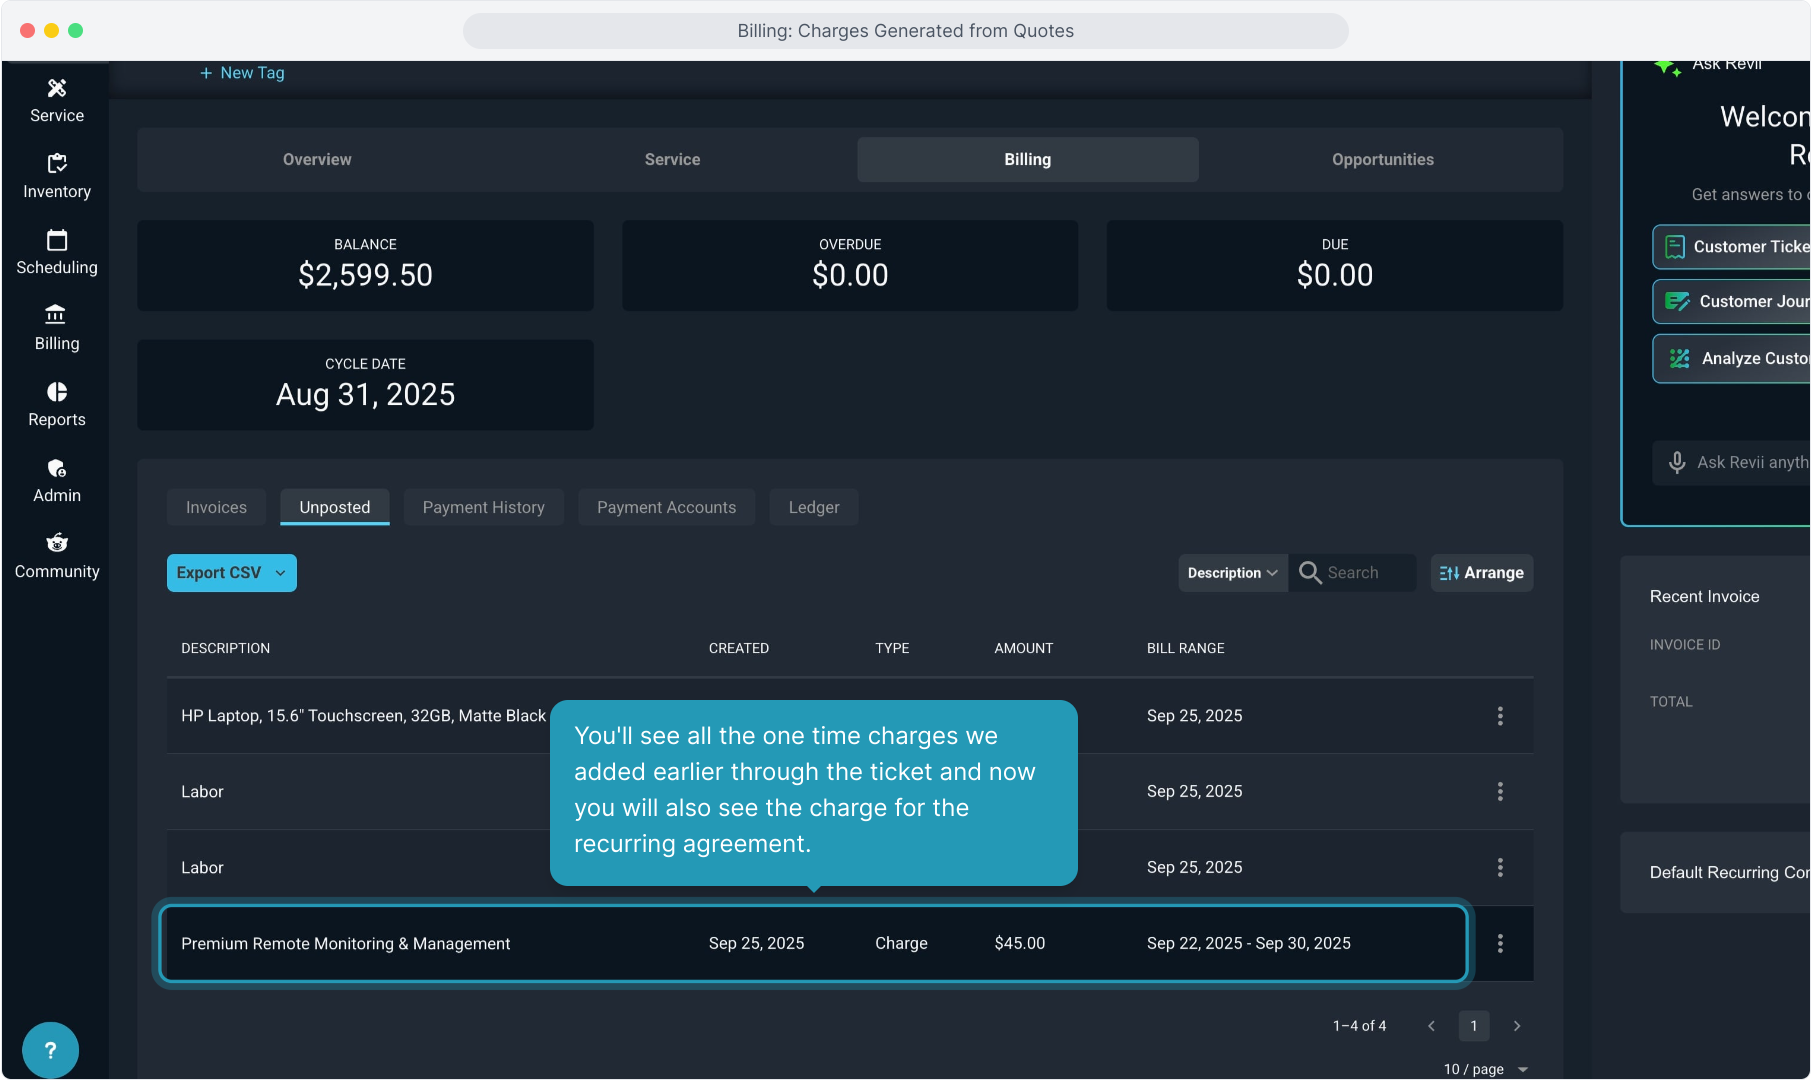
32. Recurring charges will show the date range that was billed.
In this case, the system is generating just the remaining prorated charges for the month, based on the Start Date that was selected when activating the contract and the bill profile configuration.
On the next cycle date, the system will automatically generate the next cycle's charges to be invoiced.

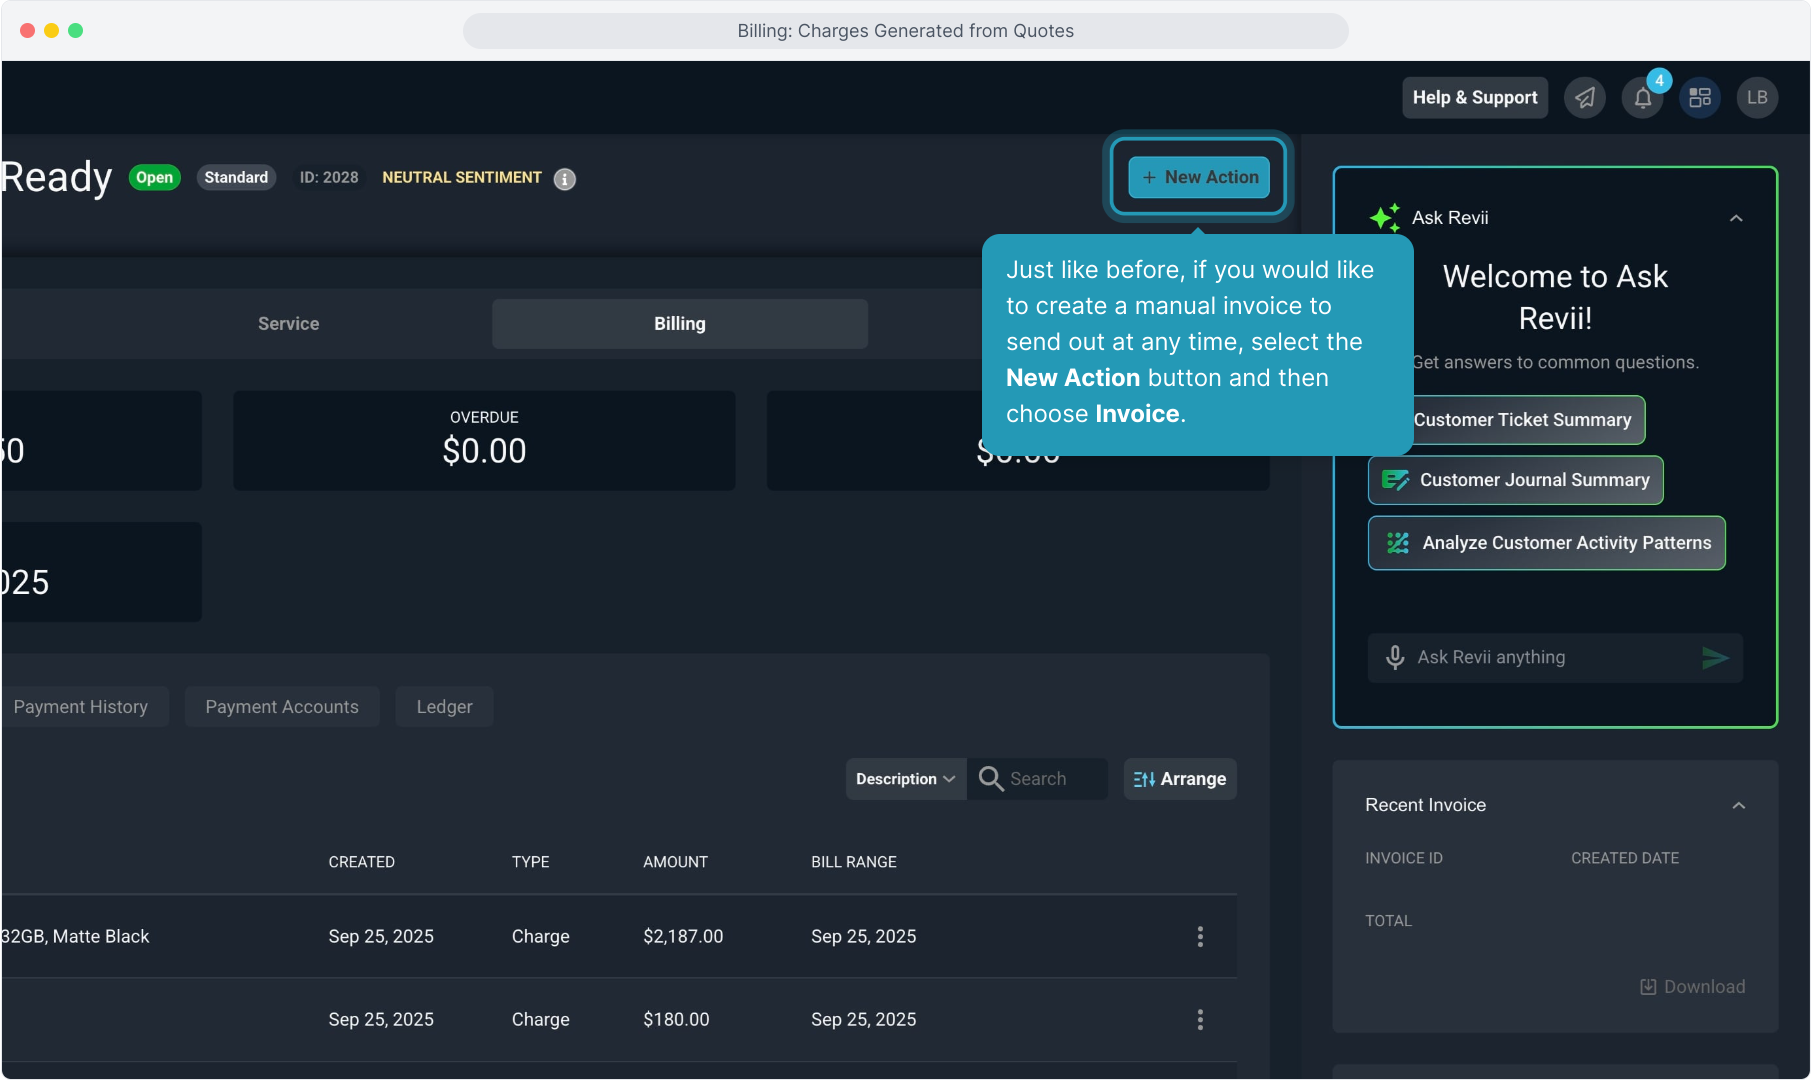
33. Just like before, if you would like to create a manual invoice to send out at any time, select the New Action button and then choose Invoice.
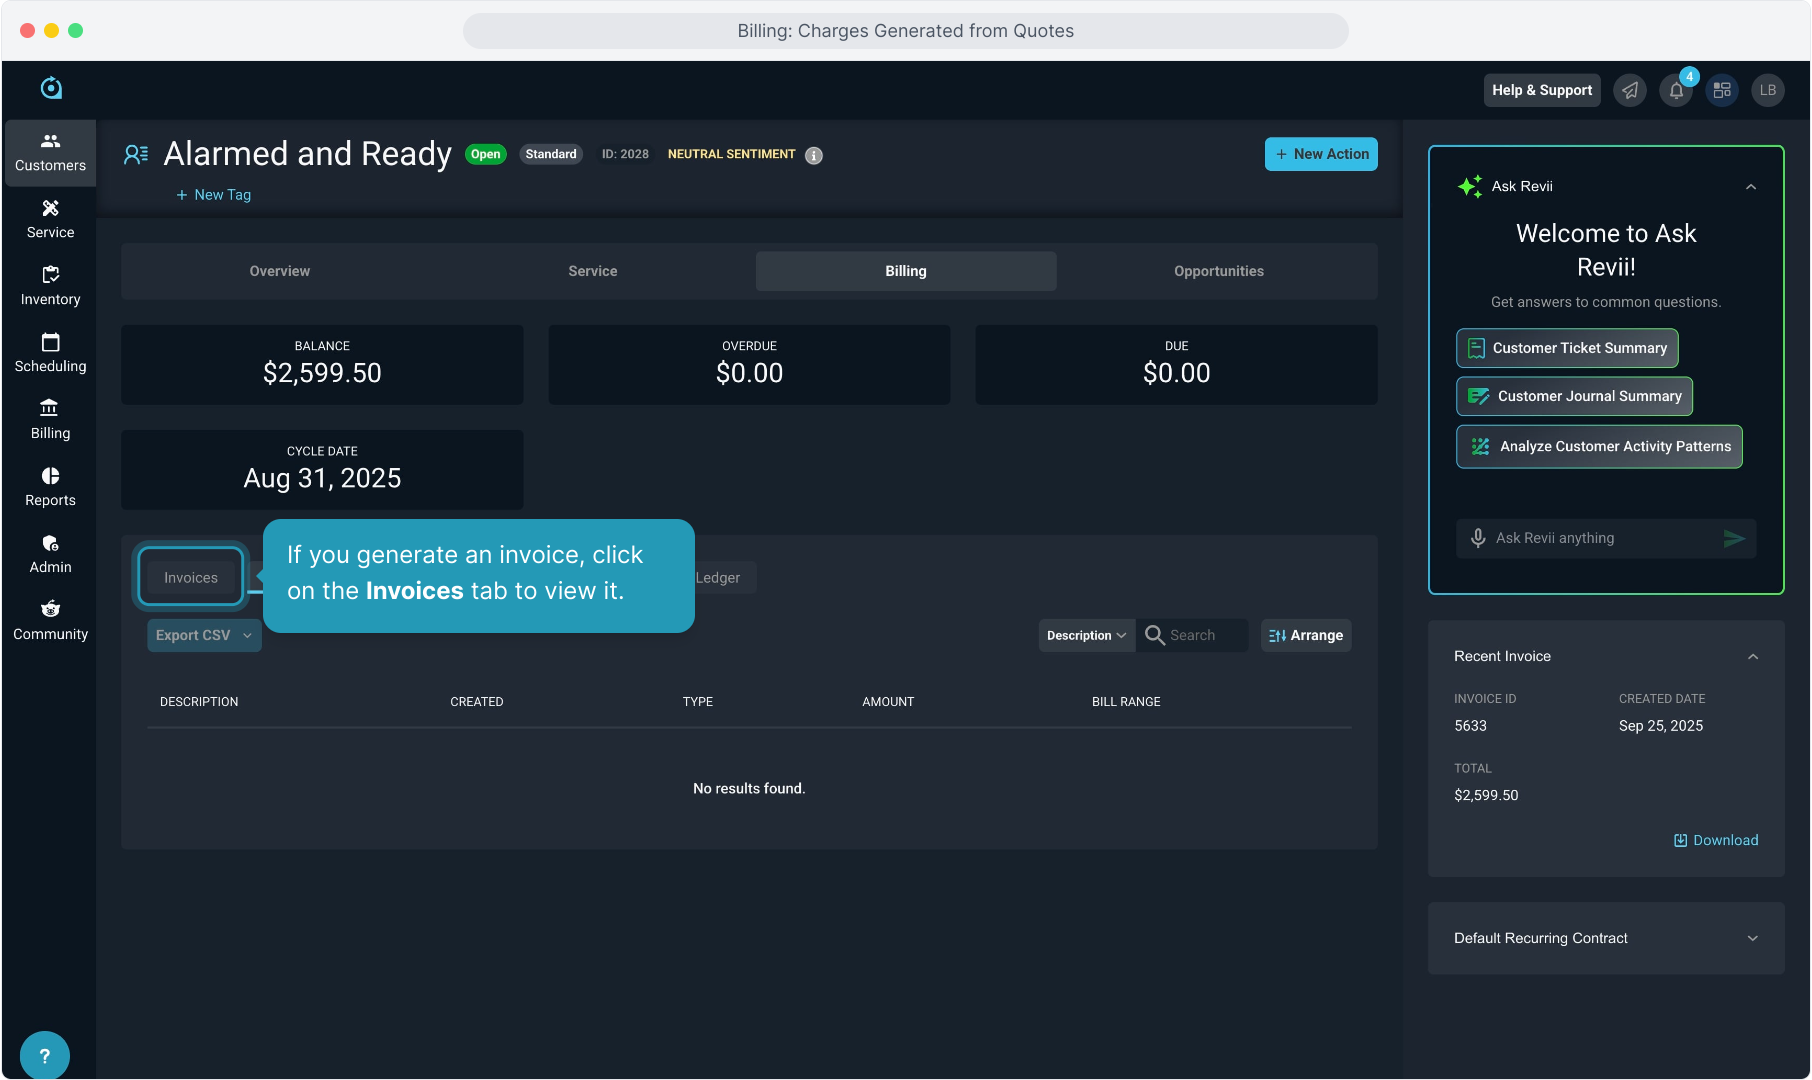
34. If you generate an invoice, click on the Invoices tab to view it.
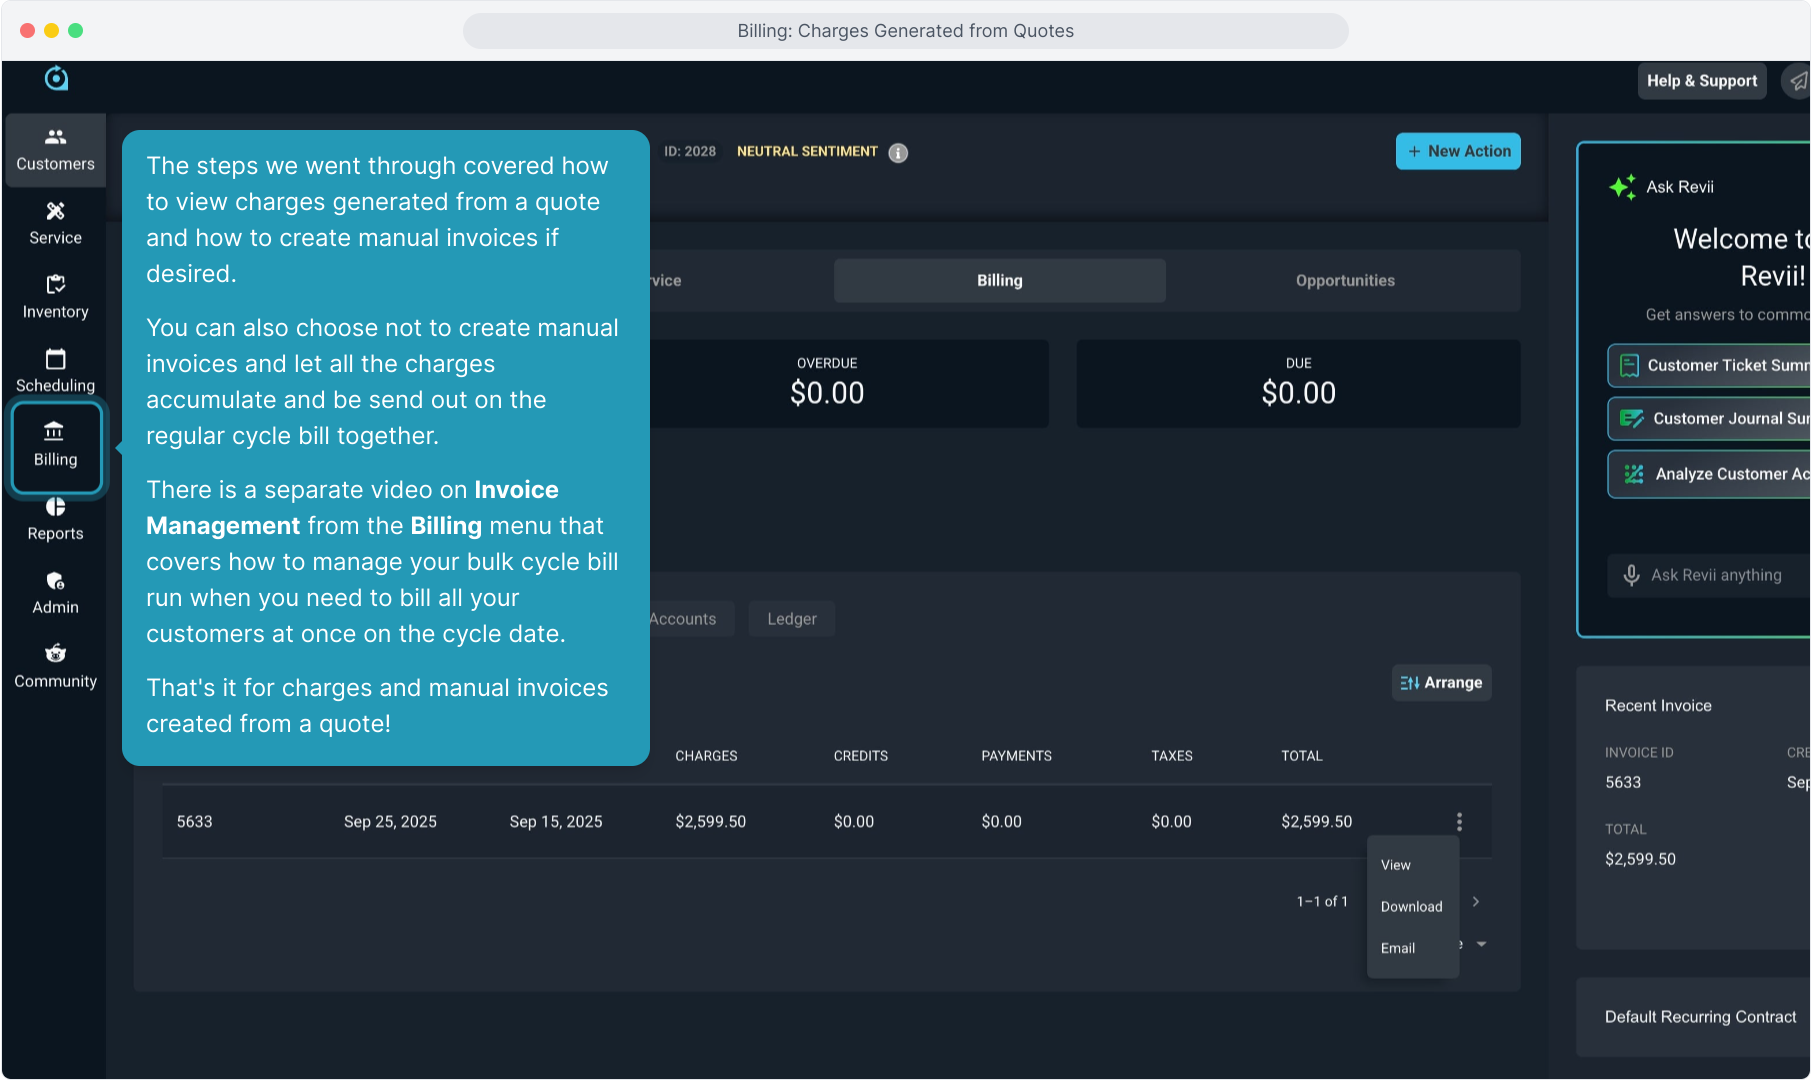
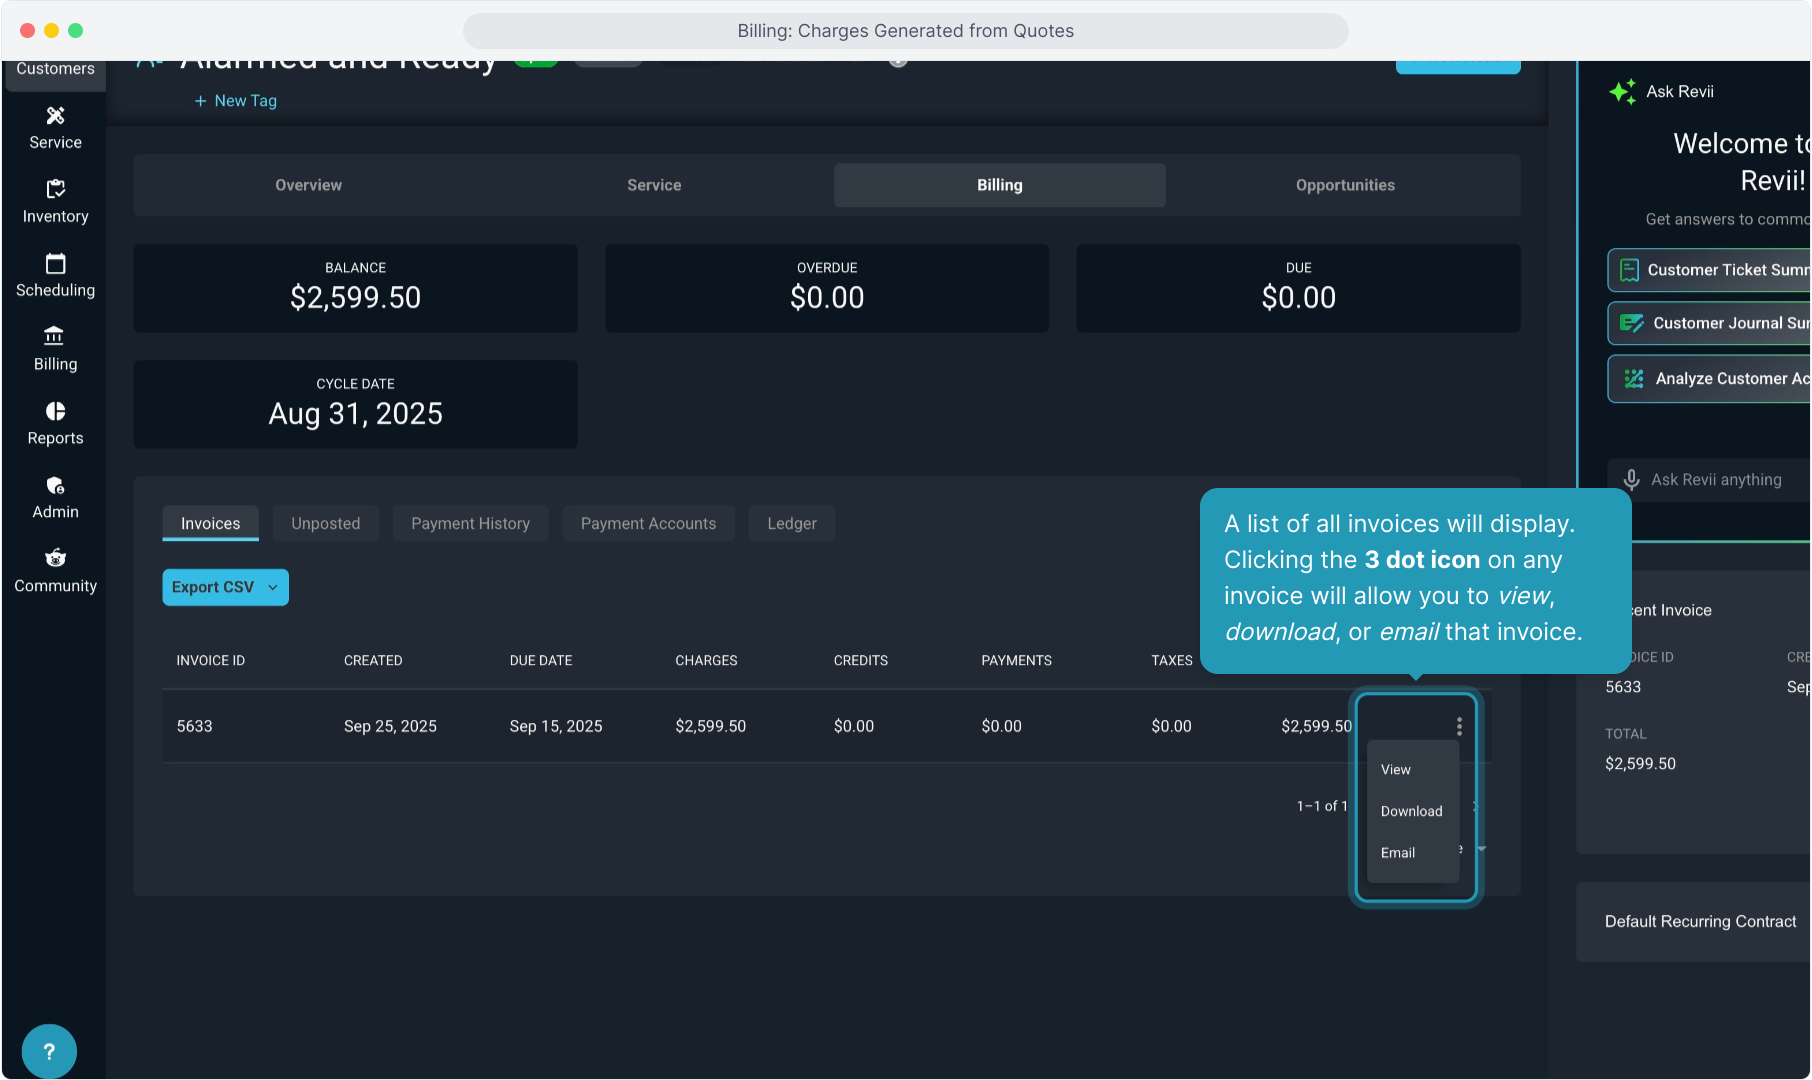
35. A list of all invoices will display. Clicking the 3 dot icon on any invoice will allow you to view, download, or email that invoice.
36. The steps we went through covered how to view charges generated from a quote and how to create manual invoices if desired.
You can also choose not to create manual invoices and let all the charges accumulate and be send out on the regular cycle bill together.
There is a separate video on Invoice Management from the Billing menu that covers how to manage your bulk cycle bill run when you need to bill all your customers at once on the cycle date.
That's it for charges and manual invoices created from a quote!