How To Guide: Linking Tickets
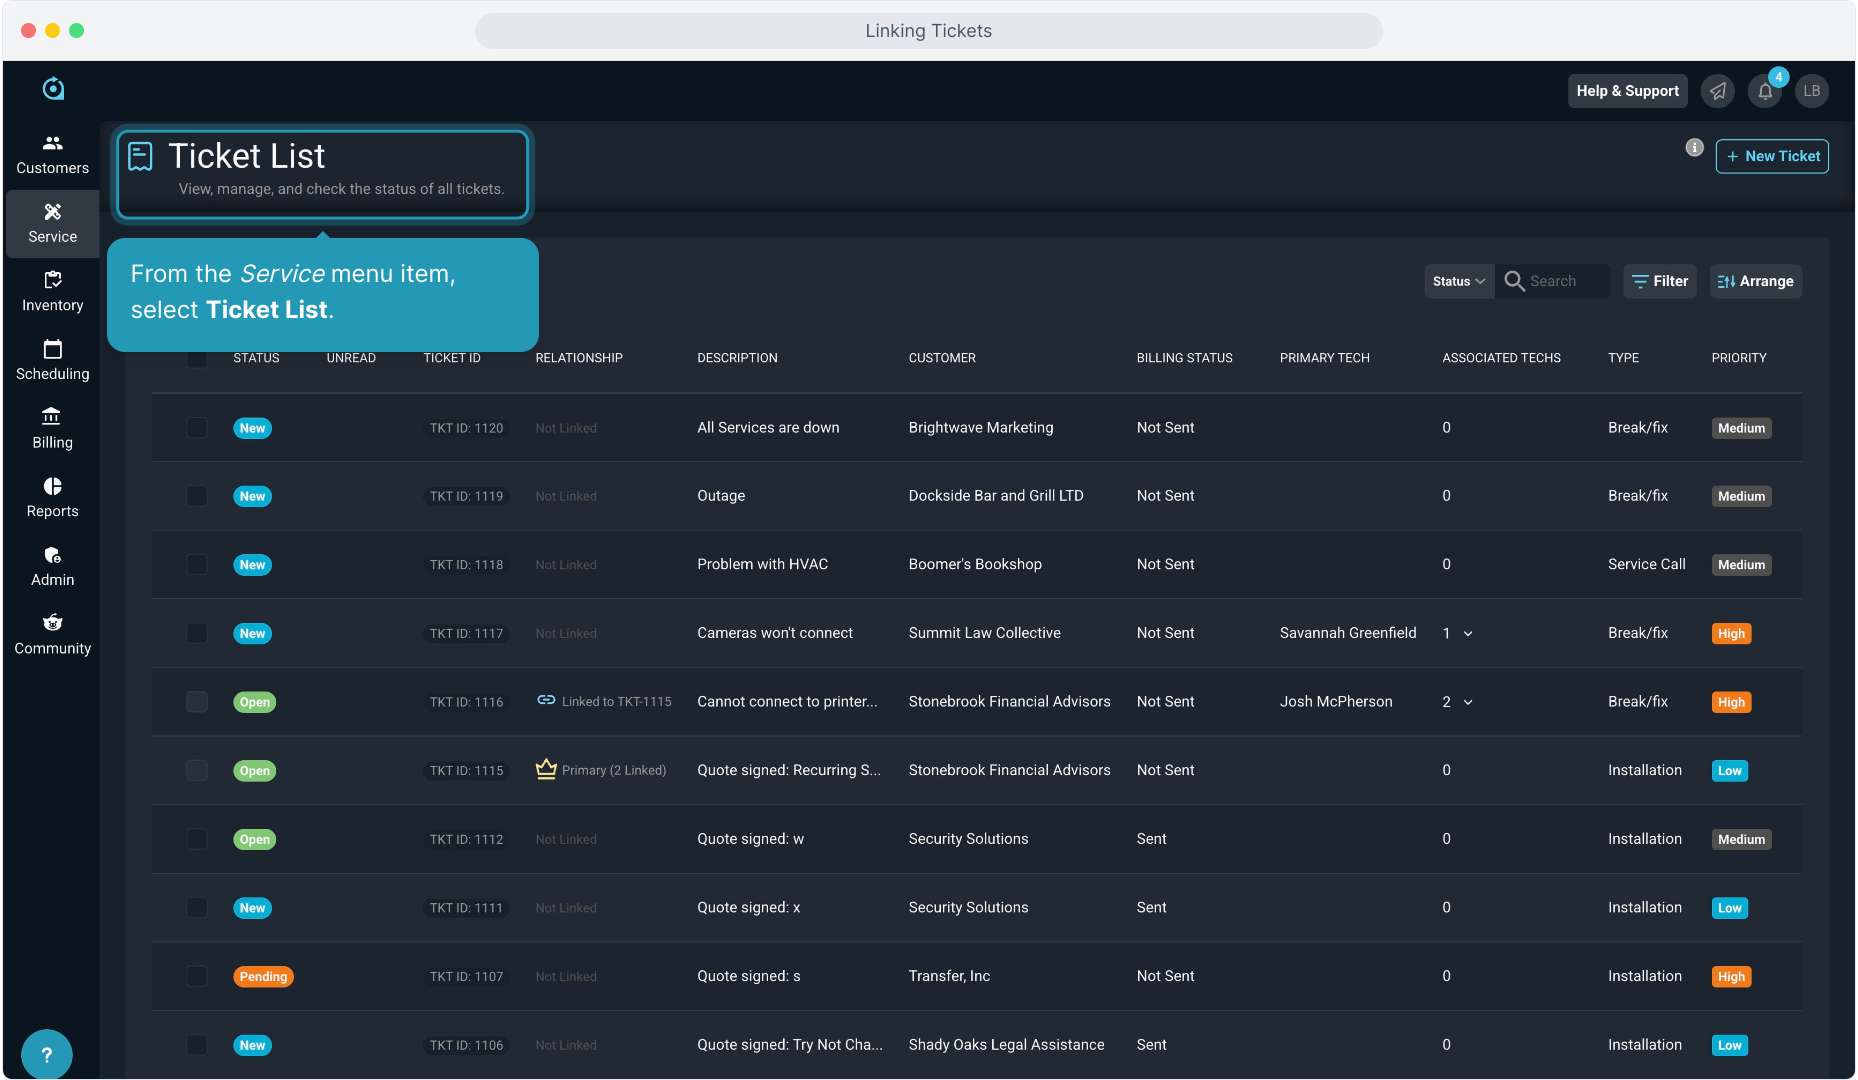
2. From the Service menu item, select Ticket List.
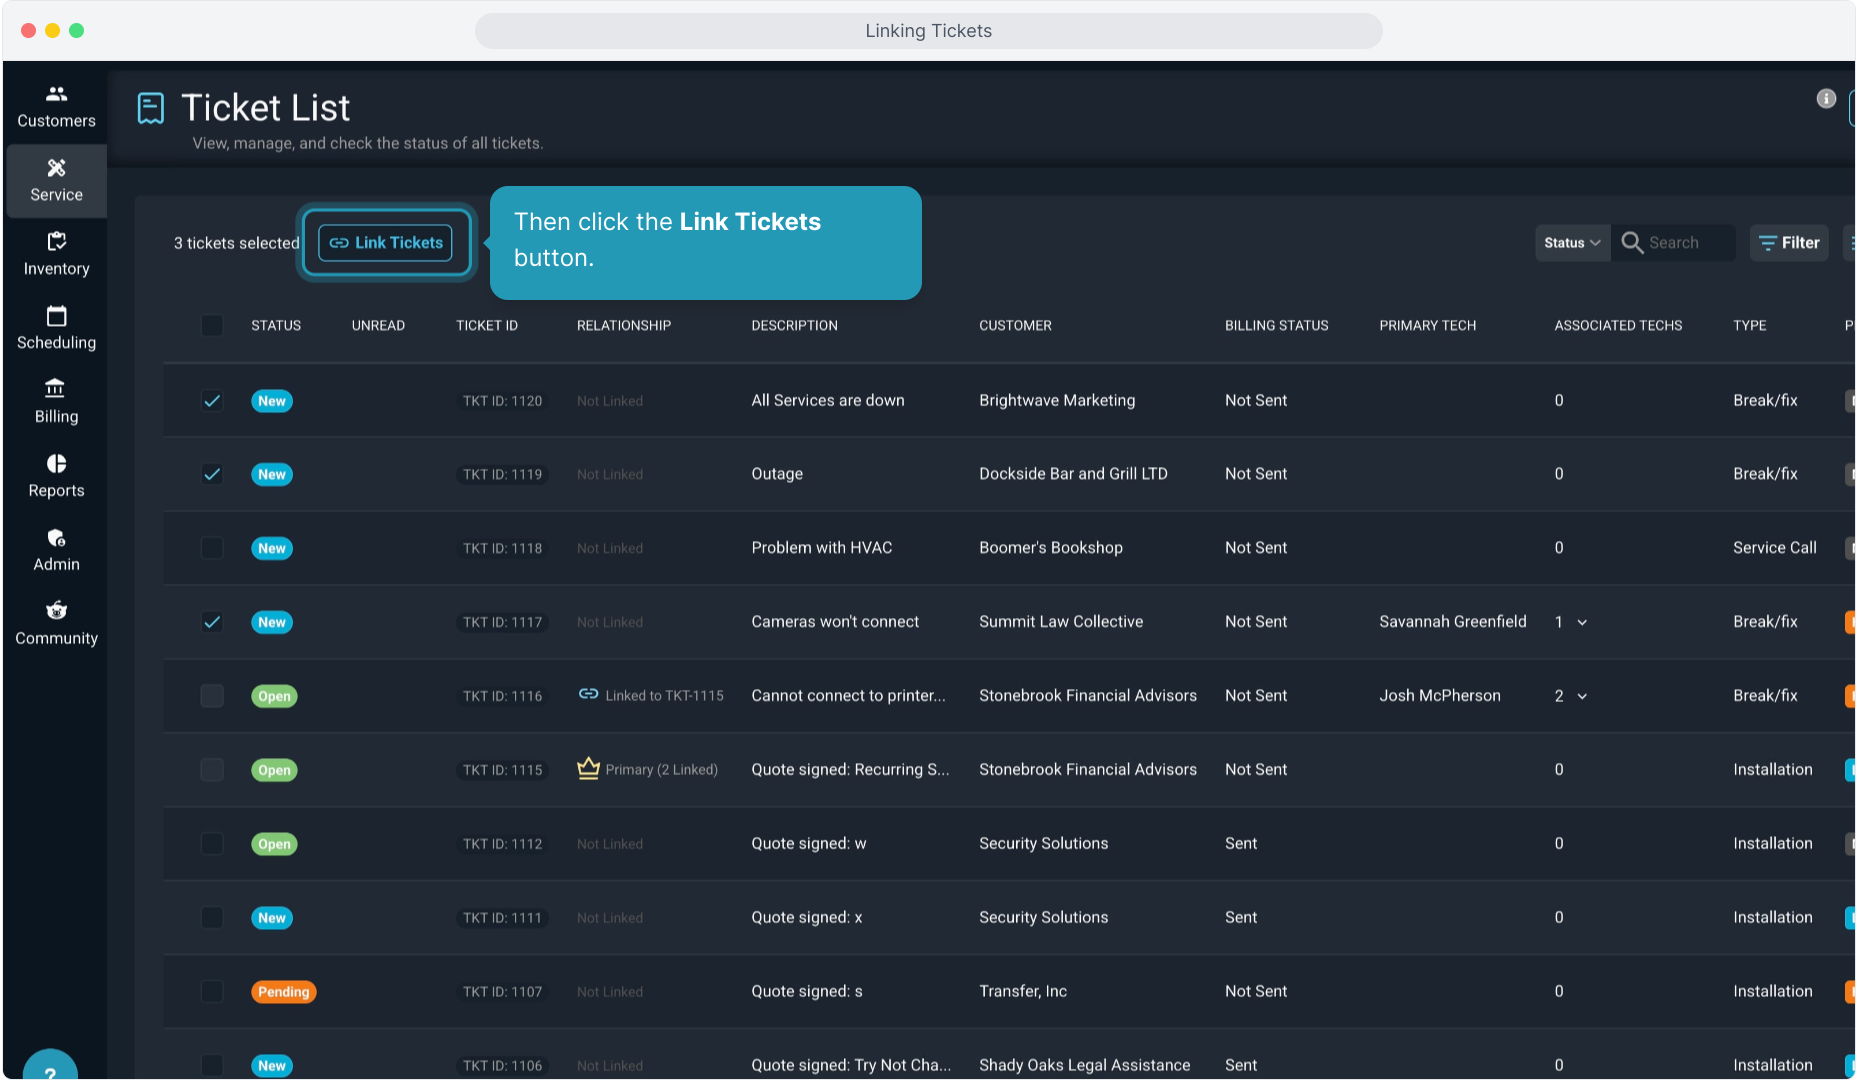
3. Find and select the tickets you want to link together.
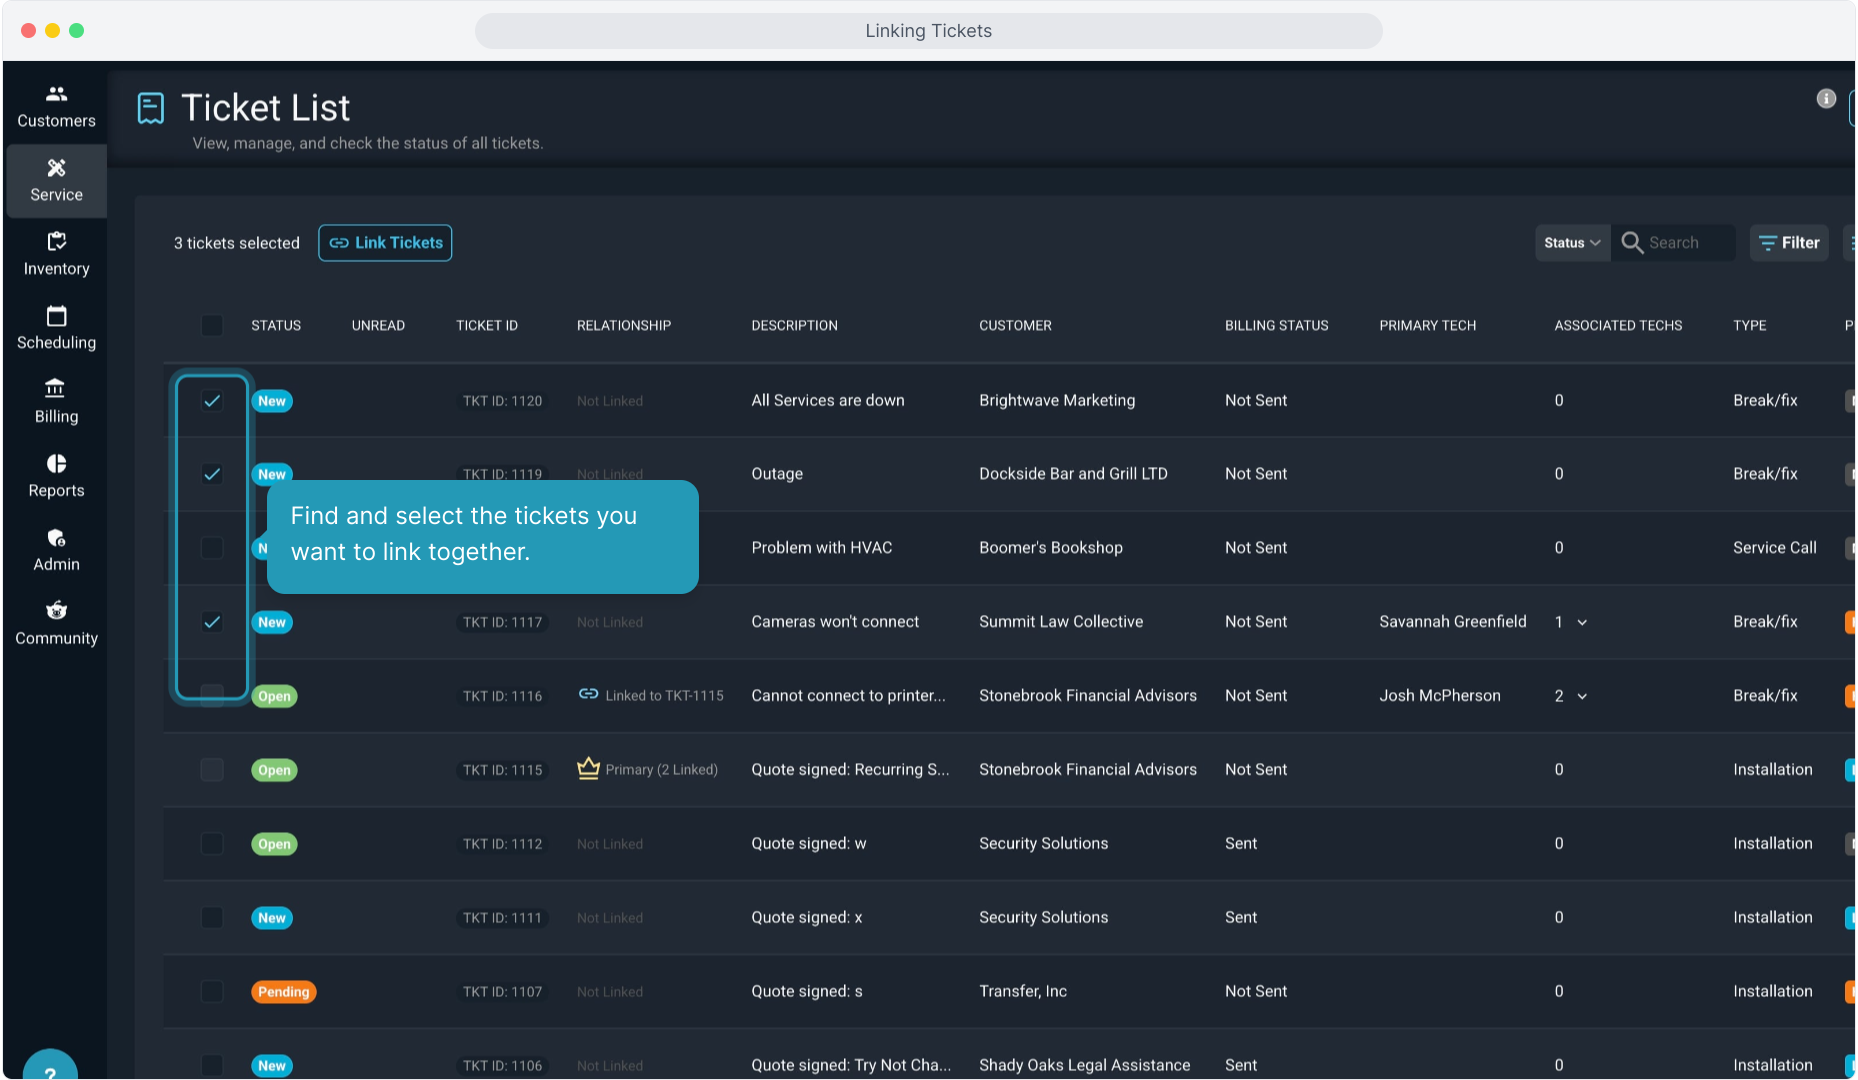
4. Then click the Link Tickets button.
5. (Intentionally blank)
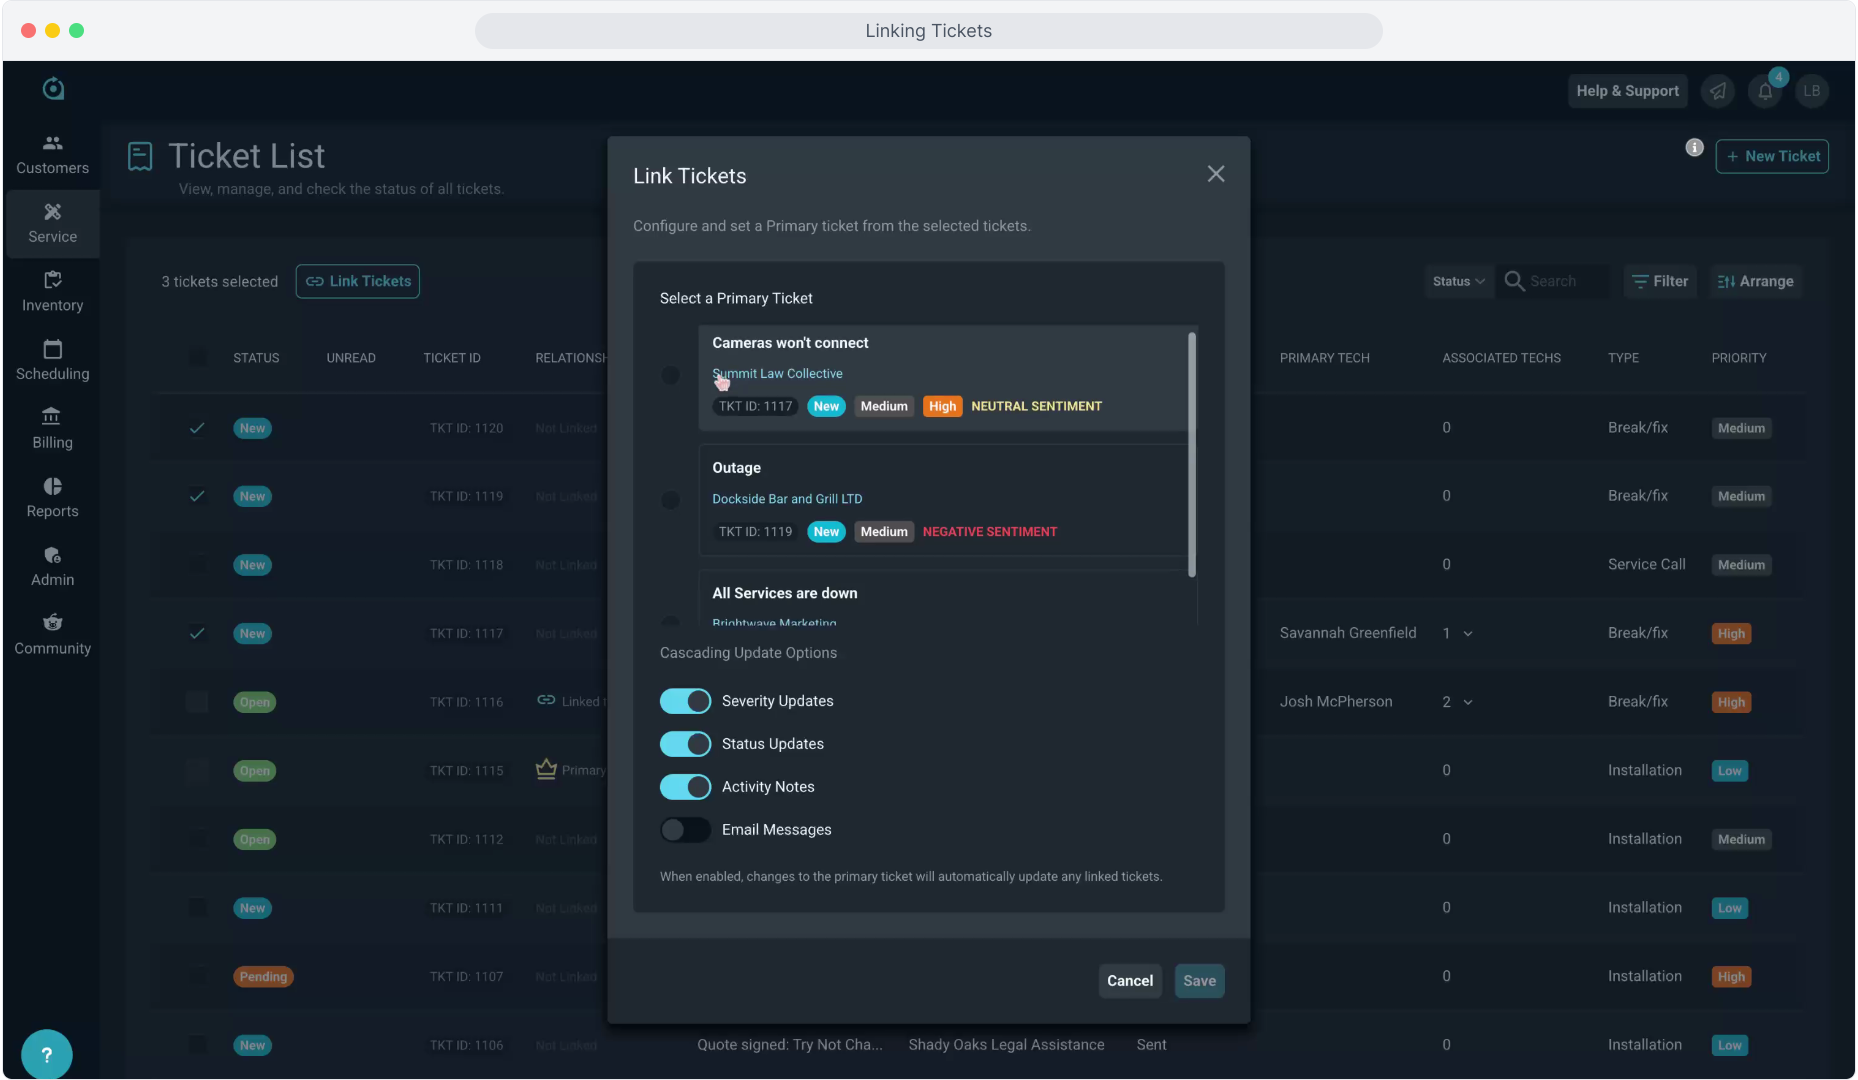
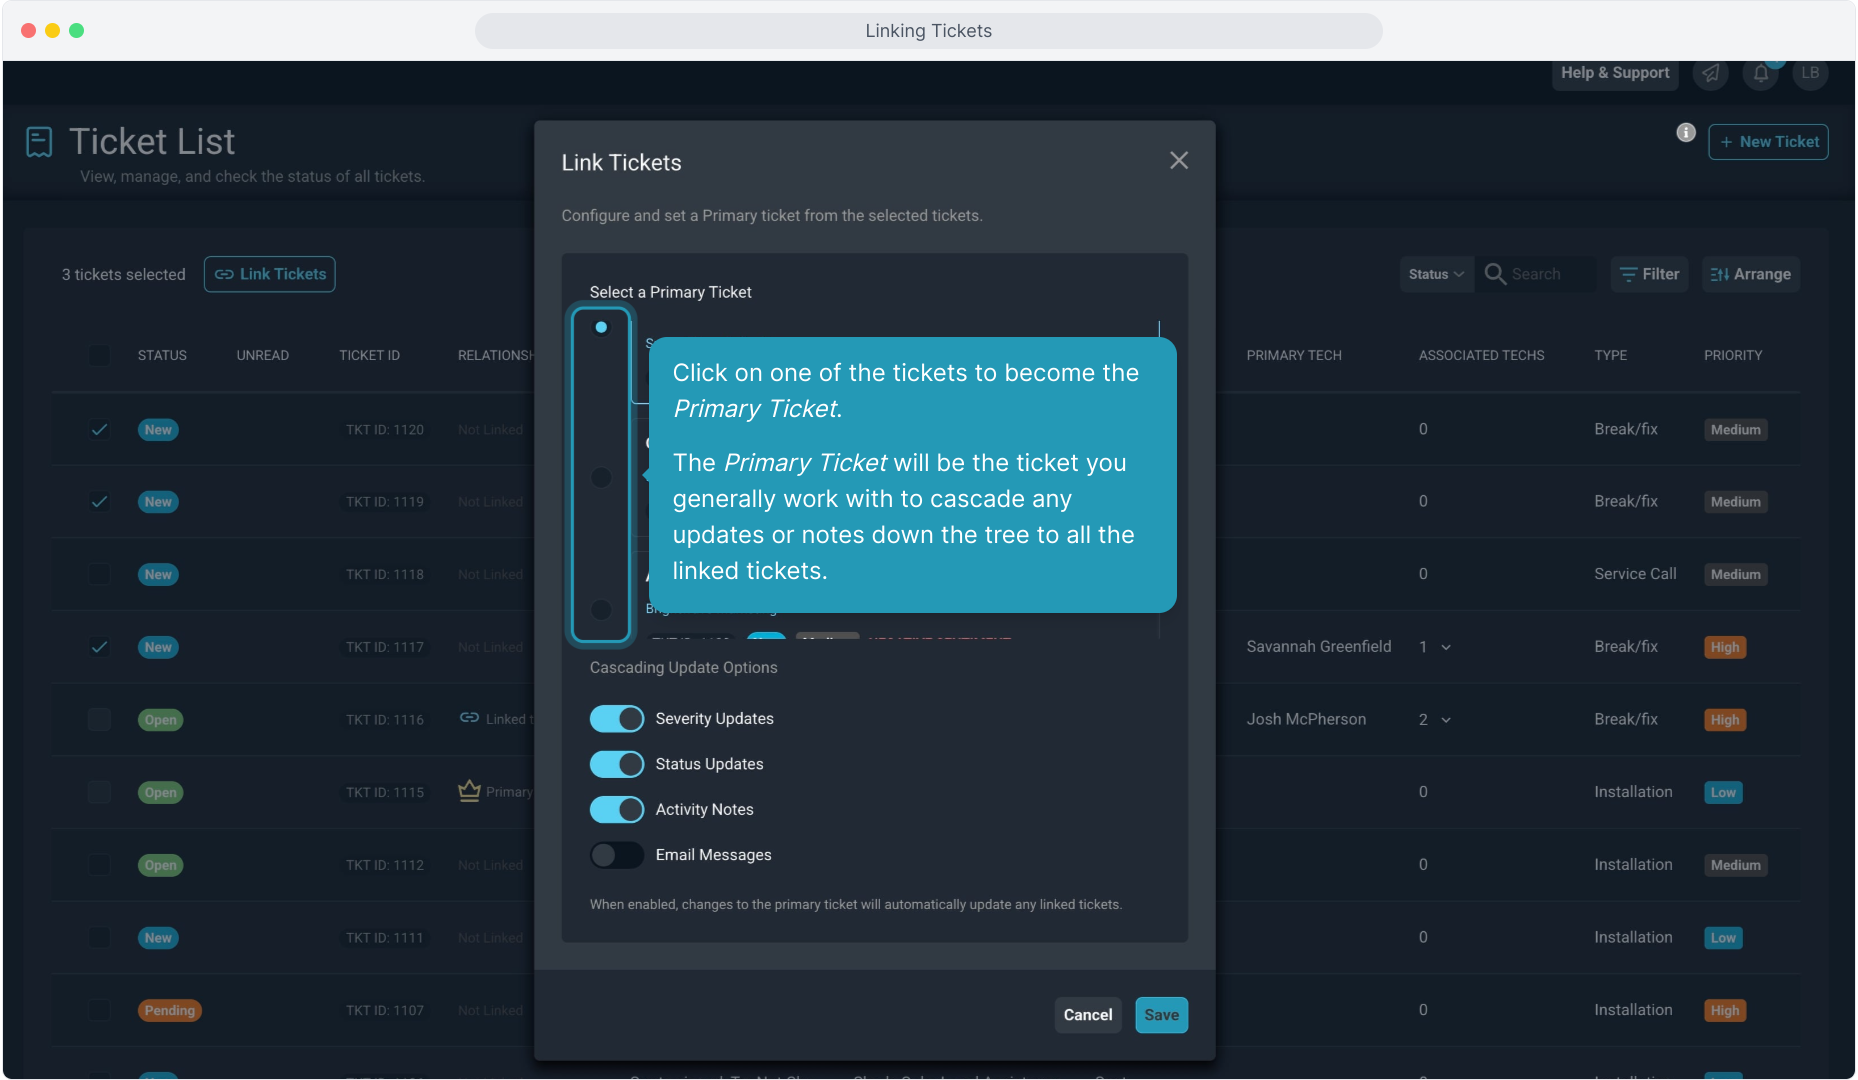
6. Click on one of the tickets to become the Primary Ticket. The Primary Ticket will be the ticket you generally work with to cascade any updates or notes down the tree to all the linked tickets.
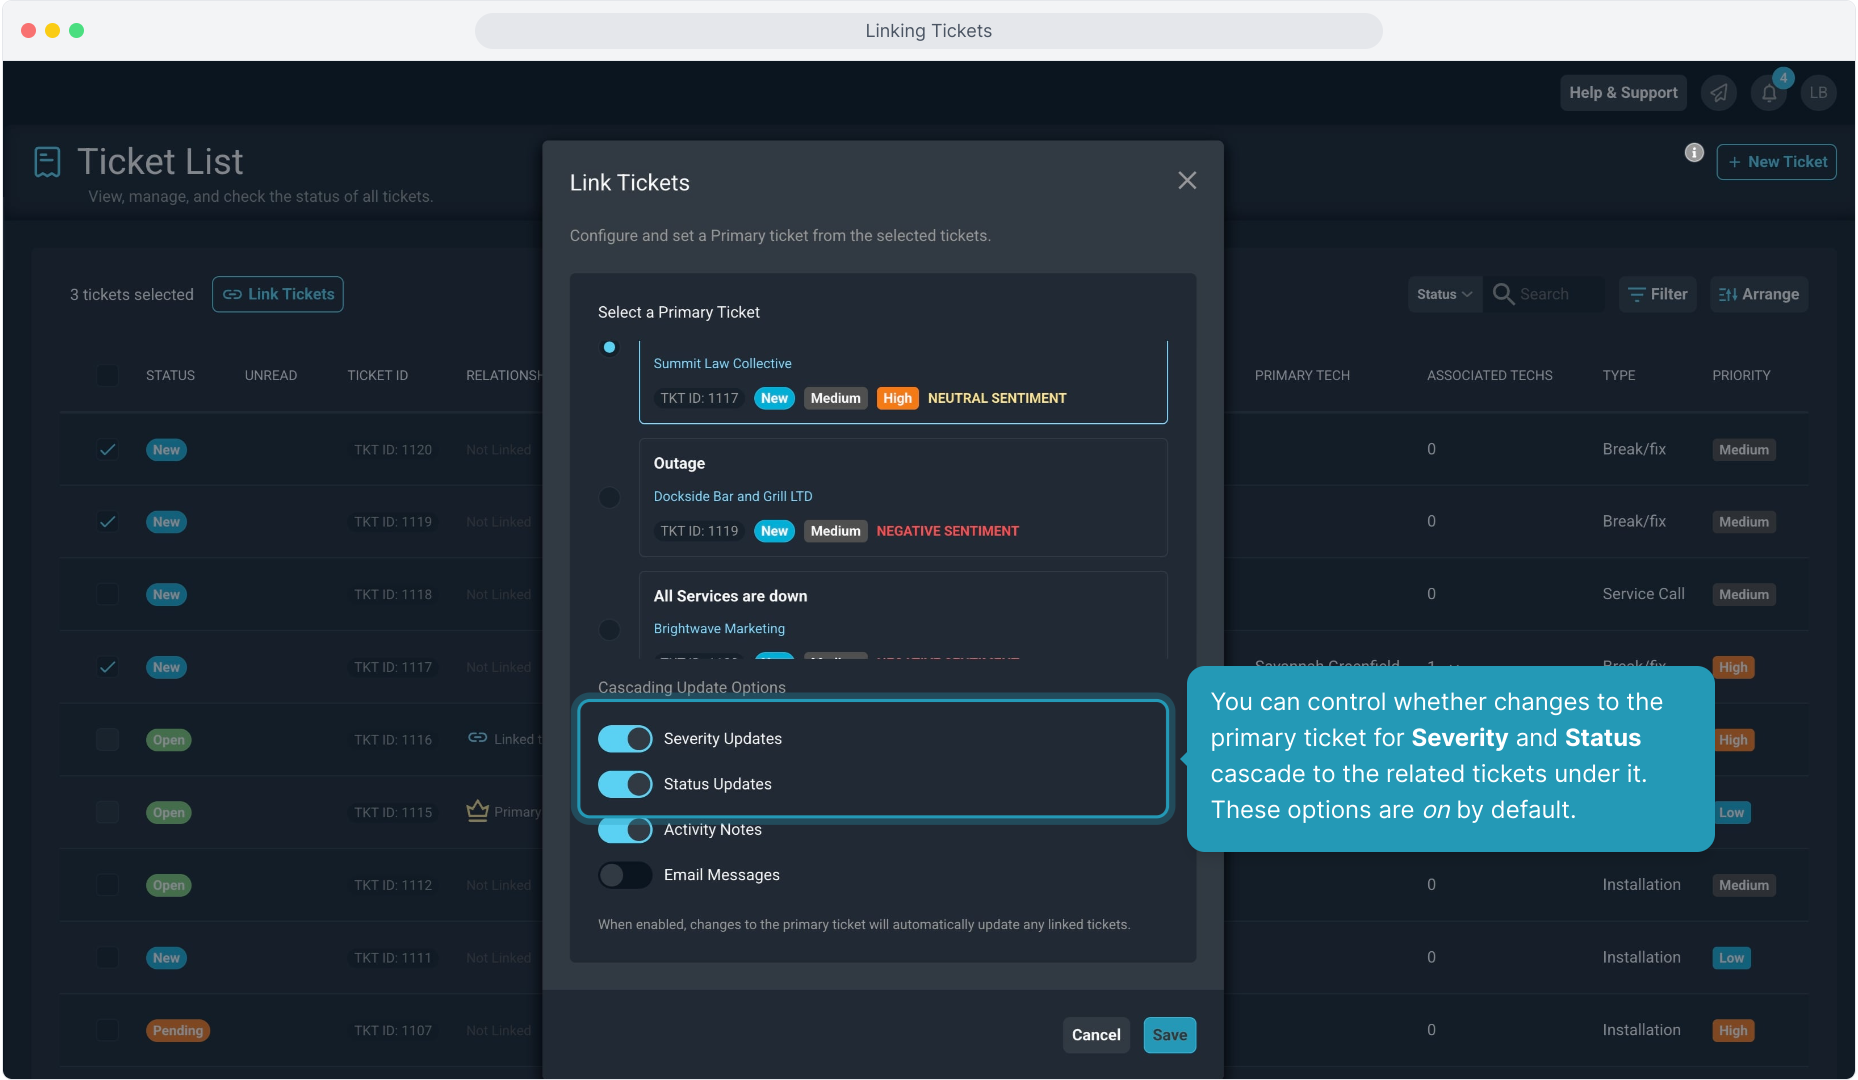
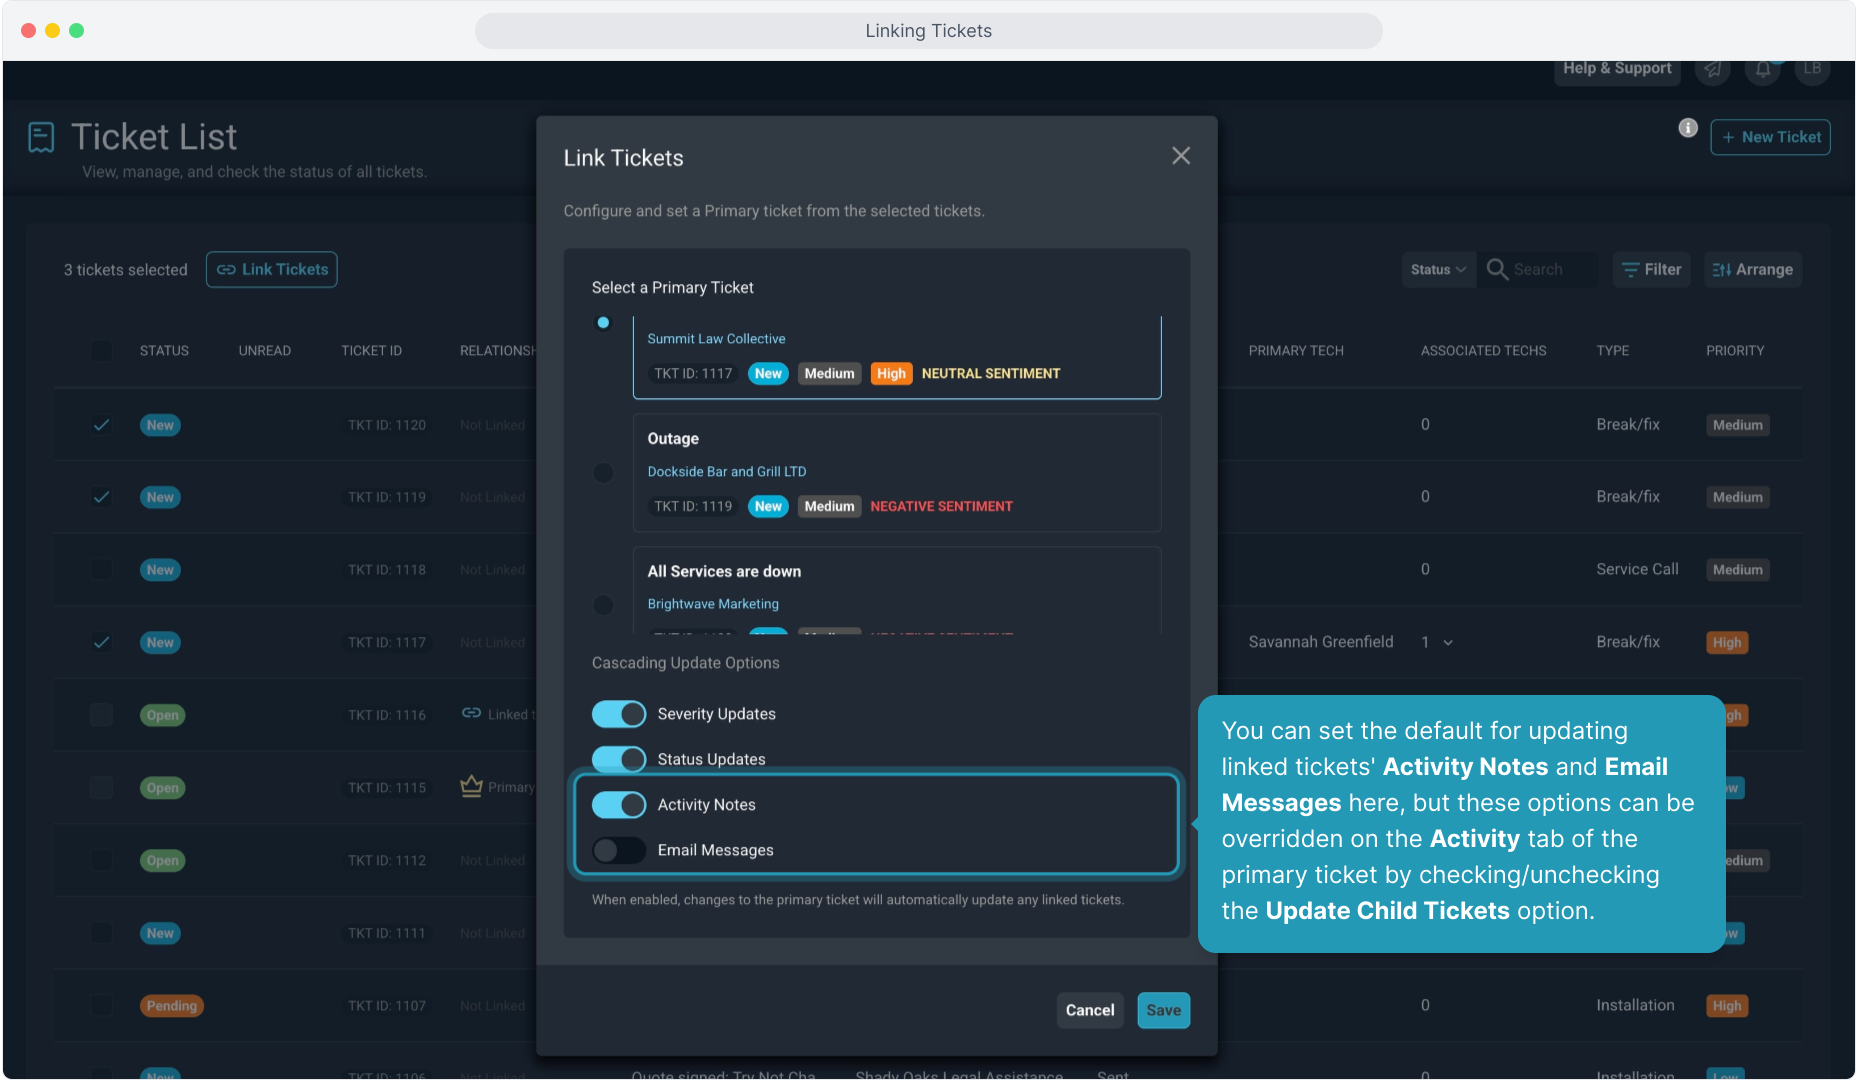
7. You can control whether changes to the primary ticket for Severity and Status cascade to the related tickets under it. These options are on by default.
8. You can set the default for updating linked tickets' Activity Notes and Email Messages here, but these options can be overridden on the Activity tab of the primary ticket by checking/unchecking the Update Child Tickets option.
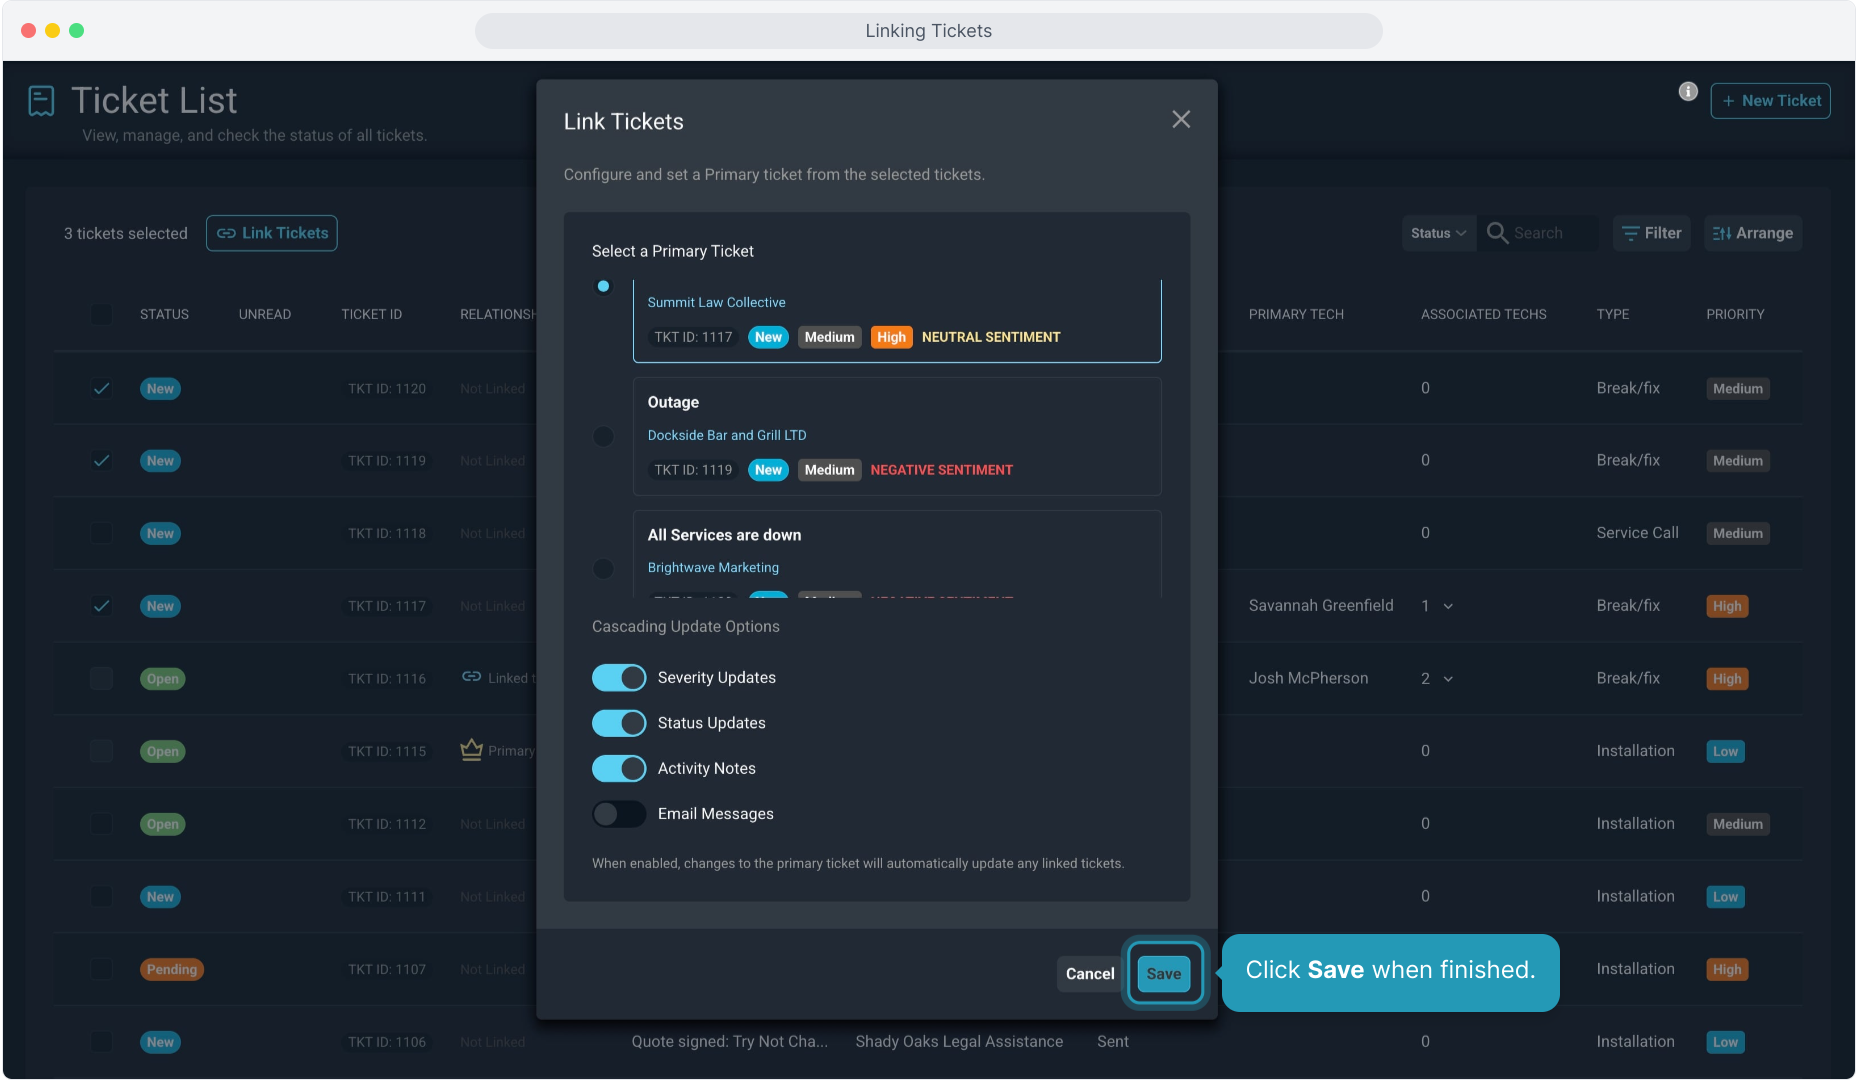
9. Click Save when finished.
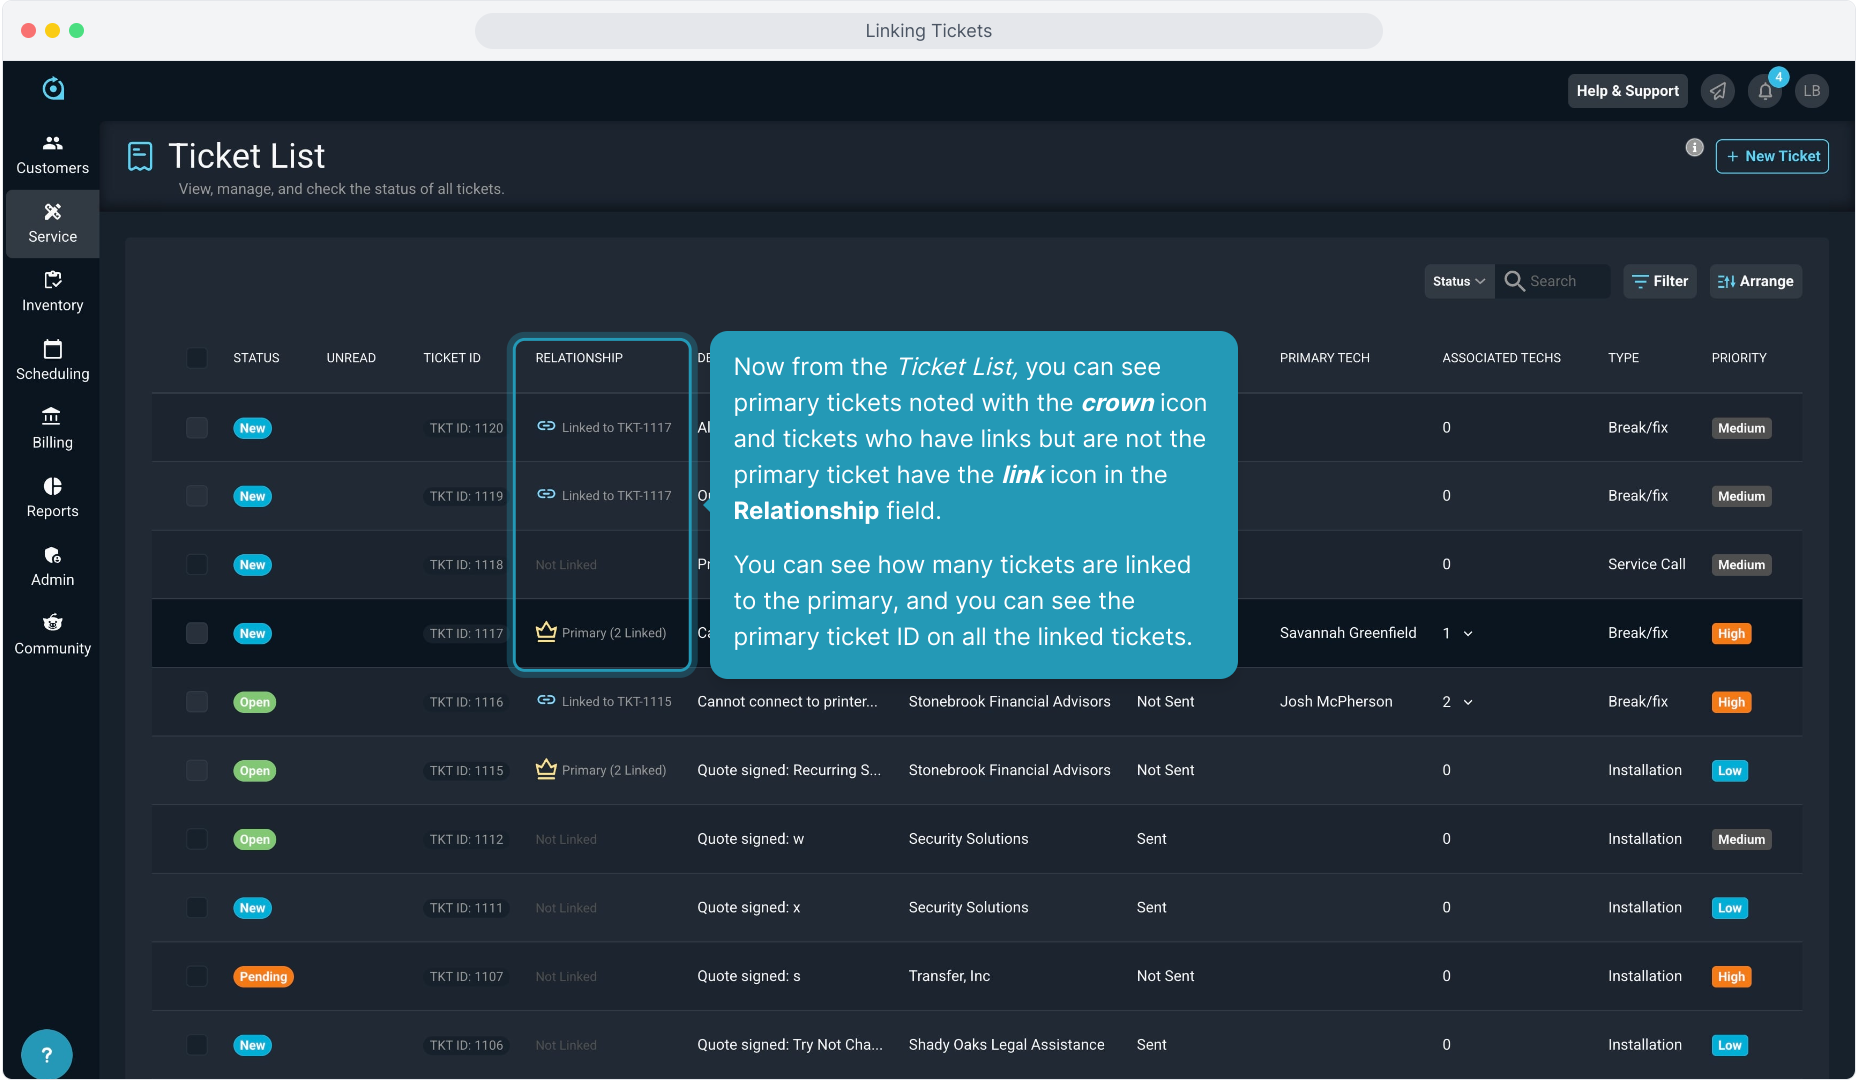
10. Now from the Ticket List, you can see primary tickets noted with the crown icon and tickets who have links but are not the primary ticket have the link icon in the Relationship field.
You can see how many tickets are linked to the primary, and you can see the primary ticket ID on all the linked tickets.
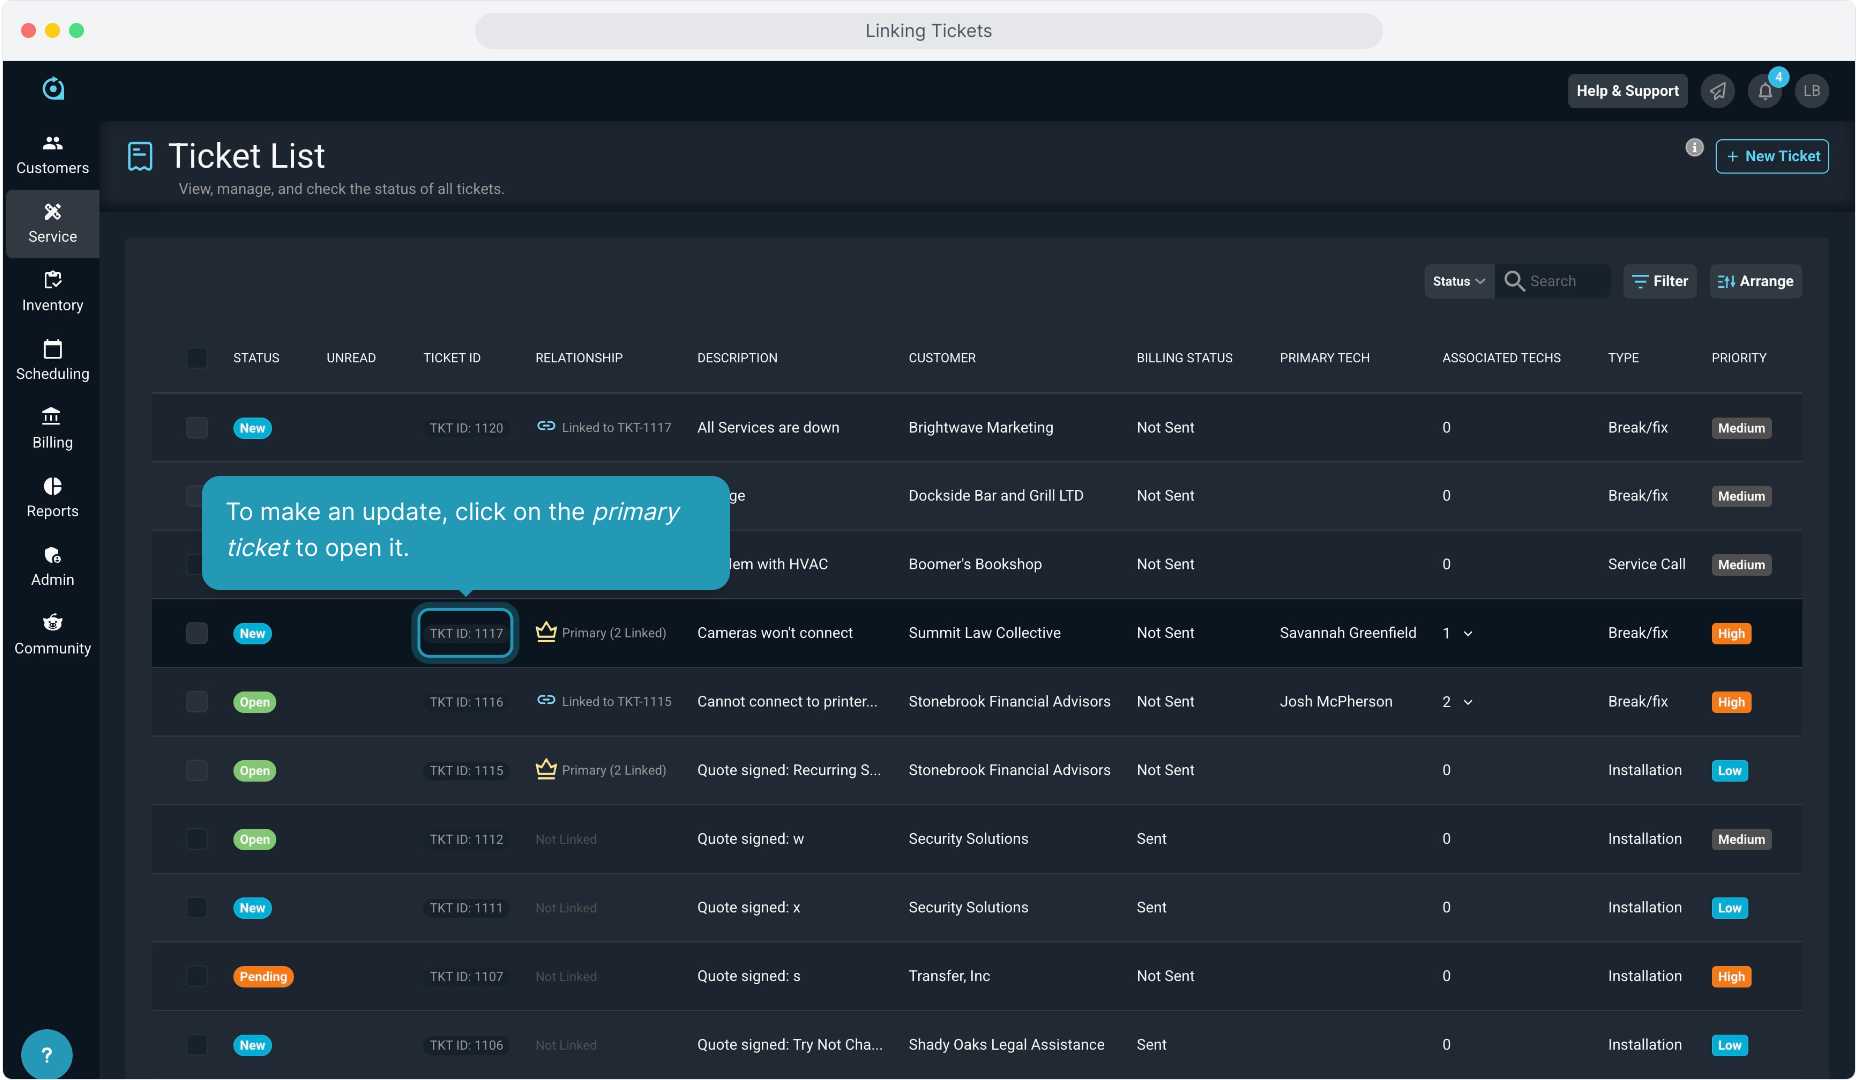
11. To make an update, click on the primary ticket to open it.
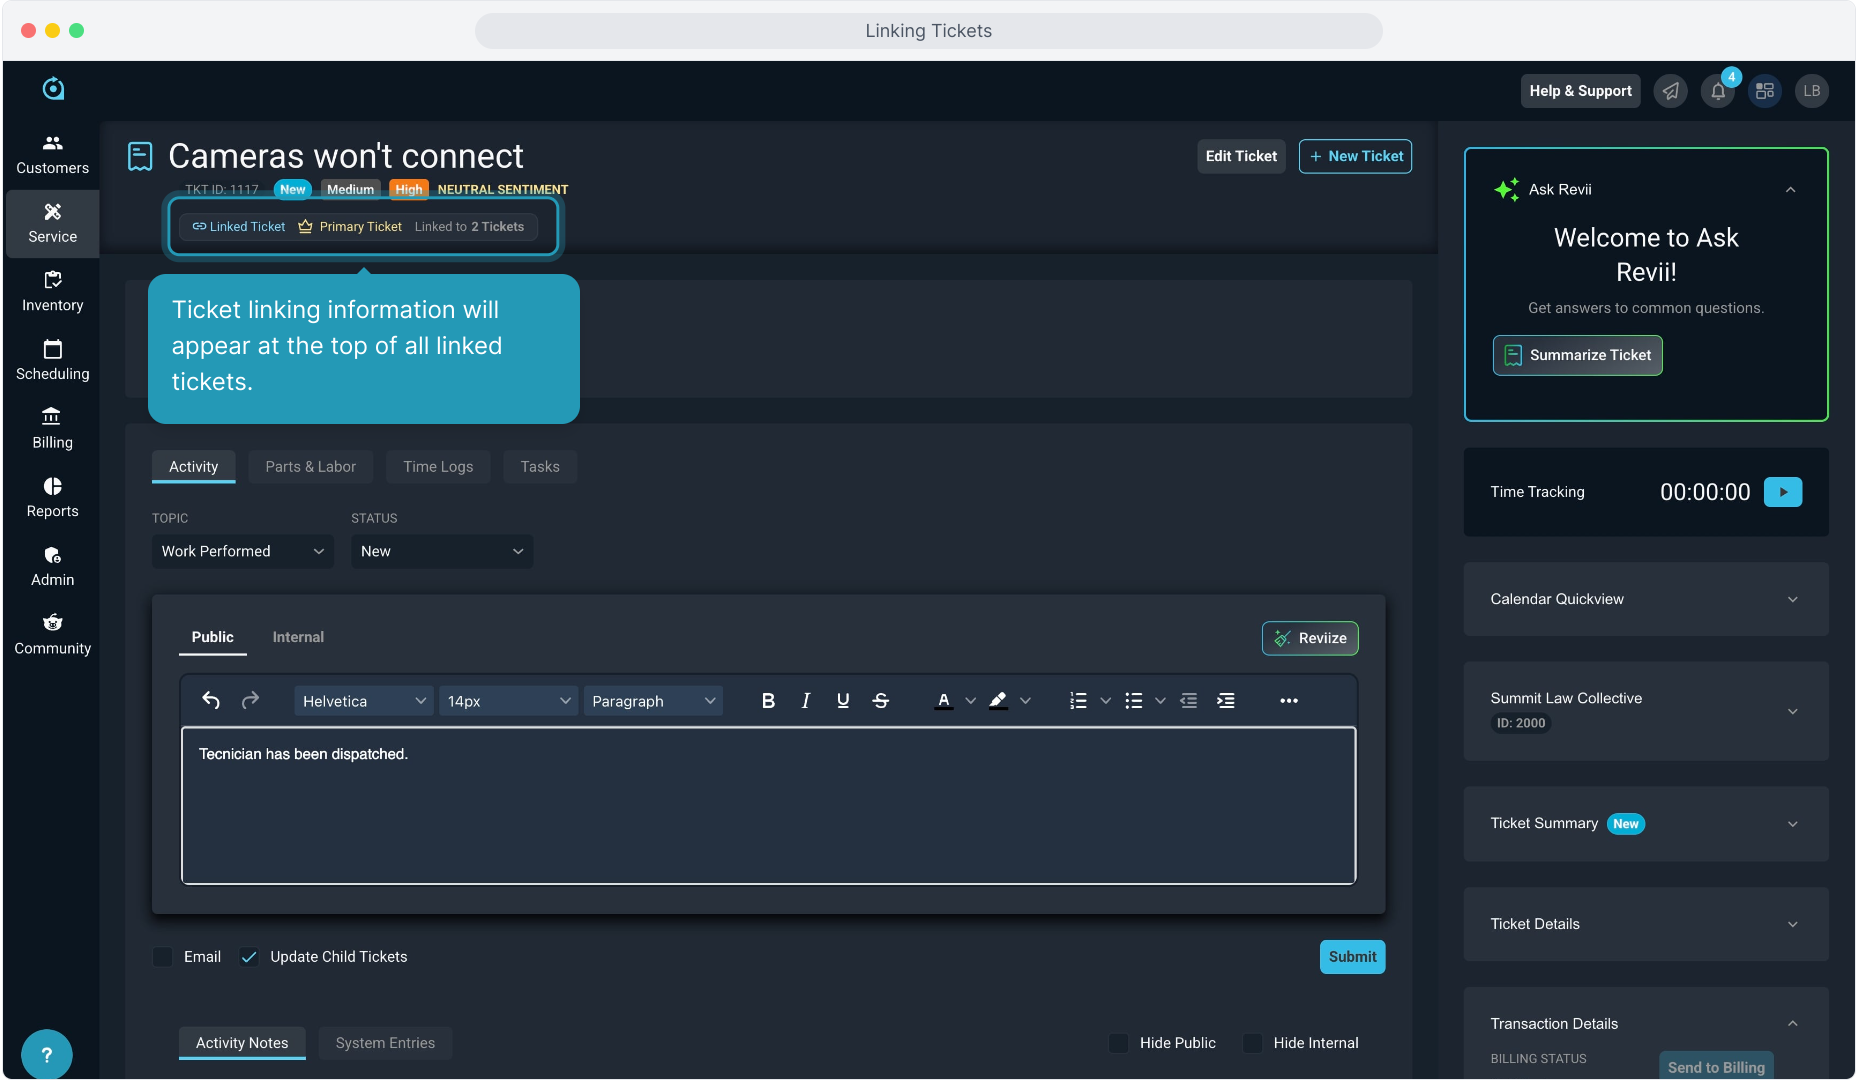
12. Ticket linking information will appear at the top of all linked tickets.
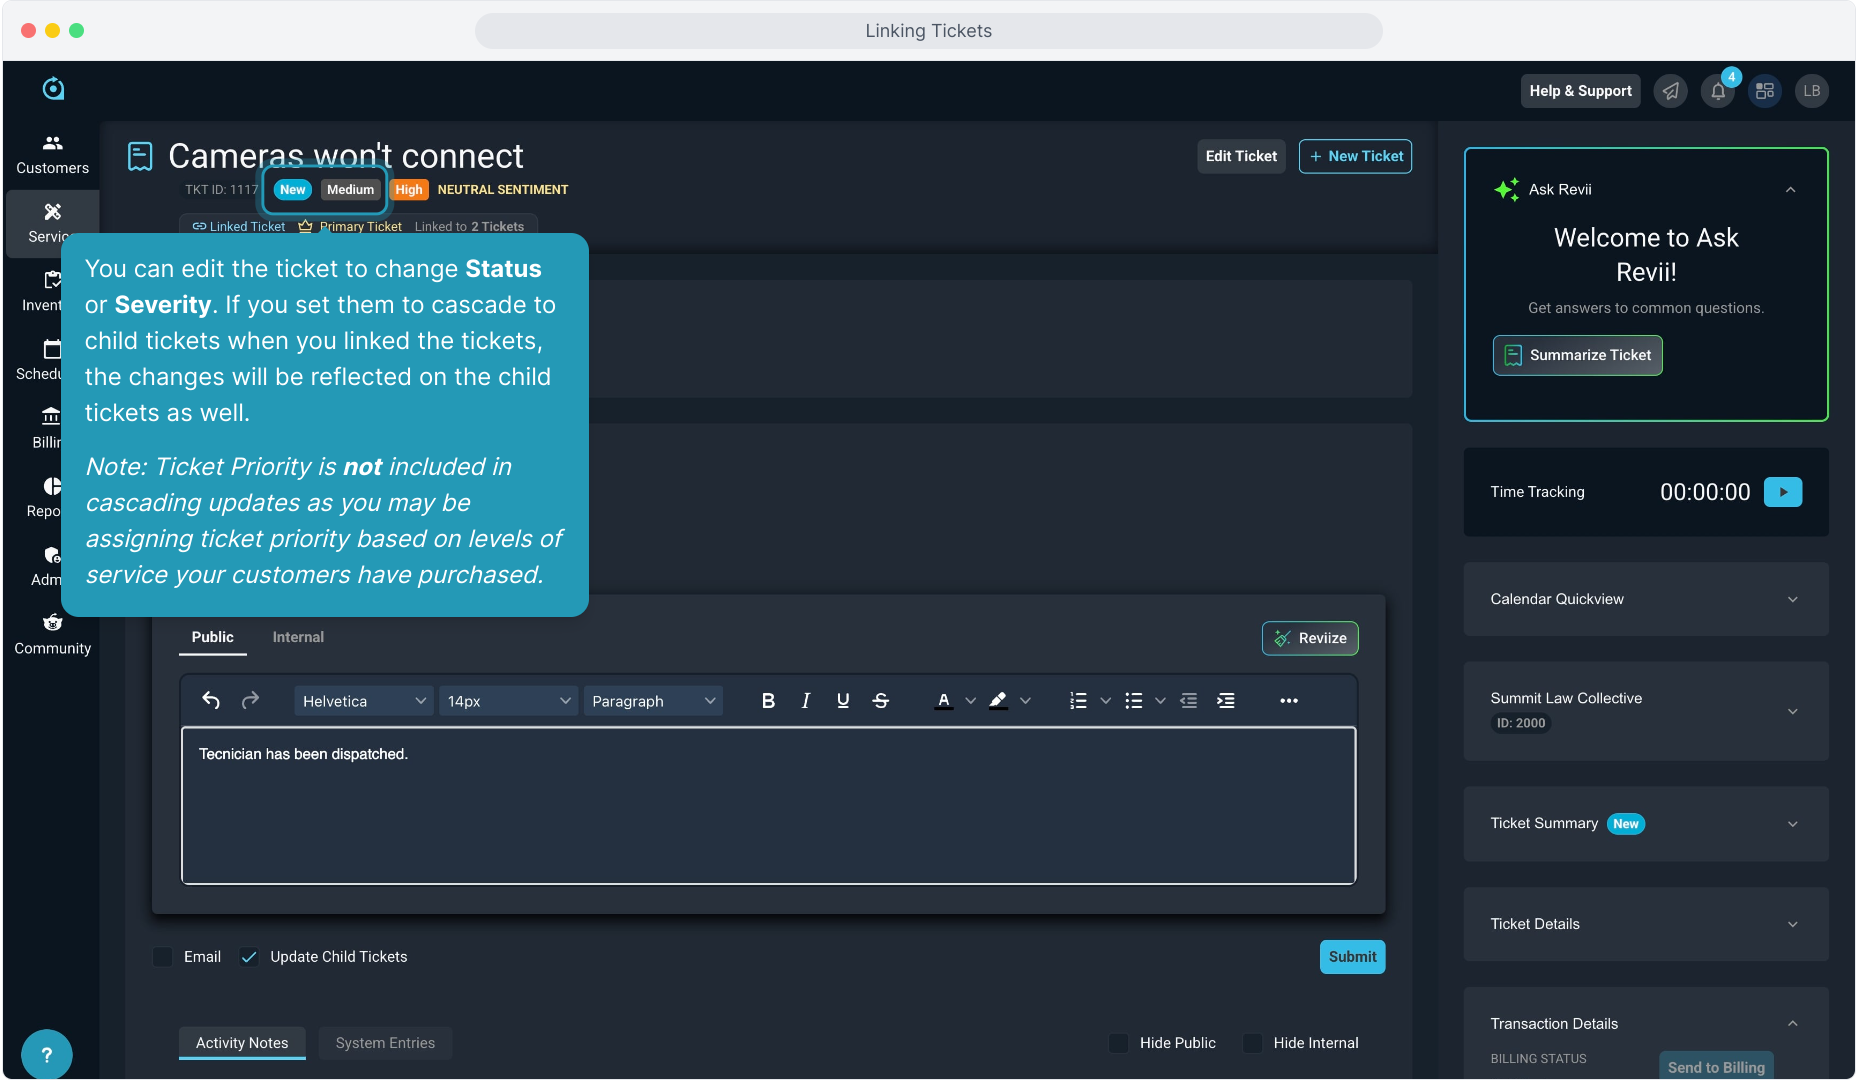
13. You can edit the ticket to change Status or Severity. If you set them to cascade to child tickets when you linked the tickets, the changes will be reflected on the child tickets as well.
Note: Ticket Priority is not included in cascading updates as you may be assigning ticket priority based on levels of service your customers have purchased.
14. You can optionally choose to send Activity Notes to the customer via email. Click the Email option and To field will auto populate if there is a ticket contact.
If no email address populates automatically, that indicates that no contact was selected for this ticket.
And if you are not emailing the note, you can still create the activity note on the tickets and use the Public and Internal options for the notes.

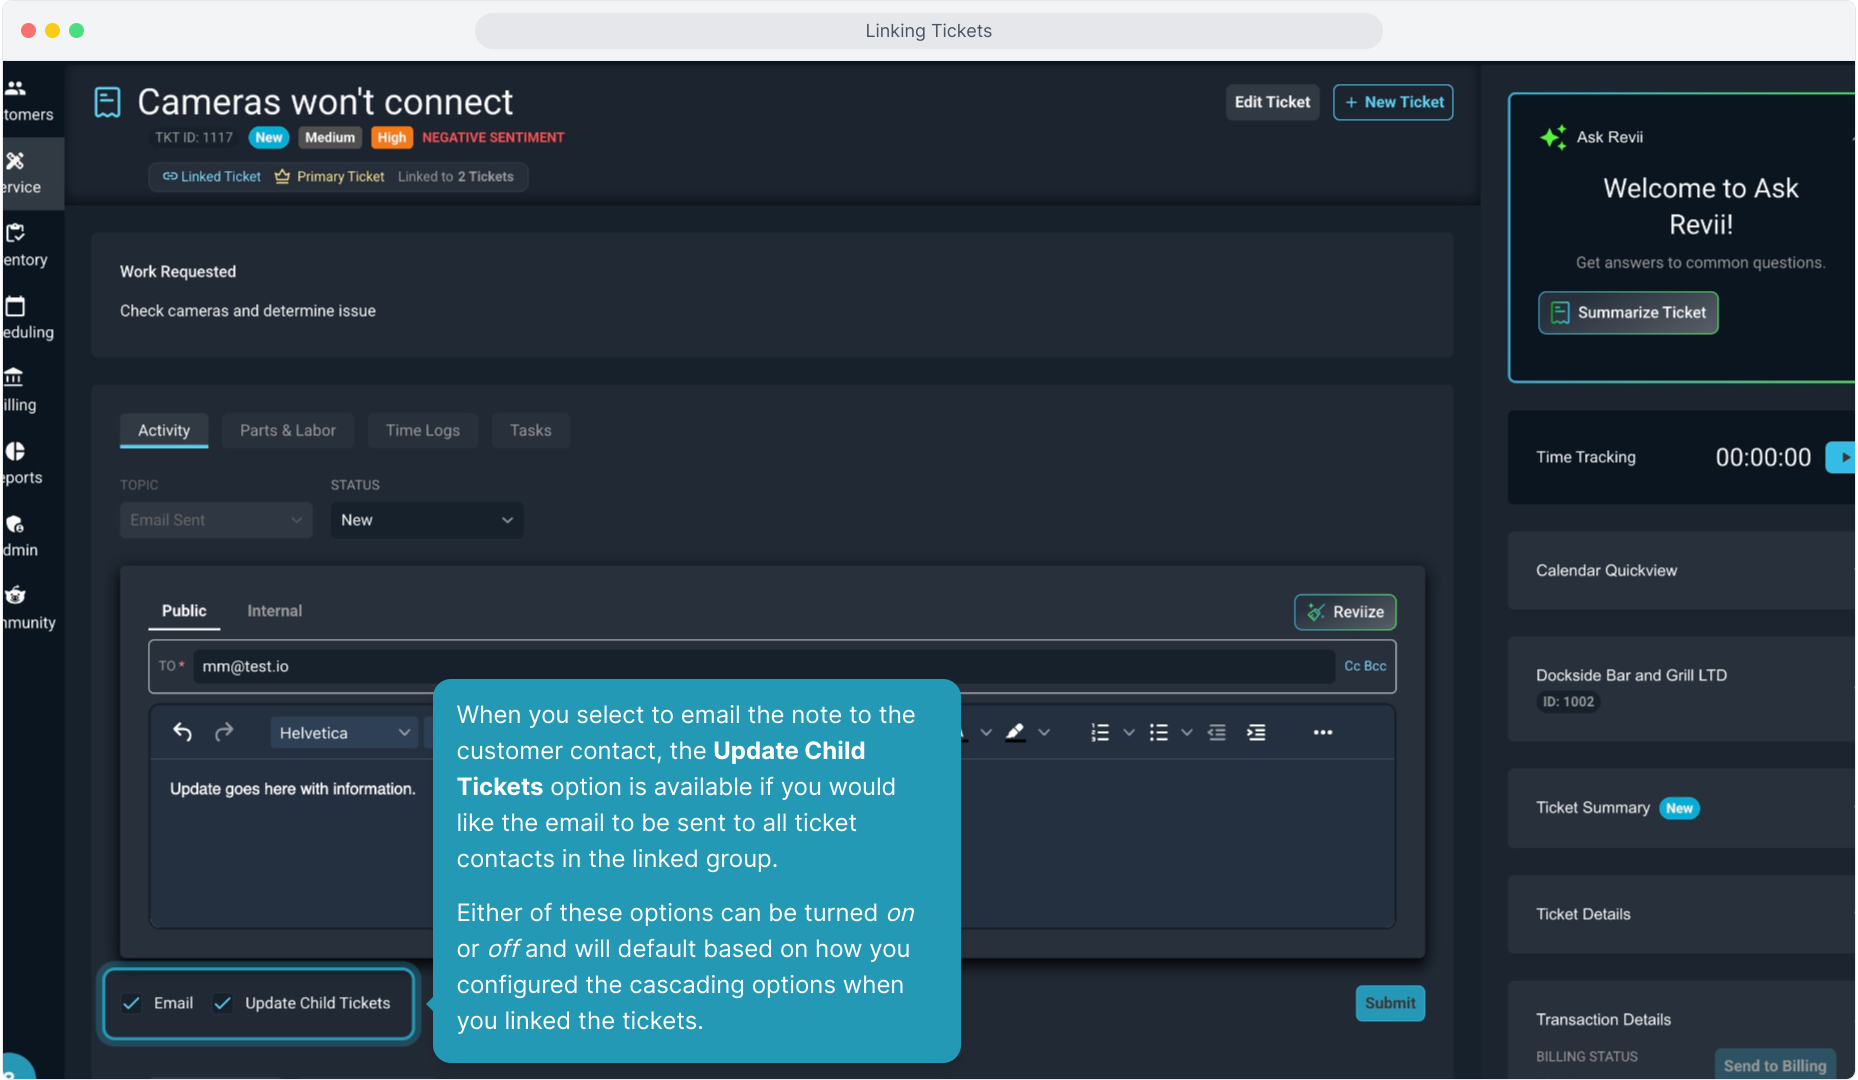
15. When you select to email the note to the customer contact, the Update Child Tickets option is available if you would like the email to be sent to all ticket contacts in the linked group.
Either of these options can be turned on or off and will default based on how you configured the cascading options when you linked the tickets.
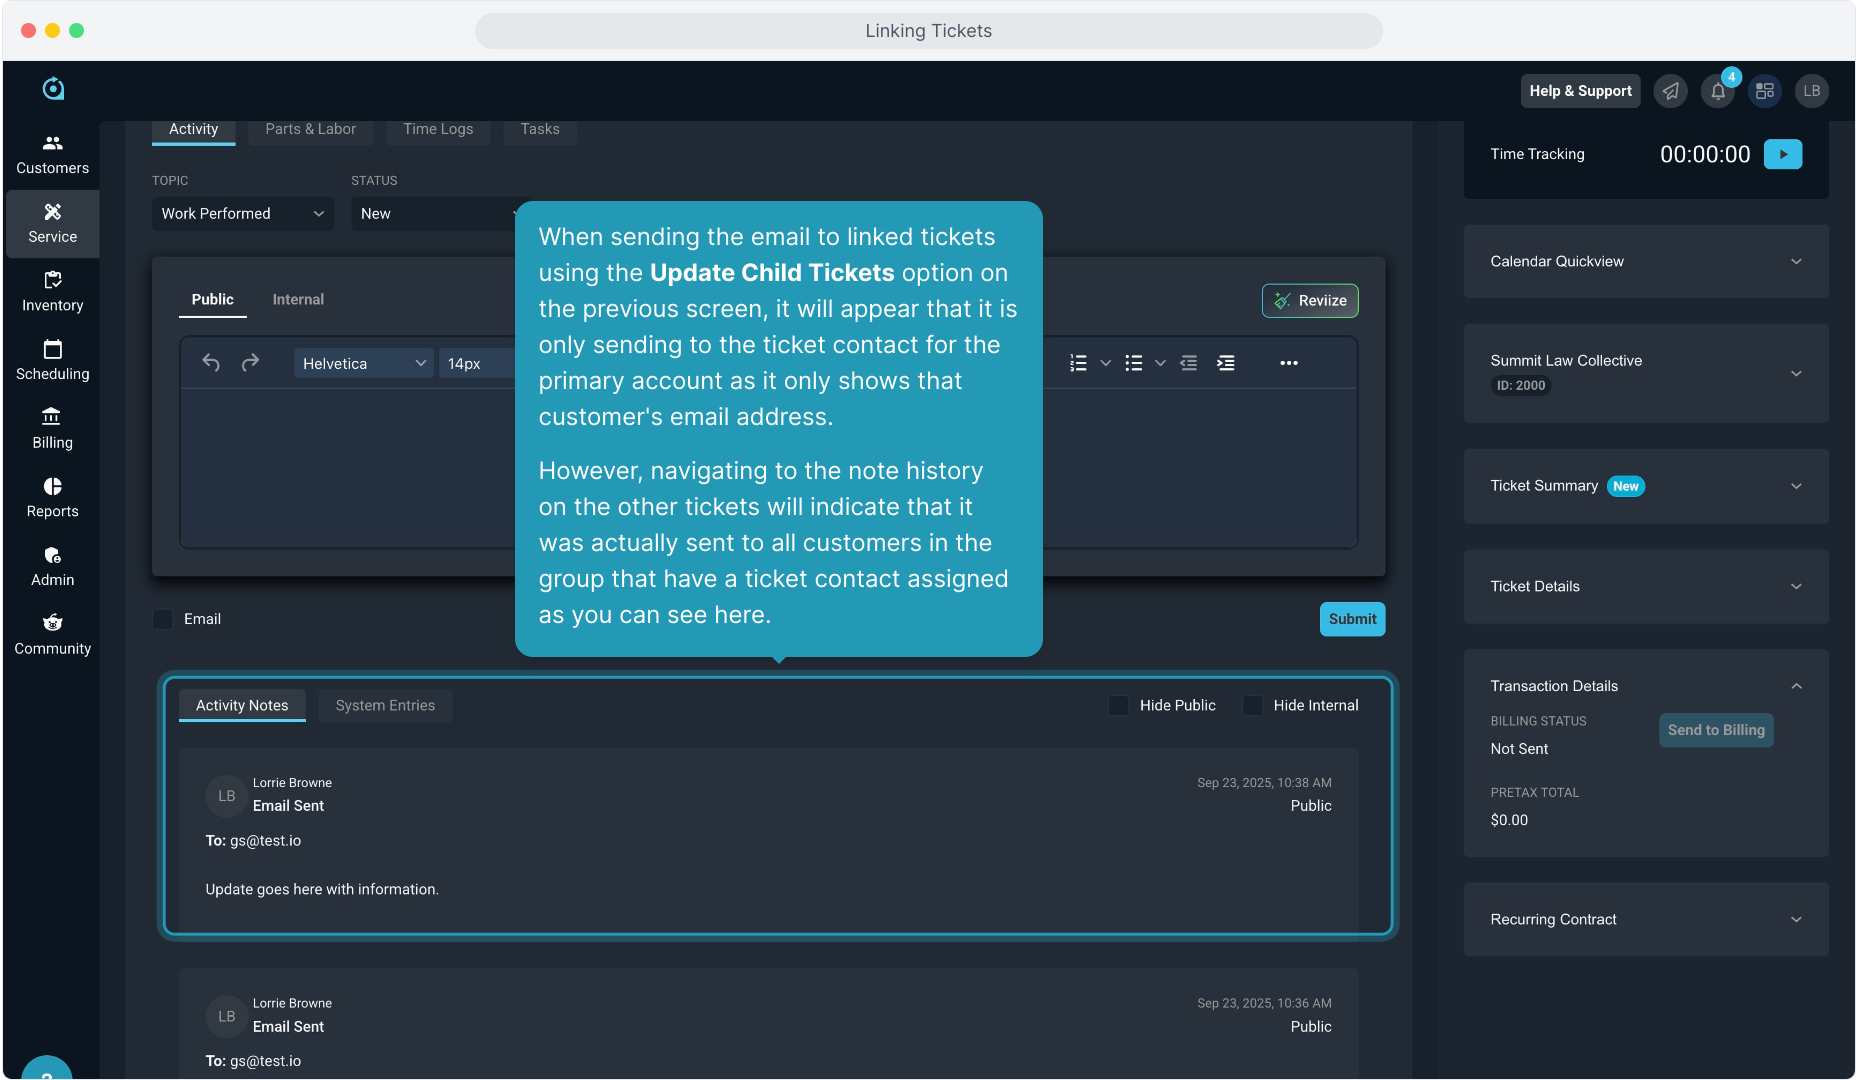
16. When sending the email to linked tickets using the Update Child Tickets option on the previous screen, it will appear that it is only sending to the ticket contact for the primary account as it only shows that customer's email address.
However, navigating to the note history on the other tickets will indicate that it was actually sent to all customers in the group that have a ticket contact assigned as you can see here.
17. Clicking any of these options at the top of a primary ticket will open a modal where you can navigate to any of the linked tickets or change the Cascading Update Options.

18. Viewing linked tickets that are NOT the primary ticket have slightly different options at the top. You can still click these options to open a modal where you can view or navigate to the primary ticket.

19. The indicator at the top for Receives Cascaded Updates serves as a reminder that any updates or journal entries made on the primary ticket will flow through to this ticket.
You can also still manually create a journal entry on this ticket that does not flow through to any other tickets in the linked hierarchy.

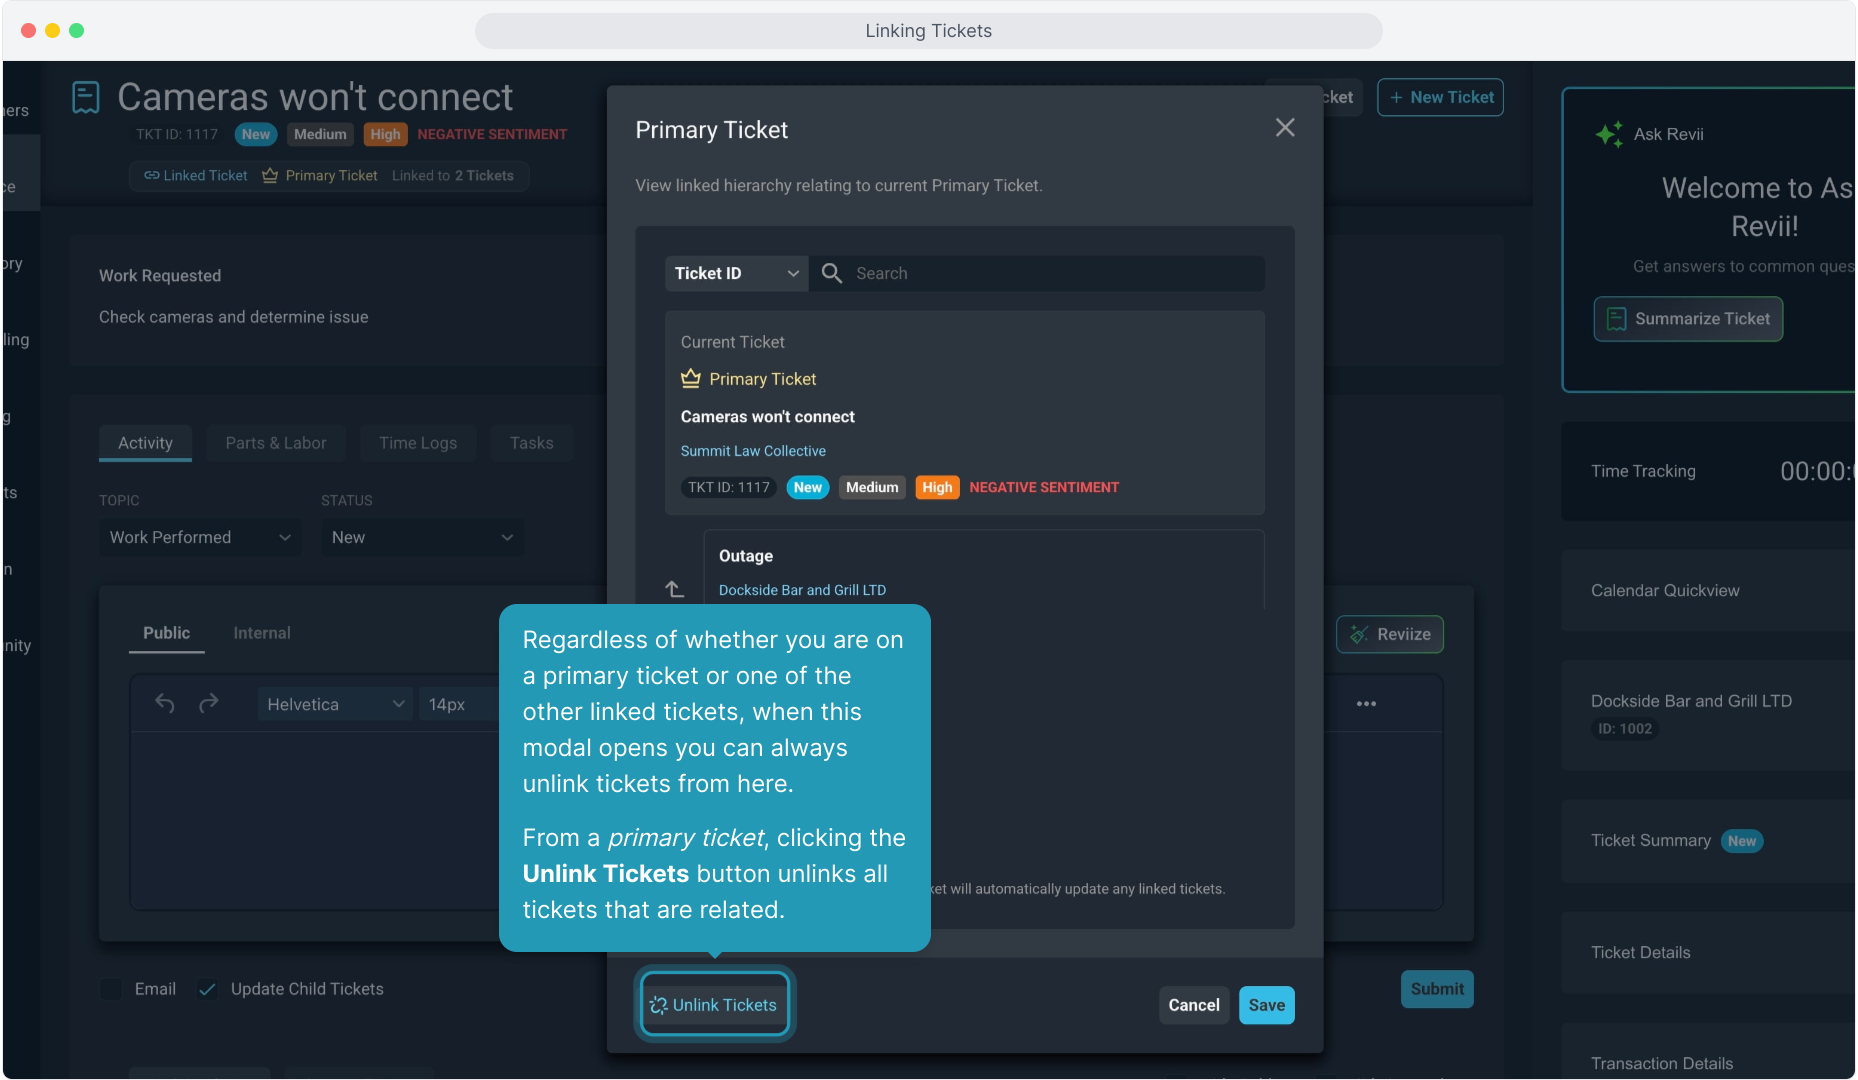
20. Regardless of whether you are on a primary ticket or one of the other linked tickets, when this modal opens you can always unlink tickets from here.
From a primary ticket, clicking the Unlink Tickets button unlinks all tickets that are related.
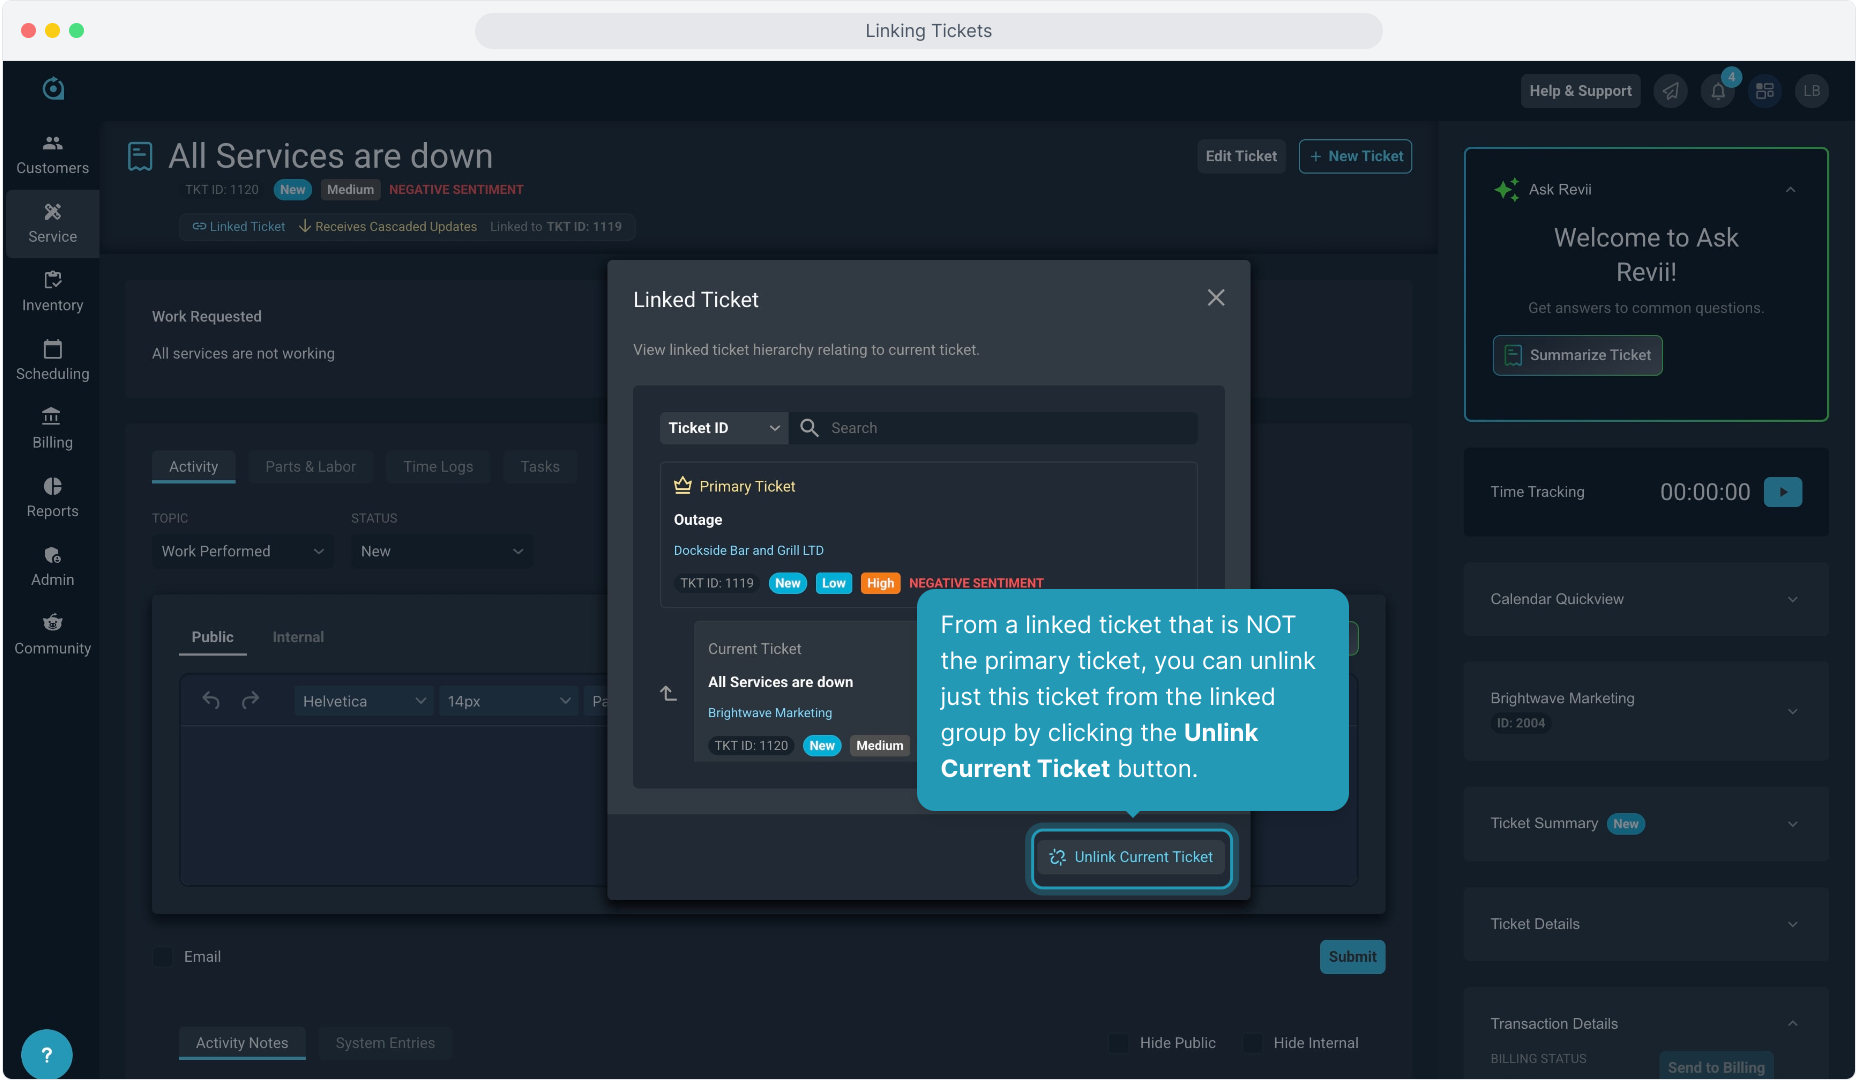
21. From a linked ticket that is NOT the primary ticket, you can unlink just this ticket from the linked group by clicking the Unlink Current Ticket button.
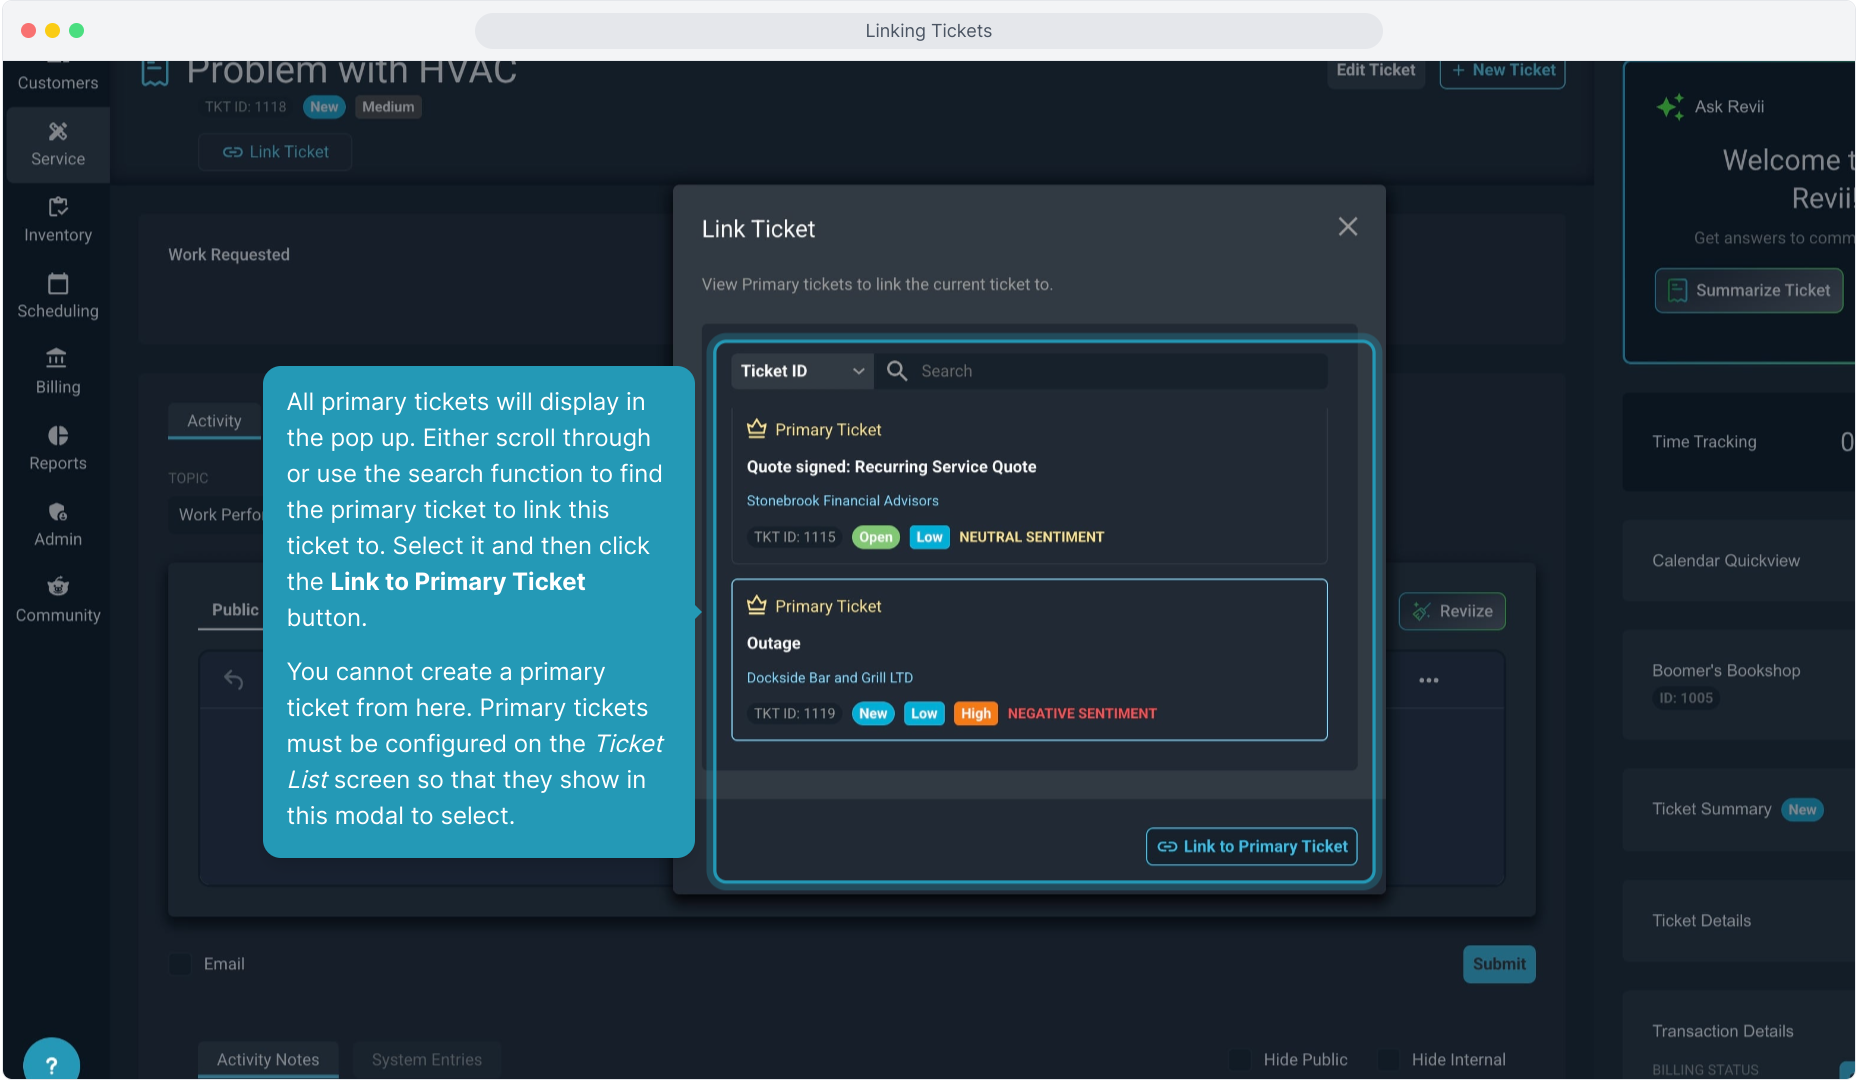
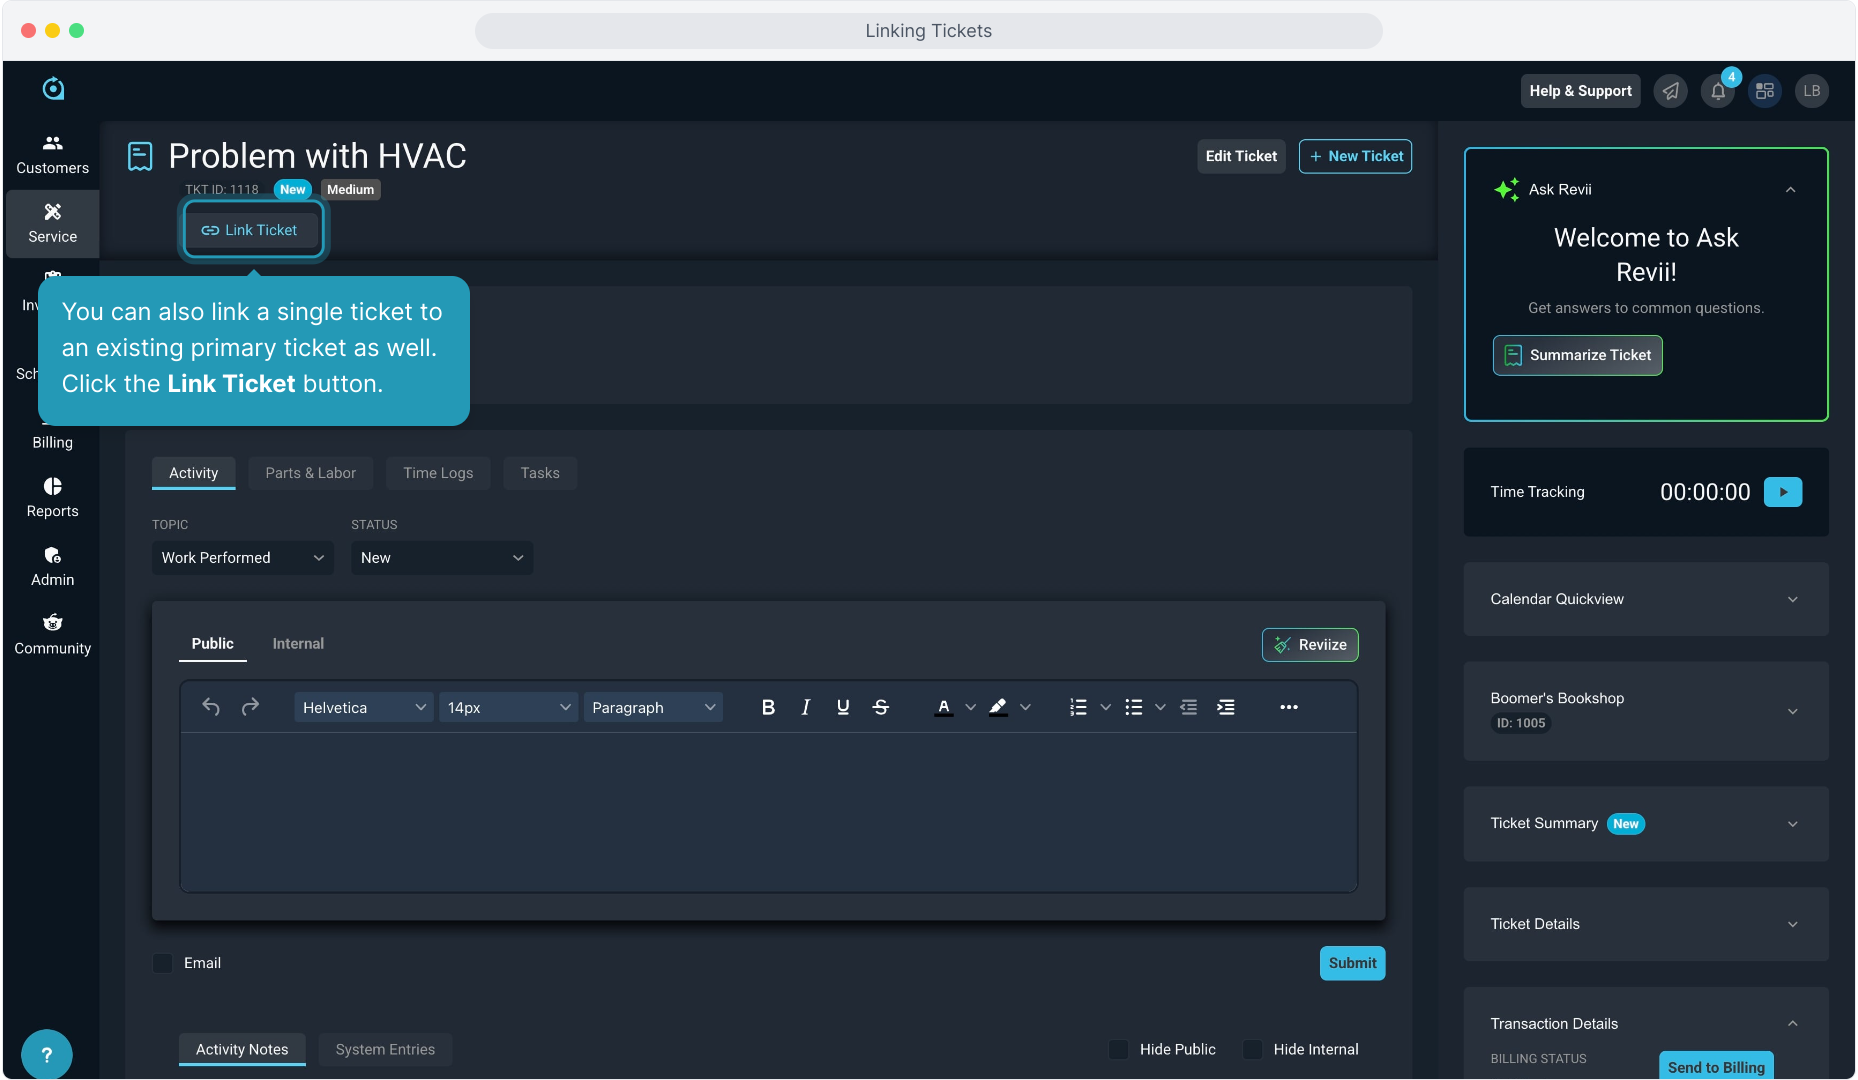
22. You can also link a single ticket to an existing primary ticket as well. Click the Link Ticket button.
23. All primary tickets will display in the pop up. Either scroll through or use the search function to find the primary ticket to link this ticket to. Select it and then click the Link to Primary Ticket button.
You cannot create a primary ticket from here. Primary tickets must be configured on the Ticket List screen so that they show in this modal to select.